 Whoa.. it all became clear now. The folks who created the first Arduino IDE, gutted Processing and changed the "export to applet" to compile & upload to an Arduino board. That is why there are so many Java file references and other applet related amalgams. Time to hack & stich it up more ! I have to rip it up and put functionality in a tiered architecture, because I have found several bugs which have occurred because of synchronizing threads between the GUI & the Arduino service. All "functionality" has to exist in the service, the gui is just a means of directing and controlling that functionality. Back to the operating table...
Removed the old button toolbar and lots of code.. Added new "easy to extend" button toolbar - connected all the old functionality to it, and added 2 new buttons "Connect" & "Fullscreen" which I'll be adding new enhancements shortly...

I'll have to add serial speed to the menu system for "Connect".. Other details of the connection can be accessed through Jython.. Speaking of which - the Jython IDE will probably be my next refactoring target....
New menu, with "rollover" + new Connect button ! ... not all the old functionality is hooked up, shouldn't take long though... Hmmm maybe I'll leave them in the center just to be "slightly" different.. maybe "hacker-green" for rollover instead of white? Sooo many possiblities...

06/04/2012 - Hmm.. "The evolution of an app". Everytime I refactor my code, I'll hear myself say "What the hell was I thinking".. You can find parts in the Arduino source like that too.. Like the EditToolbar class. It seems like a lot of code to make menu items look like buttons so that they support rollovers.. What the ... ?!?
I just wanted to add a button. The button will be "connect" which connects the pin & oscope to the board on the same serial port which the editor uploaded its last program. But when I saw the intimidating amount of linguini code which handled the current "menus" (posing as buttons), I believe it would be better to rip it all up and make a toolbar of buttons. There might be more I want to add in the future... time to get my code-machete out...
06/02/2012 - Funny comment in the Arduino source... I'll need to fix it ;)
06/01/2012 - Editor board selection drives pin configuration - Most Arduino boards use the Duemilanove pin configuration.. Now when a "Mega" board type is selected in the editors pin configuration - the pin panel changes to the approriate board. Lilypad & FIO are currently not supported. I will be systematically removing all config & the config tab and putting it all in the editor's menu.

05/25/2012 - Targeted now for 14.8 since 14.7 will be a release with updated MRLClient, UDP/TCP communication & Tutorials
05/23/2012 - Beginning to figure out how to bundle the embedded Arduino IDE & all its dependencies in 5 different flavors (win x86, win x86_64, linux x86, linux x86_64, maxOSx) Oy vey !
05/22/2012 - Starting the Mega GUI
Oye... That was a Mega-pain ! Sooo many buttons ! - now to work on the Oscope & other plumbing....

05/21/2012 - Dock/Undock & Right-Click
All together....

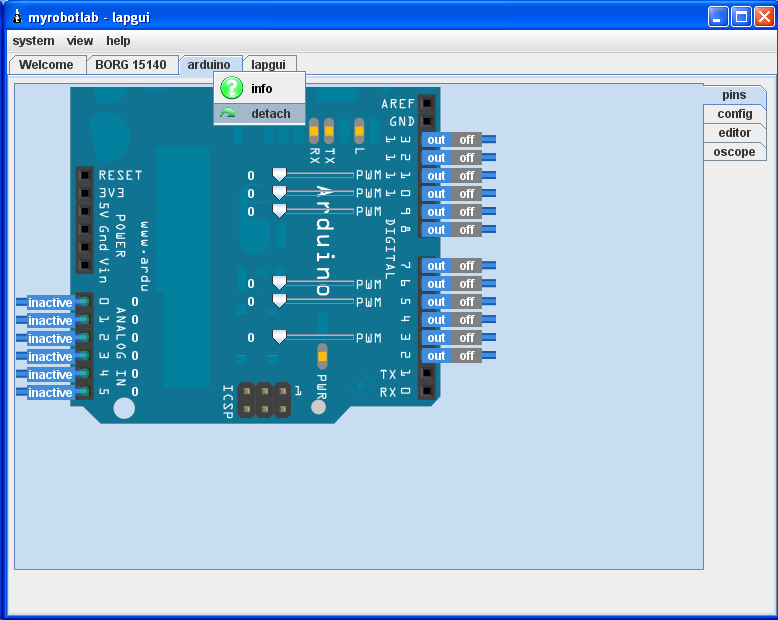
Arduino detached from MRL.

Oscope detached from Arduino !
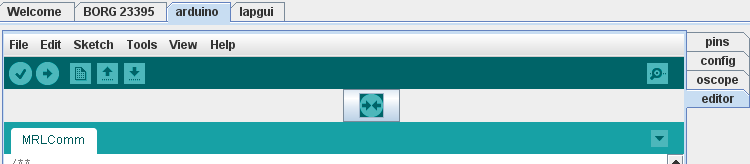
05/21/2012 Right Clicks Rule ! - Got two levels of embedded controls to work with right-clicking on the tabs. The right-click creates a pop-up menu which allows contextual Info or Detaching. Here I detached the Arduino service from the MRL Frame (but wait there's more !) And then I detached the Oscope from the Arduino service. An oscope screen all by itself (woohoo) ! My original intention was to get the Arduino Editor capable of going fullscreen, still needs some work :D
 05/19/2012 Doing alot of Serial Plumbling recently. Created a "SerialDevice" to handle all serial communication in MRL. Depending on platform (Windows/Mac/Linux/Android) - it will create the appropriate SerialDevice.
05/17/2012 Alrgith I'm thoroughly confused. I've been staring at RXTXComm code for about an hour. I've written a custom port before - A WiiCom Port which implemented 3 bit serial to a wii controller. Now, I'm trying to reconcile Android Bluetooth Serial with RXTXComm. The RXTXComm native binaries will not work on Android, and I don't want to attempt to cross-compile them either. The Bluetooth serial works fine on Android, but that is part of the Dalvik VM and it sure is not going to work on any computer.
What needs to happen is I need to extend a RXTX CommPortIdentifier .... but...... the author decided to load the binary libraries in a static section.. and he hardcoded the Class.forName("gnu.io.RXTXCommDriver") .. bummer. Now I think I'll need to create a bunch of interfaces and wrapper code ... bleh...
Make note - if your going to dynamically instanciate classes and load libraries - it might be nice to have those string values passed in :P

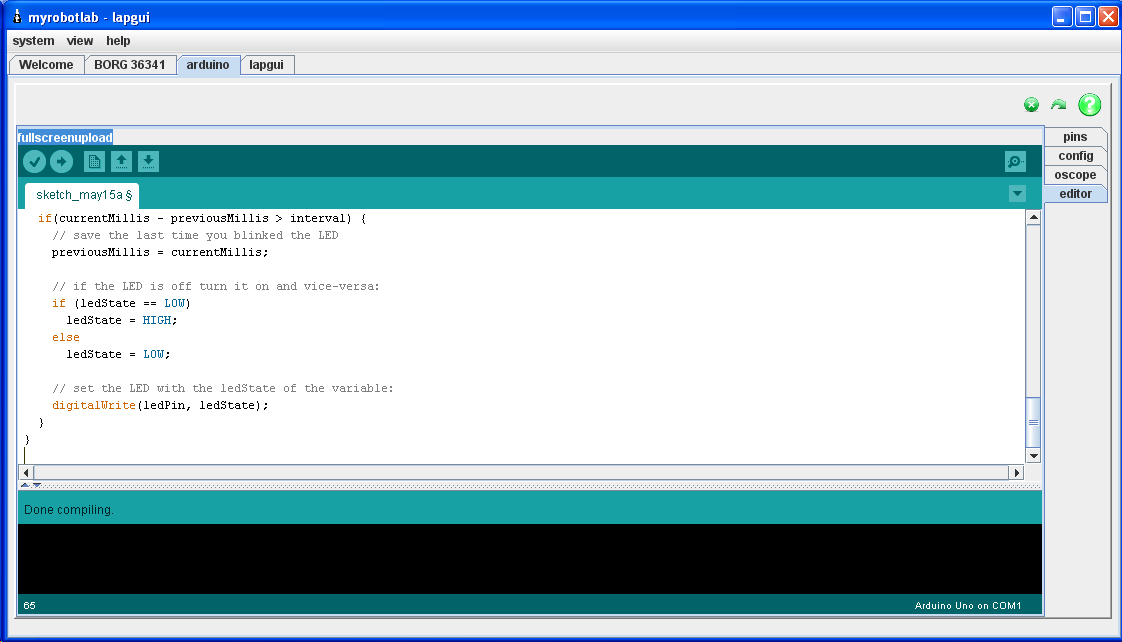
Example ---> MyRobotLab ---> MRLComm put in.... No more searching for ArduinoBareSerial.pde or any other communication files ! Its all right there now - click and upload ! Whoo-hoo.. An interesting side node - compiling & loading this Arduino script on a board could be done programmatically with a Jython script. So a computer now has the capability of changing out scripts on Arduino boards dynamically. Whacky No?
.png)
FrankenGUI updats
Example menu working - switches to example code
Compile works
Output for compile works
Added FullScreen menu item - (still needs implementing)
 05/16/2012 - Menus are Working ! Previous screen shot was missing them. Also, reasonable screen width. The first of many bugs to be squashed. The Sketchbook & Examples don't work, probably do to directory pathing problems. I'll add a View --> Fullscreen menu item & add a Examples --> myrobotlab --> ArduinoBareSerial.PDE. Lot's of thingys to fix, but It's ALIVE ! Once it's banged into a decent shape, I'll repackage it as a seperate jar file and post the sources in the repo. Feel free to give suggestions of IDE improvements if you have them.
 05/15/2012 (update) - Look Frankenduino ! It's Alive ! Half MRL & half Arduino IDE without Processing ! Now... just start working on the bugs and other leaky parts :D

05/15/2012 - Where to cut? I tried cutting the compiler and uploader out of the Arduino IDE - but that got messy (blood everywhere). So now as an alternative, I'm trying to cut the GUI & Processing out of the Arduino IDE - then sew what's left onto the backend of the new MRL GUI. Mwa ha ha ha !
05/14/2012 - So In order to have a complete Arduino GUI, I thought it would be good to have the IDE. And if you have an IDE you should have a working avr-gcc compiler, and be able to compile & upload your "sketch". I "thought" I could cut out the backend of the Arduino IDE and slap it in place.
If it was only that simple. I stepped through the Arduino IDE source line by line and saw that it was generating commands to the avr-gcc compiler & linker. Effectively, I made the code which I put into MRL do "exactly" the same. But to no avail ! Grrr.. even though the system calls were identical (effectively) when mine linked it came up with the following errors
Lots of real estate ! I looked into "true" fullscreen and found it was frought with bugs and cross platform issues. Apparently it needs some JNI calls which aren't supported in Linux and I found a couple of components (all text widgets) failing when in fullscreen mode on windows (bleh).. So, here is the next best thing.. the fullscreen in a new JFrame.. much better than the previous tiny viewport.
Look big a PDE I'll be able to write ! :P
Now I have to make a toggle switch for it and then onto UPLOAD !!!

Here is a start .. hmmmmmm full screen mode would be nice ;)
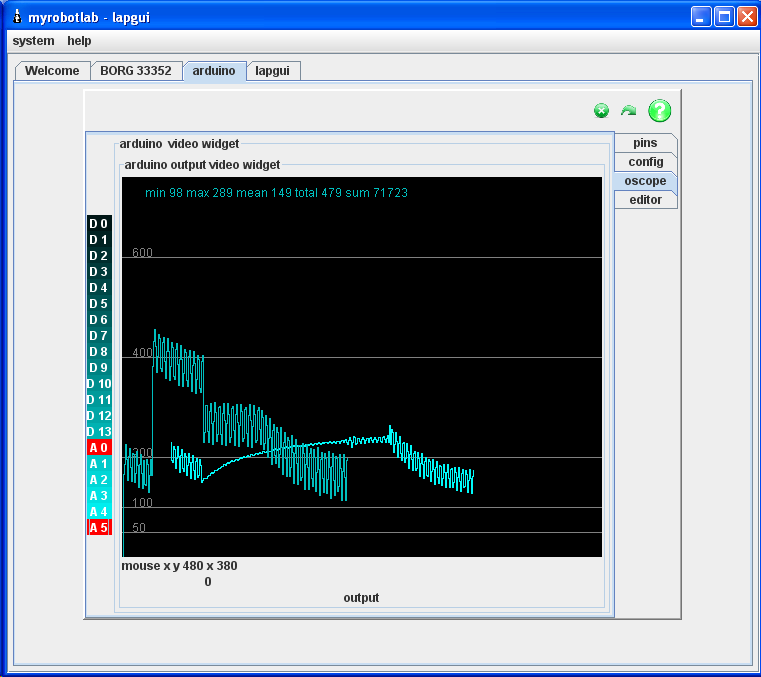
There we go. Gradient color on traces and some of the plumbing hooked up. I hooked up the buttons so they activate analog pins or set the mode to "in" and set value to off on the digital pins. Still have some more plumbing to work on - the screen reset is kindof cheesy too - after a trace hits the right side of the screen the entiere display is redrawn. Its faster than repainting each pixel, but when viewing multiple traces, its a bit irritating.
Dimension needs to be re-scaled so 1024 is at the top & digital lines do not appear to be working at the moment.
Still need to add config values, check getState & make editor too...
Oh, and a message generator too based on trigger values.
Like this, Ya like one of them fancy digital analyzers. Now, I just got to hook up the plumbing... soo tired.. yawn. Maybe, I'll get my monkey wrench tomorrow... Oooh, and I got an editor to make too .. (yawn)
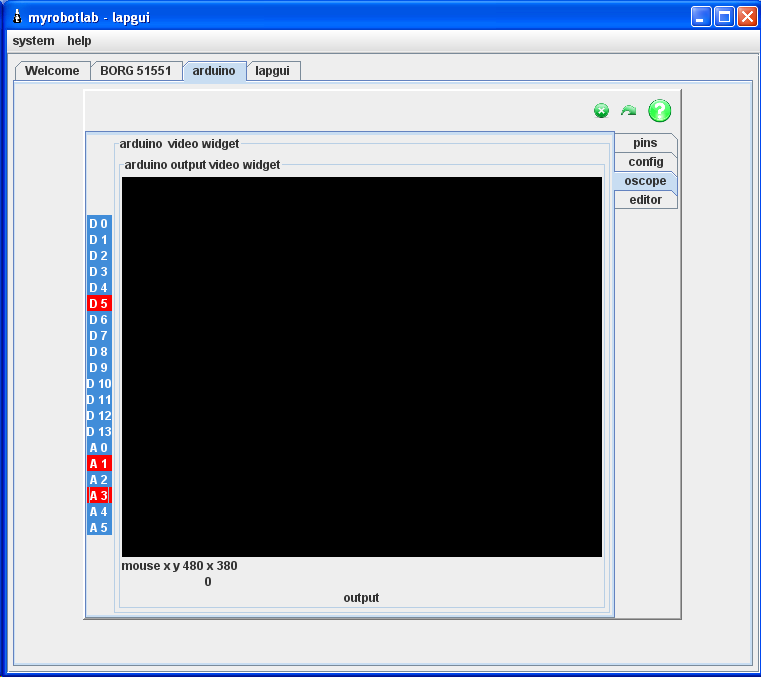
 Got the oscope working (ish), copied a lot of code from SensorMonitor . There should be a slight performance gain operating directly on the arduino gui. It still should be exportable too over TCP/IP so you can still watch your Roboscope from remote...
I'll have to add the buttons on the oscope for the traces - flipping back and forth from the pins tab is kind of inconvienent. Also I need a good way to distiguish multiple traces - color probably.
I've got a lot of ideas for additional configuration, like dynamically changing the baud rate, a reset, and various software smoothing to add.
Fresh No?
Got most of the Pin display figured out.. need some more plumbing.. and then off to the Oscope .. yeehaa !

Got the picture from Fritzing...
What do you think?
Still working on it.. What should "On/Off" be ???

Looks nice!
As for status indicators--Does the gui track changes in real time? (Or something like real time.) In other words, does it monitor the changing state of the pins, or just what their initial configuration is? I would expect that watching everything is too much work, and really not very helpful. But if the initial configuration and state of each pin that's addressed in the code could be indicated, and then as a diagnostic feature, one, or perhaps a handful of pins could be monitored--THAT would be very useful. (Also probably a pita to code and require too much overhead.--Never mind me, I'm a dreamer who still can't understand why computers don't work like the ones in Star Trek.)
Any progress with mega class Arduinos? You know I had to ask. ;)
All of the above.
Yes, it will monitor, in "very close" to real time. When a digital pin is put into pinmode input, the code will send changes to the GUI. Analog pins will have polling switch in the GUI and like wise will send change event back. The little oscope tab will show analog & digital lines as they change - This used to be possible by adding a sensor monitor to the Arduino, but there is more overhead because the data would be routed to another service.
With the oscope on the Arduino, the screen can be customized to accomidate the Arduino and optimized to be faster.
Previously, I believe I sent you a python script which works with the Mega. I've hooked it up and tested it with one servo so far and it works fine. The gui has me sidetracked from more testing.
If you have any insight on what would be a "intuitive" on off switch (perhaps an LED?) let me know. The little "out" buttons you see change the pin mode (INPUT/OUTPUT)
Excellent!
This will be a great way to configure and test Arduino based control.
Wow! That looks great!
This new Arduino interface is amazing! It like an all-in-one solution for debugging Arduino stuff using MRL.I can't wait to get some guys in the lab working with this over summer!
Hi morrows_end
Ya.. it's going well !
The GUI part was fun and relatively easy. The backend got a little ugly. I planned to hack out Arduino's IDE backend, which in turn was hacked out of Processing.. A hack, to a hack to a hack, so to speak..
Now I'm trying to figure out what parts to throw away and build from scratch and what parts to keep...
very messy at the moment.. need a big mop :)
P.S. nice picture :D