

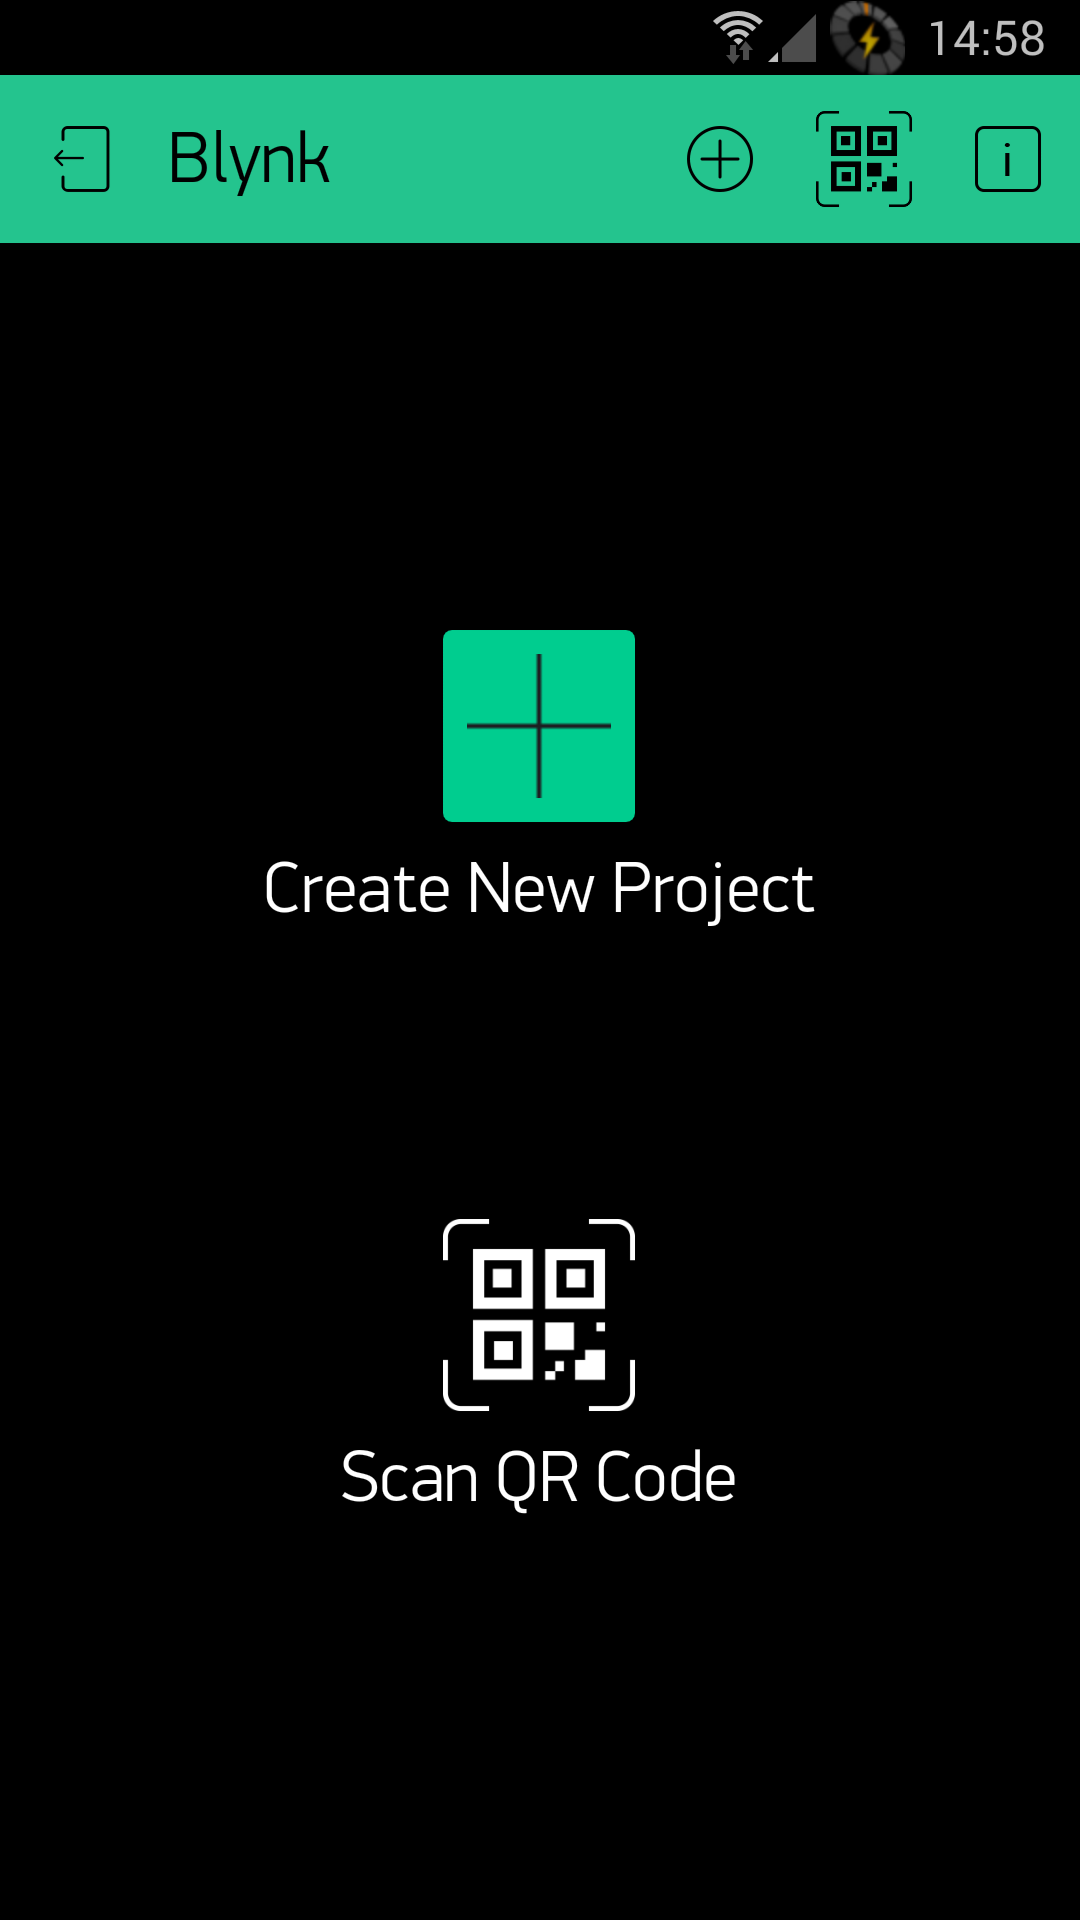
What is "Blynk" .... It is a Smart Phone APP that uses either Android or iOS to IoT your projects for remote control.
To get things started download the Blynk app off Google Play or Apple itunes.
PART 1
Run the APP and continue to Signup for an account (you will need this for authentication)
Click on the "Create New Project" selection to start the process.
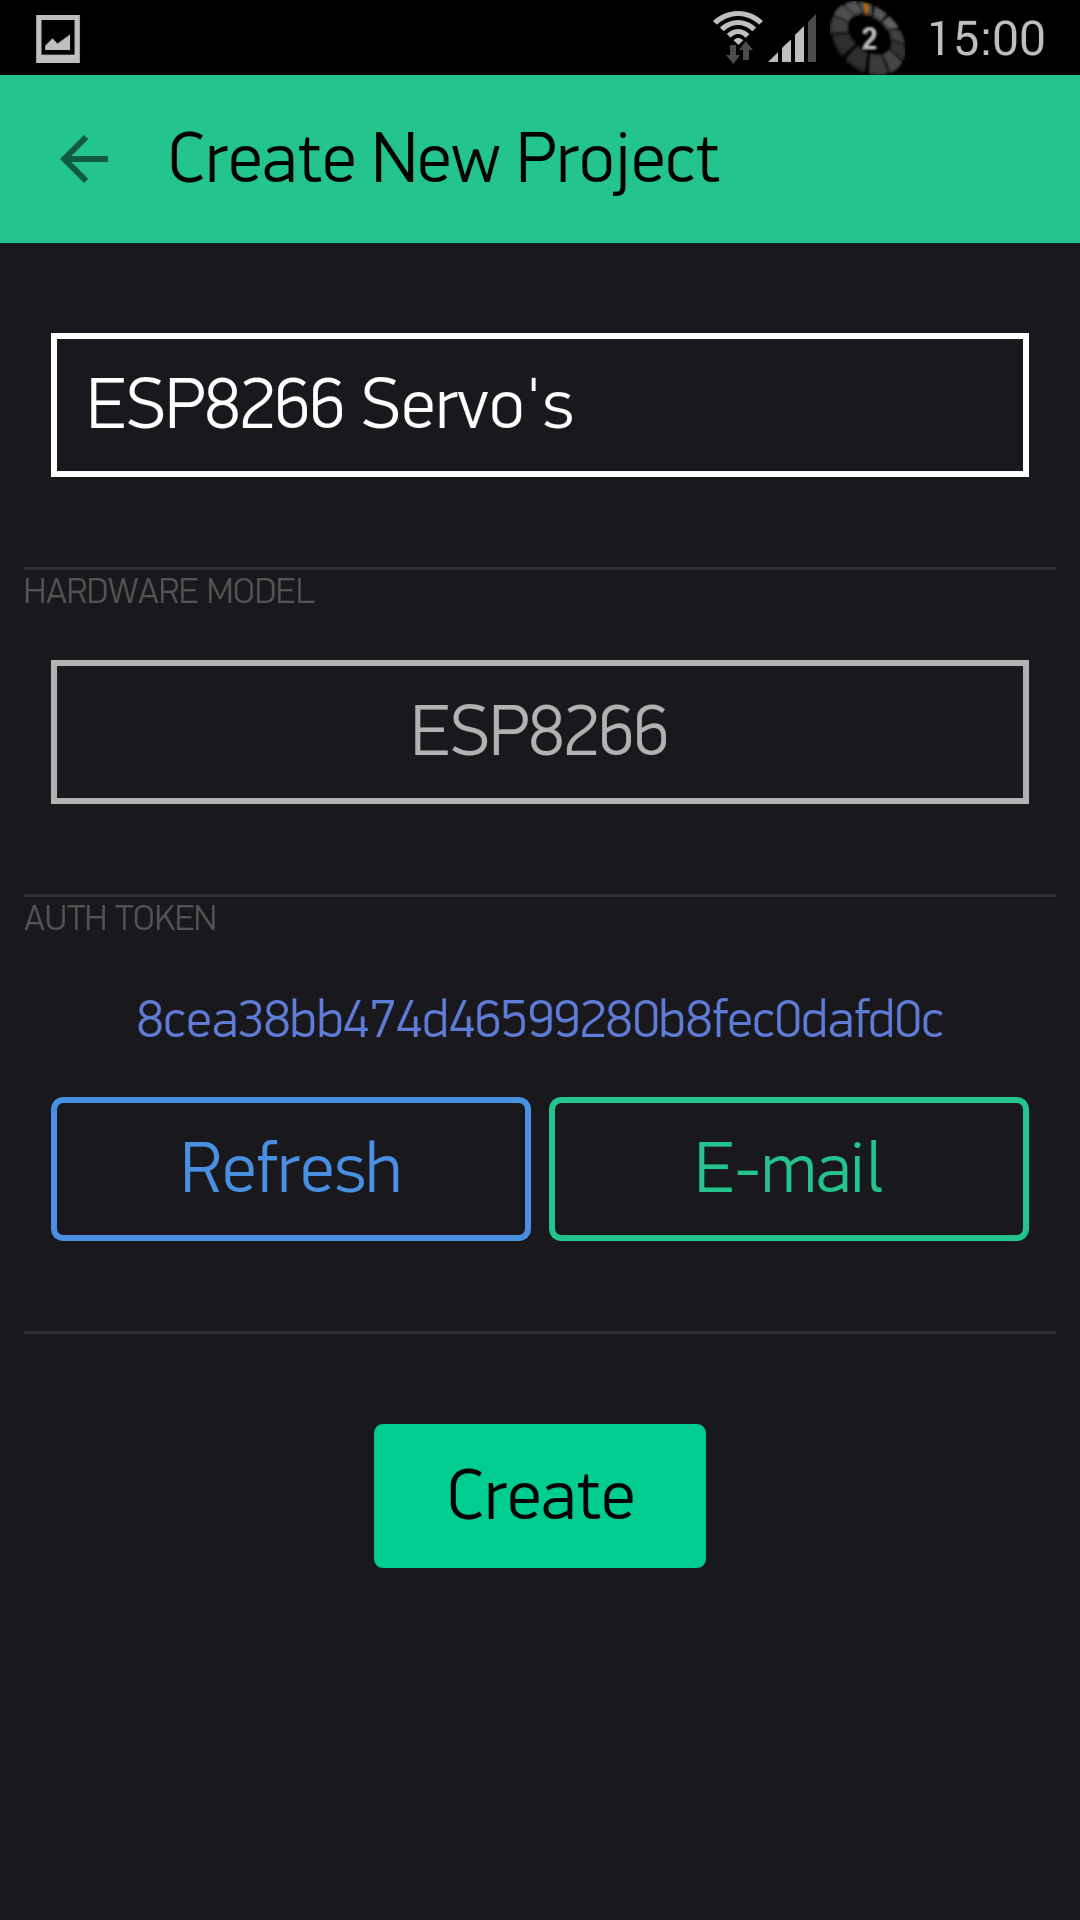
Name your project and on the Hardware Model choose ESP8266 (there are many other selections including Arduino,Raspberry pi, etc)
It will create an "Auth Token" which its best to straight away email to your self as you need to paste this into your ESP8266 code later.
Next a blank screen will be shown which confused me at first until I discovered that a "Right Swipe" of the screen brings in the "Widget Box"
Below you see all the possible current Widgets :-
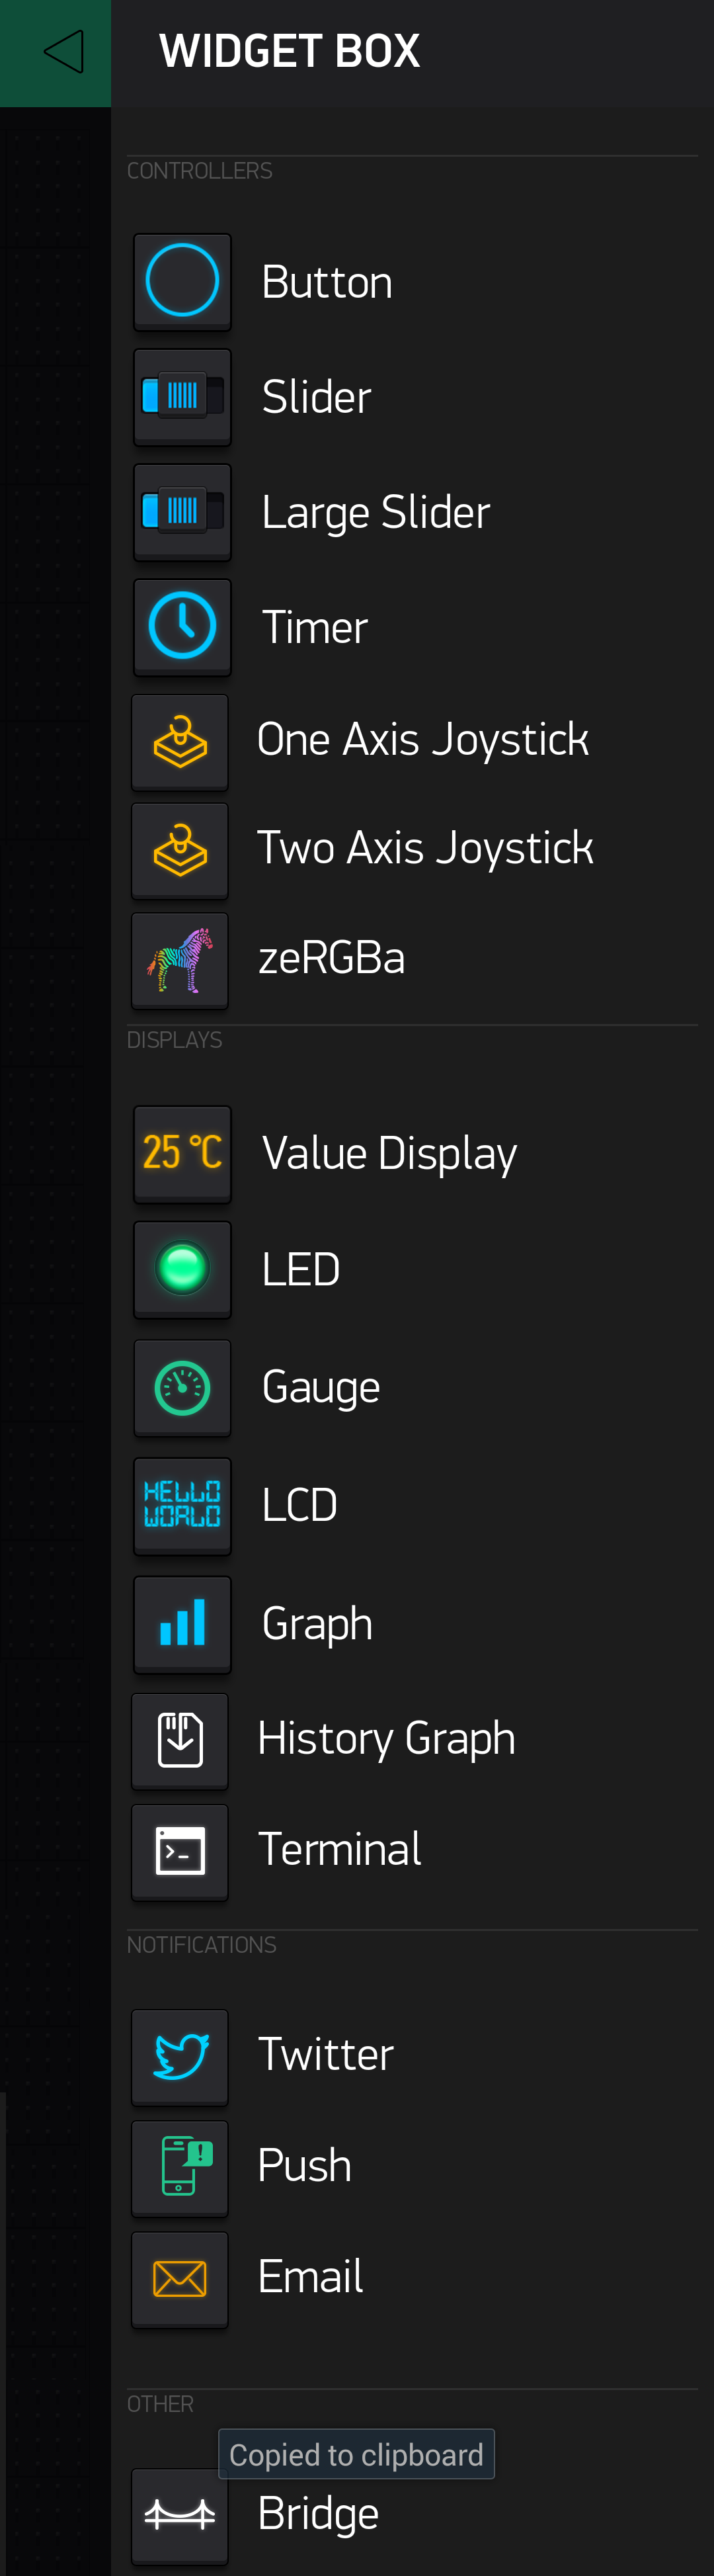
In our example we will set it up to control a Servo (5 actually) using an ESP8266 E12 WiFi chipset
So Select the "Large Slider" and this will be ported to your Project Gui.
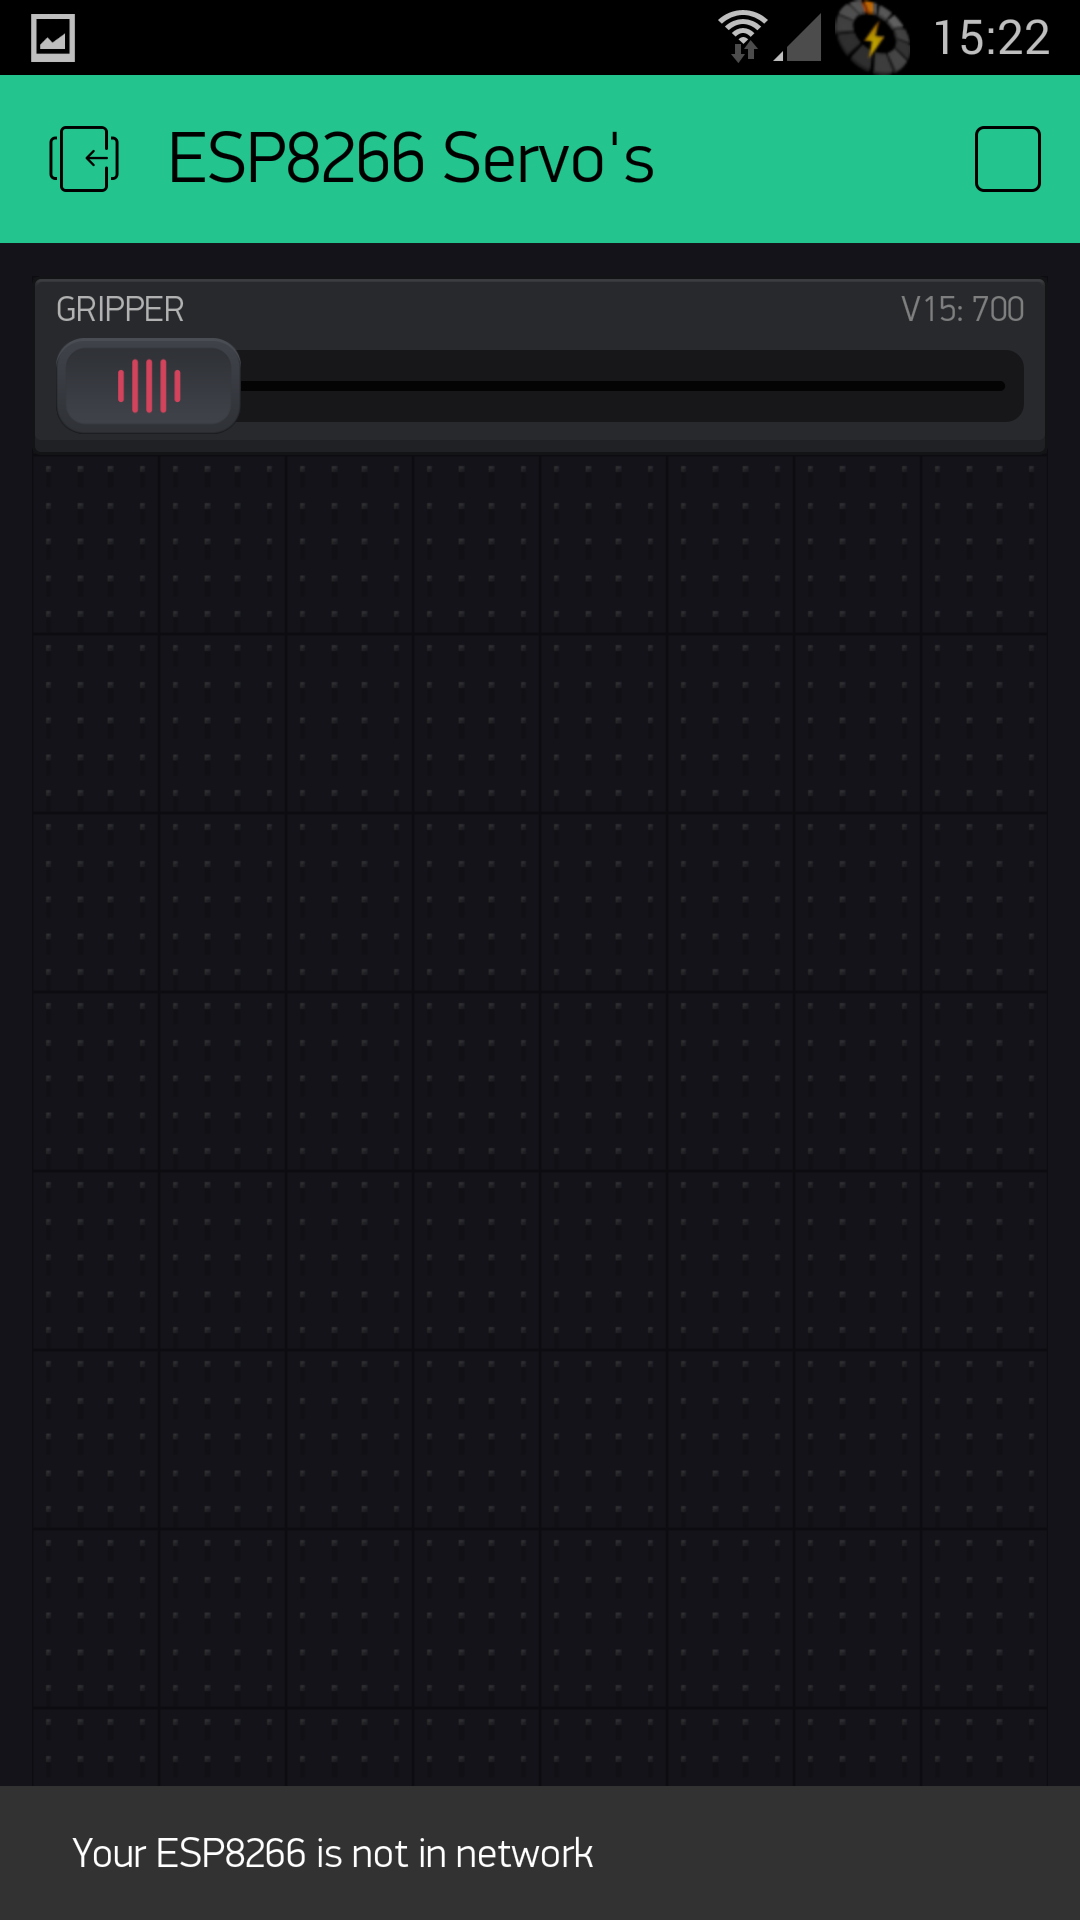
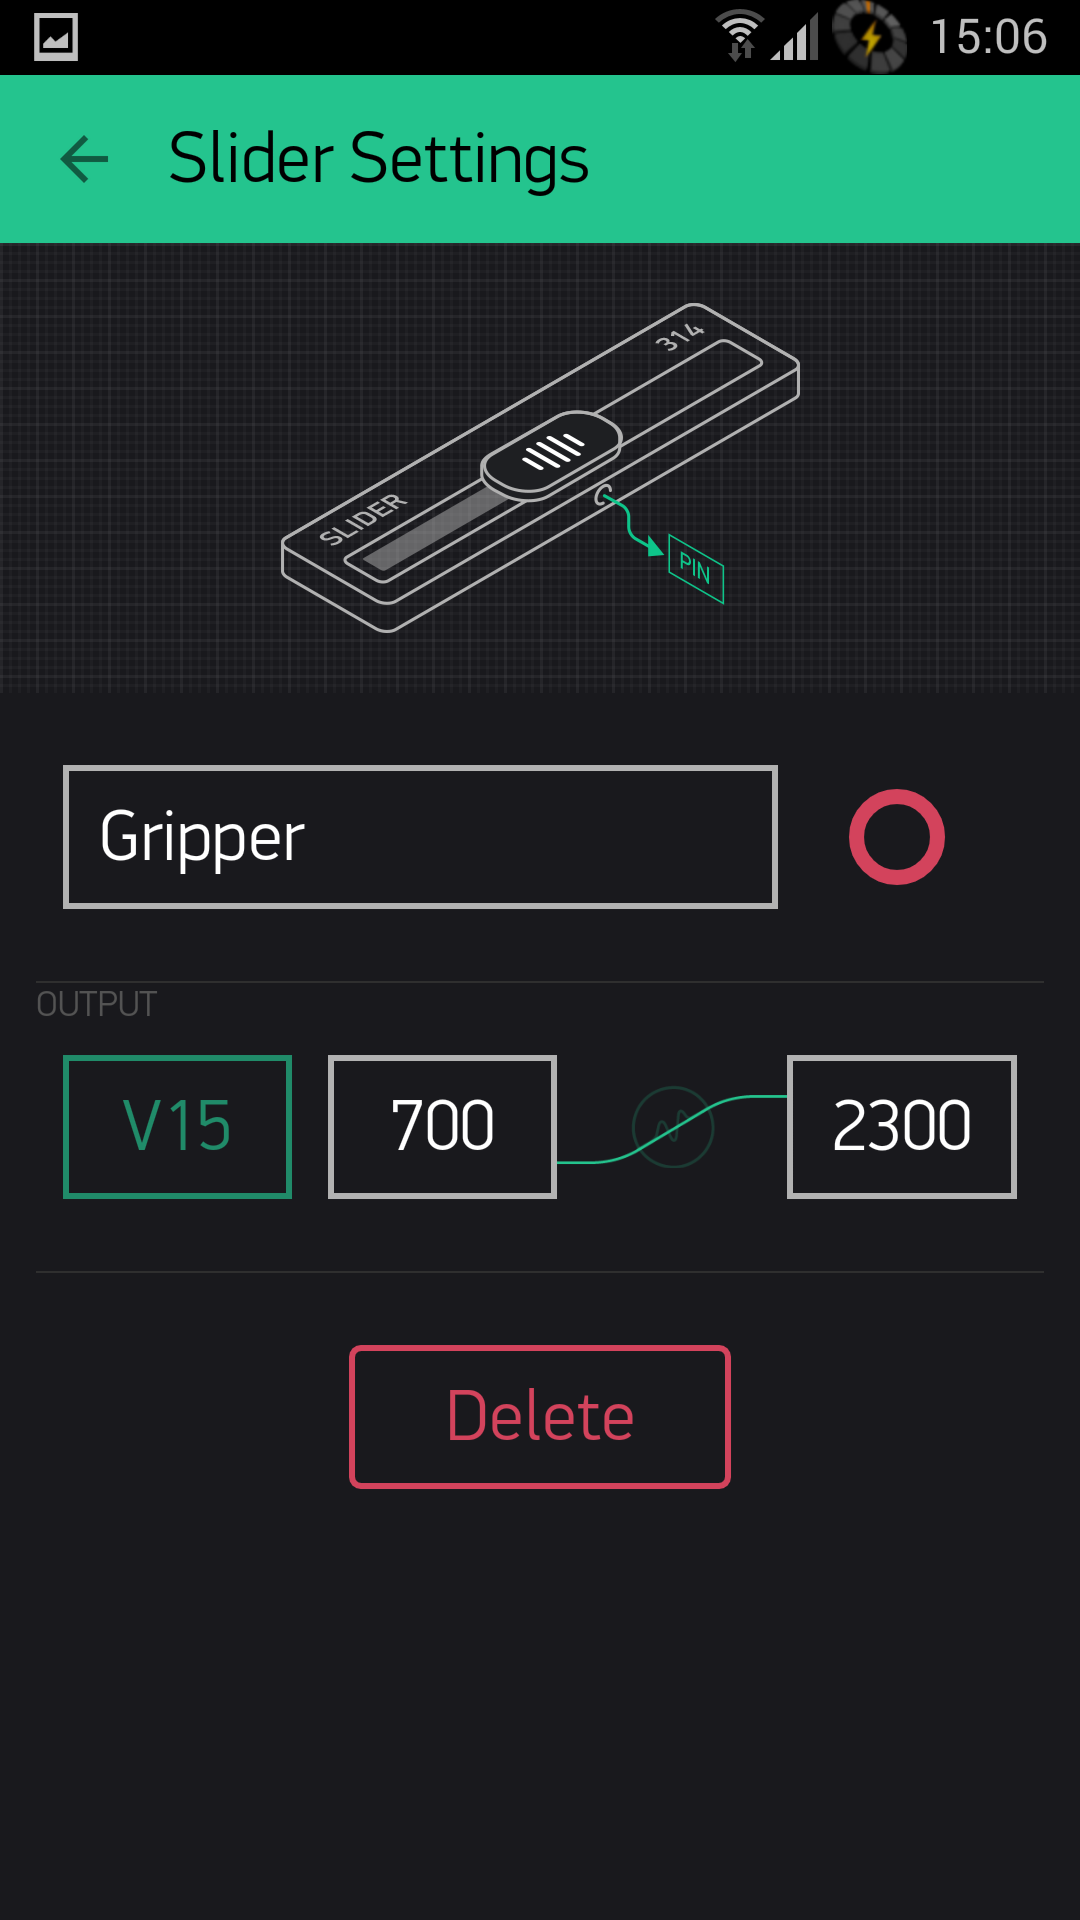
Press the slider and its setting will pop up .
- Rename it.
- On the "Output" press the greenbox (PIN) and Select "Virtual" and V15
- Press the slider Setting bar to return to your Gui
- That's the Smart Phone finished
- On your Gui there will be a triangular ">" play button press this to run the module
PART 2
Now its time to load up your ESP8266 with some code.
I highly recommend you use the Arduino Gui to program the ESP8266 (it will save you a lot of heart ache)
You will need to place these libraries into your Arduino "libraries" folder :-
| ESP8266 Servo Code |
|
/*
// You should get Auth Token in the Blynk App.
Servo servo; void loop() { |
Download the code to your ESP8266......
Be sure to connect your servo to Pin 15 of the ESP8266.
... and as your Smart Phone is already running you "Servo Gui" you can slider the slider to control the Servo.
If you notice I am using the servo.writeMicroseconds command servo values span 700-2300us.
a video that will appear shortly.... that controls a Gripper Arm.