
The Adafruit Motor Shield is a service which will create a number of sub services. It will create 4 Motor, 2 Servo, and 1 Arduino service. This shield uses its own library, so MRLComm.ino will need to be modified.
Fortunately, the Arduino service will have the modified MRLComm.ino pre loaded in its editor. This will need to be compiled & uploaded into the Arduino.
The AdafruitMotorShield initially makes 7 sub services.
The names of the sub services follow this convention :
- <name of shield>_m1 - m4 (for dc motors)
- <name of shield>_s1 - s2 (for steppers)
- <name of shield>_servo1 - servo2 (for servos)
- <name of shield>_arduino (for the arduino which the adafruit is mounted on)
Installation Process
To install the AdafruitMotorShield service in a new MRL installation, simply go to the Runtime panel and right click on AdafruitMotorShield - then select install. This will download all the necessary dependencies including all dependencies for an Arduino (if not already installed)
Once the installation is complete, you will need to restart MRL.
Start Process
Right click on the newly installed AdafruitMotorShield service and select start. You will need to supply a unique name. In the following example we are going to name our service "fruity"
Initially the AdafruitMotorShield will start with 4 DC motors, 2 Servos, and 1 Arduino.
Make sure the arduino's board type and com port are selected appropriately

The shield utilizes the AFMotor library on the arduino, and the MRLComm.ino needs to be modified. If all went well, the modified sketch is in the arduino's editor.
Press the compile button.
When finished upload the sketch.
When you are confident the sketch is loaded, make sure the Arduino is attached. The oscope should be responsive. This is a good way to test Arduino connectivity.
.png)
Bug list
- (Arduino) - compile always before upload - big hammer solution
- (Arduino) - make sure you see a bunch of stuff scroll by when you do the upload - errors on upload are not handled correctly yet
- (Arduino) - if no ports are available - the MRLComm does not load
- the servo's are listed as connected but they probably won't be - workaround - hit detach then attach again
- (Arduino) - the upload process disconnects the serial port - even though it show's as connected - you'll need to disconnect & reconnect after the sketch uploads
- (enhancement) - In subsequent releases - it would be nice if the Adafruit service checked to see if the appropriate sketch is already loaded
- Arduino currently does not remember the serial port it was connected to - this will be fixed
-
Download services screen needs movable split size
- Connect button's disconnect does not workk - use container for both button & menu item? - since the do the same thing
At this point the motors should be controllable from the GUI. Click to one of the motor tabs and check to see if the motor moves in both directions and stops.
.png)
If you want to view all motor panels at once, just right click on their tab, detach and position them.
.png)
.png)
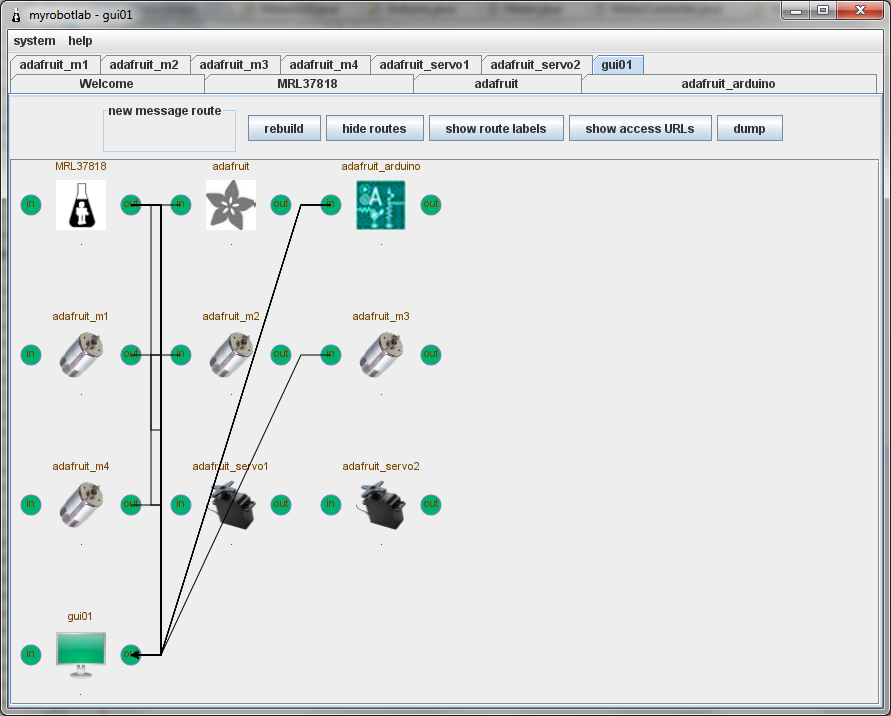
Map of message routes
References:
[[AdafruitMotorShield.DCMotor.py]]