So you have a little robot that is based on an Arduino running MRLComm but you really want to cut the USB cord. Here's what I've done to cut the cord and go wireless via a cheap chinese bluetooth module I picked up on Amazon.
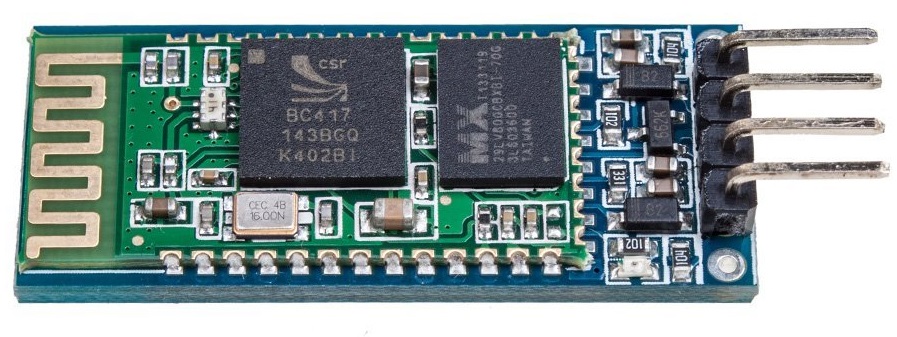
First get yourself an arduino (I've tested this with an Uno, Mega, and Sparkfun Pro Micro 5V) and one of these HC-06 modules.
You don't have to get yours from that link on Amazon but I like Prime shipping cuz I have to have it NOW!!
So when you get that bad boy you need to need to do a little setup for it to work at the right baud rate when it starts up. Do you remember "AT" commands from back in the days of dialup internet? No? ... then GET OFF MY LAWN!!!!
You're going to use your Arduino to configure the module before you actually load MRLComm onto the Arduino. For example if you're using an Uno, connect the GND pin of the HC-06 to a GND pin on the Uno. Connect the VCC pin of the HC-06 to a 5V pin on the Uno. Connect the RX pin of the HC-06 to pin 11 of the Uno and TX of the HC-06 to pin 10 on the Uno.
Open your Arduion IDE and load the following sketch I found here (I added the informative comments to the top) to your Uno.
/*This is a simple sketch to setup an HC-06 Bluetooth module via an Arduino and the IDE Serial Monitor
Connect to the arduino at 9600 with No line ending
Connect the power and ground of the HC-06 to the Arduino VCC and GND and connect the module's RX to pin 11 and TX to pin 10
Try different baud rates for "mySerial" until sending an "AT" command produces an "OK" response.
AT : check the connection
AT+NAME: Change name. No space between name and command.
AT+BAUD: change baud rate, x is baud rate code, no space between command and code.
AT+PIN: change pin, xxxx is the pin, again, no space.
AT+VERSION
AT+NAMEPROTOTYPE will set the name to PROTOTYPE.
To change baud rate, type AT+BAUDX, where X=1 to 9.
1 set to 1200bps
2 set to 2400bps
3 set to 4800bps
4 set to 9600bps (Default)
5 set to 19200bps
6 set to 38400bps
7 set to 57600bps
8 set to 115200bps
so sending AT+BAUD4 will set the baud rate to 9600.
*/
#include <SoftwareSerial.h>
SoftwareSerial mySerial(10, 11); // RX, TX
void setup() {
Serial.begin(9600);
pinMode(9,OUTPUT); digitalWrite(9,HIGH);
Serial.println("Enter AT commands:");
mySerial.begin(9600);
}
void loop()
{
if (mySerial.available())
Serial.write(mySerial.read());
if (Serial.available())
mySerial.write(Serial.read());
}
Once you load that you can open the Serial Monitor of your Arduio IDE and set it to 9600 baud in the bottom corner pull down menu because the Ardino will be listening at 9600.
You should see the message "Enter AT commands:" in the Serial Monitor window. In the input field on top type "AT" without quotes and hit ENTER or click the Send button. If you put the right baud rate in the "mySerial.begins()" line of the sketch you should see an "OK" response from the device. If not, try another number and reload the sketch to your Uno. The default of the HC-06 is supposed to be 9600. Other common values are 19200, 38400, 57600, and 115200.
Assuming you got your OK response the next thing to do is try setting a new baud rate so MRLComm will be happy later. We want to set it for 57600 so send "AT+BAUD7" without the quotes. I can't remember if you need to reset everything after that since I did this a while ago. I used the script above to try connecting at different baud rates because I couldn't remember what I set it too before.
To test if you've successfully set the baud to 57600 you can change the "mySerial.begin(57600);" and reload the sketch to the Uno. Test with the Serial Monitor (still 9600 in the bottom pull down because that's the speed the Uno is talking over USB) to see if an "AT" command gets an "OK" response.
If all that worked it's time to power down the Uno, and pull the wires from Uno pins 10 and 11. Load up the latest version of MRLComm.ino in your IDE and load it onto your Uno. Close the IDE and test with MRL that you can connect to the Uno via USB and get your "goodtimes" response. If that works out it's time to unplug the Uno and shut down MRL.
Connect the RX of the HC-06 to the TX(1) pin of the Uno and the TX pin of the HC-06 to the RX(0) of the Uno. Power up your Uno (preferrably without using USB from your computer so you know the cord is cut) and start up MRL. You need to get your computer to do the bluetooth pairing with the HC-06 and see what serial/COM port gets created. I did this a while ago so I don't remember how that part worked and it will vary a bit based on what OS your computer is running. On my MacBook I have a device called "/dev/tty.HC-06-DevB" which is what I need to connect to.
In MRL create an Arduino service and select the Serial Device in the Tools menu. MRL should then try to connect to the Uno over Bluetooth and you should get your "goodtimes" message. For me the HC-06 module will have it's LED blinking when it's not connected to the computer and once the link is established, it will turn on solid.
Troubleshooting:
Make sure that Tx on the Arduino is connected to RX on the HC-06 and vice versa.
I was trying to get this to work with a Sparkfun Pro Micro 5V 16MHz Arduino and it wasn't working. I couldn't figure out why so I used the Uno and sketch above to check the baud rate of the HC-06. I found it was already set to 57600. The Pro Micro is based on the 32u4 chipset and doesn't quite work the same as an Uno or Mega so I connected the HC-06 to an Uno with MRLComm like I describe above and it worked. Then I connected it to a Mega like above and it worked. Tried it on the Pro Micro again and it didn't work. I did a little reading on the
Sparkfun site and found out that I needed to change MRLComm to use "Serial1." rather than "Serial." because the standard "Serial." is what the 32u4 chip uses to talk over USB only and isn't shared with the RX(0) and TX(1) pins on the board. I did a Find and Replace in the Arduino IDE and reloaded MRLComm to the Pro Micro and it worked!
This helped a lot
I have some of these modules that I couldn't program with AT commands because of some bizarre timeout window. (I used to set up modems back in the days of DOS, so yeah, I know all about the Hayes command set.)
I had actually found something like this trick, and was finally able to use the module, but then I lost it. Now I can reconfigure these pita bt modules again. Thanks!
Nice post...
Nice post KMC... But you should have used HC-05 one instead... Its both master and slave and you can use bi-directional... HC-06 is just a slave bluetooth module... Their prices are more or less the same at Chinese suppliers... :)
yeah when I decided to get
yeah when I decided to get the 06 and not the 05 I was going off an old post of Grog's where he had problems with the Master version so I went with the simple slave version.
Heh, when I originally
Heh,
when I originally purchased my first batch, the distributor did not know the difference and just threw a bunch (some slaves & mostly masters) in a bag .. I sorted them out, but did not find how to turn the Masters I got into slaves ... Maybe its possible (maybe not)
The slaves can be fun - here's one strapped to a Bare Bones Board Arduino - fully self contained radio linked Arduino. Tested with a pack of AA Batteries - works pretty well