UPDATE - 04/30/2014
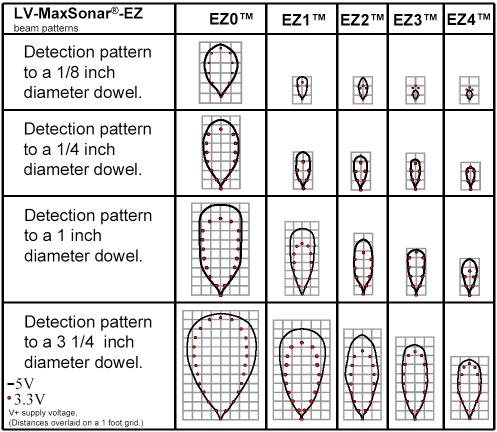
Hi guys! Short update... Well, it's working! Just the first tests with Maxbotix ultrasonic range finder LV-EZ1. I'm working on an autonomous routine.
UPDATE - 04/27/2014
I've got a good progress on my project this week. It's not in action yet, but have the most of the parts assembled. Got to work now on the electronics and programmation.
FIRST POST - 02/03/2014
Hi guys!
It's been a long time since my last post here. Well, I needed some time to inspire me again, and about three weeks ago I started to rebuild my butler with some new features. Just a bit of work is done. As it progresses I'll show you here.
On the video you can see the head controlled by a Xbox 360 joystick using MRL services.
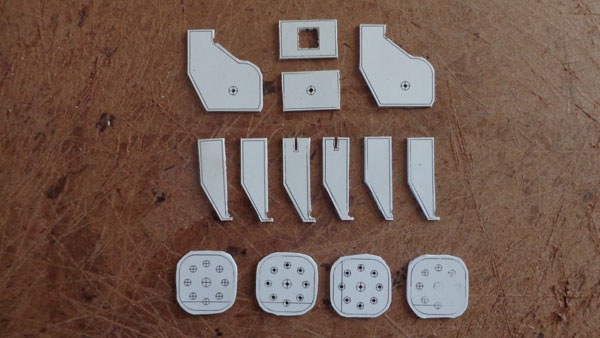
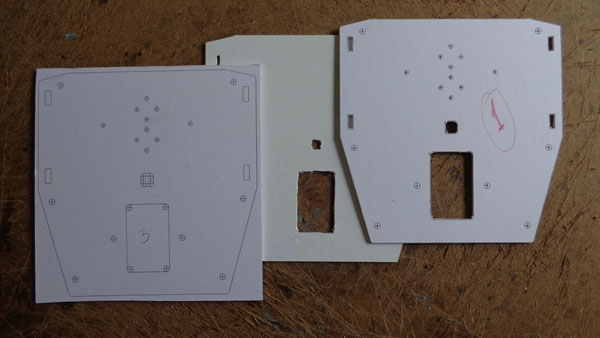
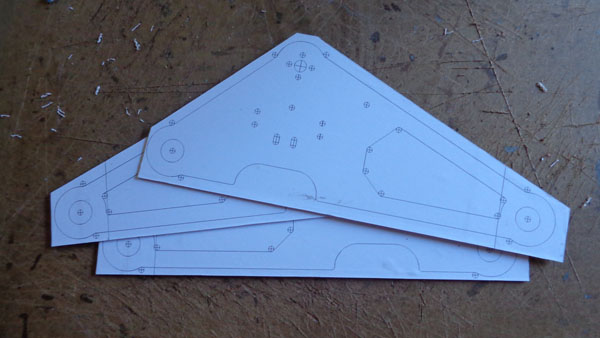
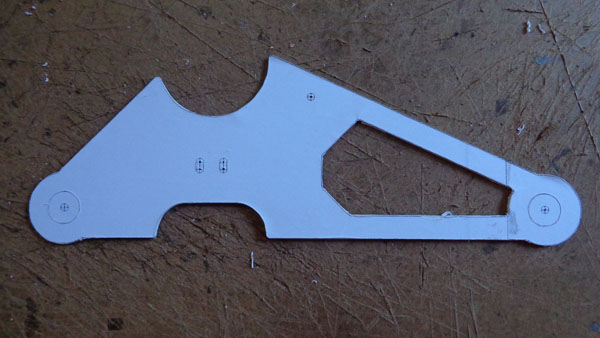
Below you see the building progress.
Here you see the parts that will form the neck.
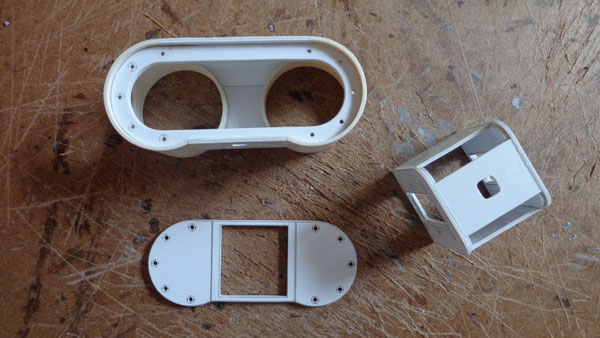
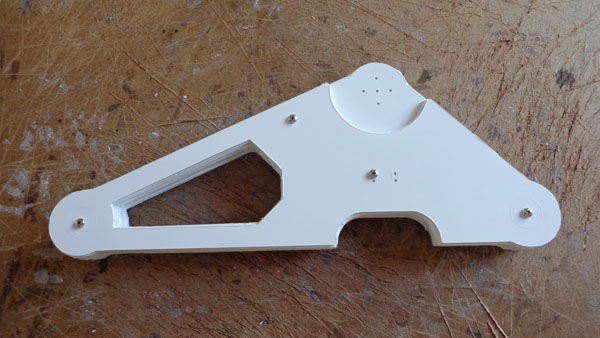
Neck done...
.JPG)
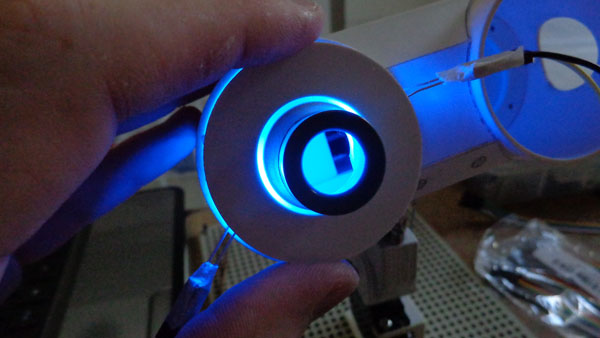
Building the head.
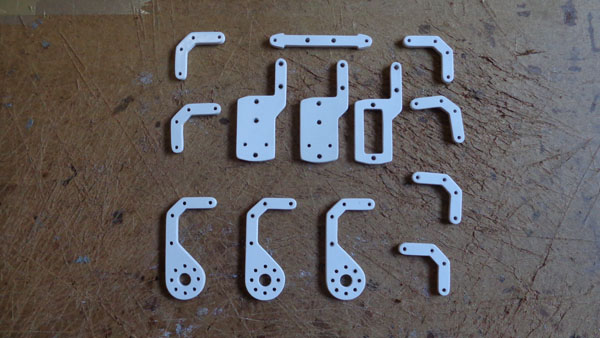
Some parts of the hands.
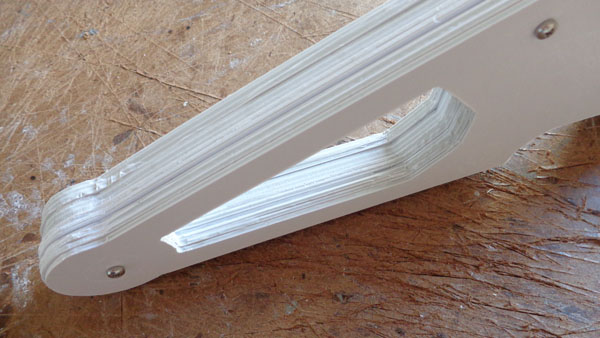
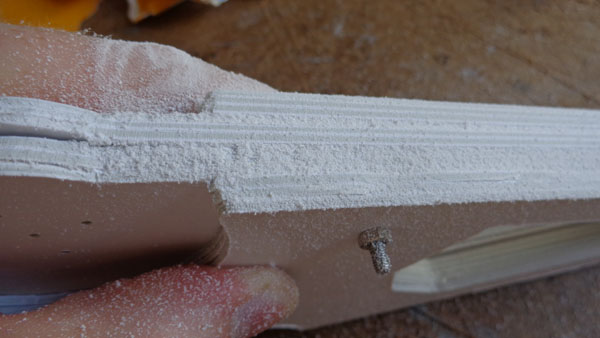
Main chassis.
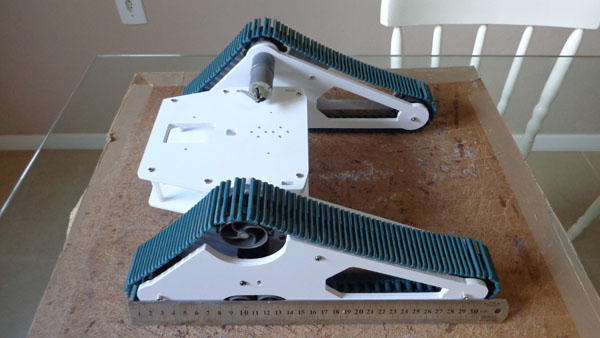
Tracks brackets.
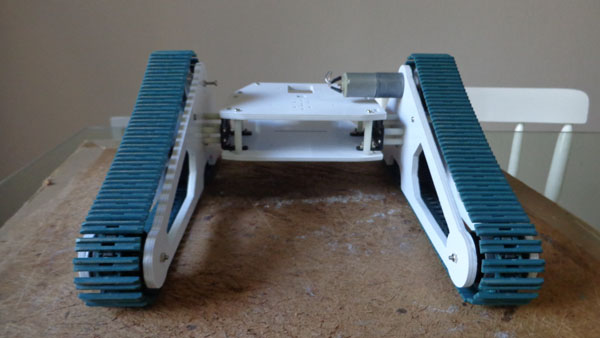
Locomotion part done.
Great build...
Great build Mech... looks neat and I loved the drive mechanism of the head... I am using a more or less similar mech to move my head... I am curious about the code for 3pid steering... can you post your code please?...
Joystick
Hi, borsaci06. Thank you very much!
For now, I'm not using PID, just a simple code with a joystick and predefined values for servo positions. Below you see full code.
Thx...
Thx.. It will be helpful for me... I am a complete noob at python scripting... I am using an Arduino and Pololu Maestro servo controller for my head... hopefully Grog or Aless will develop an nPID py script for me if he can find time to create a Meastro service... Your robot is very cute, like Wall-E... :)
WOW !
WOW MECH !
That is one fine looking bot ! Your revisions get better and better... Quality with a capital Q !
You have a great style too, I could spot one of your builds easily.. yep, that's a Mech ;)
Very curious on the springs in the torso - I remember version 2 - there seemed to be a lot of jitter in the camera - were the springs a way to smooth camera image during movement? What size brain will it have - of course it will be wired via wifi to the rest of your computers - but on board will it be a raspi, udoo, beagle board black, odroid?
Thank you very much!
Actually the springs (shock absorbers) are more aesthetical than functional, just to complete the parallel linkage mechanism. What will reduce the jitter on the image of the camera are the reinforced parts. The plan is to use the Raspberry Pi as brain for this robot.
Sooooo Bad Ass
Mech that is over the top. Awesome control with the controller. Man just shows that the new Bot Space is working out for you. Cant wait to see more on this build.
Dwilli9013 Dwayne
Good place to work, good work :D
Thank you very much!
wouaaa a very nice progress
wouaaa a very nice progress my friend
your robot is so nice and with no 3d printer lol
i loove your post and i am exiting each day s for see more news
do you think put your plans in free down load? for everybody build it the same?
thank you best regards amby
Open source
I do intend to publish this as an open source project, and share all the files used to build this robot.
Very nice work!!! I love
Very nice work!!! I love styrofoam aspect.
Very well done.
Thank you very much, Gael!
It's a great material: strong, easy to work with and cheap. I love it too!
Beauty ! Let's start Slam
Beauty ! Let's start Slam !
So with the LV-EZ1 you got range.
You could start with dead-reconning, but that gets pretty difficult and sloppy. So more sensors would be useful.
Camera - OpenCV - even low FPS - you could set an LKPoint and begin rotating - which would give you angular change + distance with the sonar - which would give you a map. A good start.
Othere sensors which might be helpful.
Looks real good Mech