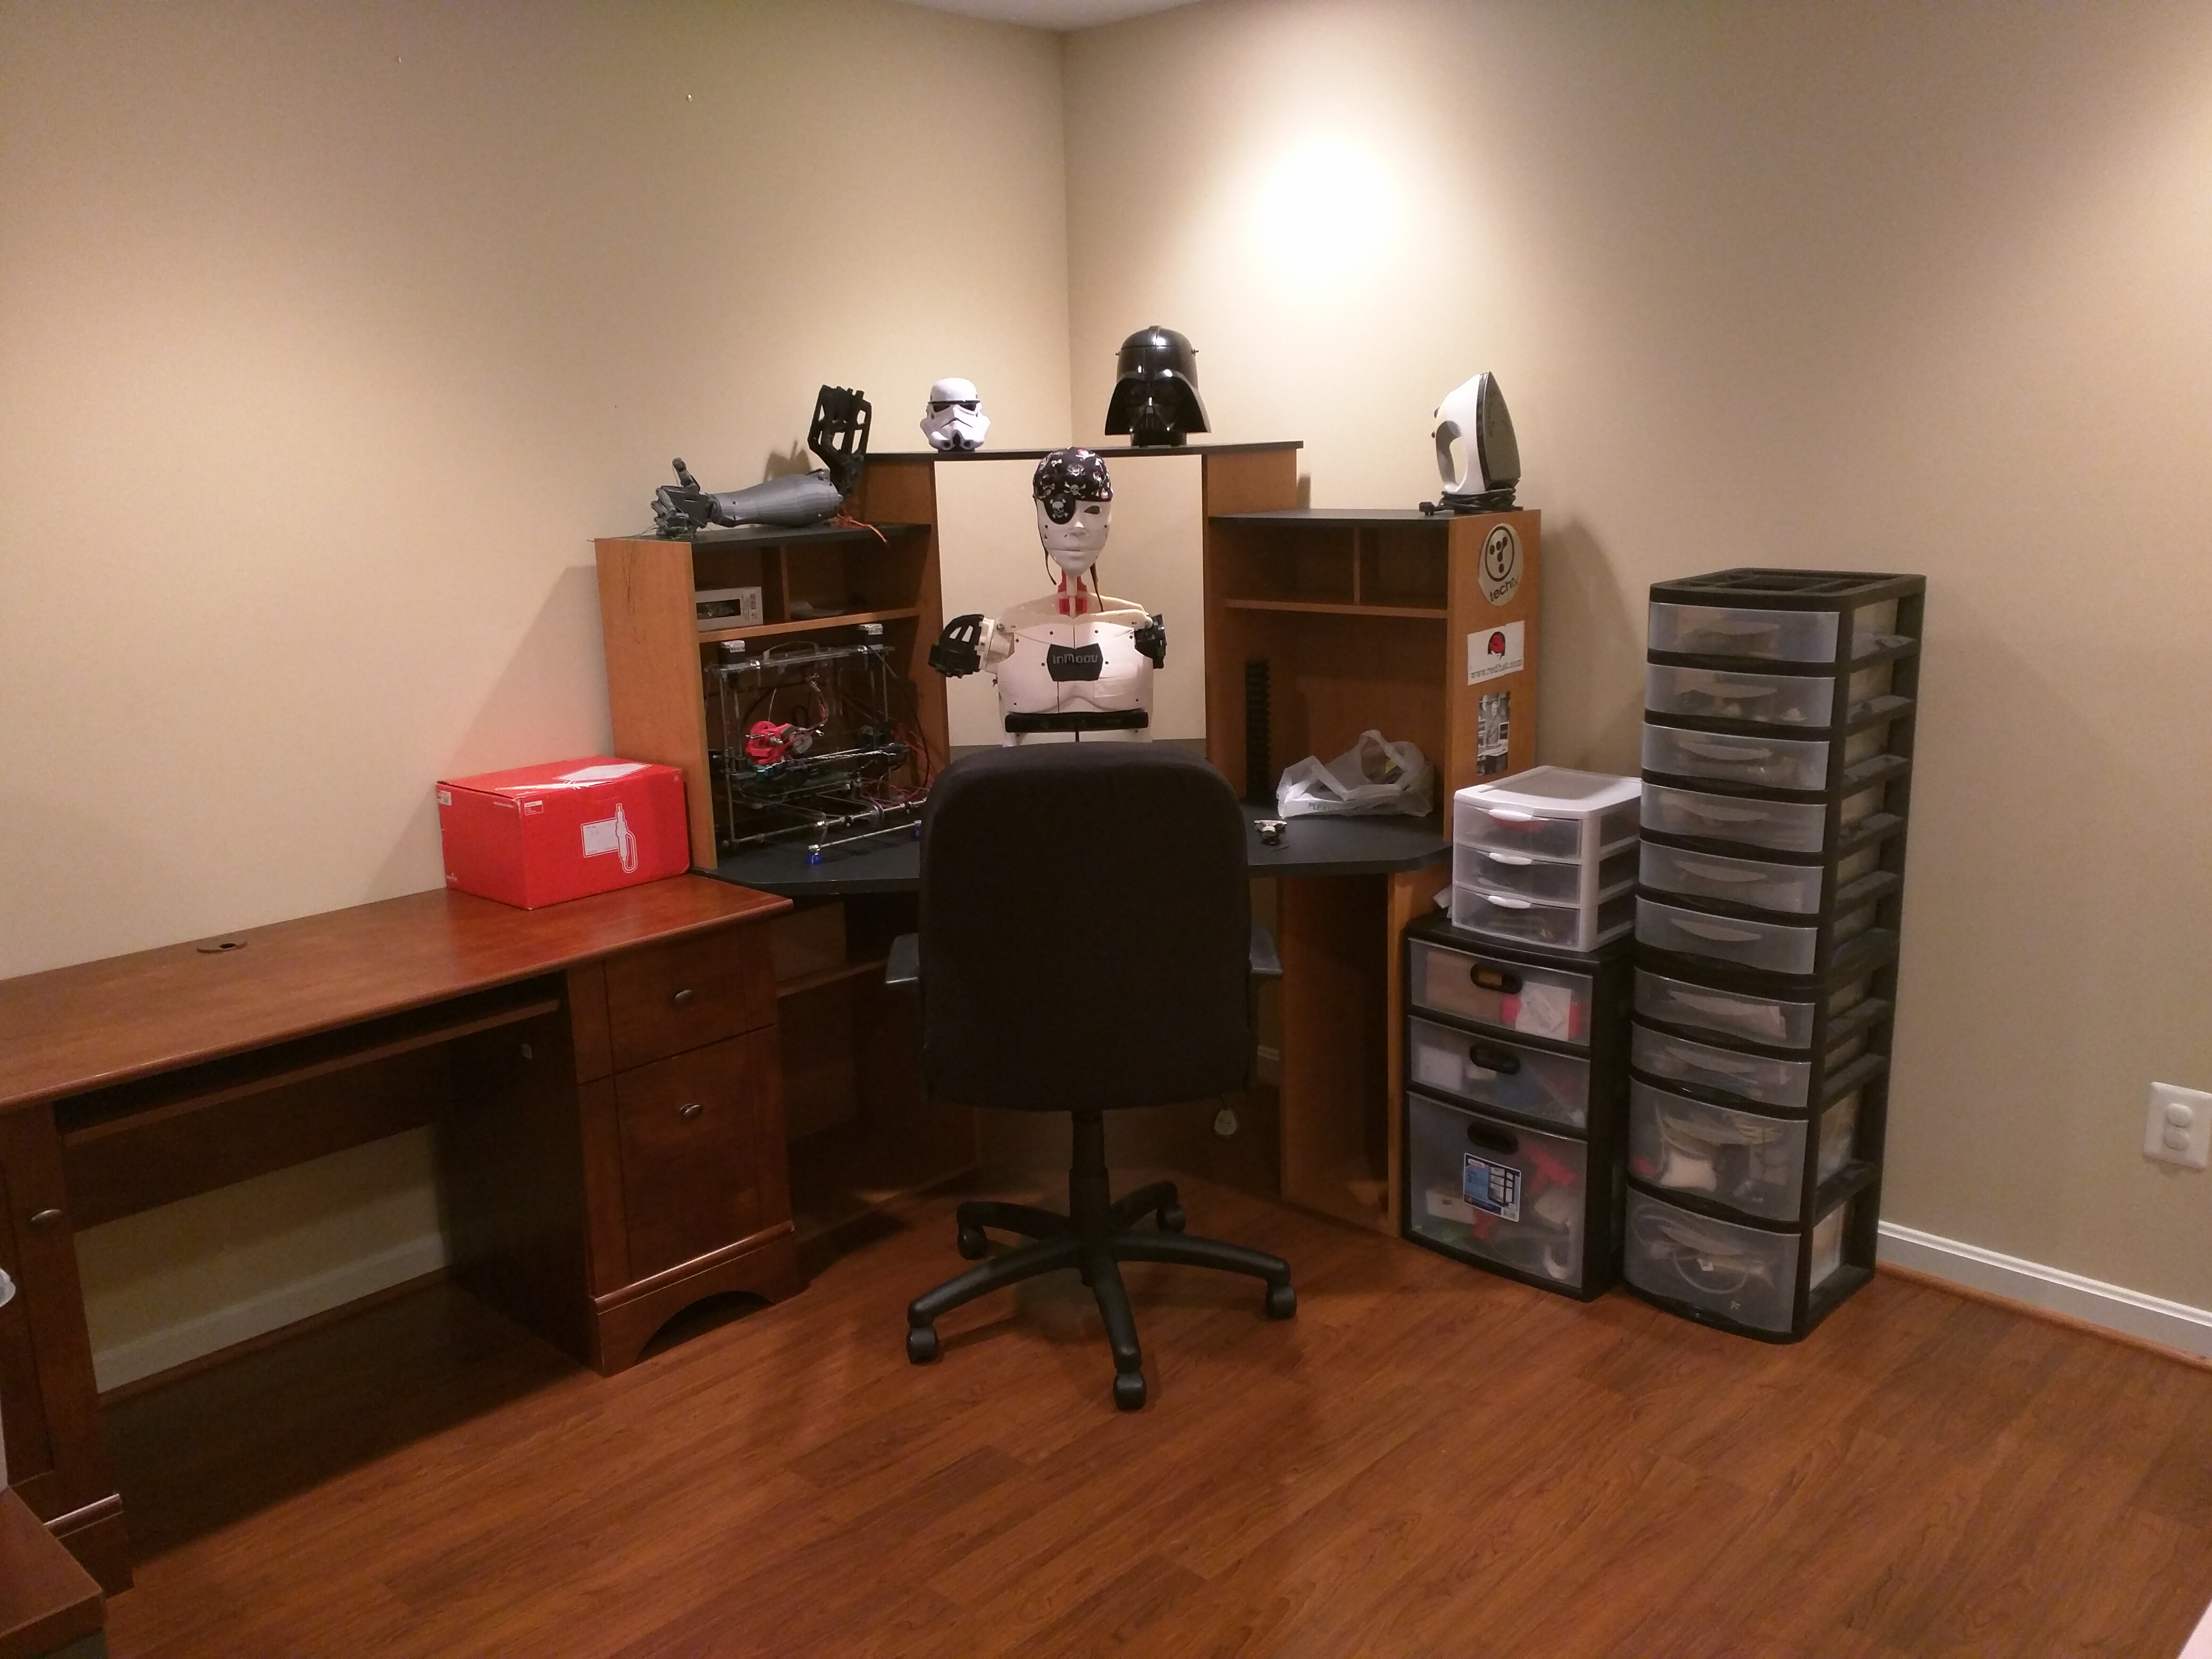
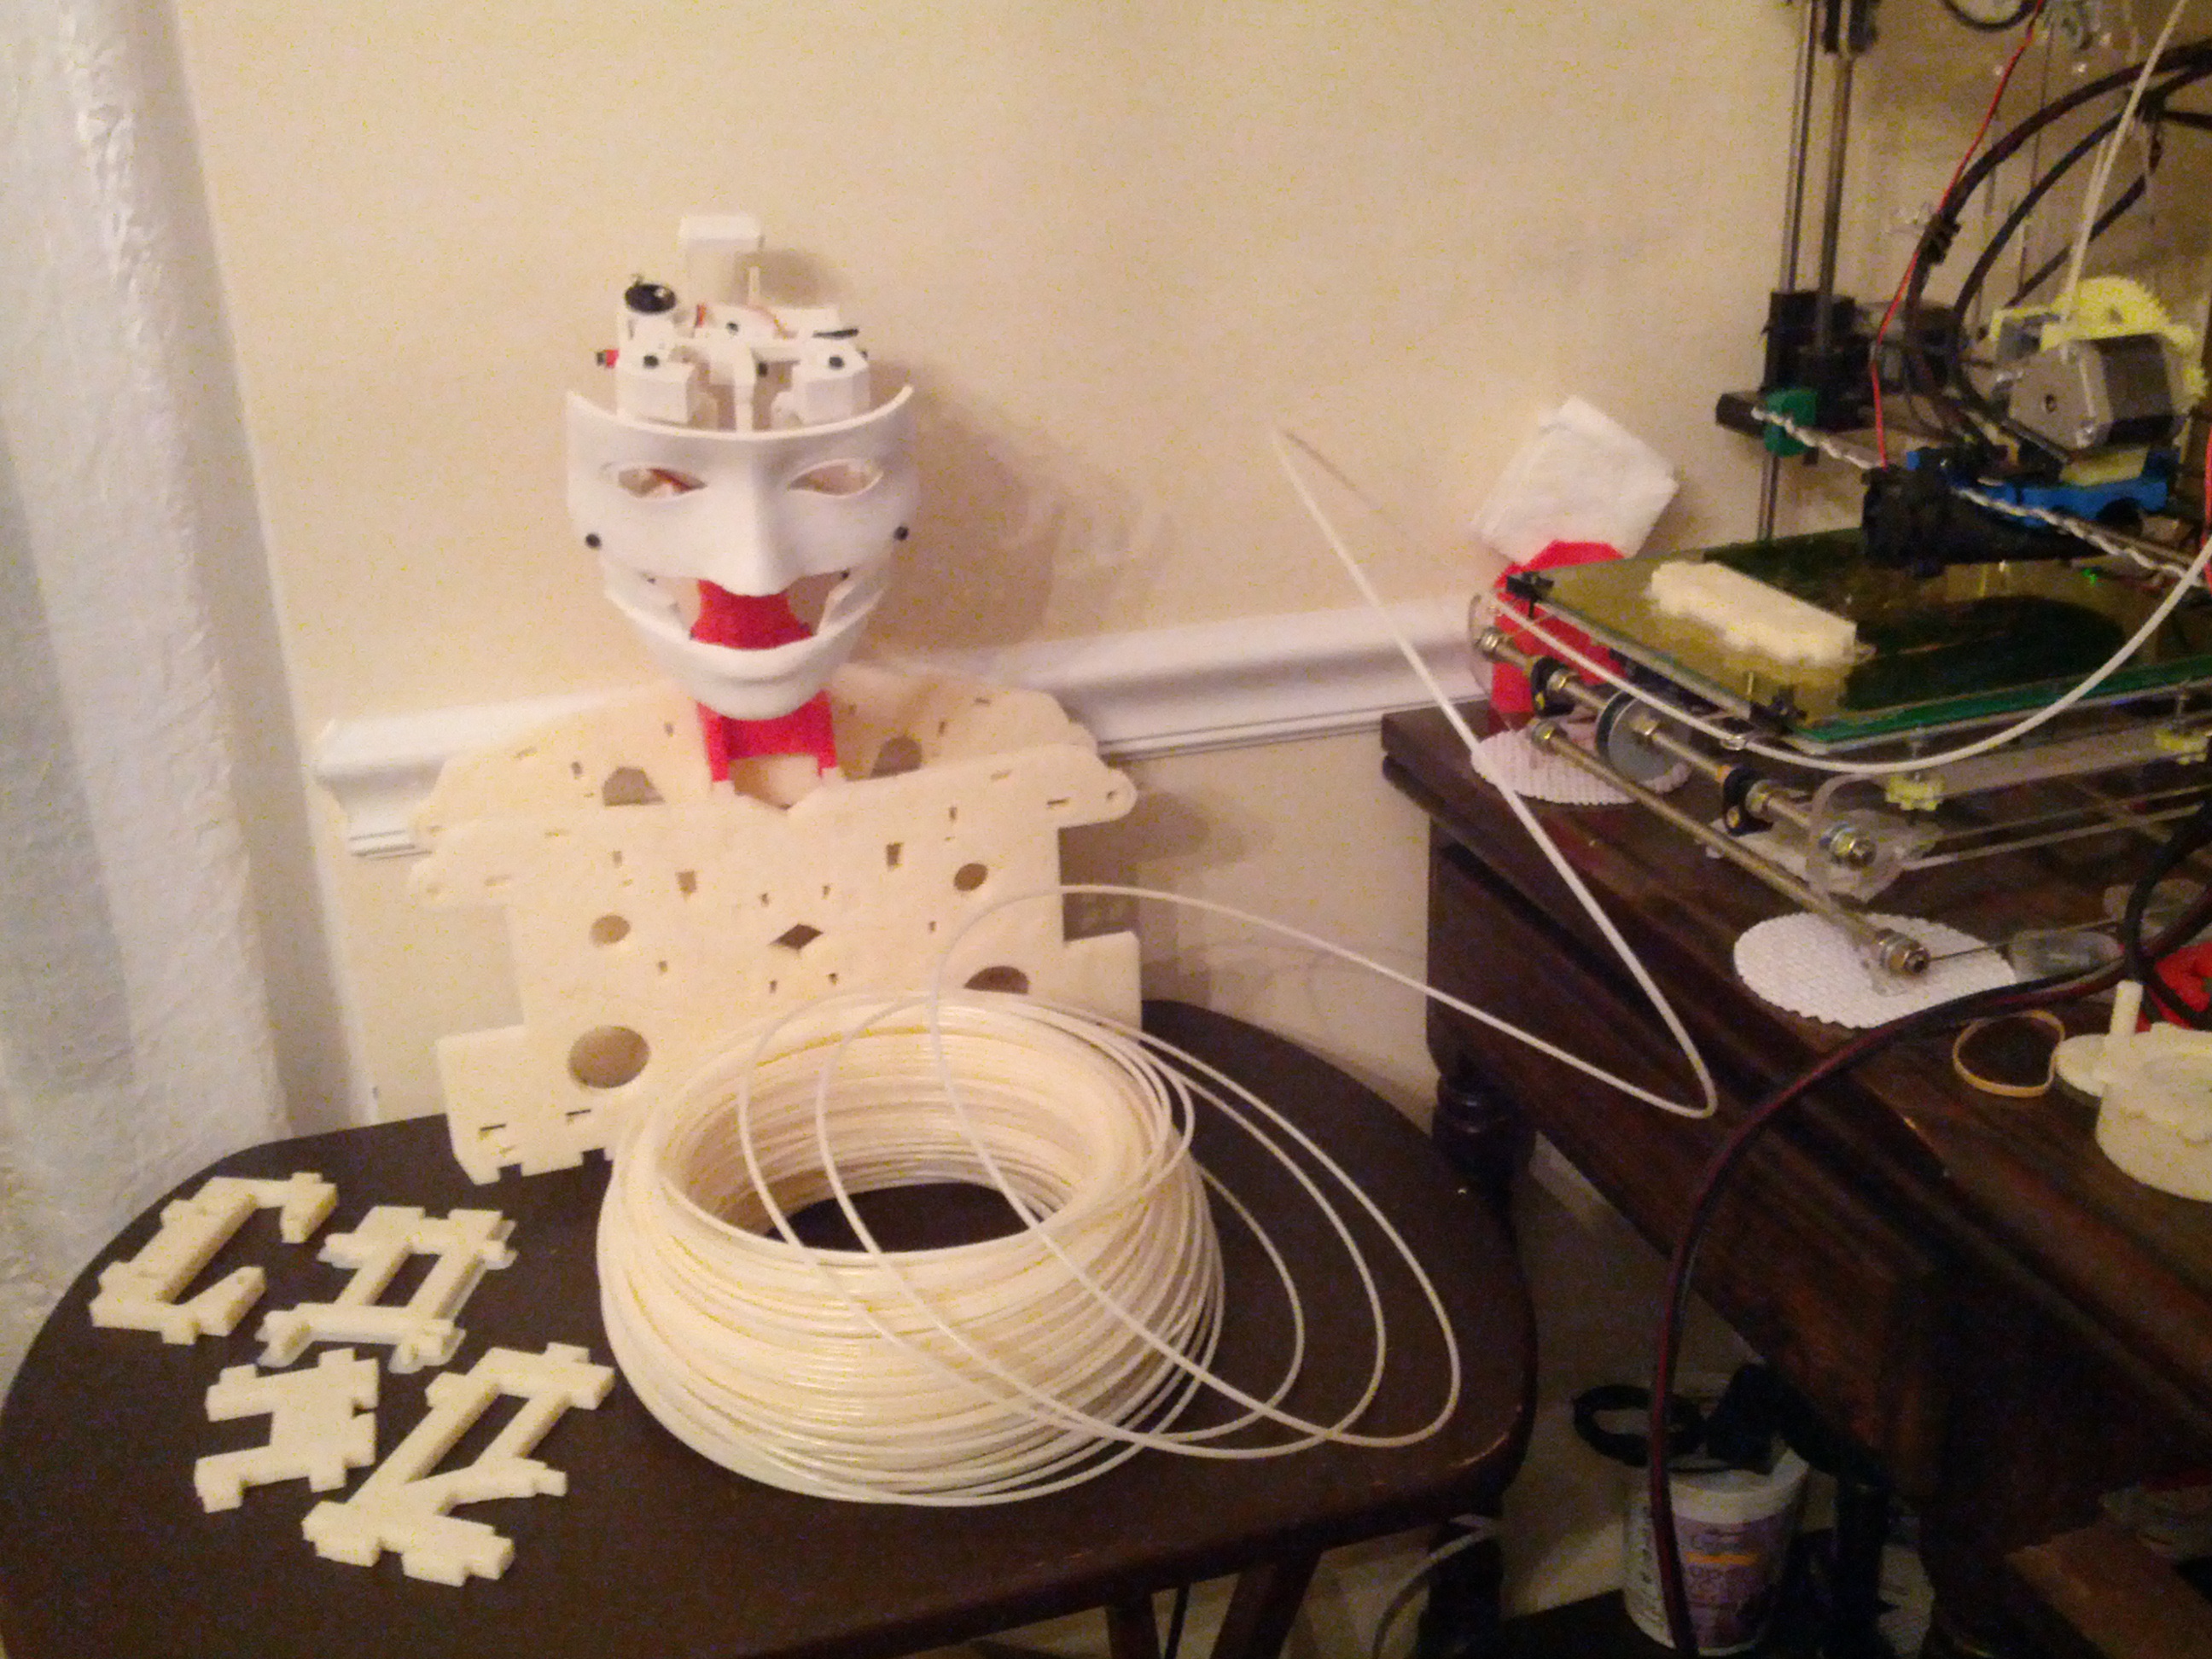
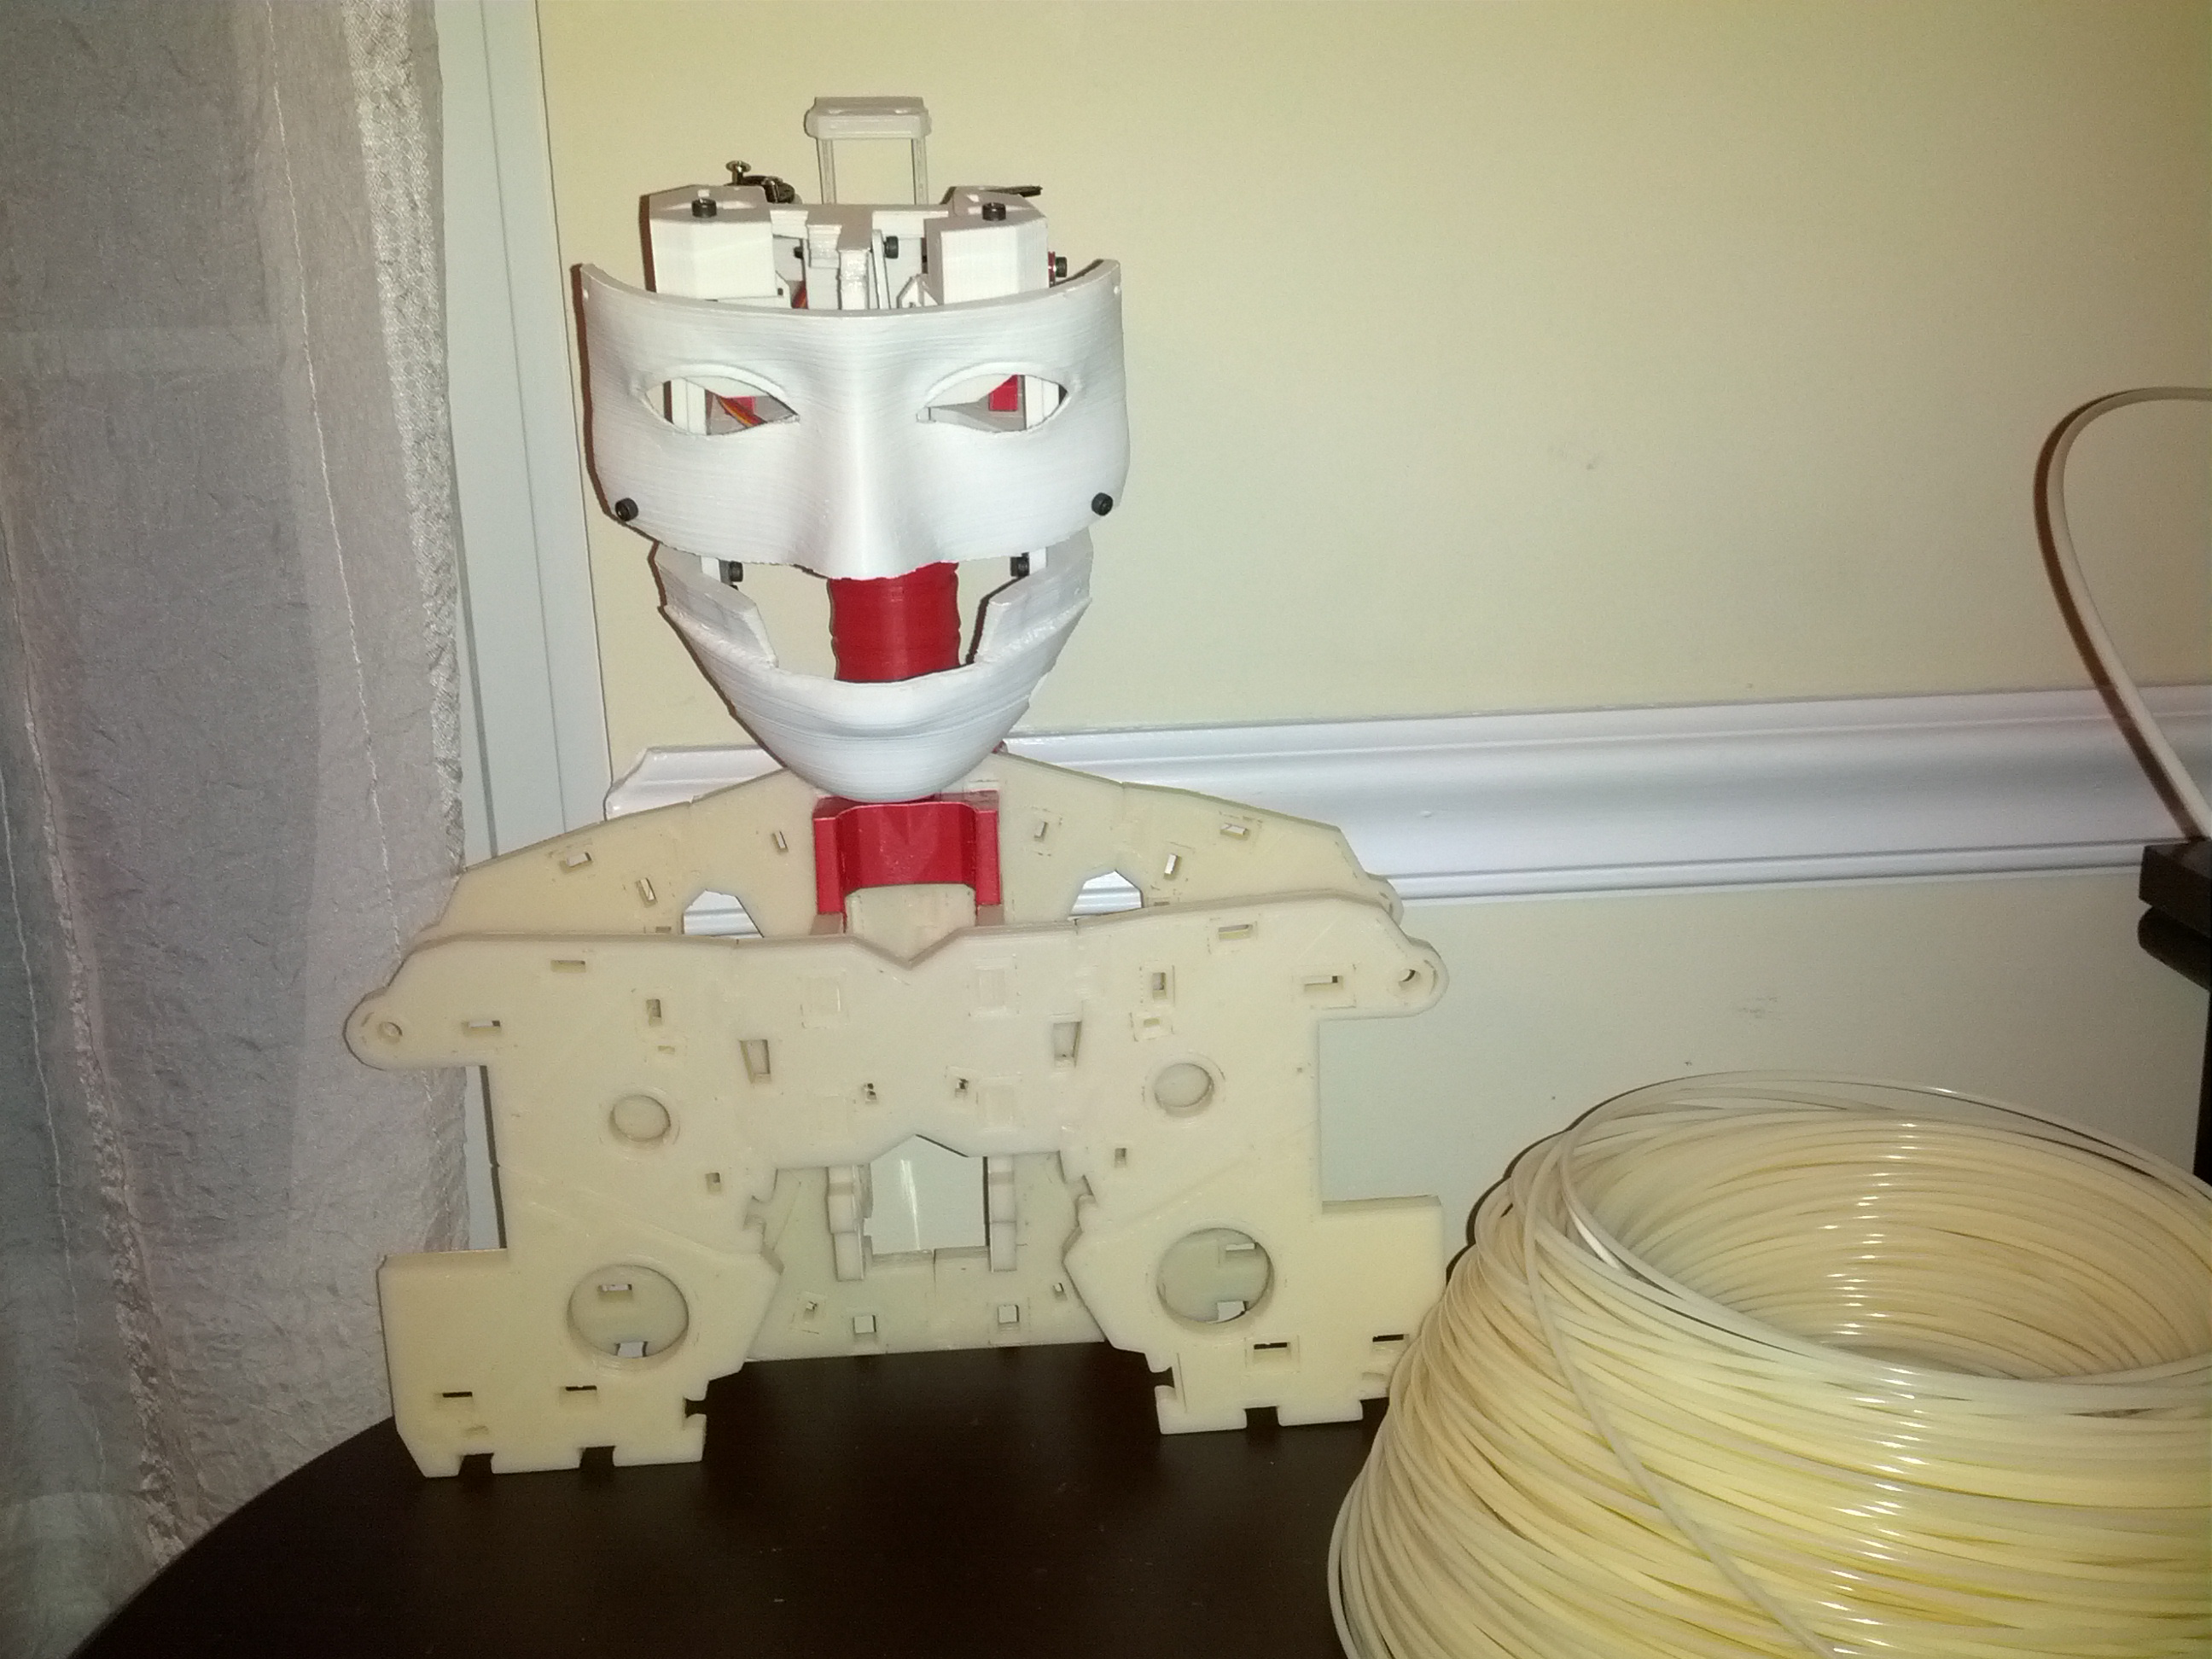
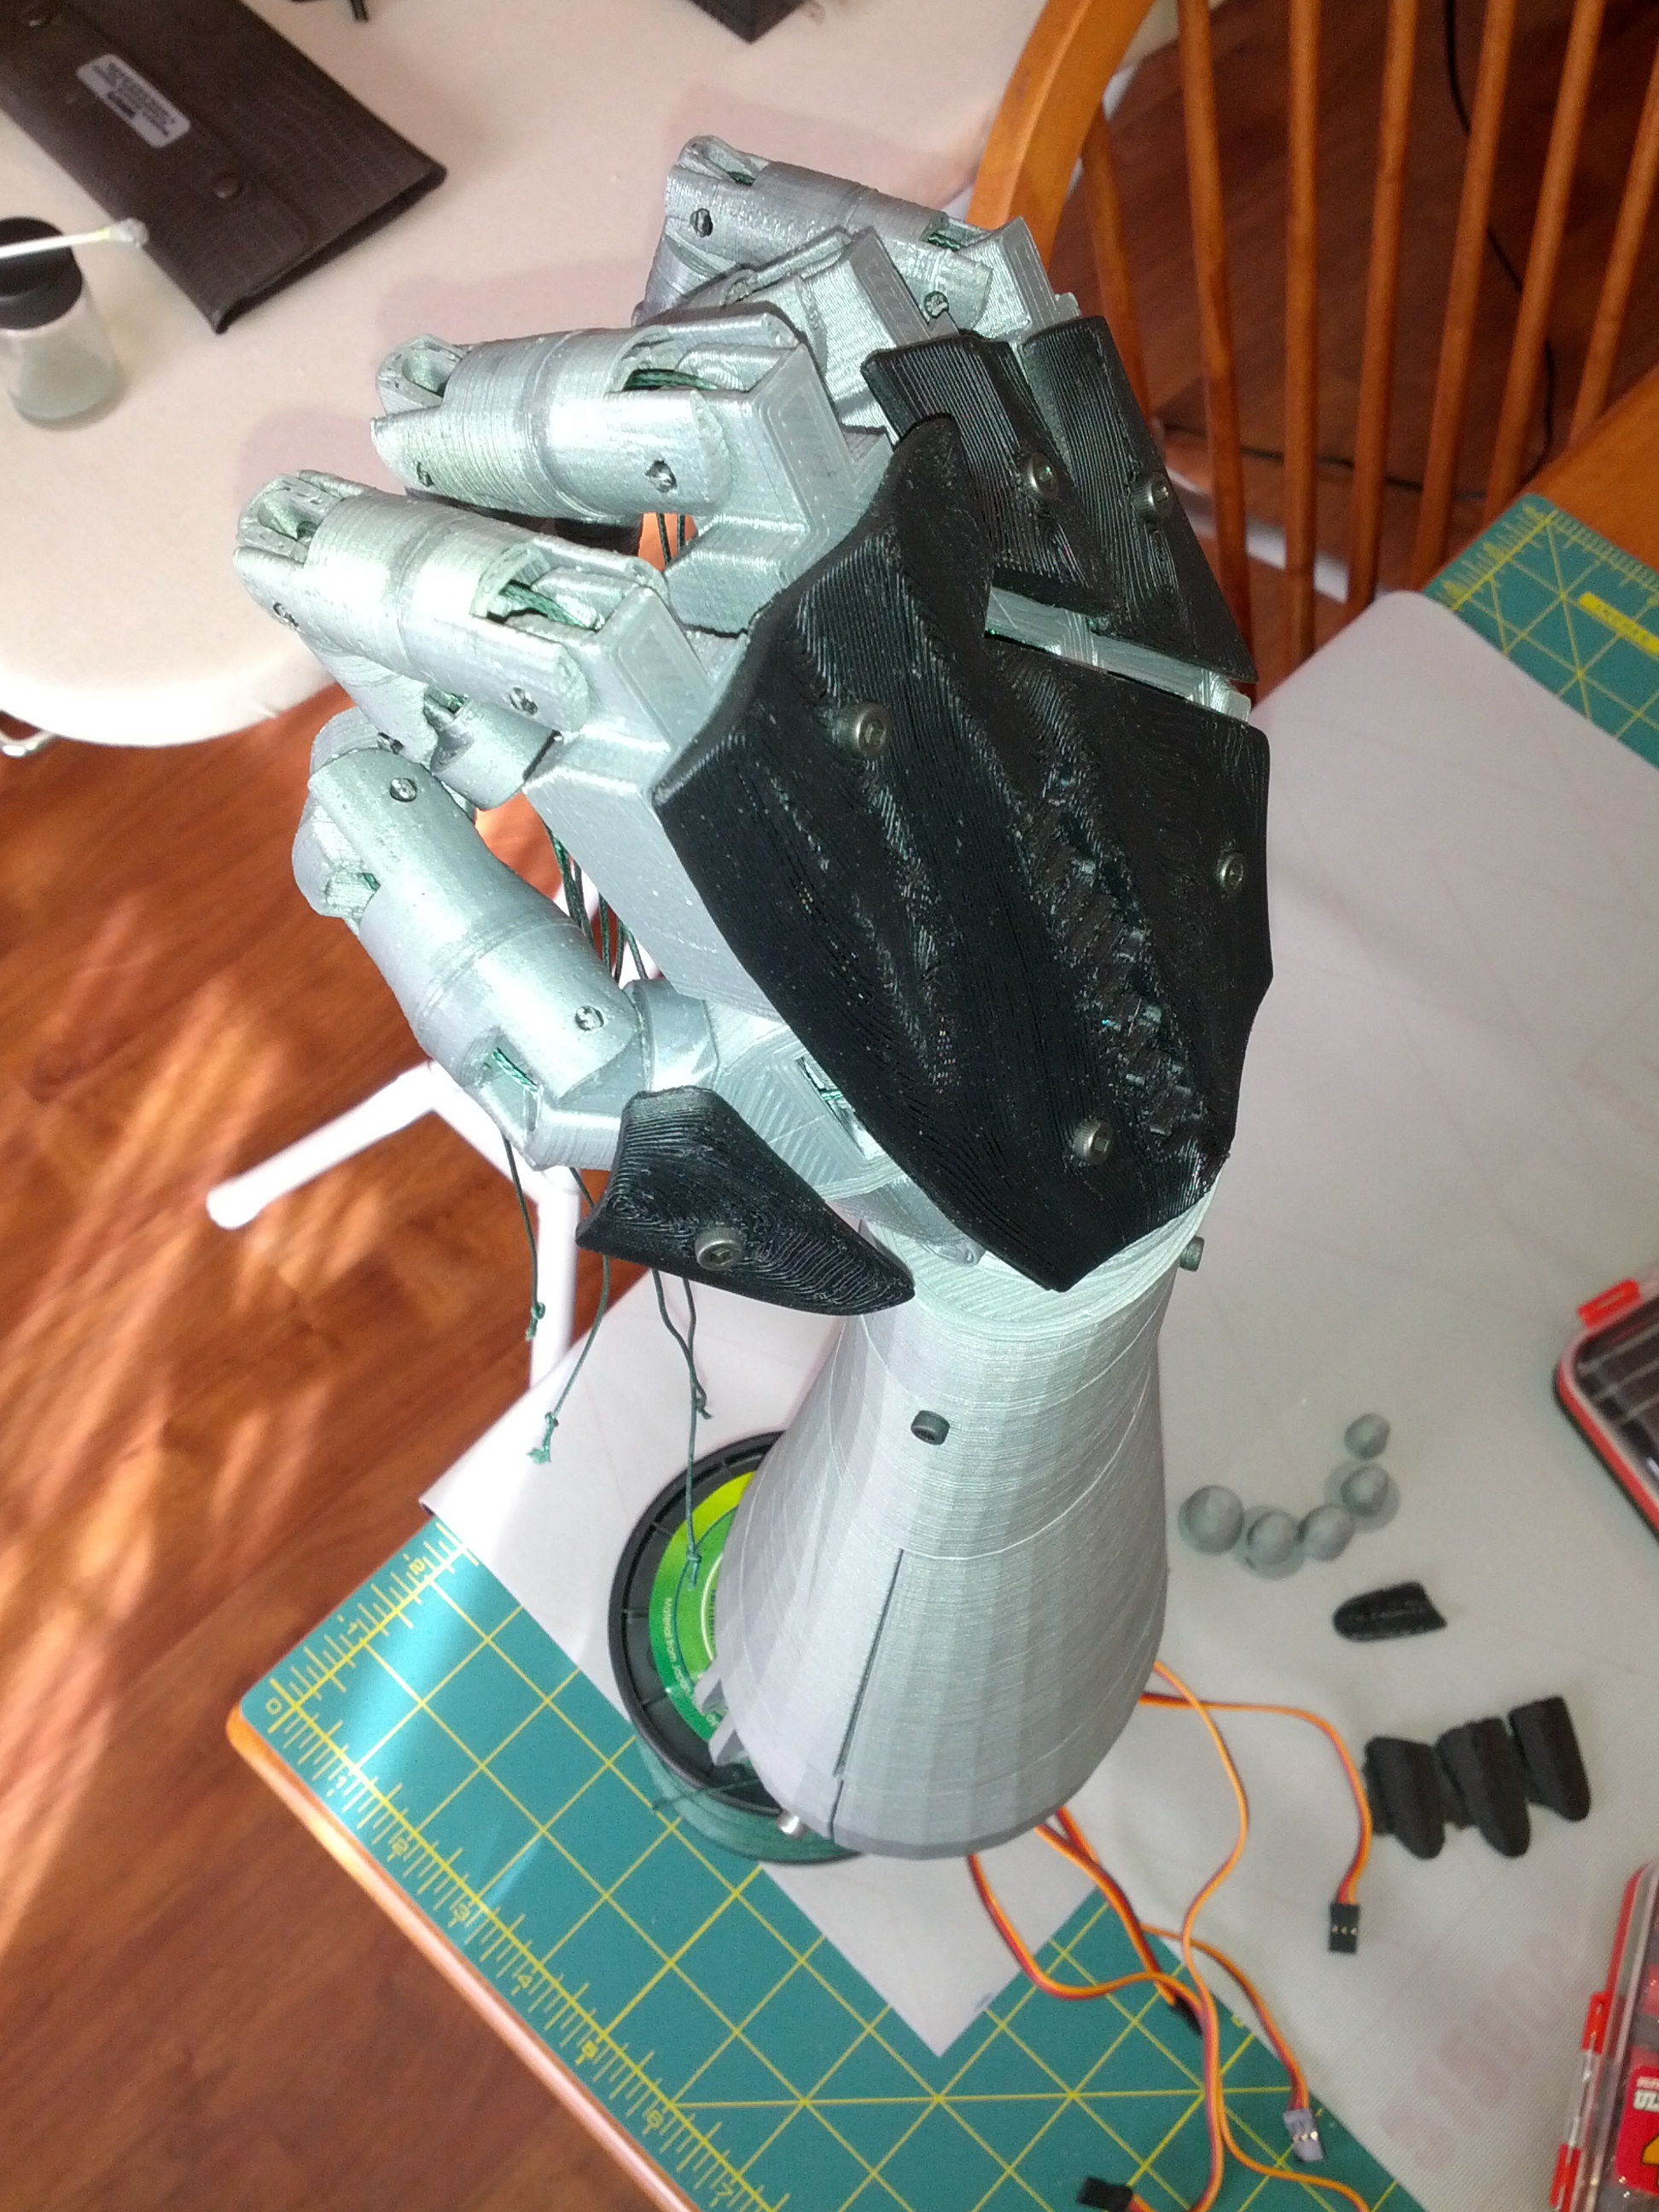
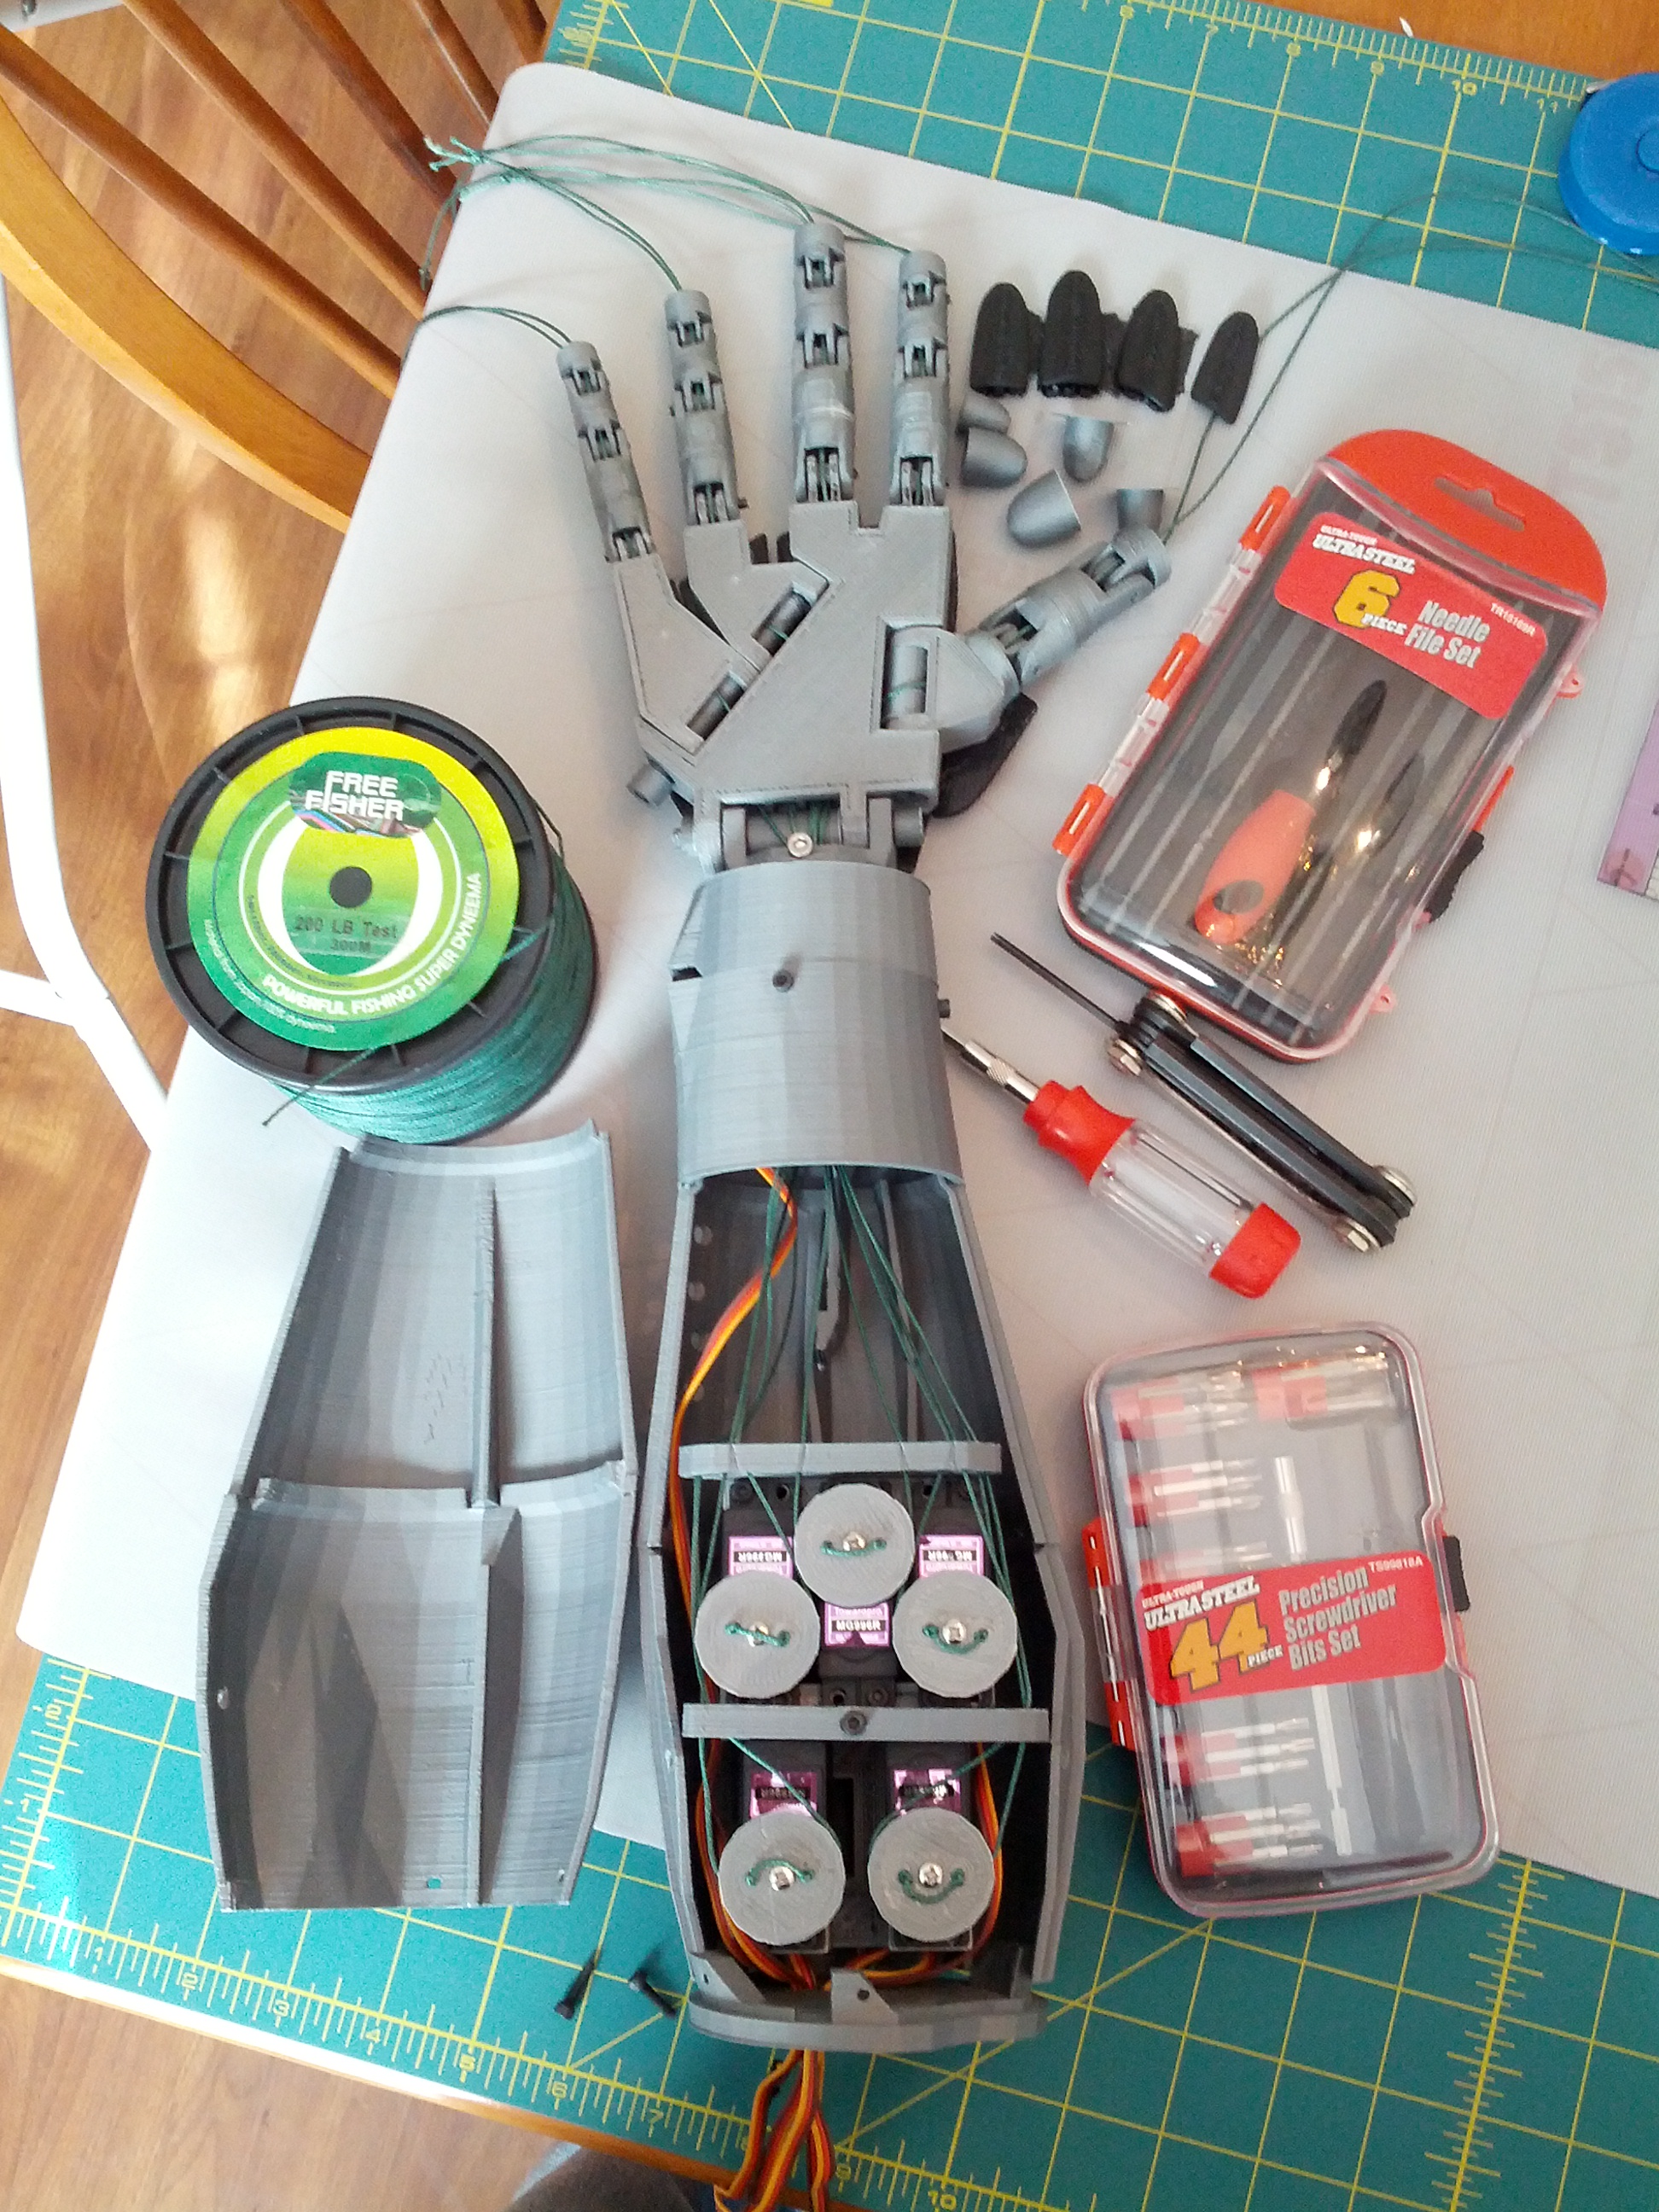
Update 2015-09-09
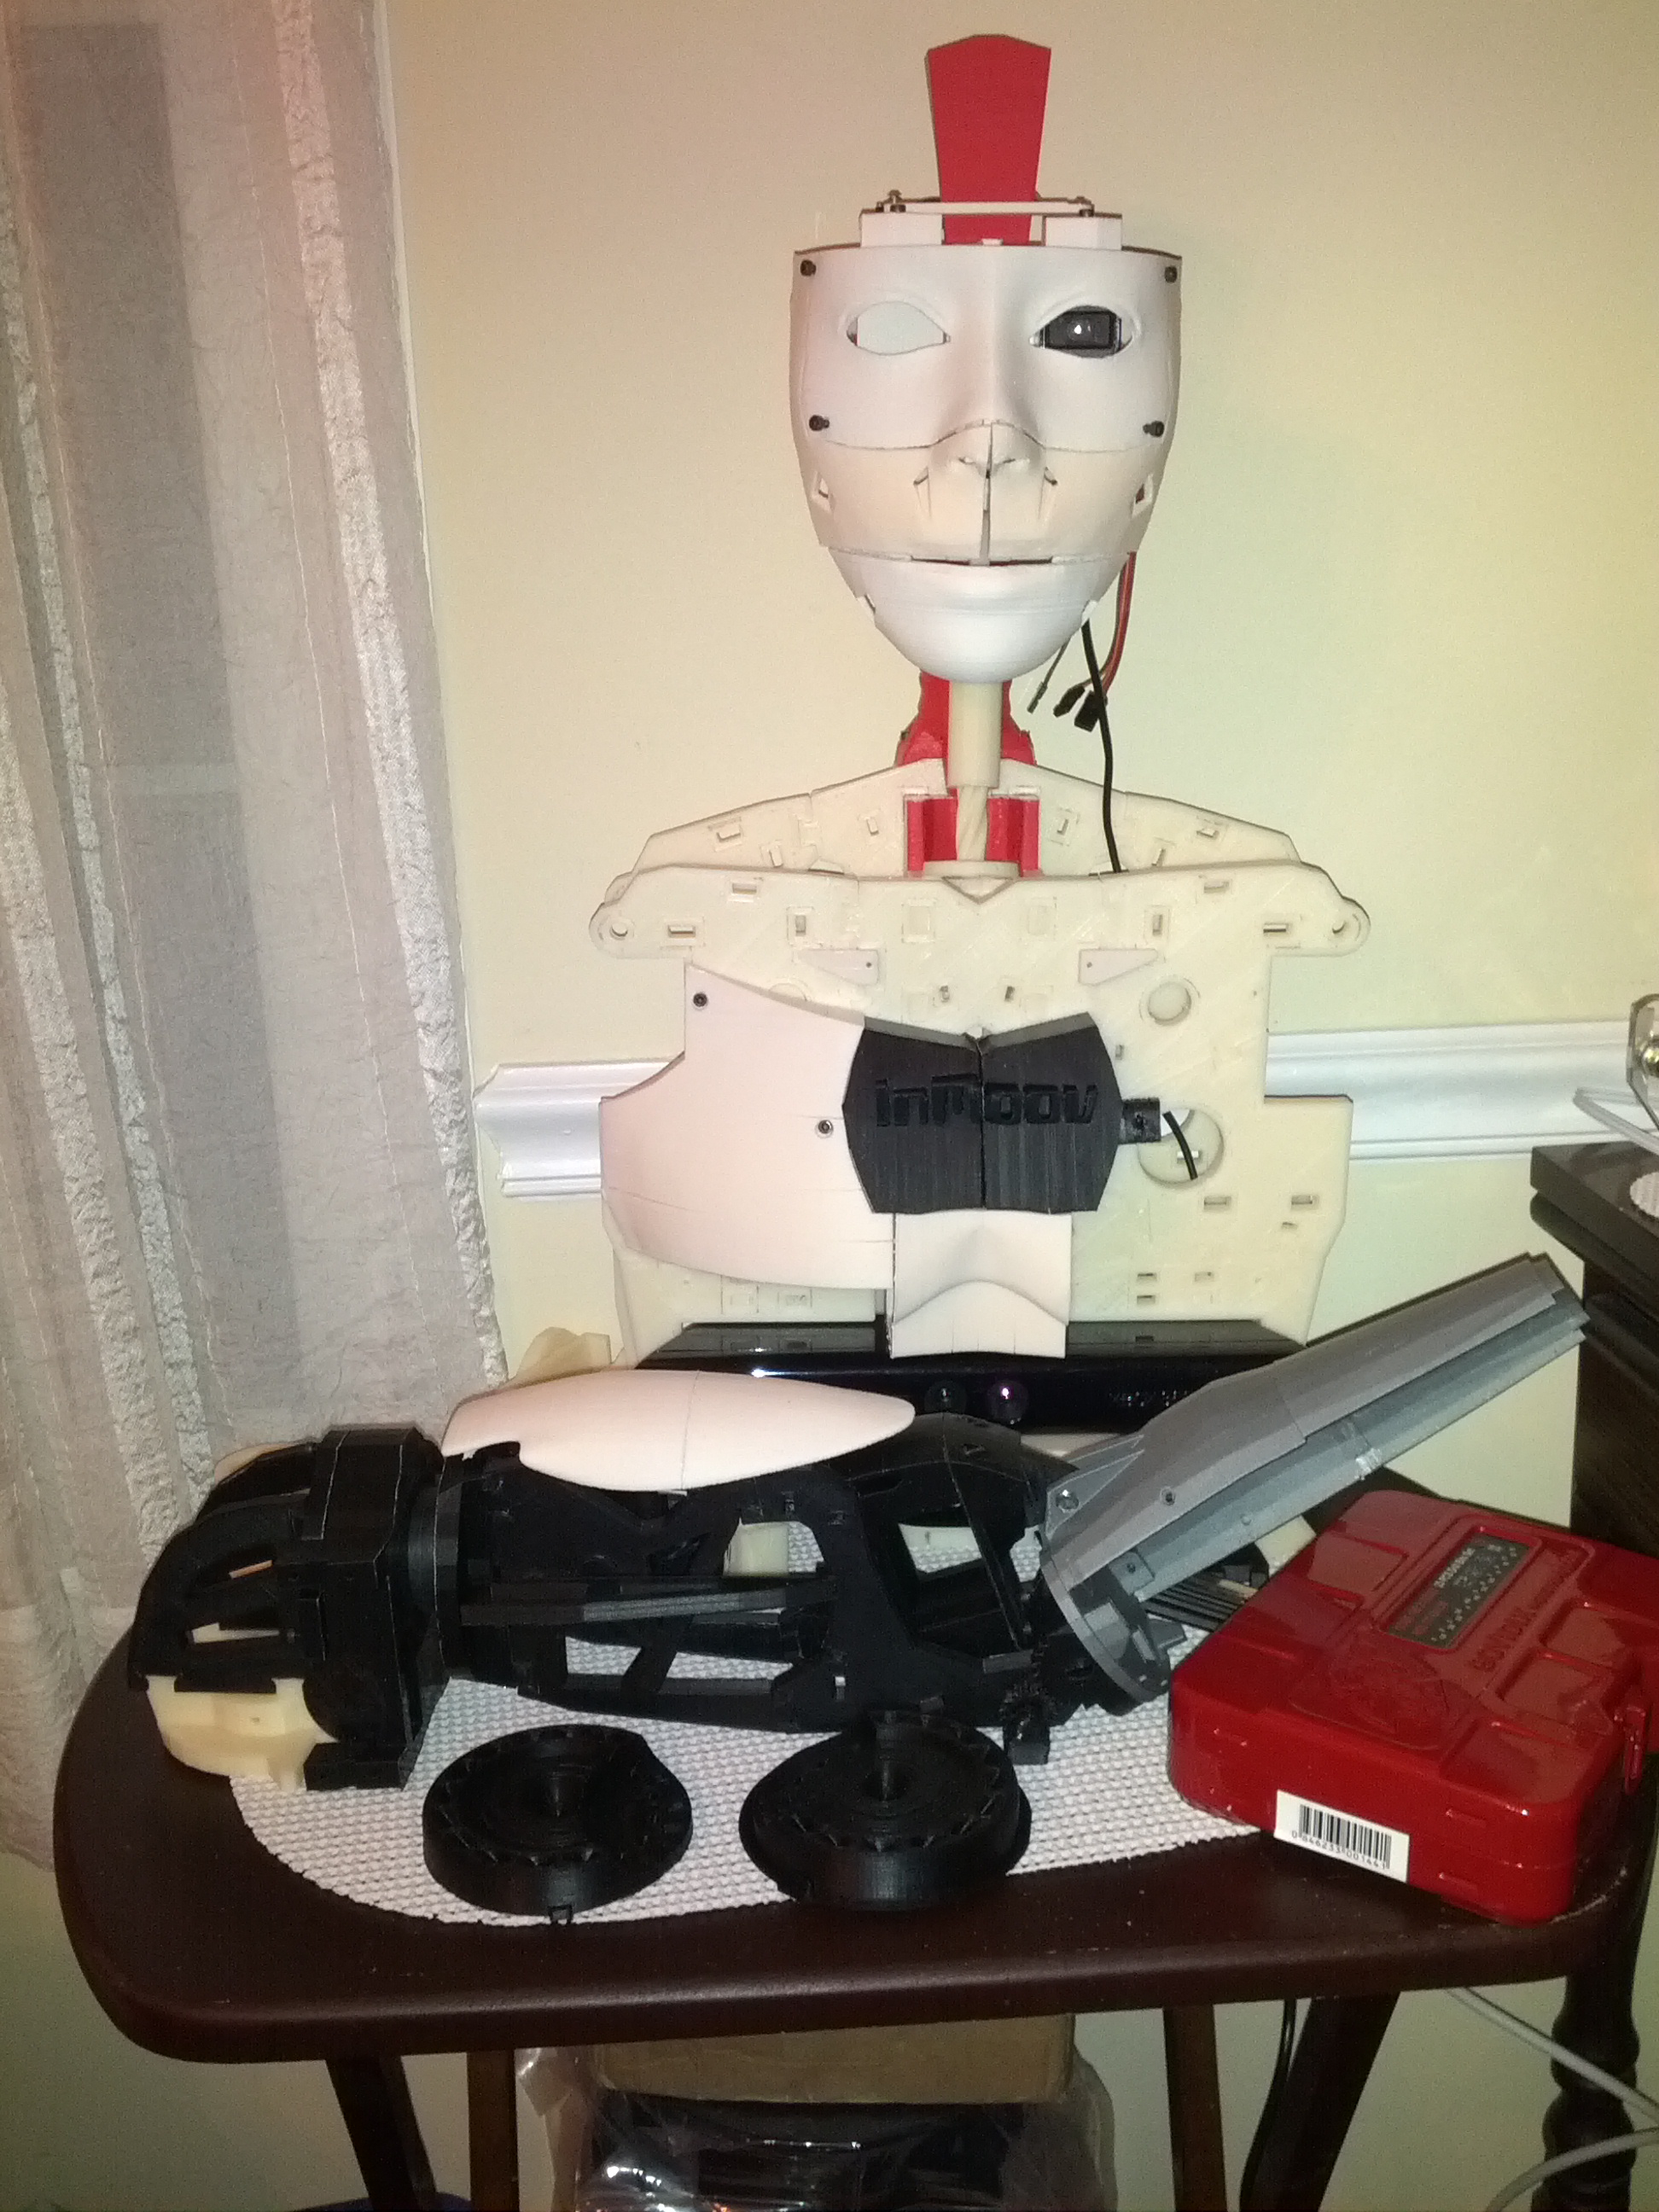
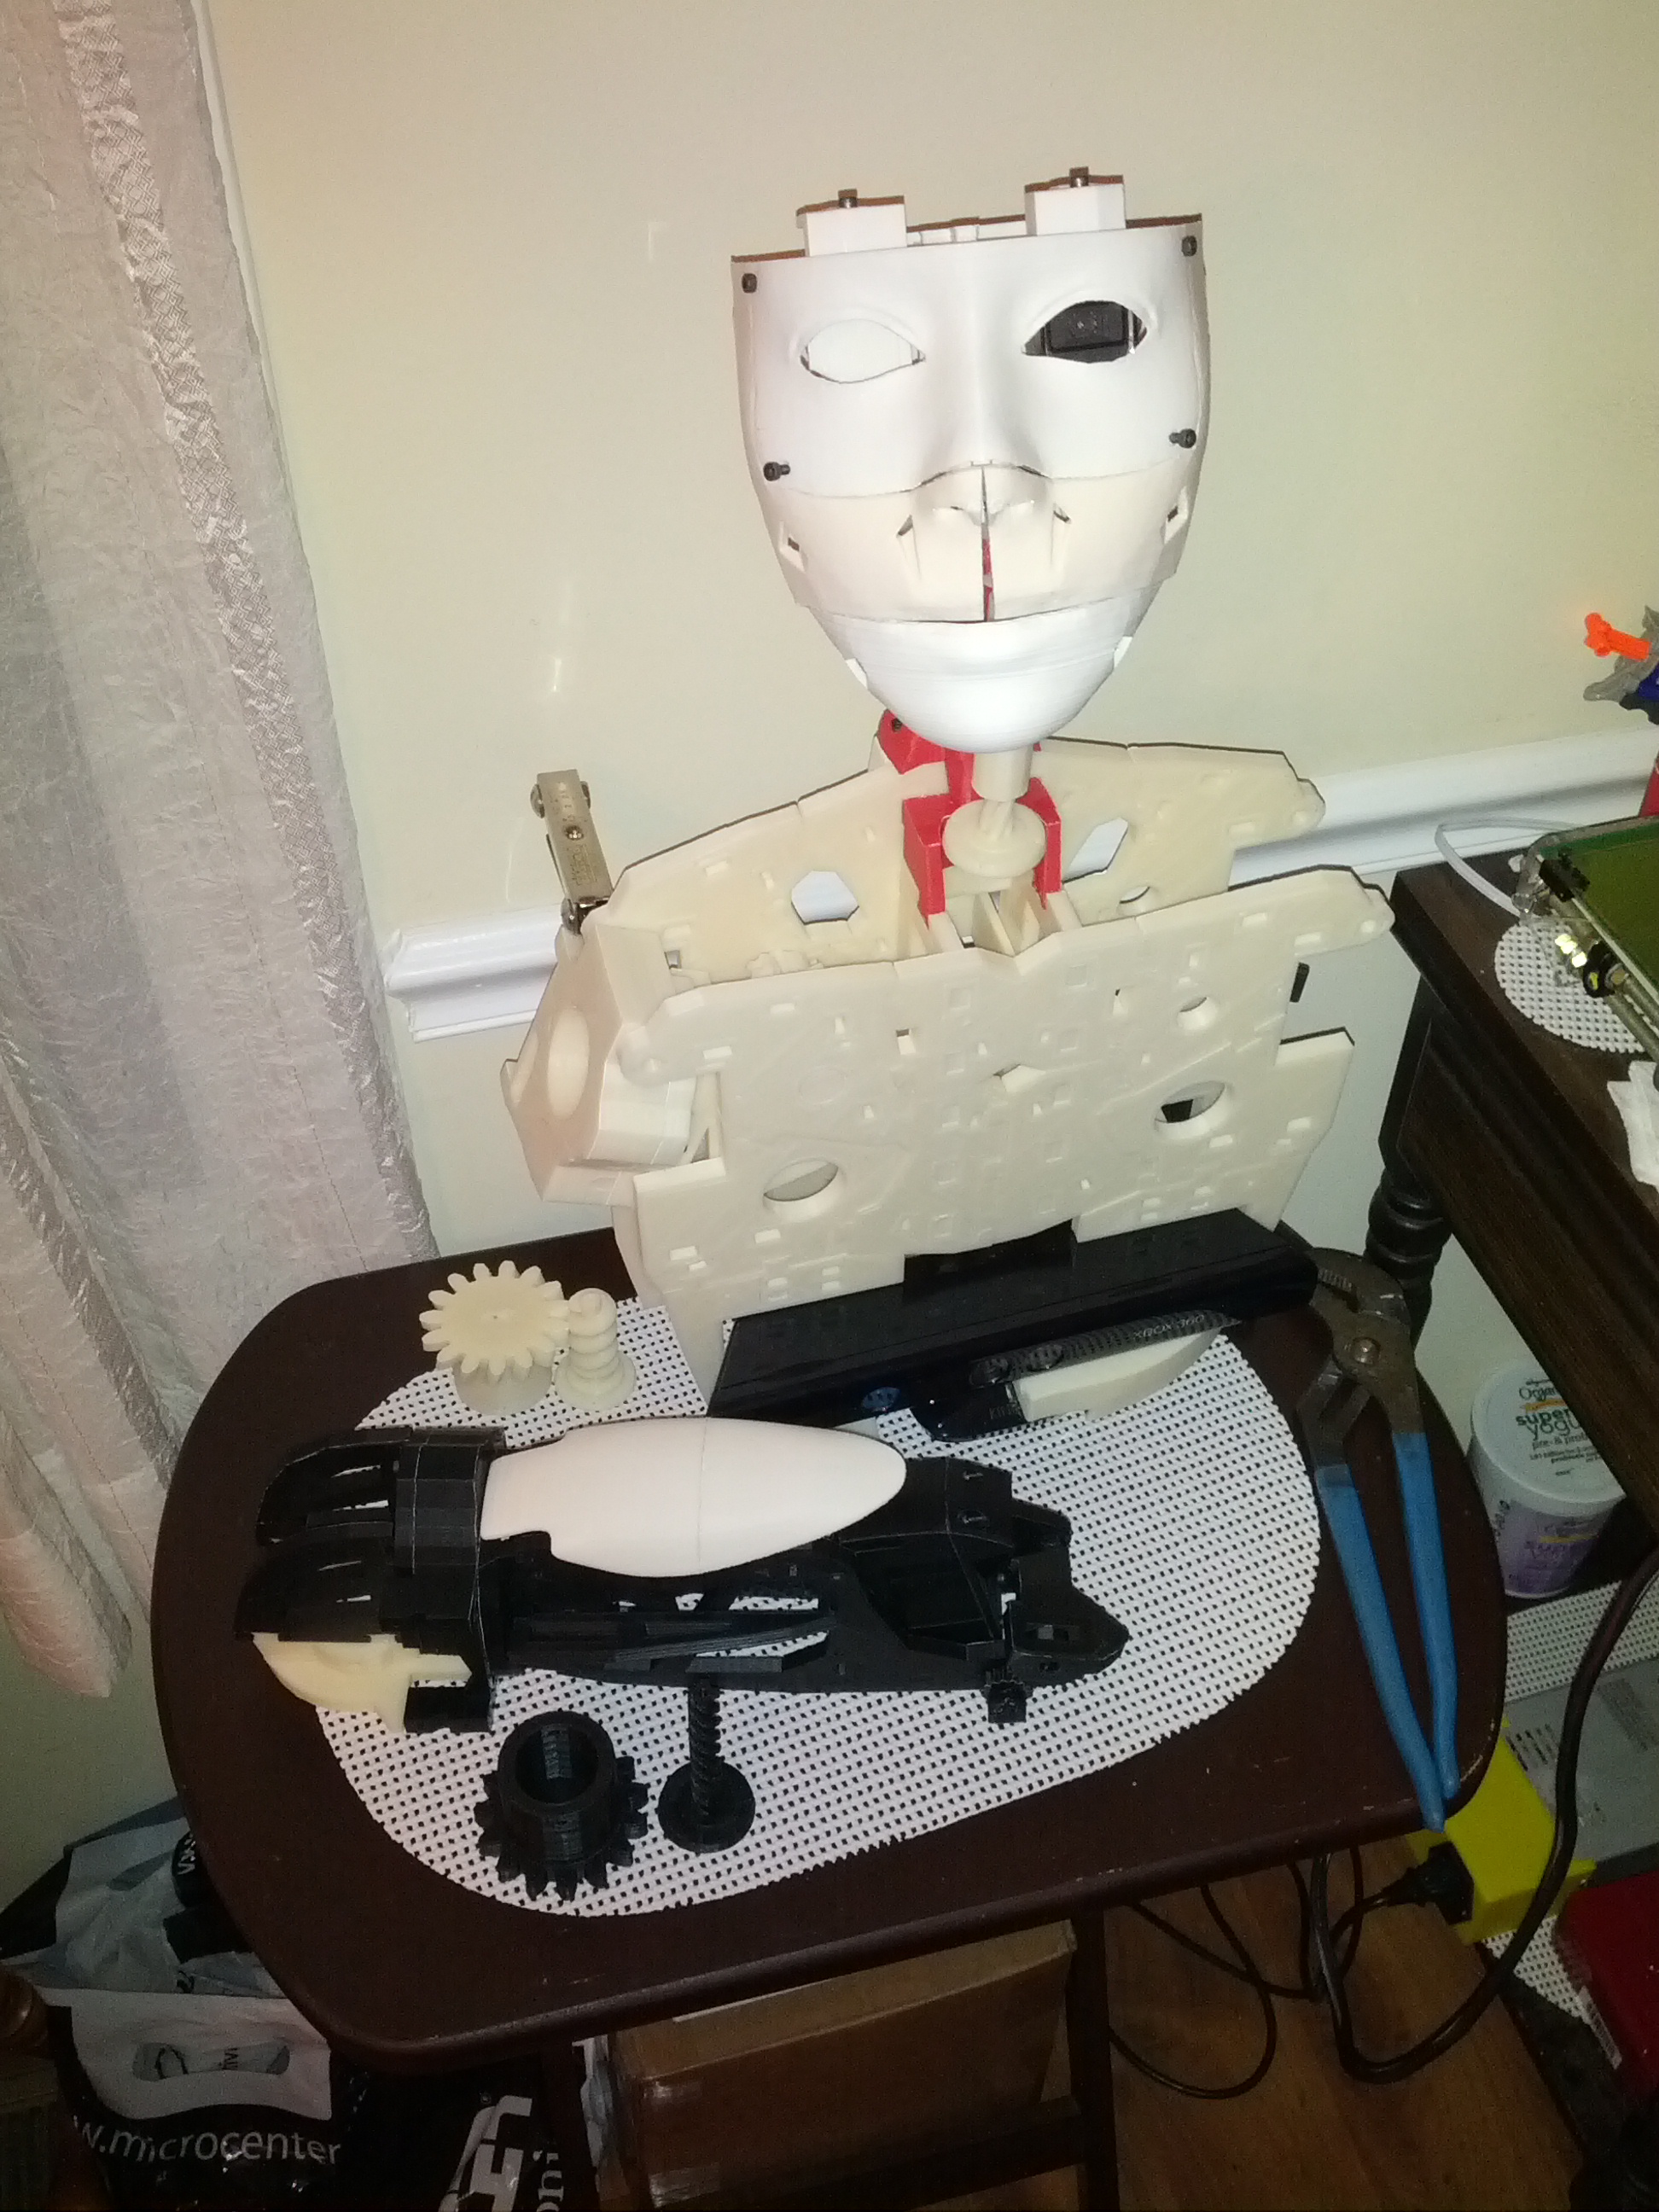
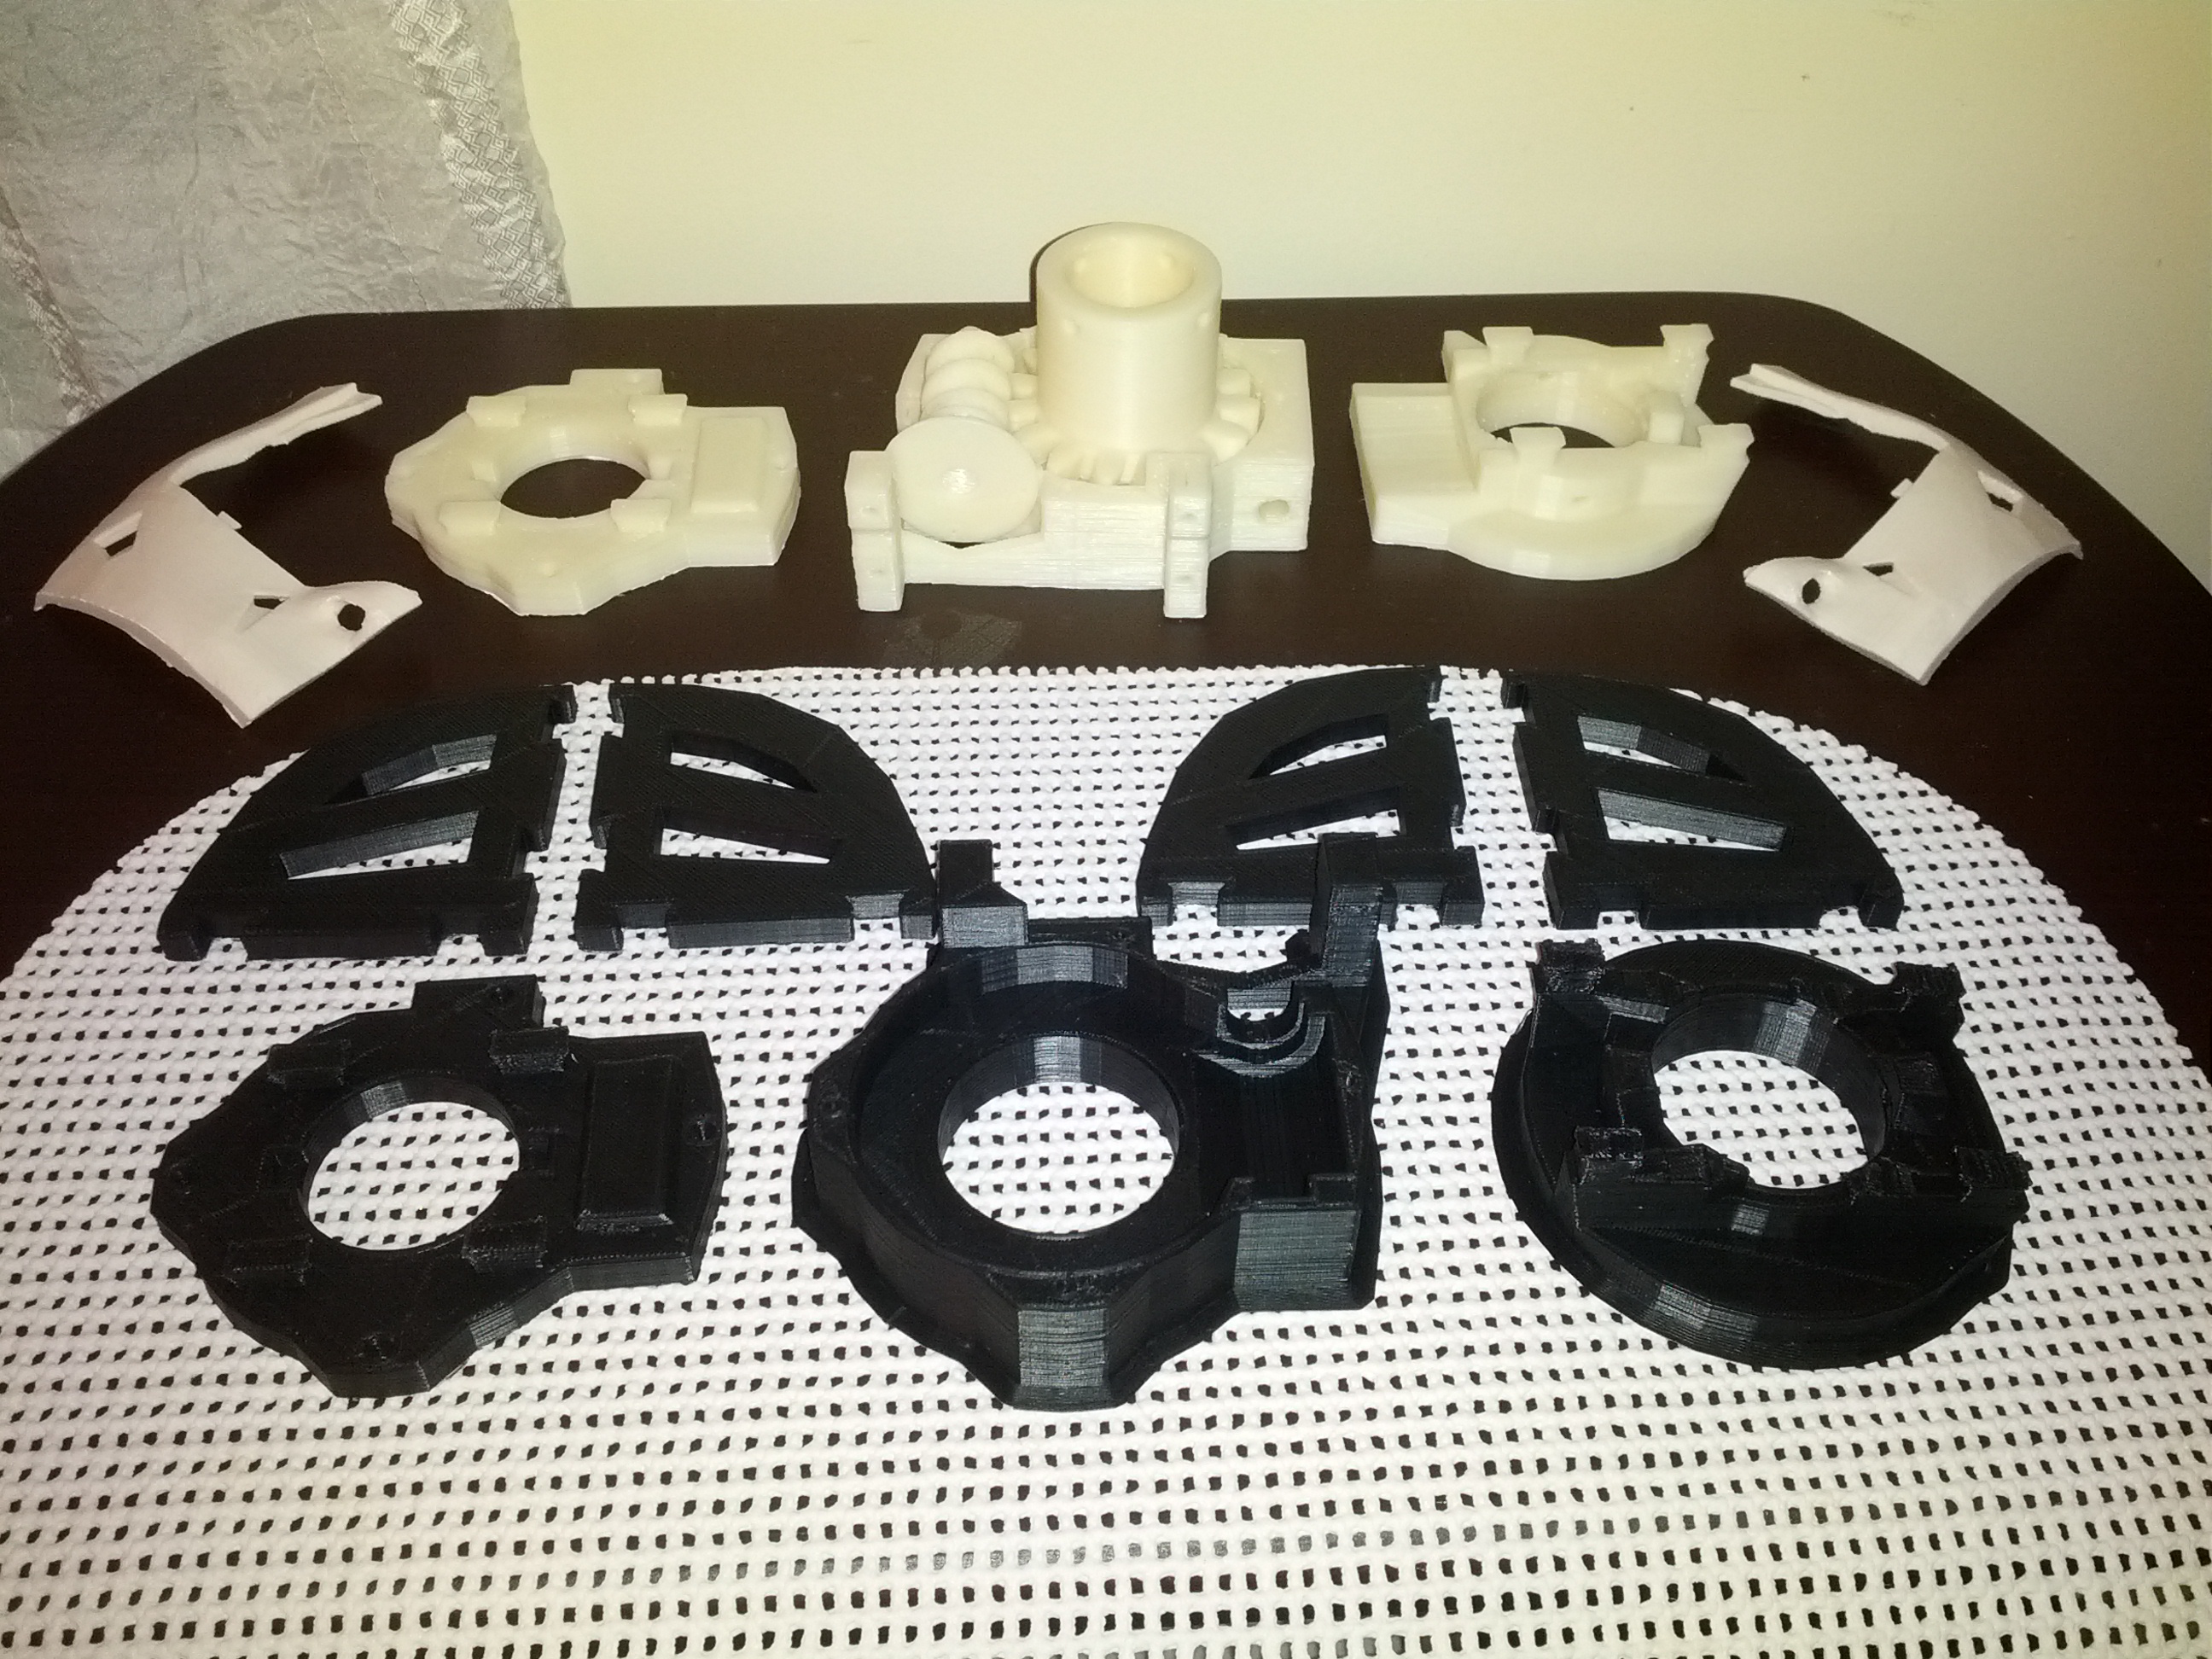
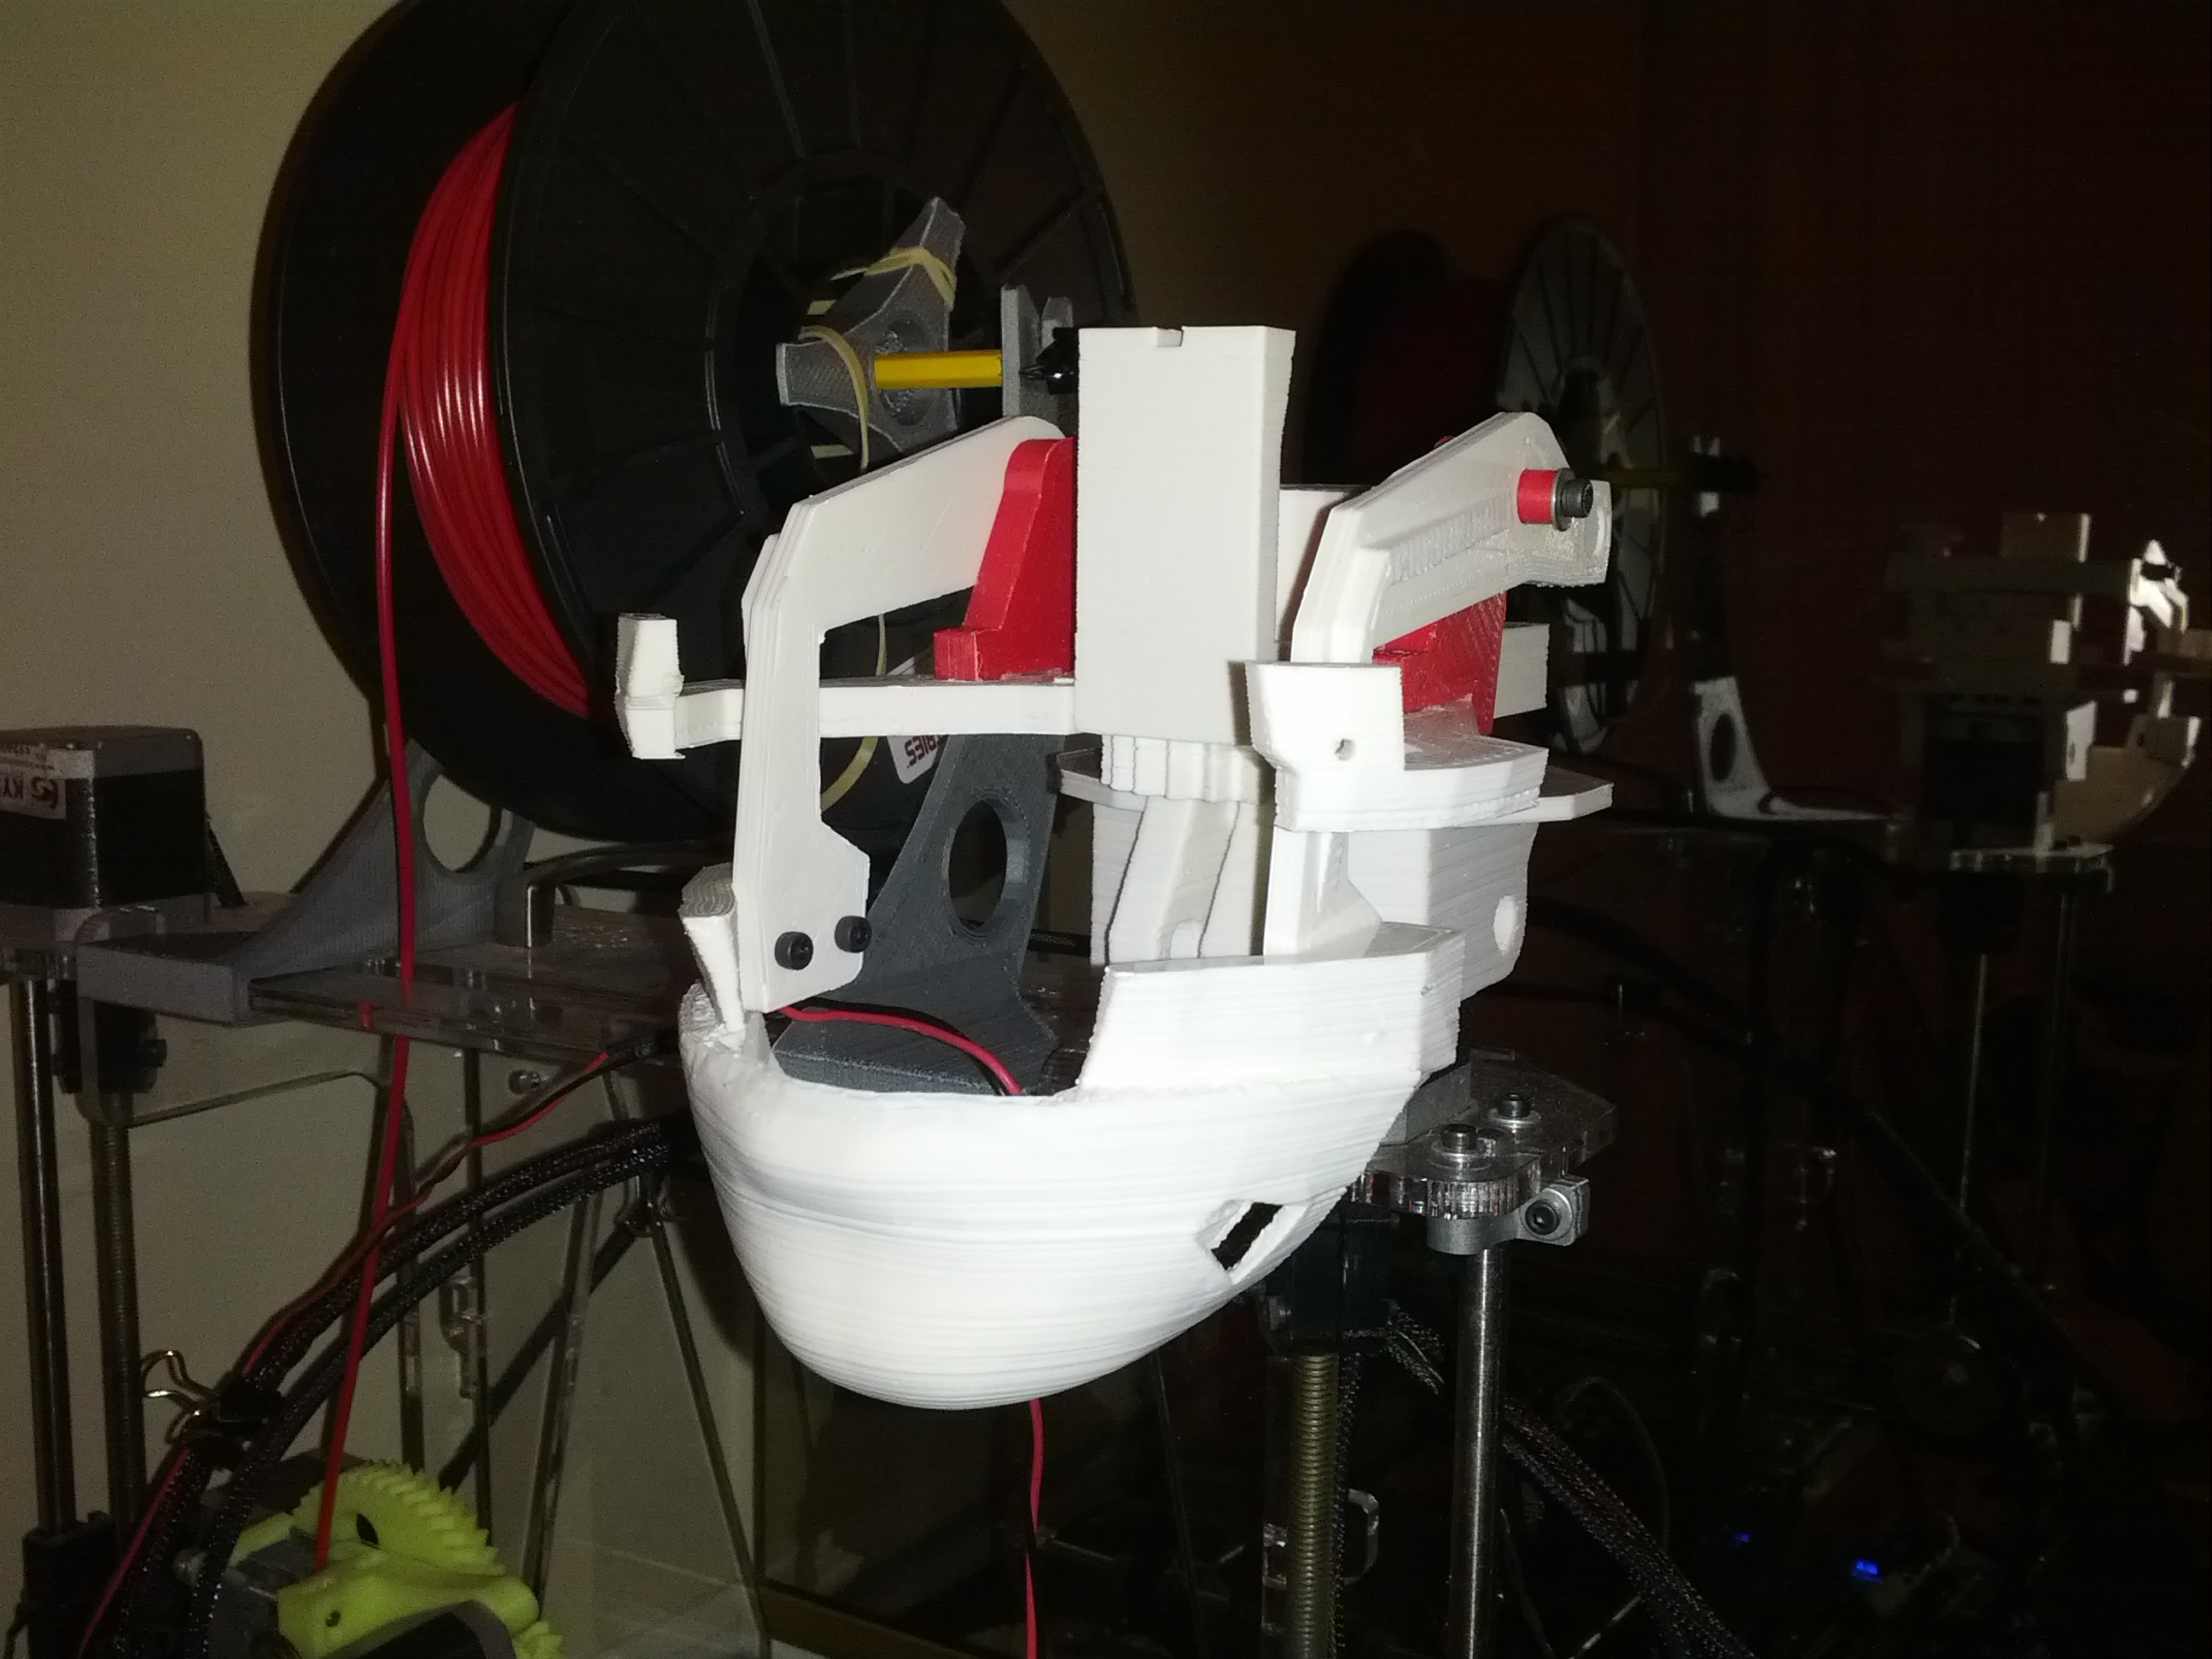
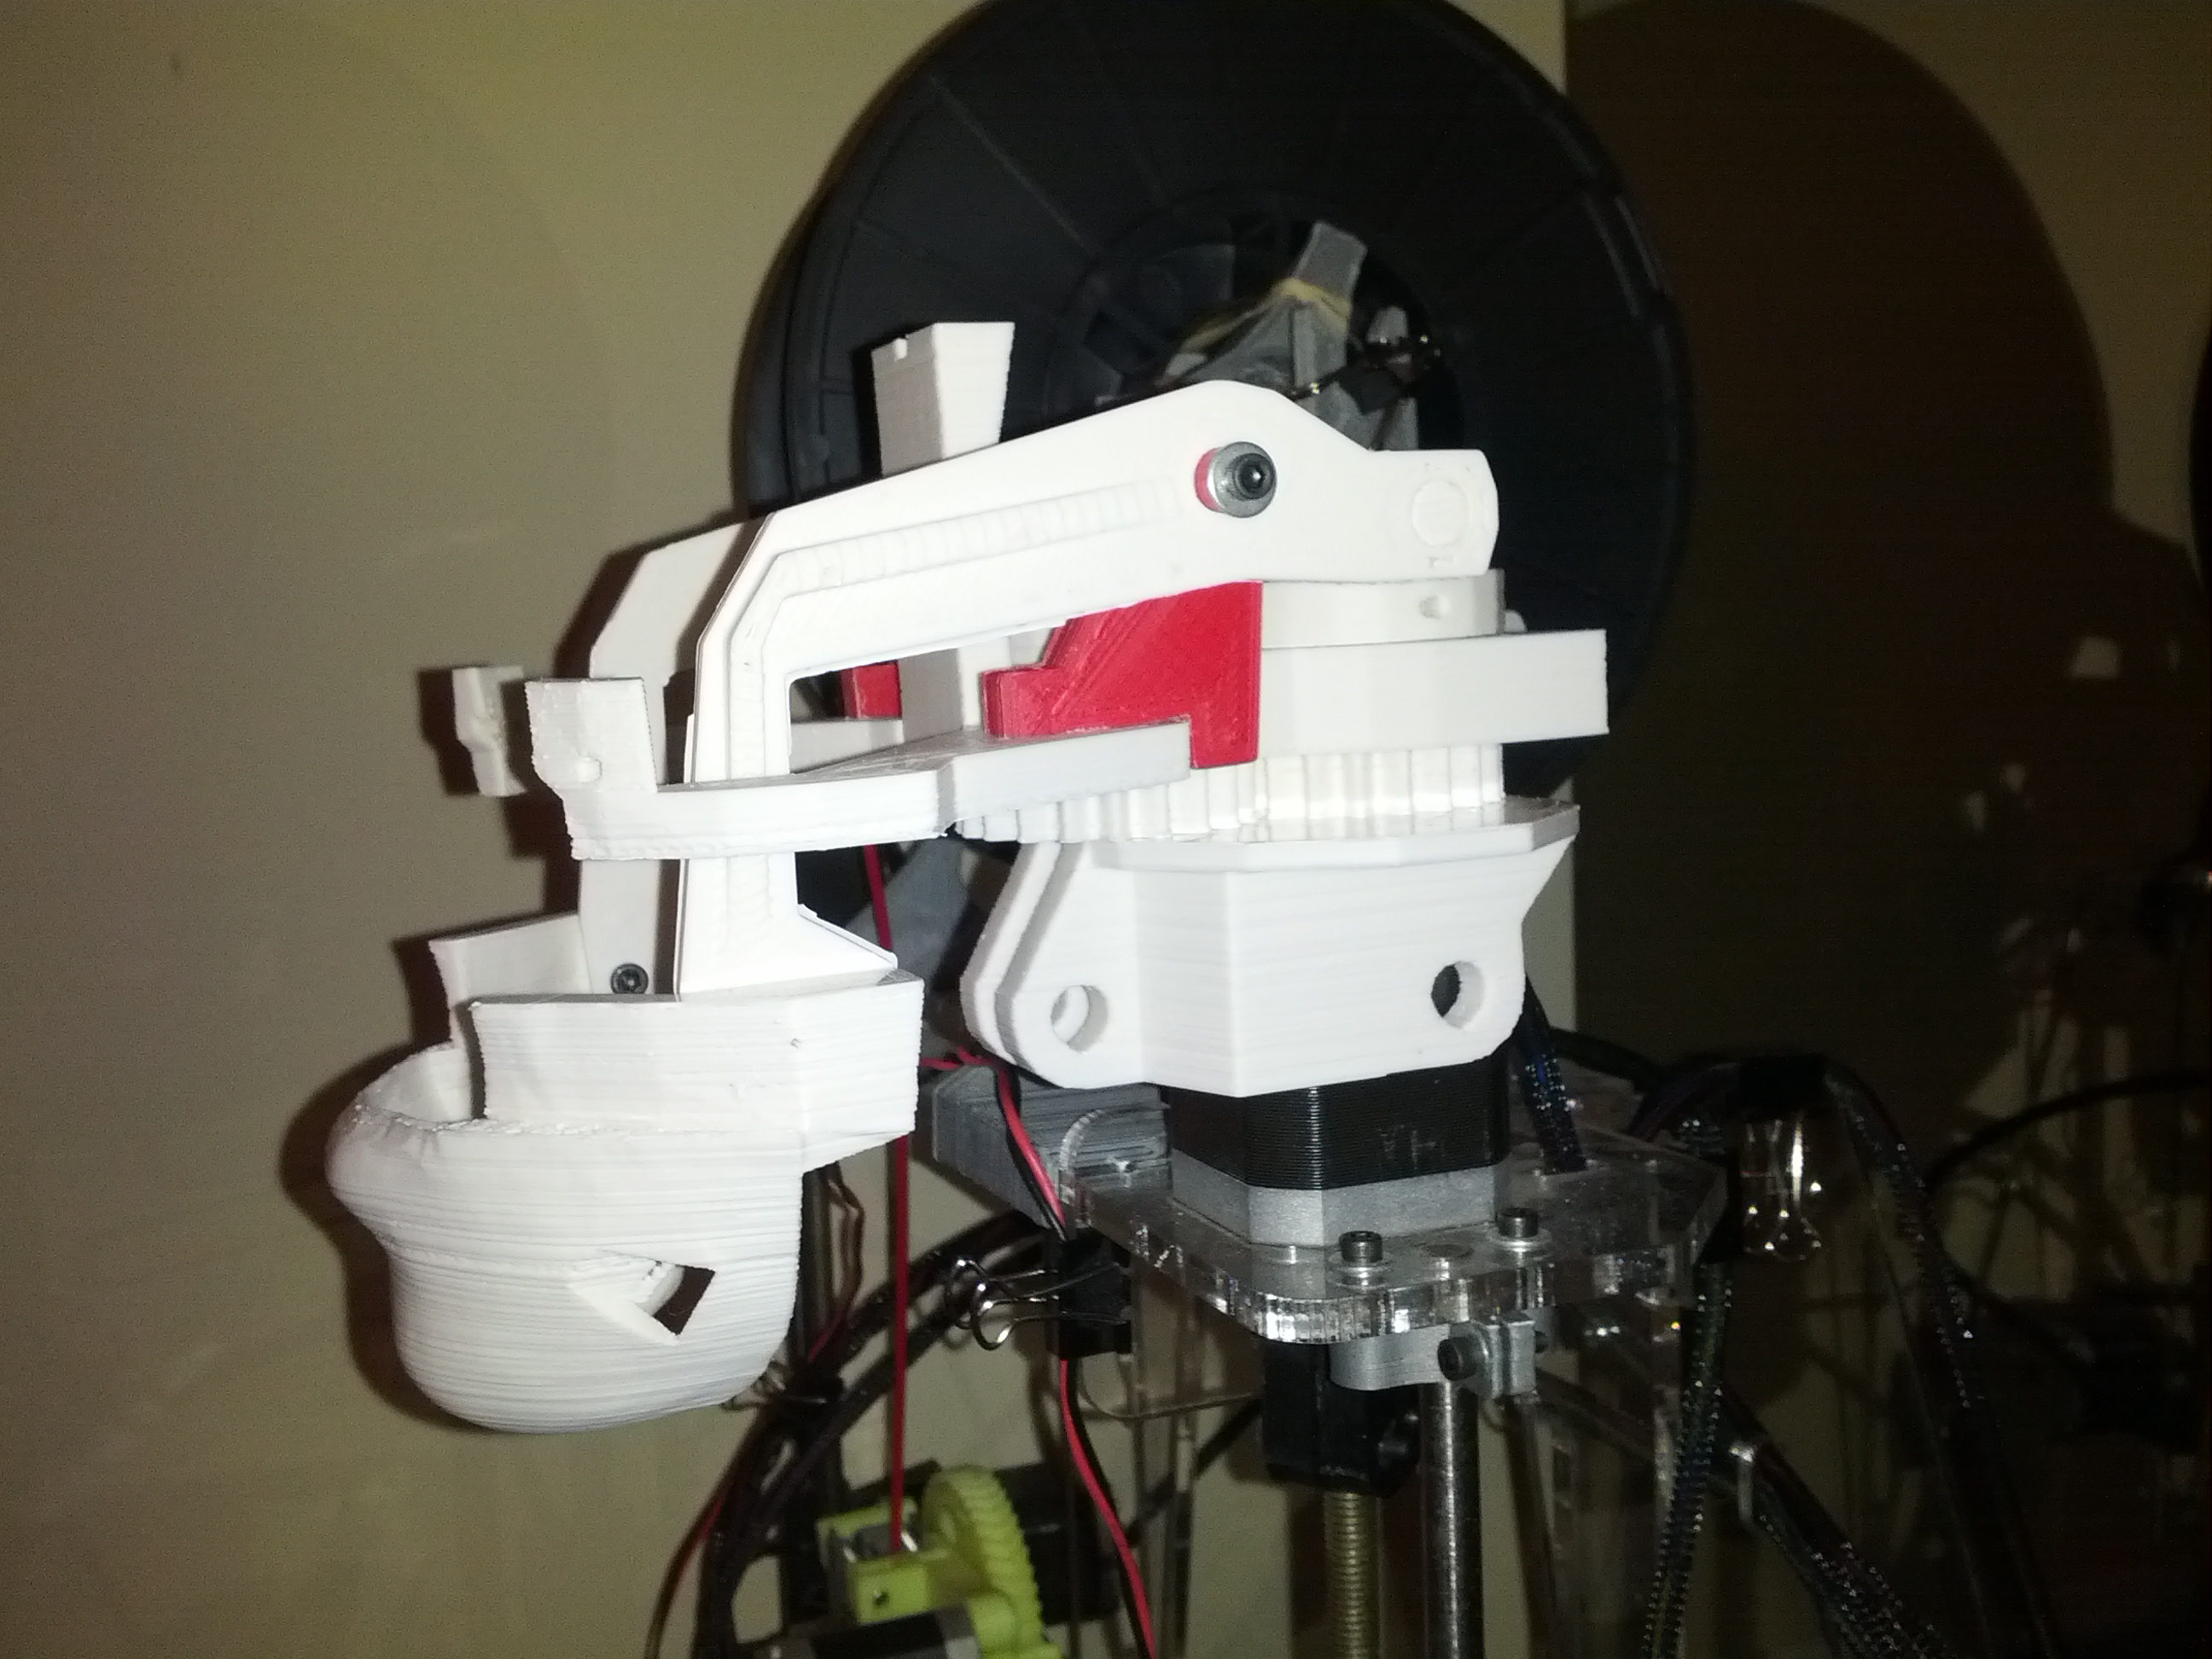
It's been nearly a year since I updated this post but I'm finally settled into a new house and have started setting up my workspace. My InMoov (and other 3D printed bots) have an appearance to make this Saturday at http://www.nova-labs.org/blog/2015/08/21/hackaday-is-coming-to-nova-lab… . So time to get cracking on fixing broken parts from a fall InMoov took this winter during a blizzard. I can rebuilt him. I have the technology. Stronger. Faster.
-----------------------------------------------------------------------------------------------------------------------------
Update 2014-09-12
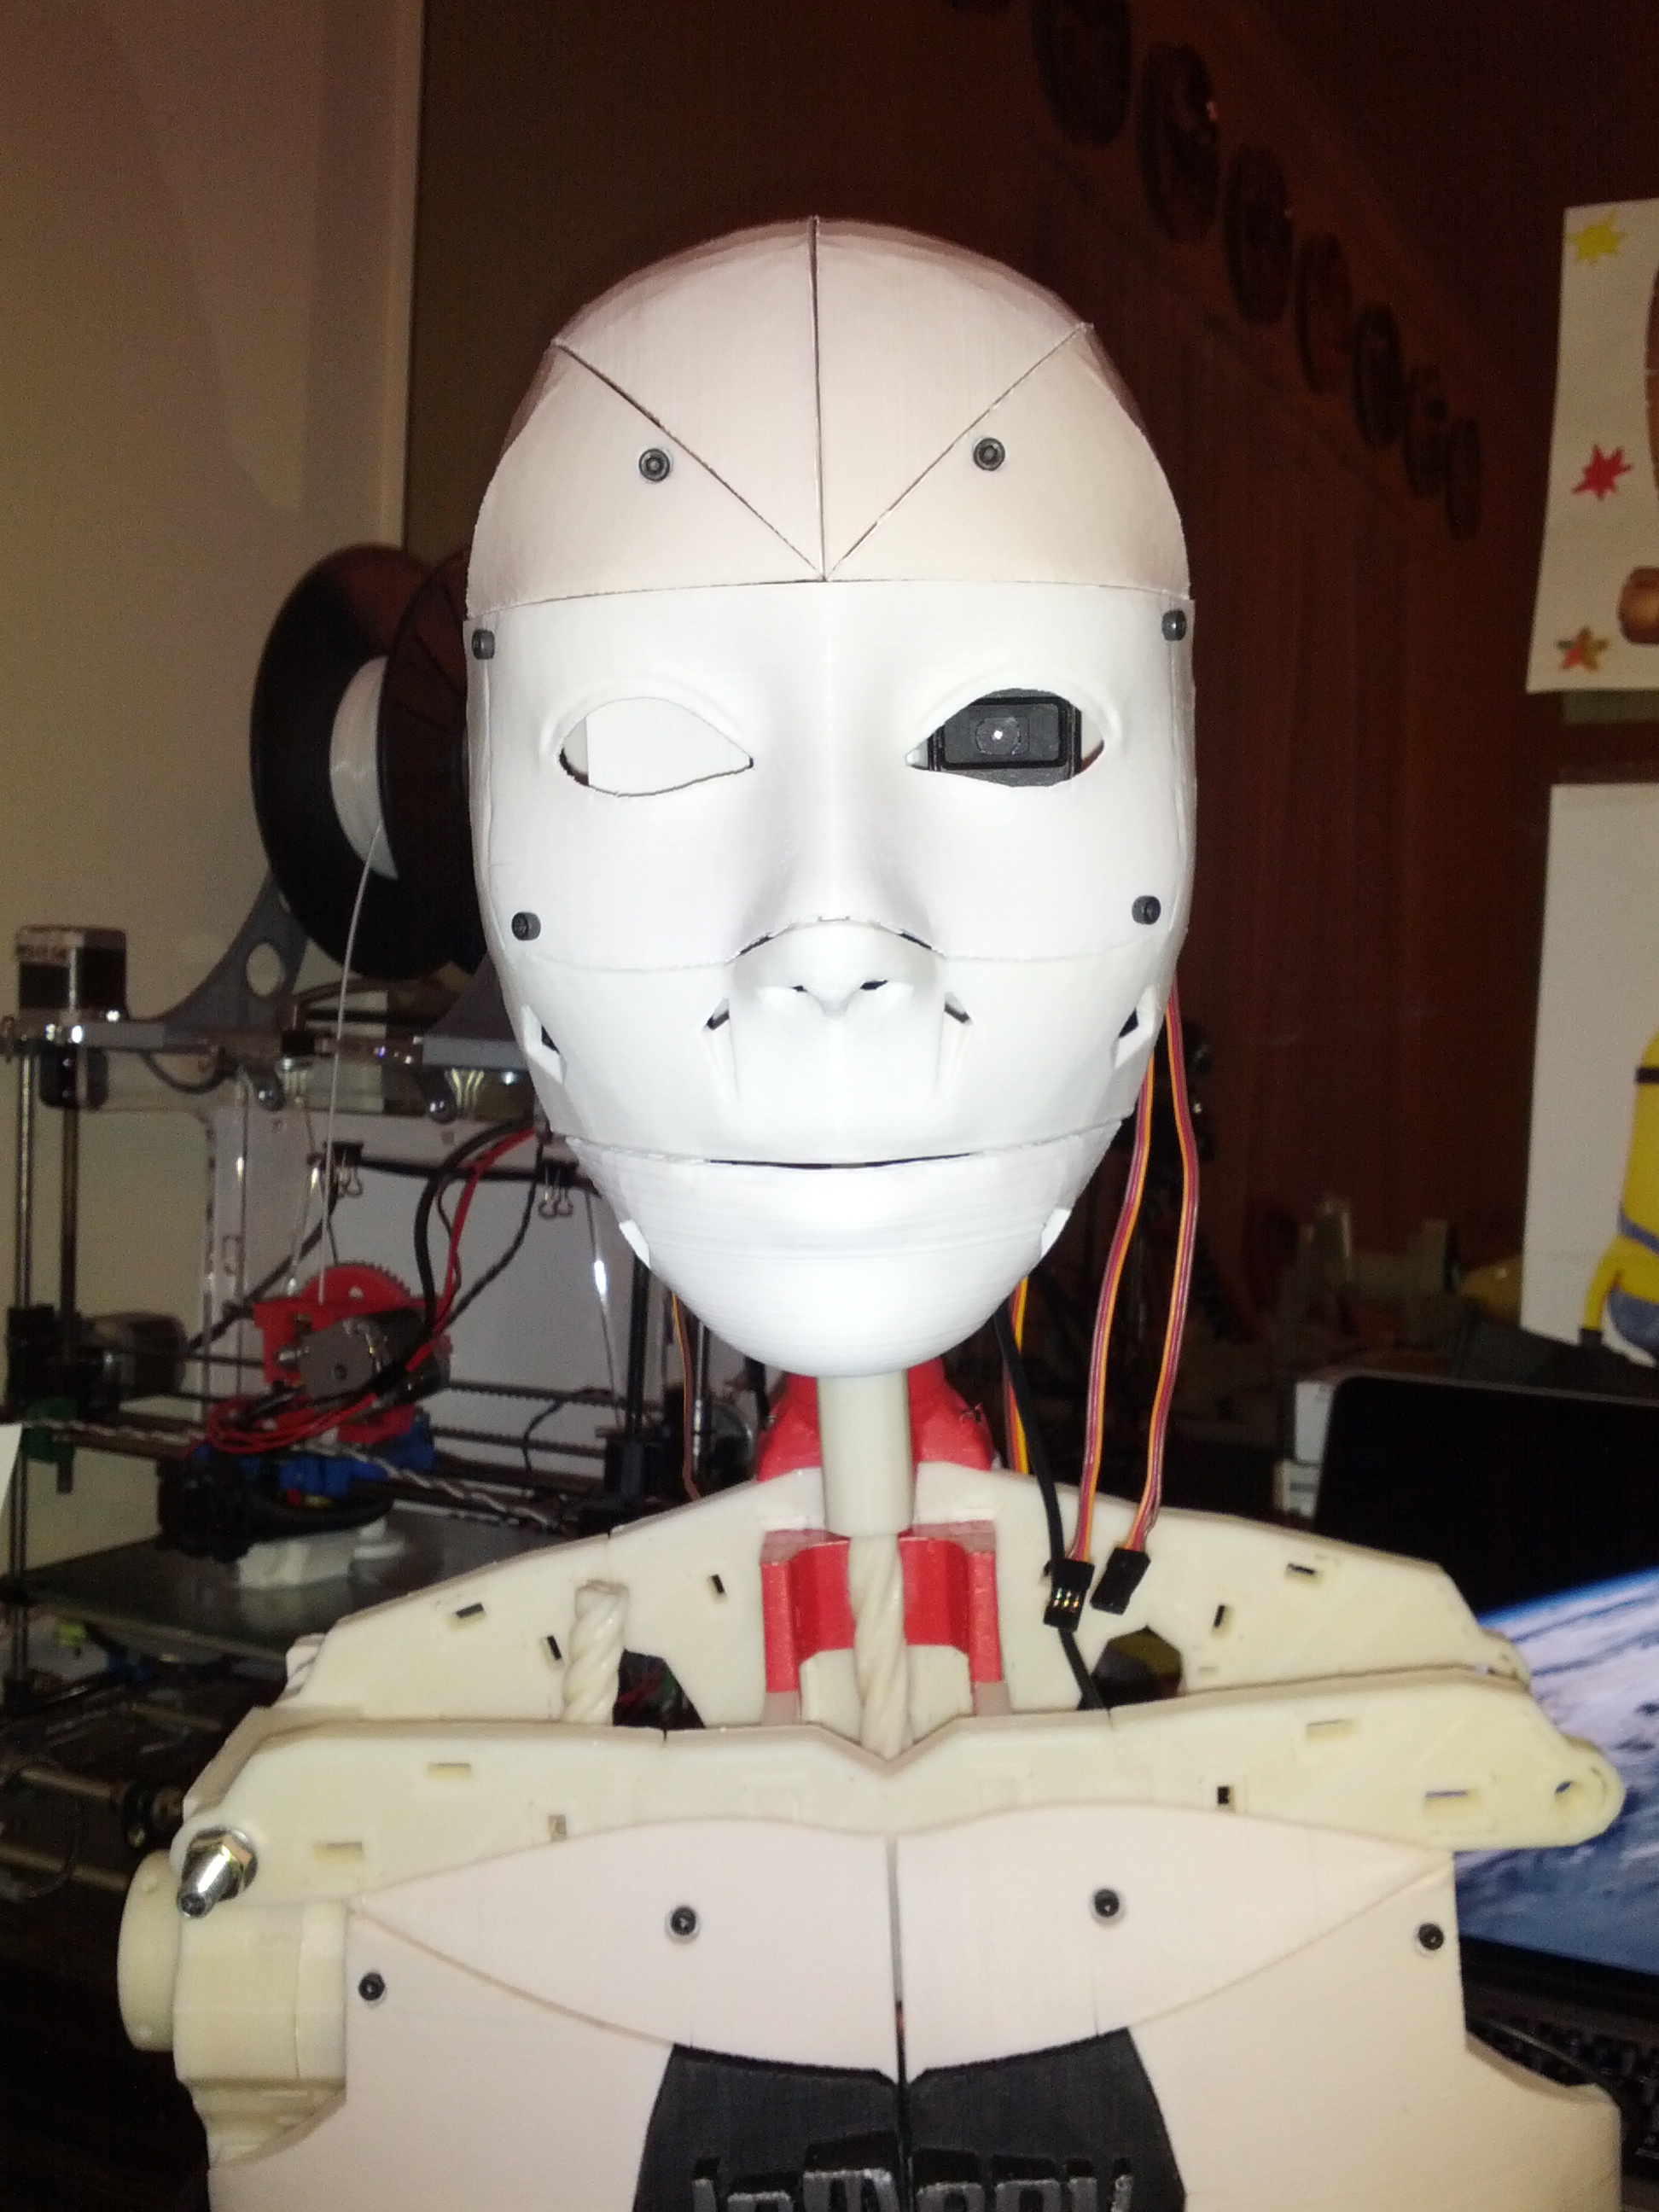
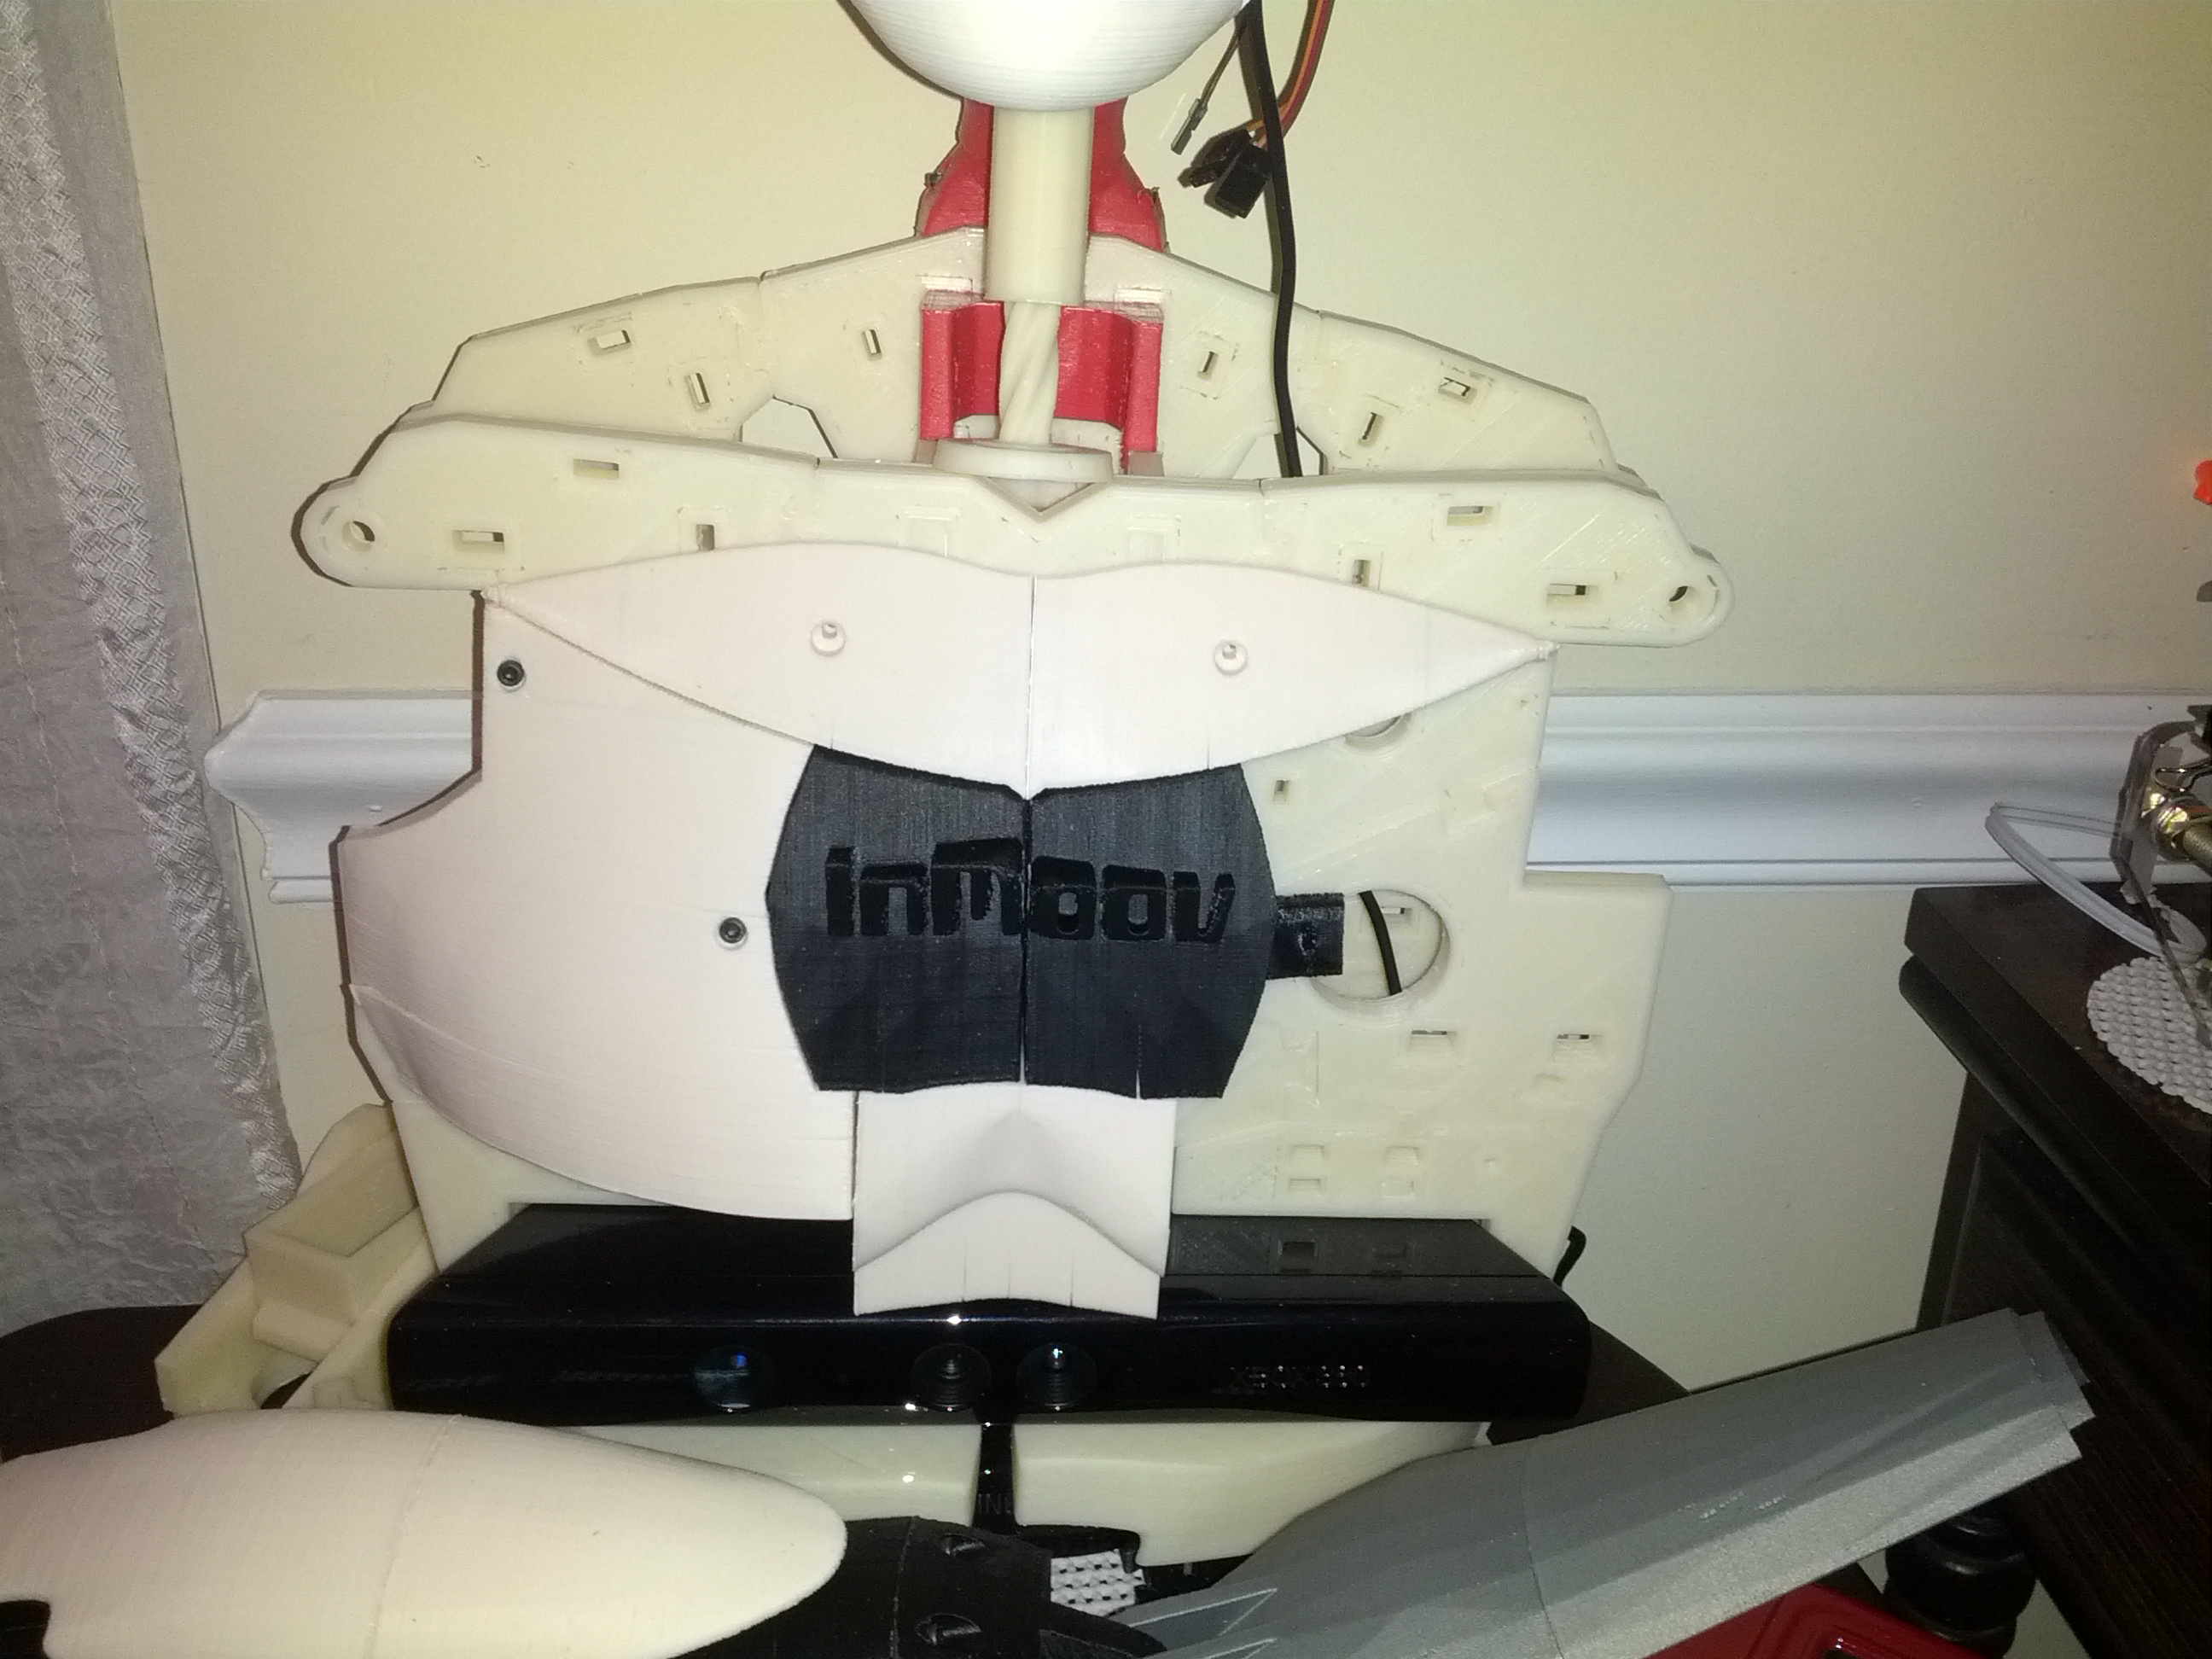
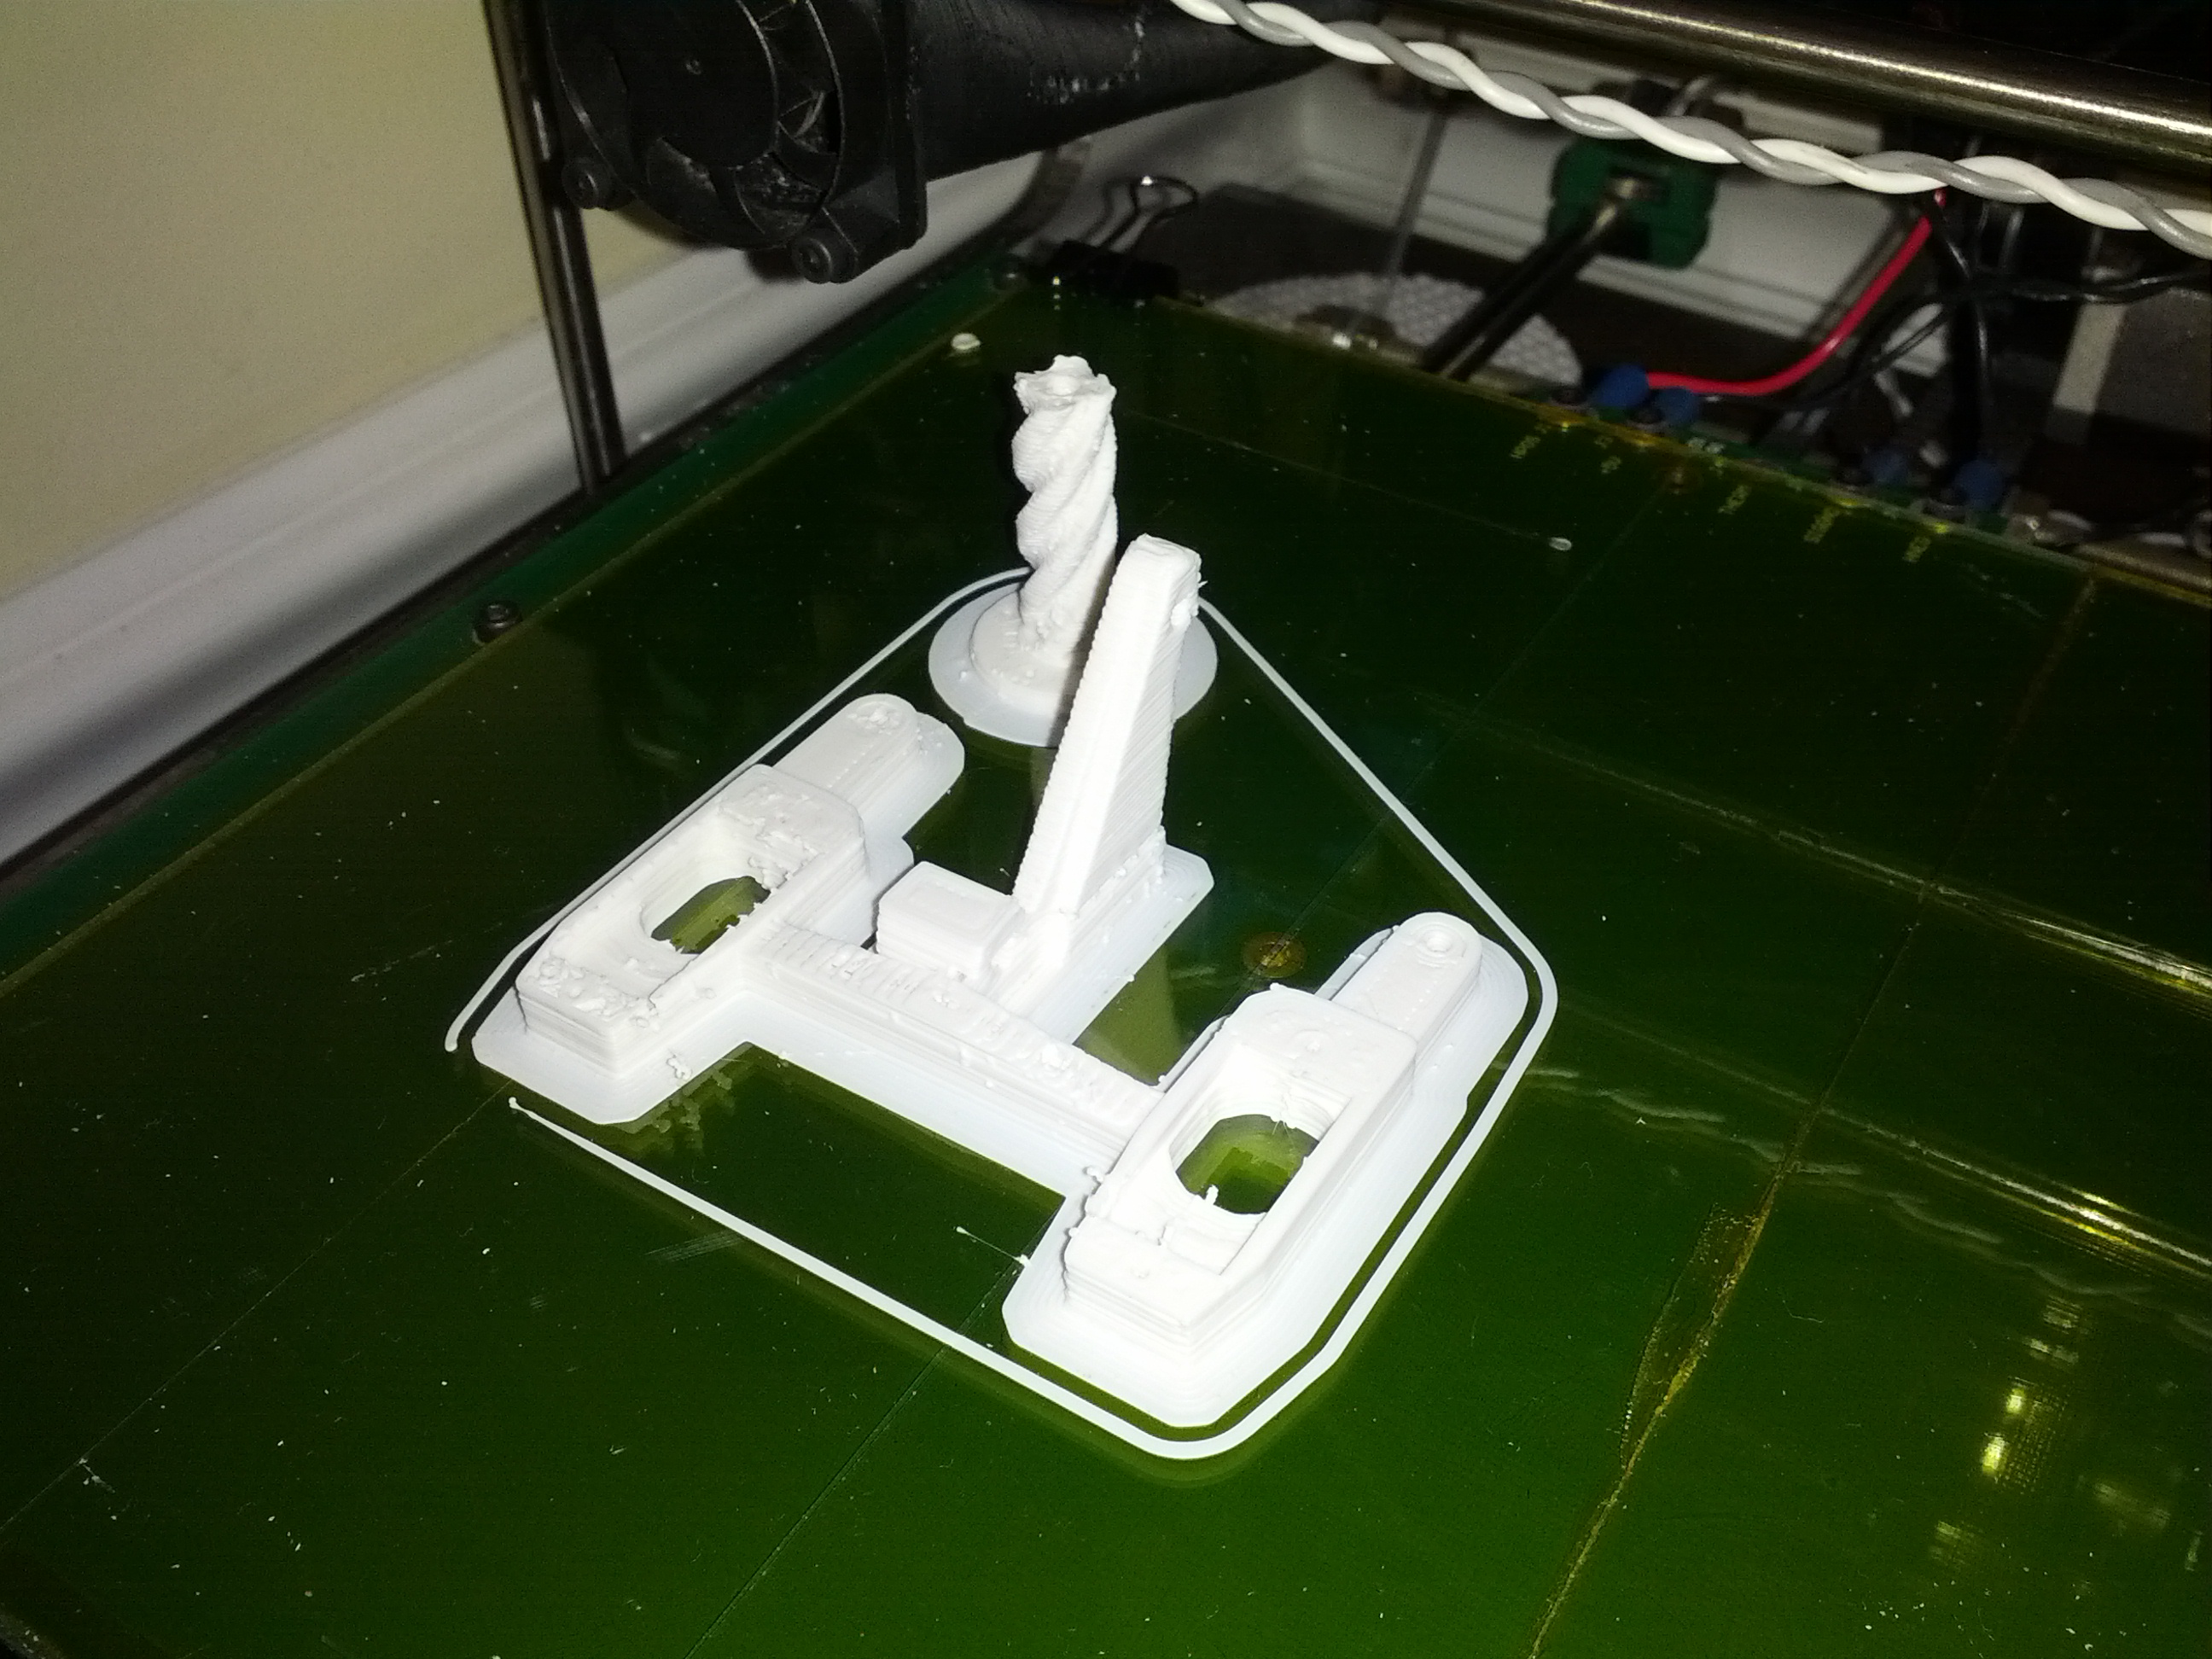
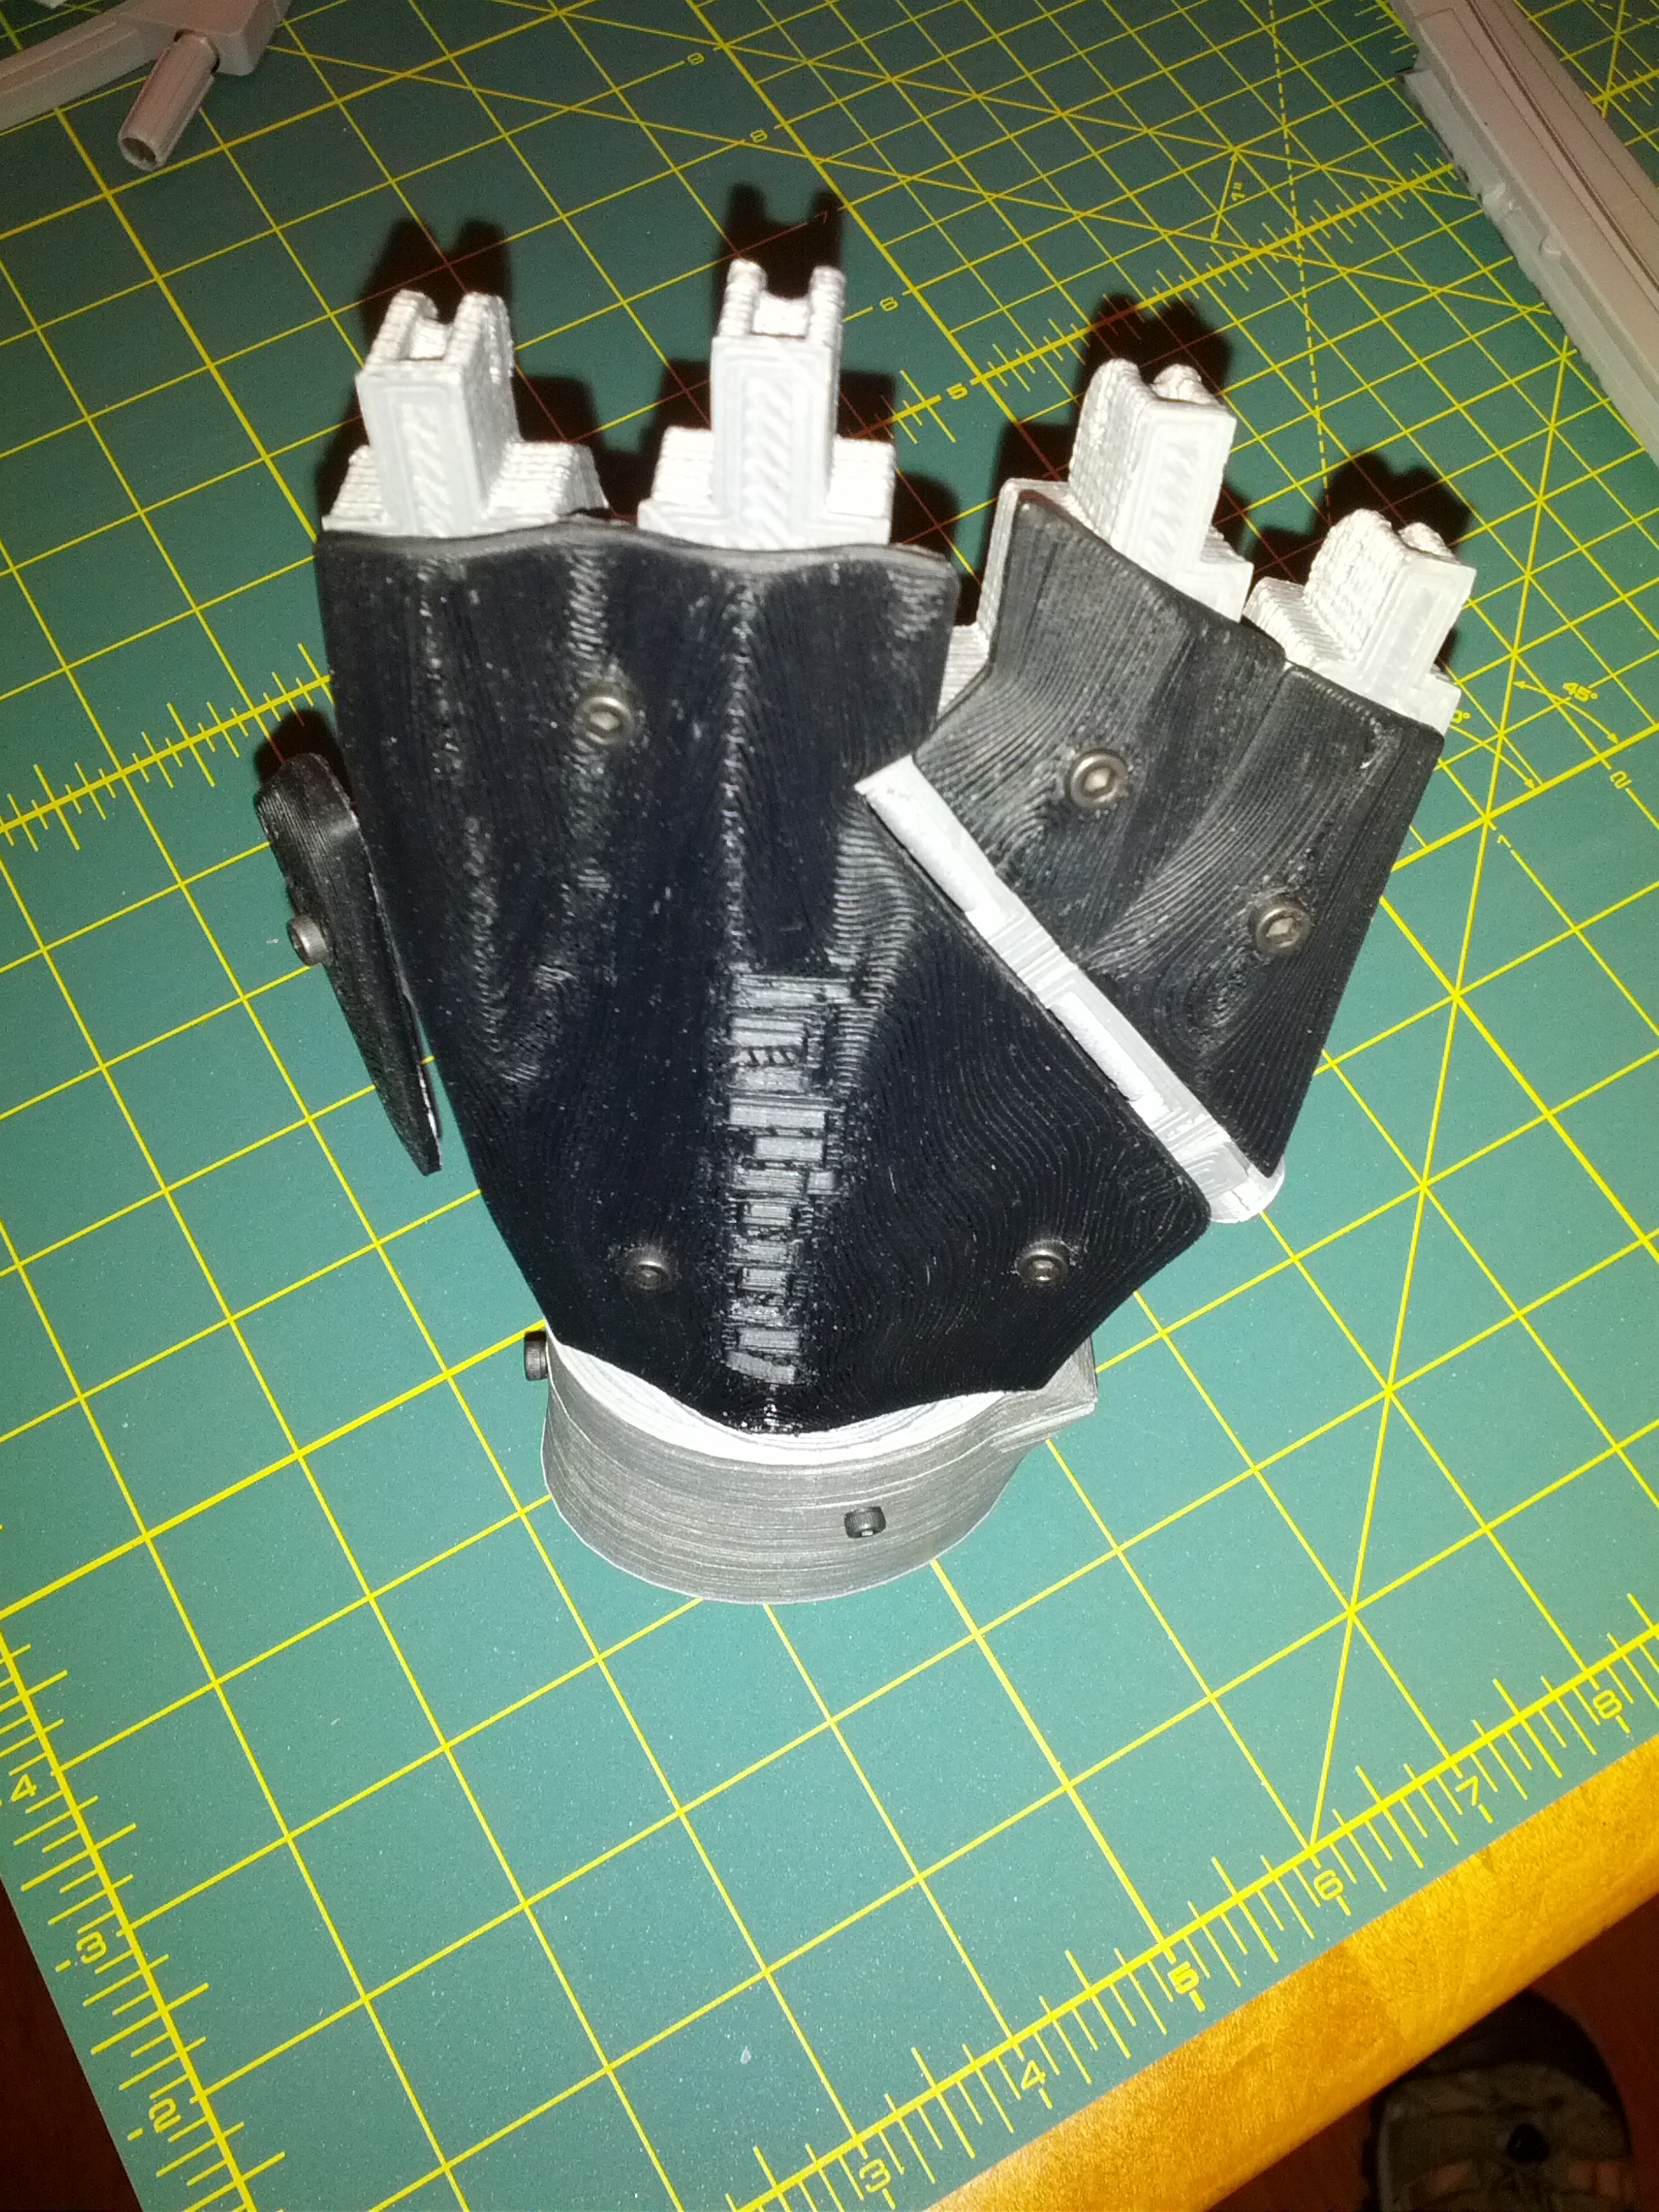
Cleft Lip BE GONE!!! After a 6.5 hour print and some "plastic surgery" InMoov's cleft lip has been removed and the color match from his eyes to his chin has been fixed. My OCD is happier now.
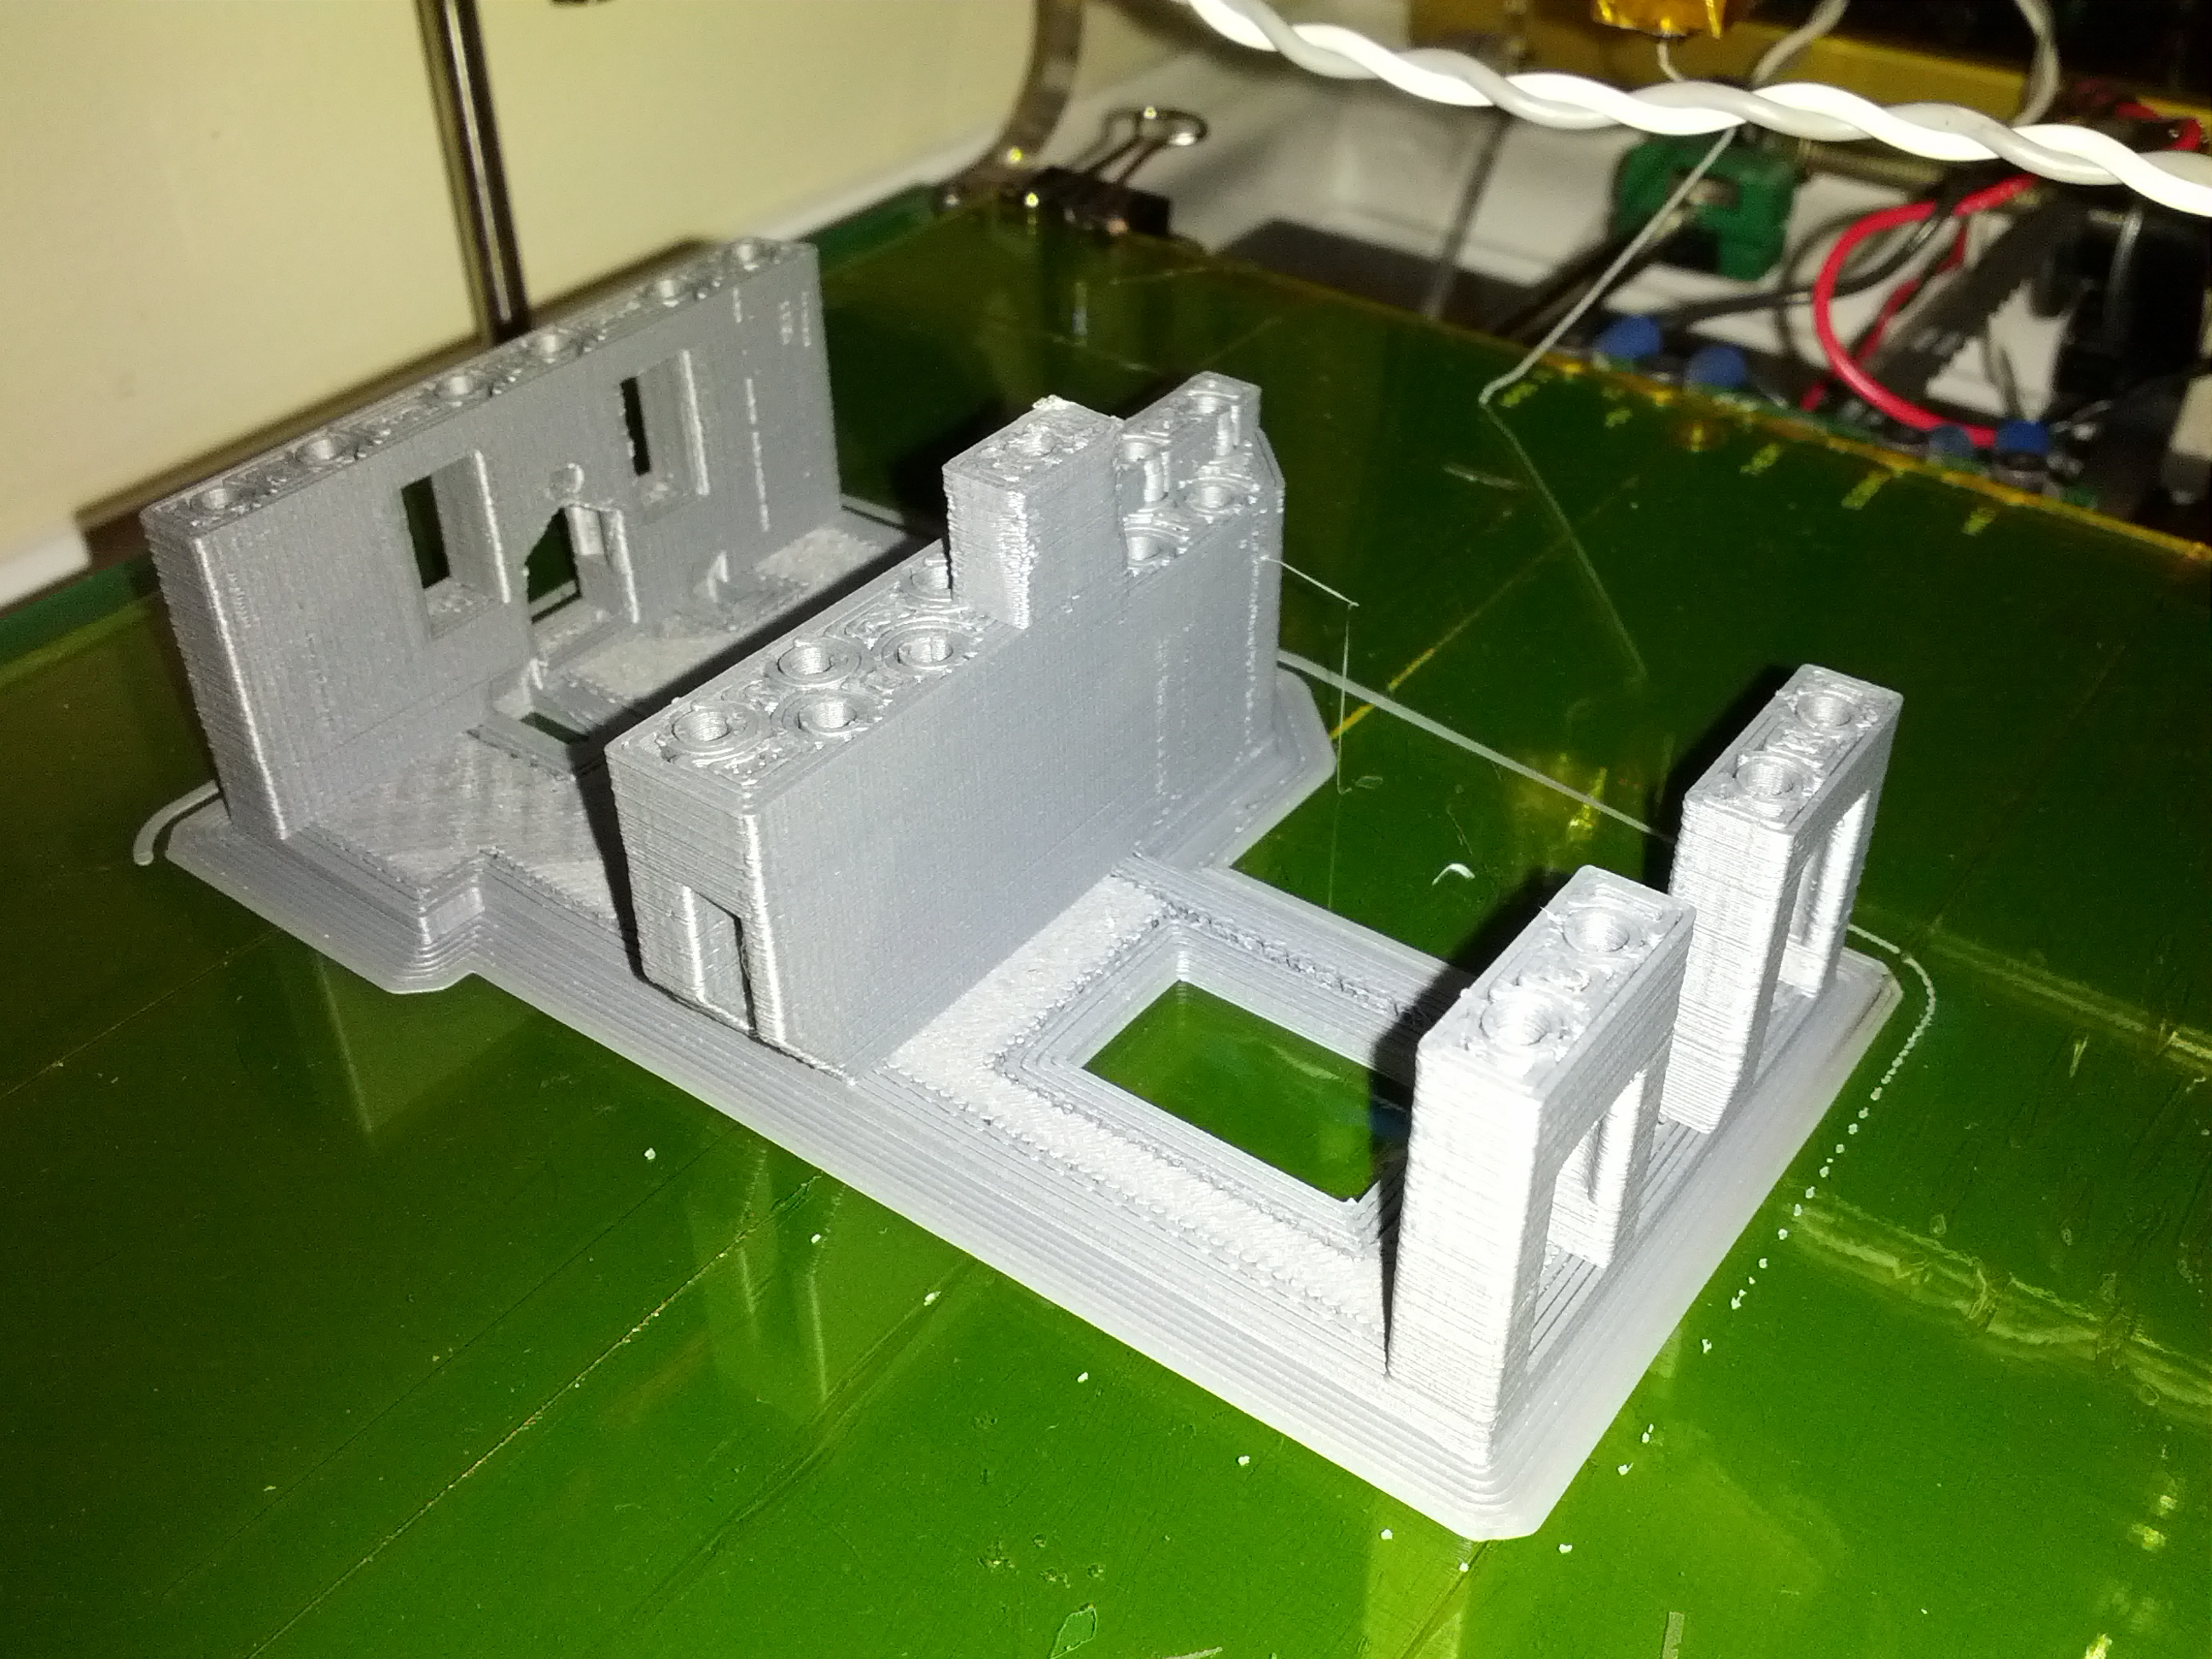
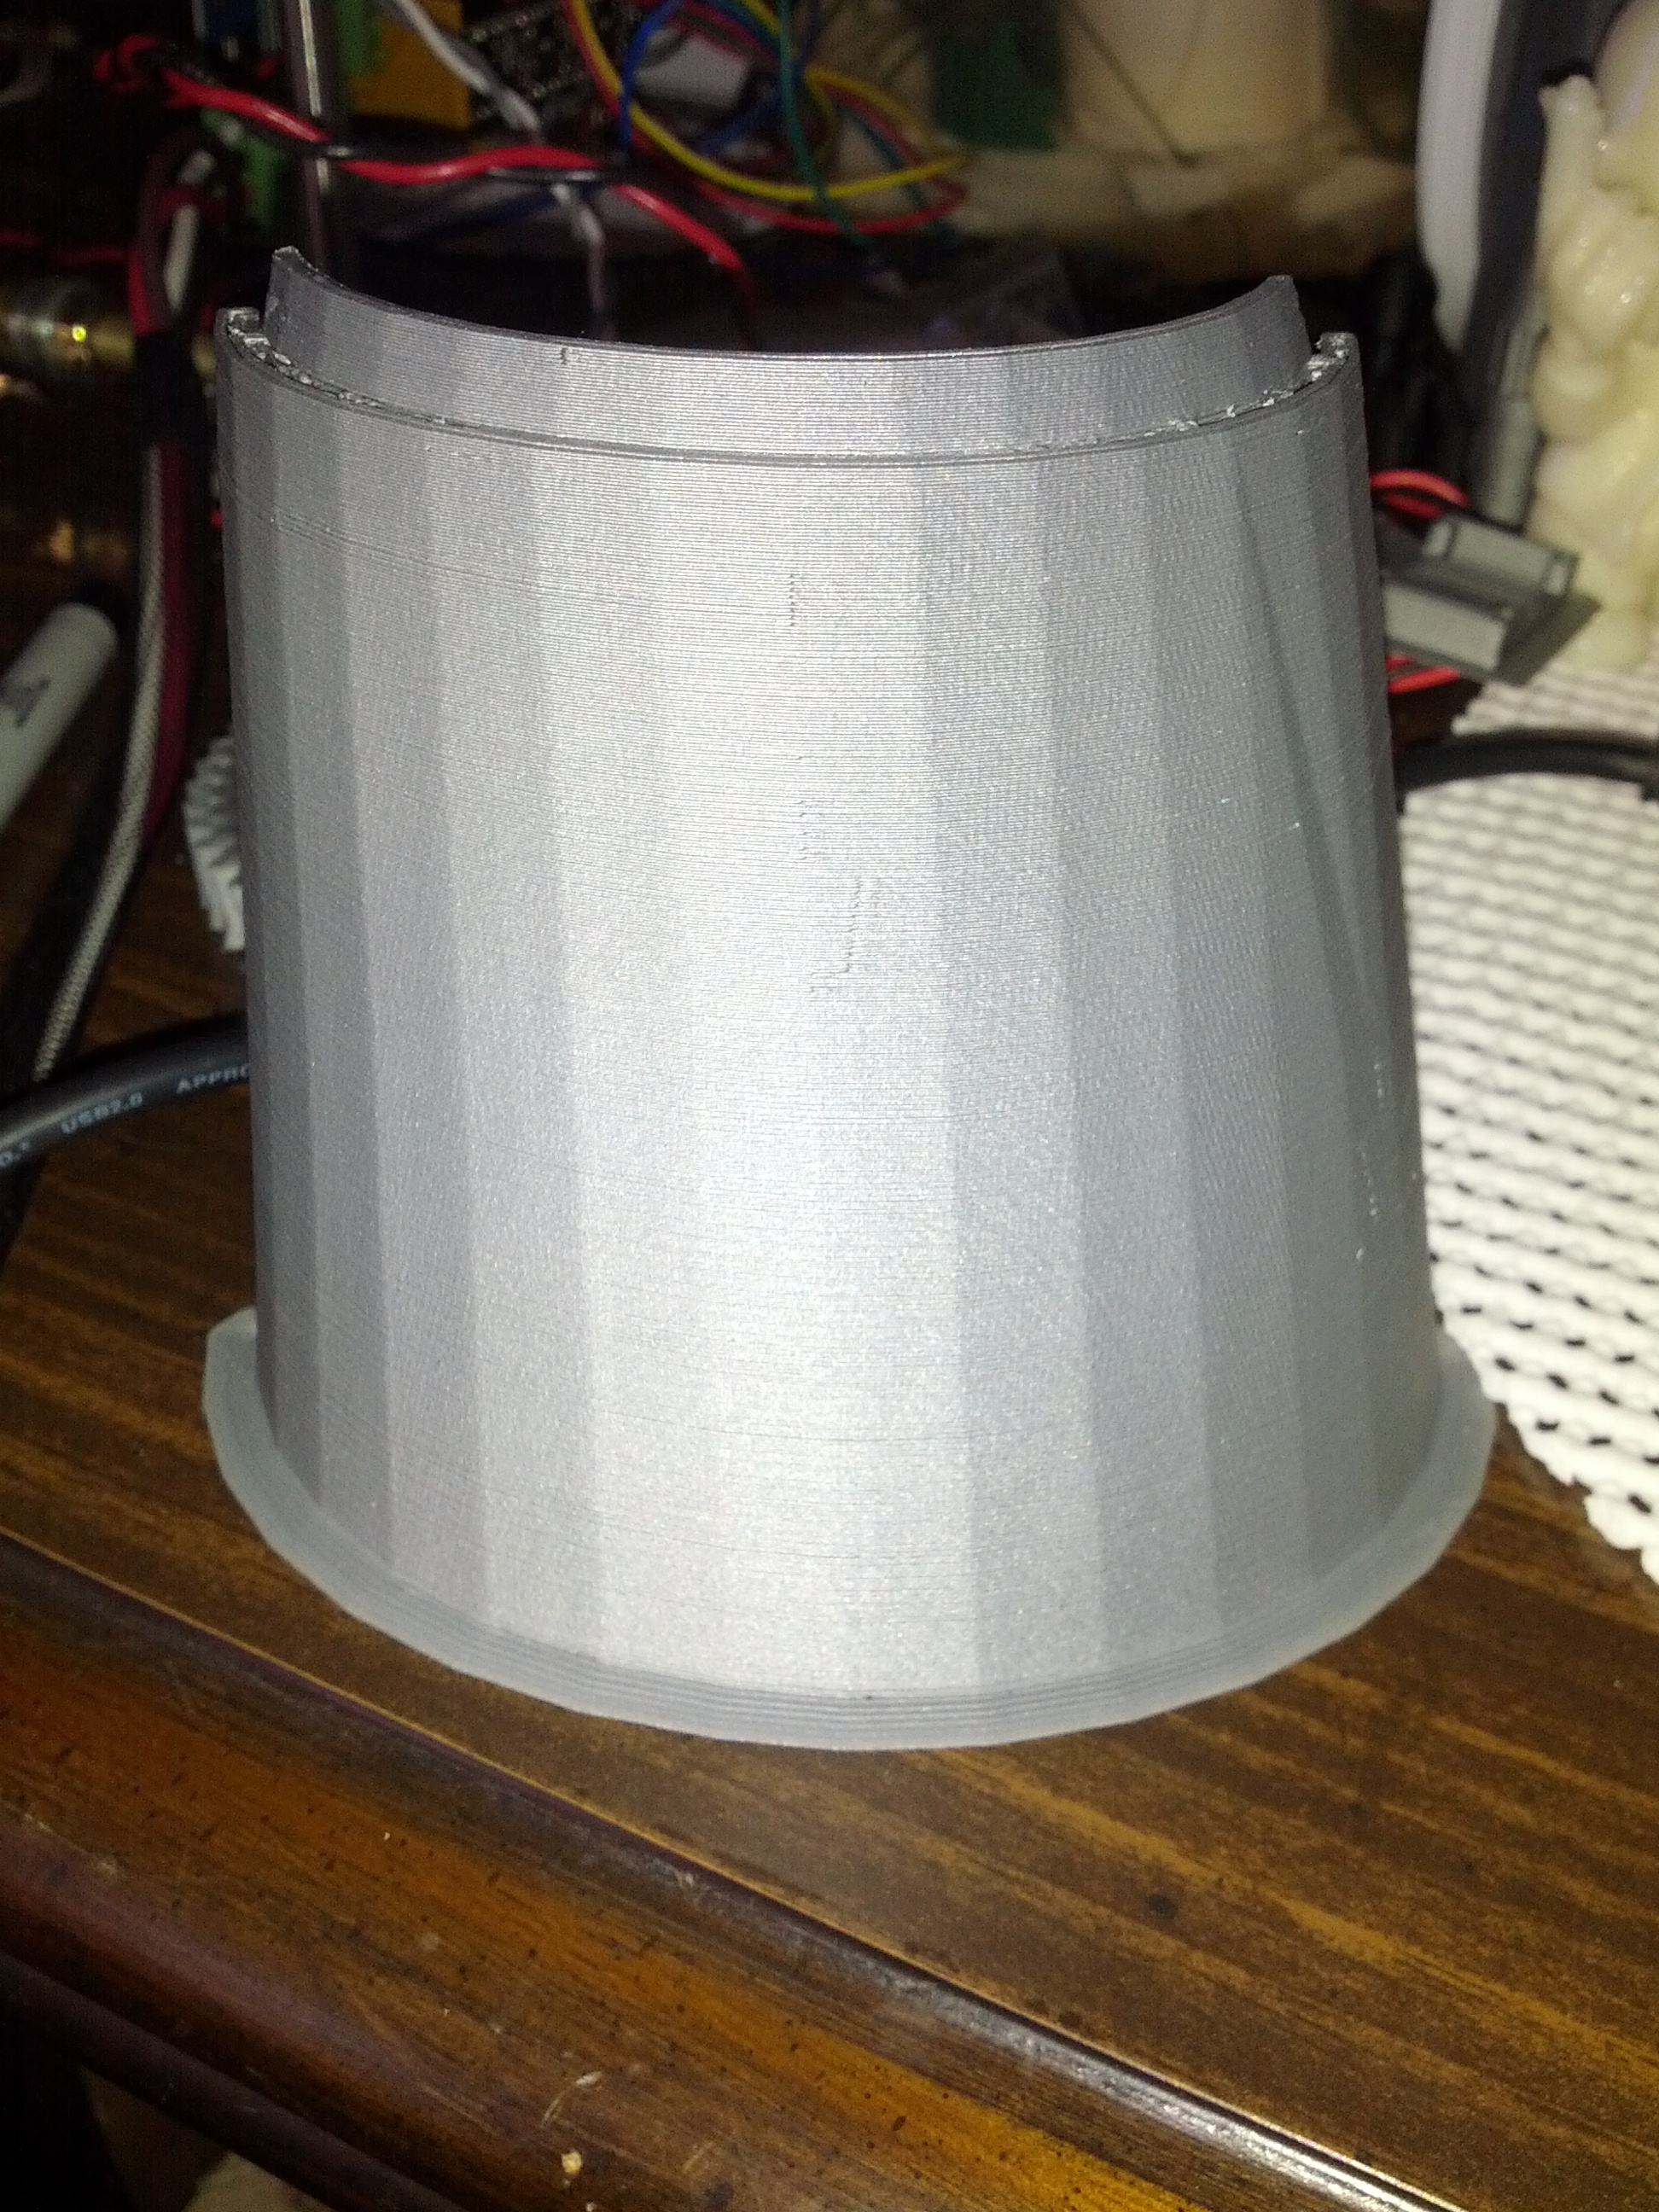
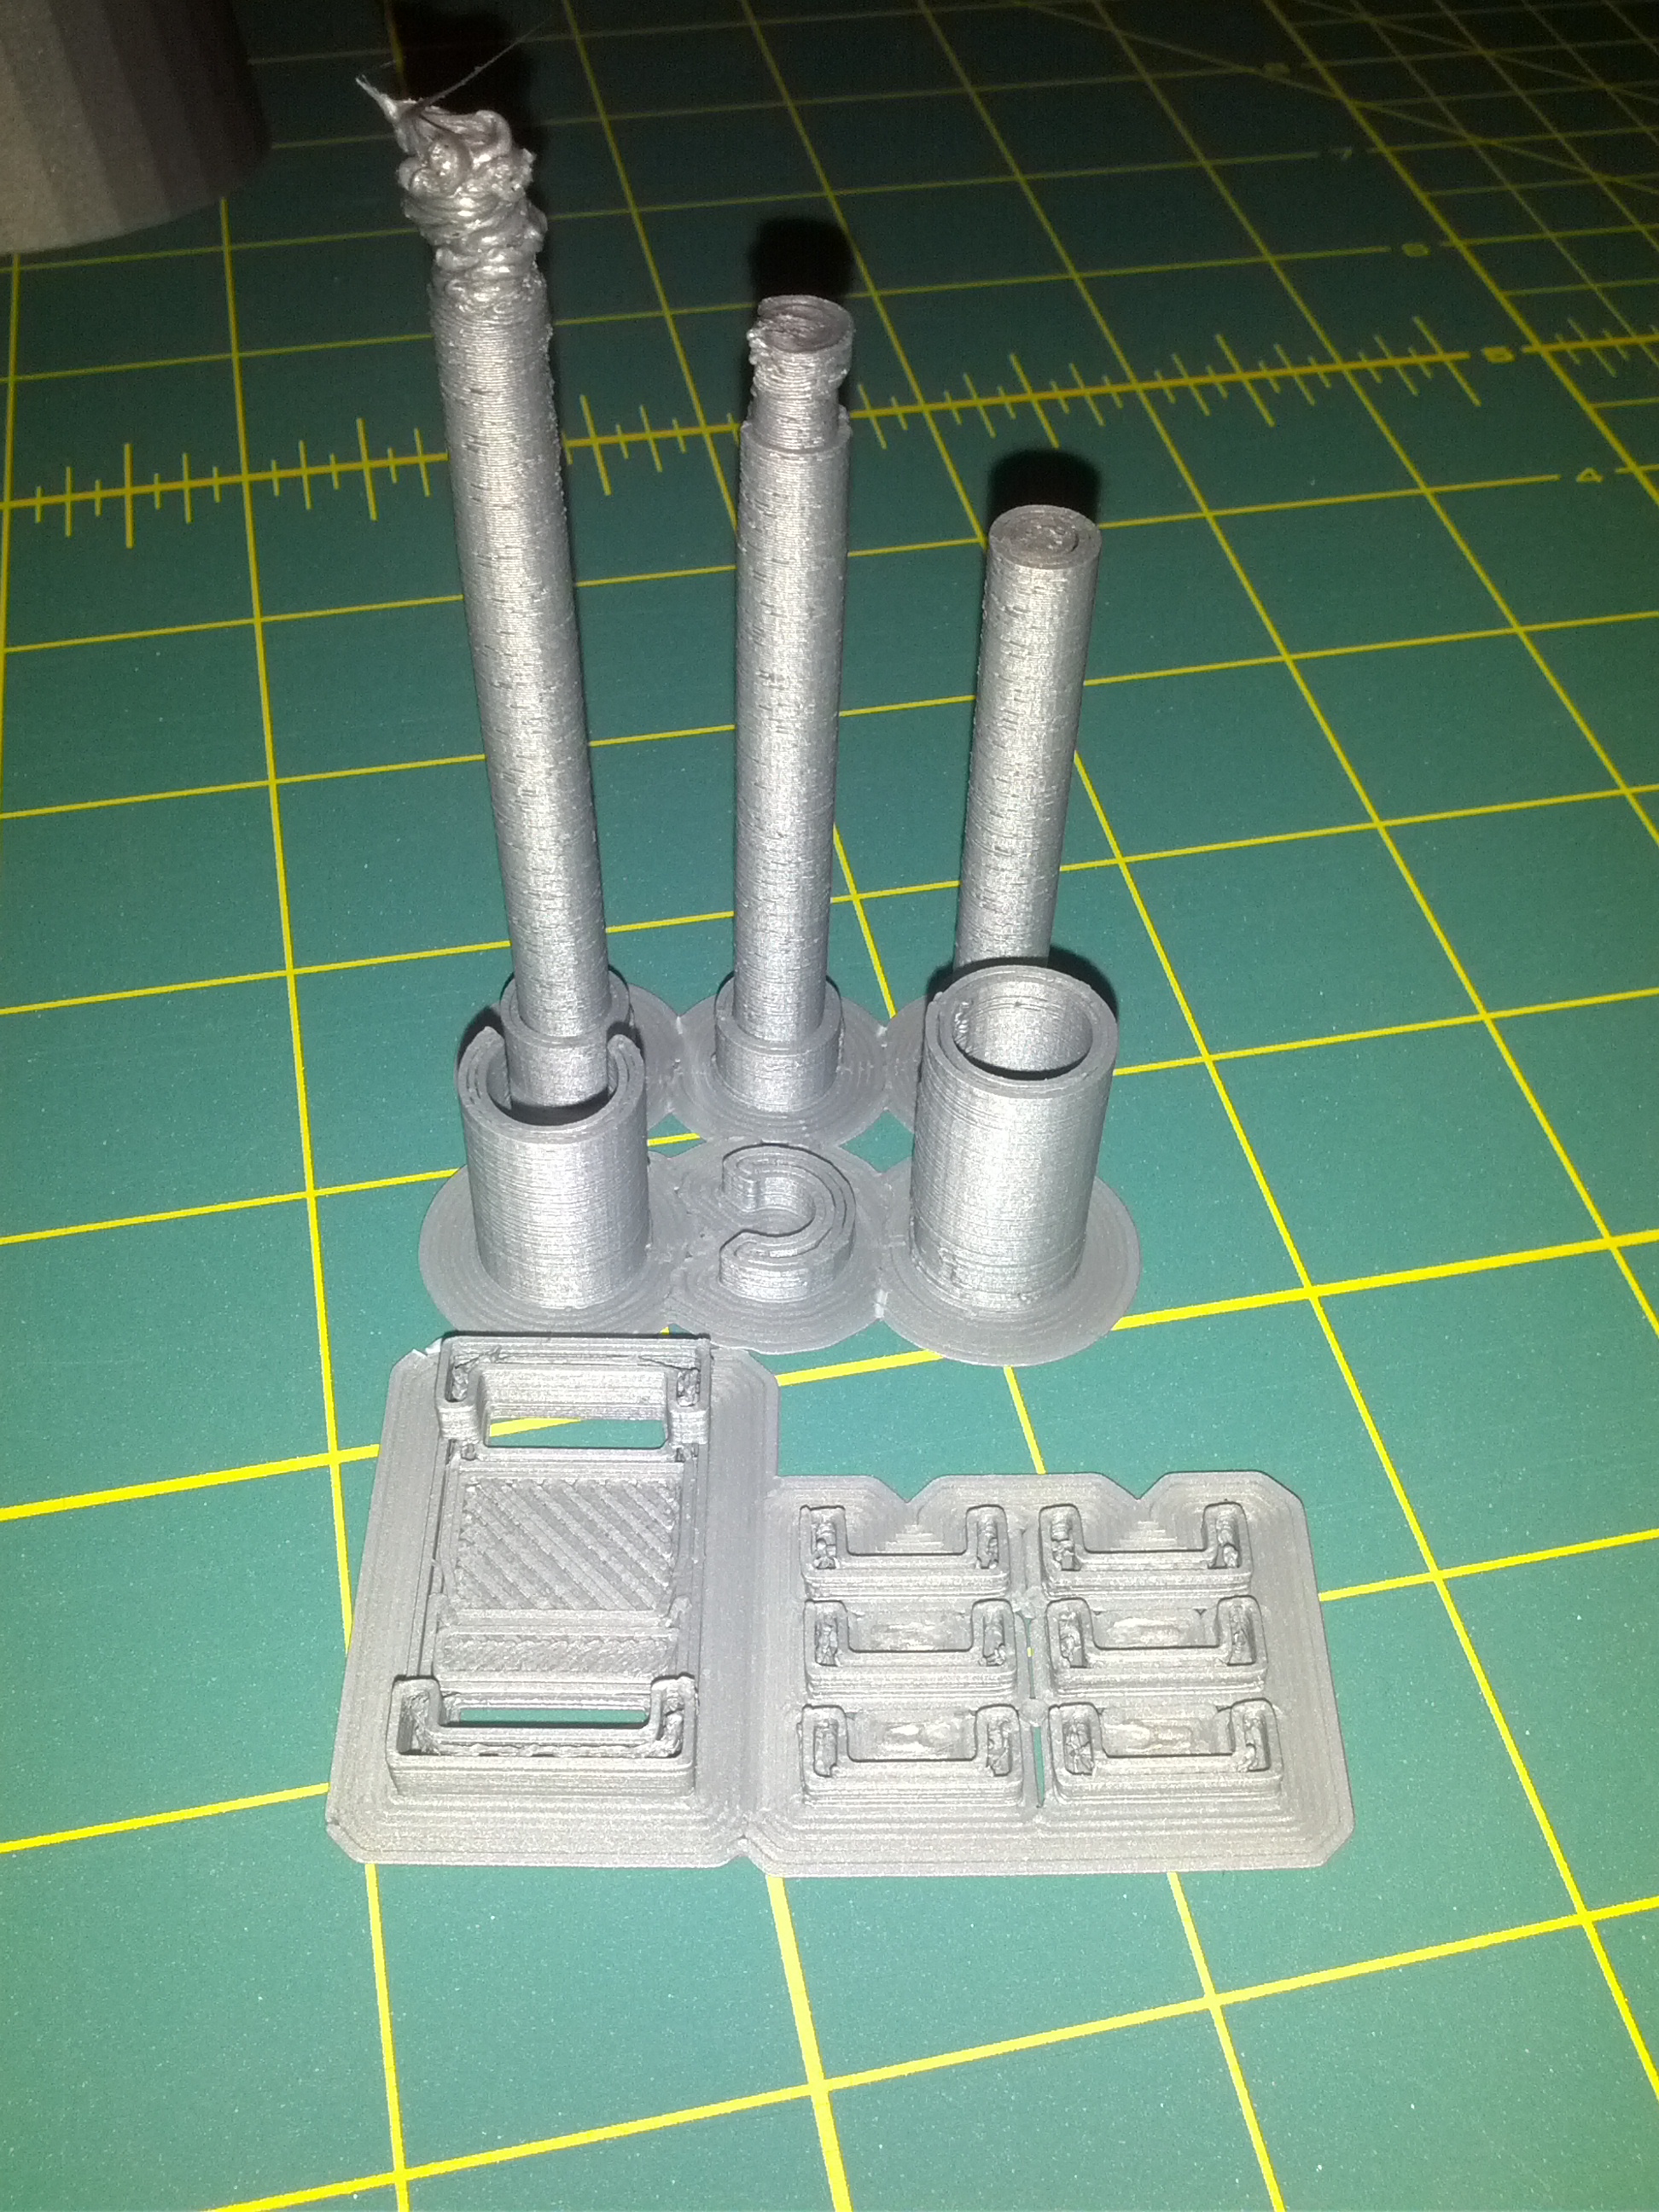
The Top Stomach build is nearly complete. Not all of the pieces have been printed and some of the ones that have need a little sanding and filing to get nice easy fits. My printer is busy with the Left Piston. After that I just need the servo holsters and the cosmetic covers for the front.
-----------------------------------------------------------------------------------------------------------------------------
"Update" 2014-05-30
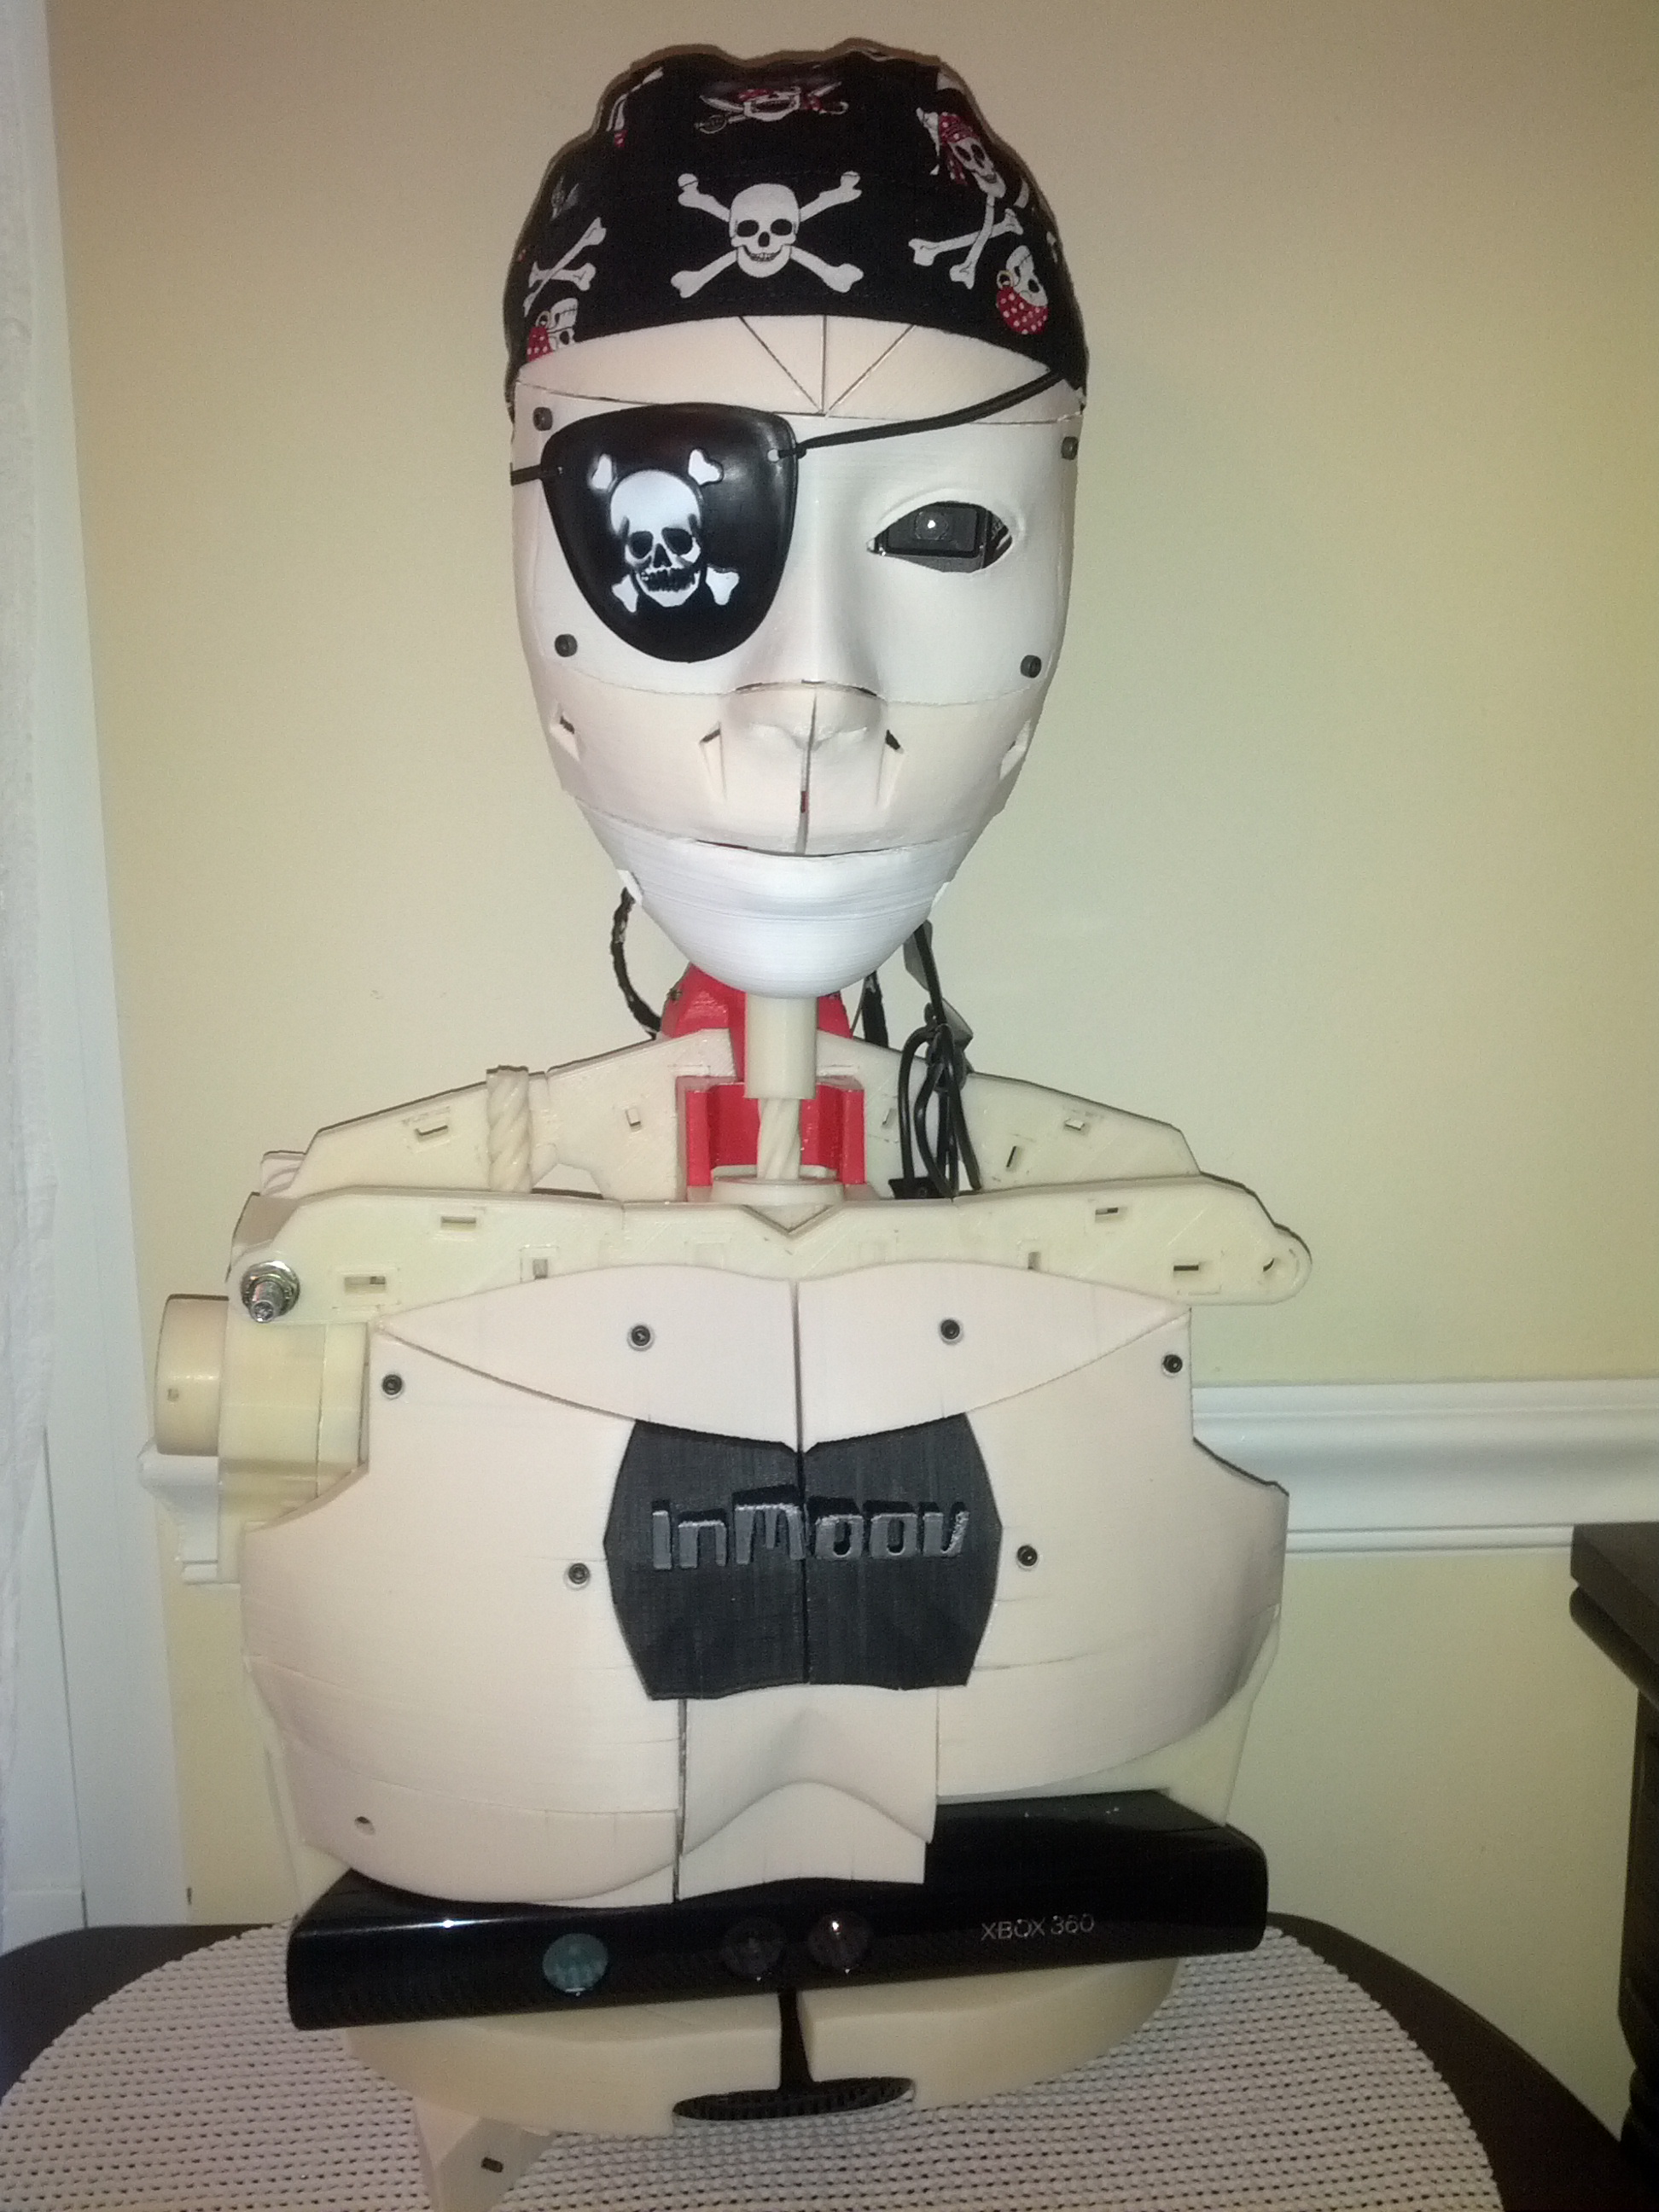
This isn't really an update but I took this picture of my InMoov dressed as a pirate. The empty eye socket was bugging me so when I found one of my kids' toy eye patches I put it on InMoov and then added a pirate dew rag that my wife had made for the kids' party last year.
Other than this I haven't been 3D printing or building anything lately because of other things demanding my free time. Hopefully I'll get back to it soon.
-----------------------------------------------------------------------------------------------------------------------------
Update 2014-04-20
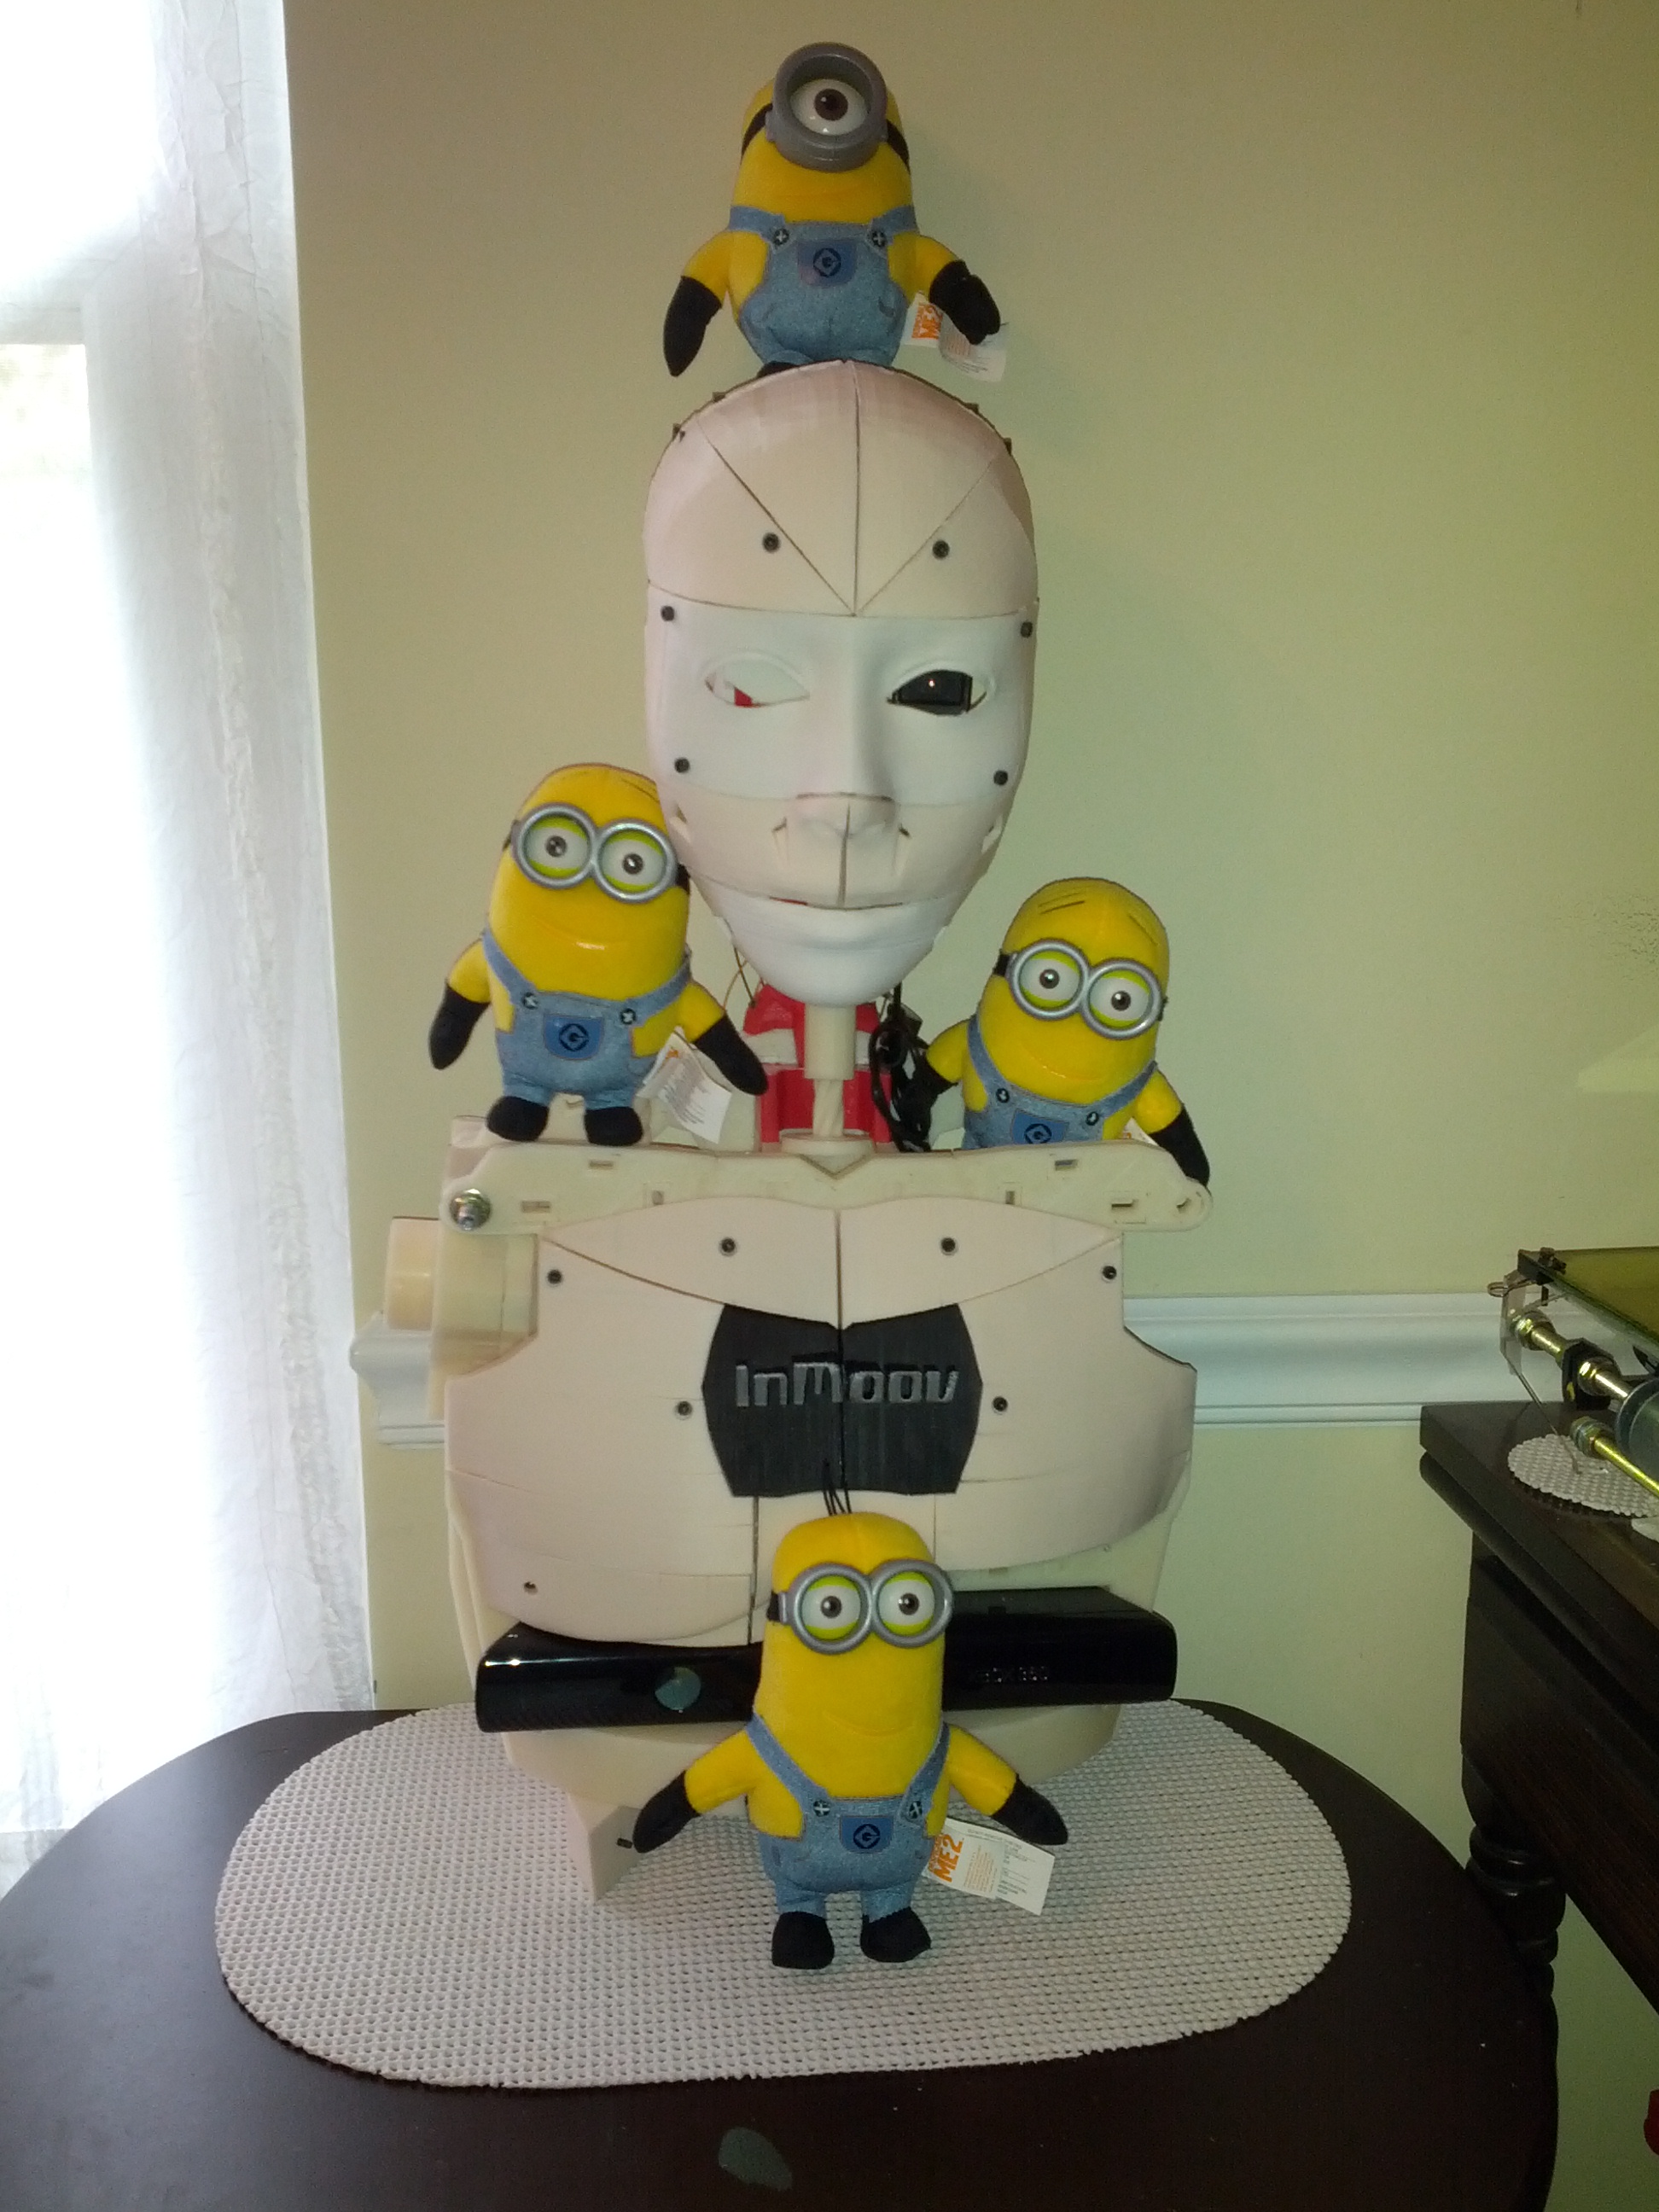
Easter Eggheads!
The easter bunny brought some reinforcment Minions to help around the house which seems appropriate since they kind of look like eggs. InMoov's head is mostly assembled rather than looking like Humpty Dumpty after his fall. Now he really needs a pirate eye patch.
-----------------------------------------------------------------
Update 2014-04-19
I spent Friday night getting InMoov's skull screwed together (still need to attach the part under the ears and the ear discs) so I could bring him to my monthly robotics meeting at the Lab. I introduced InMoov and MRL to some new comers and then showed off the Tracking service using OpenCV LKOptical and FaceTracking. I only had the eyes wired up for tracking but it was still impressive. After the Tracking demo I fired up the Kinect and demoed the OpenNI service. I didn't have his arm attached so after we watched the skeleton tracking enough, I played some of wkinne's youtube videos to show how it's working with the arms. Overall a good showing for both MRL and InMoov. It's funny how I feel like not much has changed with my build when I bring it but the group members keep pointing out what has changed.
-----------------------------------------------------------------
Update 2014-04-18
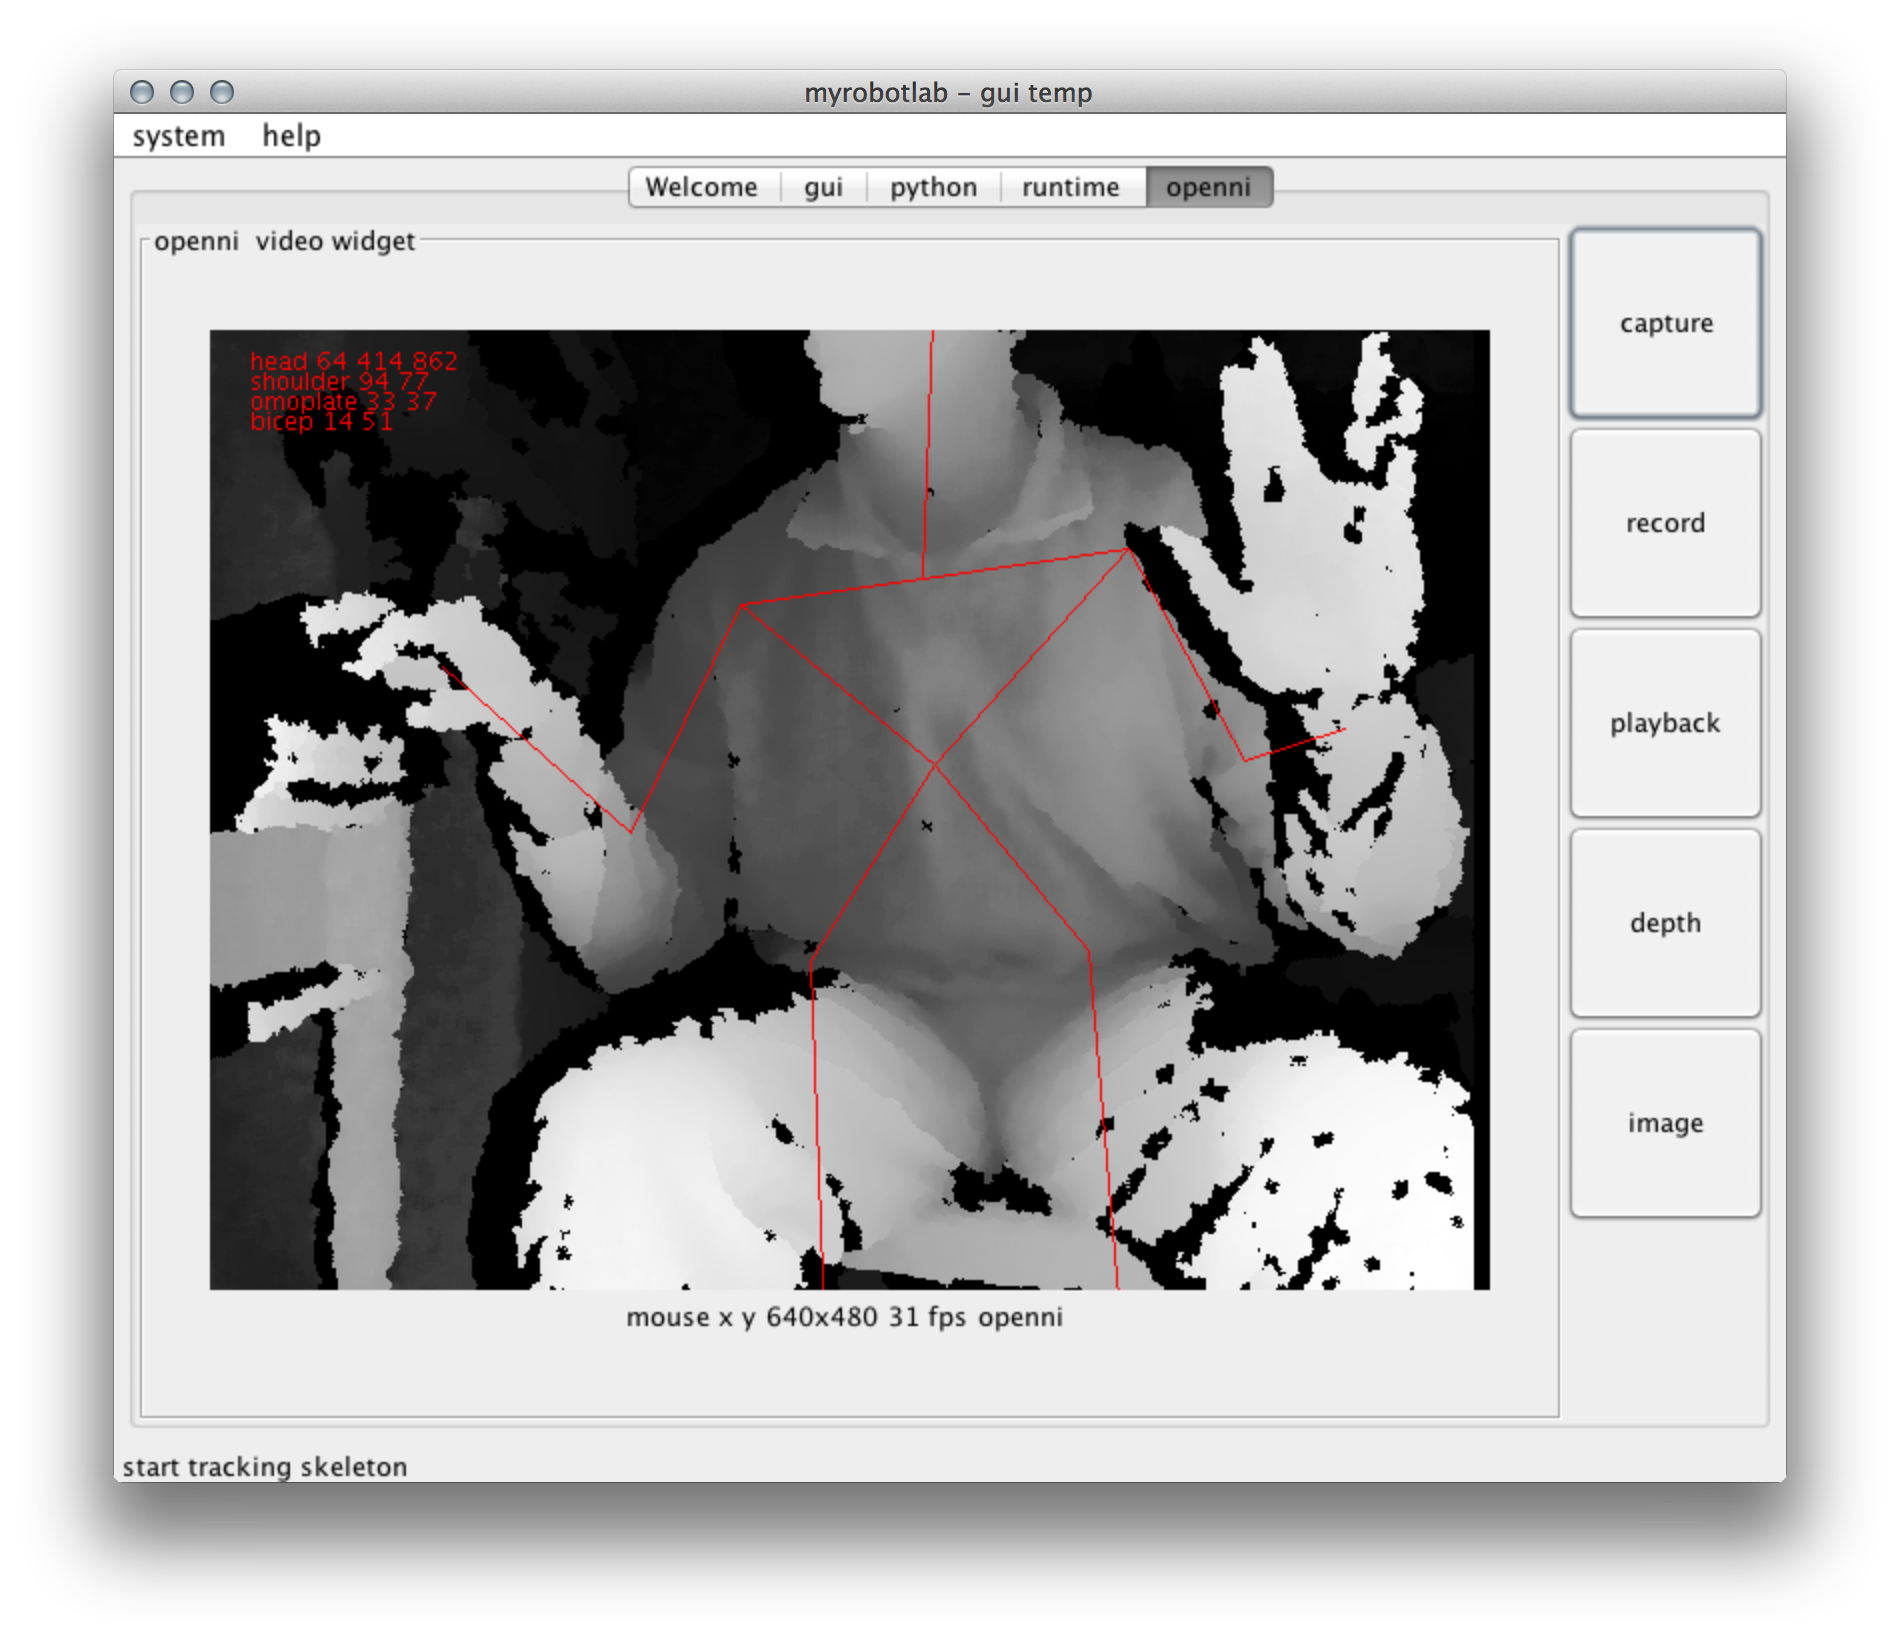
With GroG's late night help I got the Kinect in InMoov's chest working with the OpenNI service.
-----------------------------------------------------------------
Update 2014-04-13
After Maker Faire I got distracted with other projects and gave my 3D Printer a rest. I decided it was time to get back into working on my InMoov and make that eye a little more useful so I gave the basic minimal tracking service script a try. WORKY!!! The camera was able to track an LKOptical dot I put on the screen. Sorry no pictures or videos at this point.
#file : Tracking.minimal.py
# a minimal tracking script - this will start all peer
# services and attach everything appropriately
# change parameters depending on your pan tilt, pins and
# Arduino details
# all commented code is not necessary but allows custom
# options

port = "/dev/tty.usbmodem1411"
xServoPin = 22
yServoPin = 24

tracker = Runtime.createAndStart("tracker", "Tracking")

# set specifics on each Servo
servoX = tracker.getX()
servoX.setPin(xServoPin)
servoX.setMinMax(30, 150)

servoY = tracker.getY()
servoY.setPin(yServoPin)
servoY.setMinMax(30, 150)

# optional filter settings
opencv = tracker.getOpenCV()

# setting camera index to 1 default is 0
opencv.setCameraIndex(1)

# connect to the Arduino
tracker.connect(port)

# Gray & PyramidDown make face tracking
# faster - if you dont like these filters - you
# may remove them before you select a tracking type with
# the following command
# tracker.clearPreFilters()

# diffrent types of tracking

# simple face detection and tracking
# tracker.faceDetect()

# lkpoint - click in video stream with
# mouse and it should track
tracker.startLKTracking()

# scans for faces - tracks if found
# tracker.findFace()
I need to do some more modification on the eye socket to get more clearance between the front of the camera body and the EyeGlass part of the face.
----------------------------------------------------------------------------------------------
Update 2014-03-16
InMoov At Maker Faire NOVA
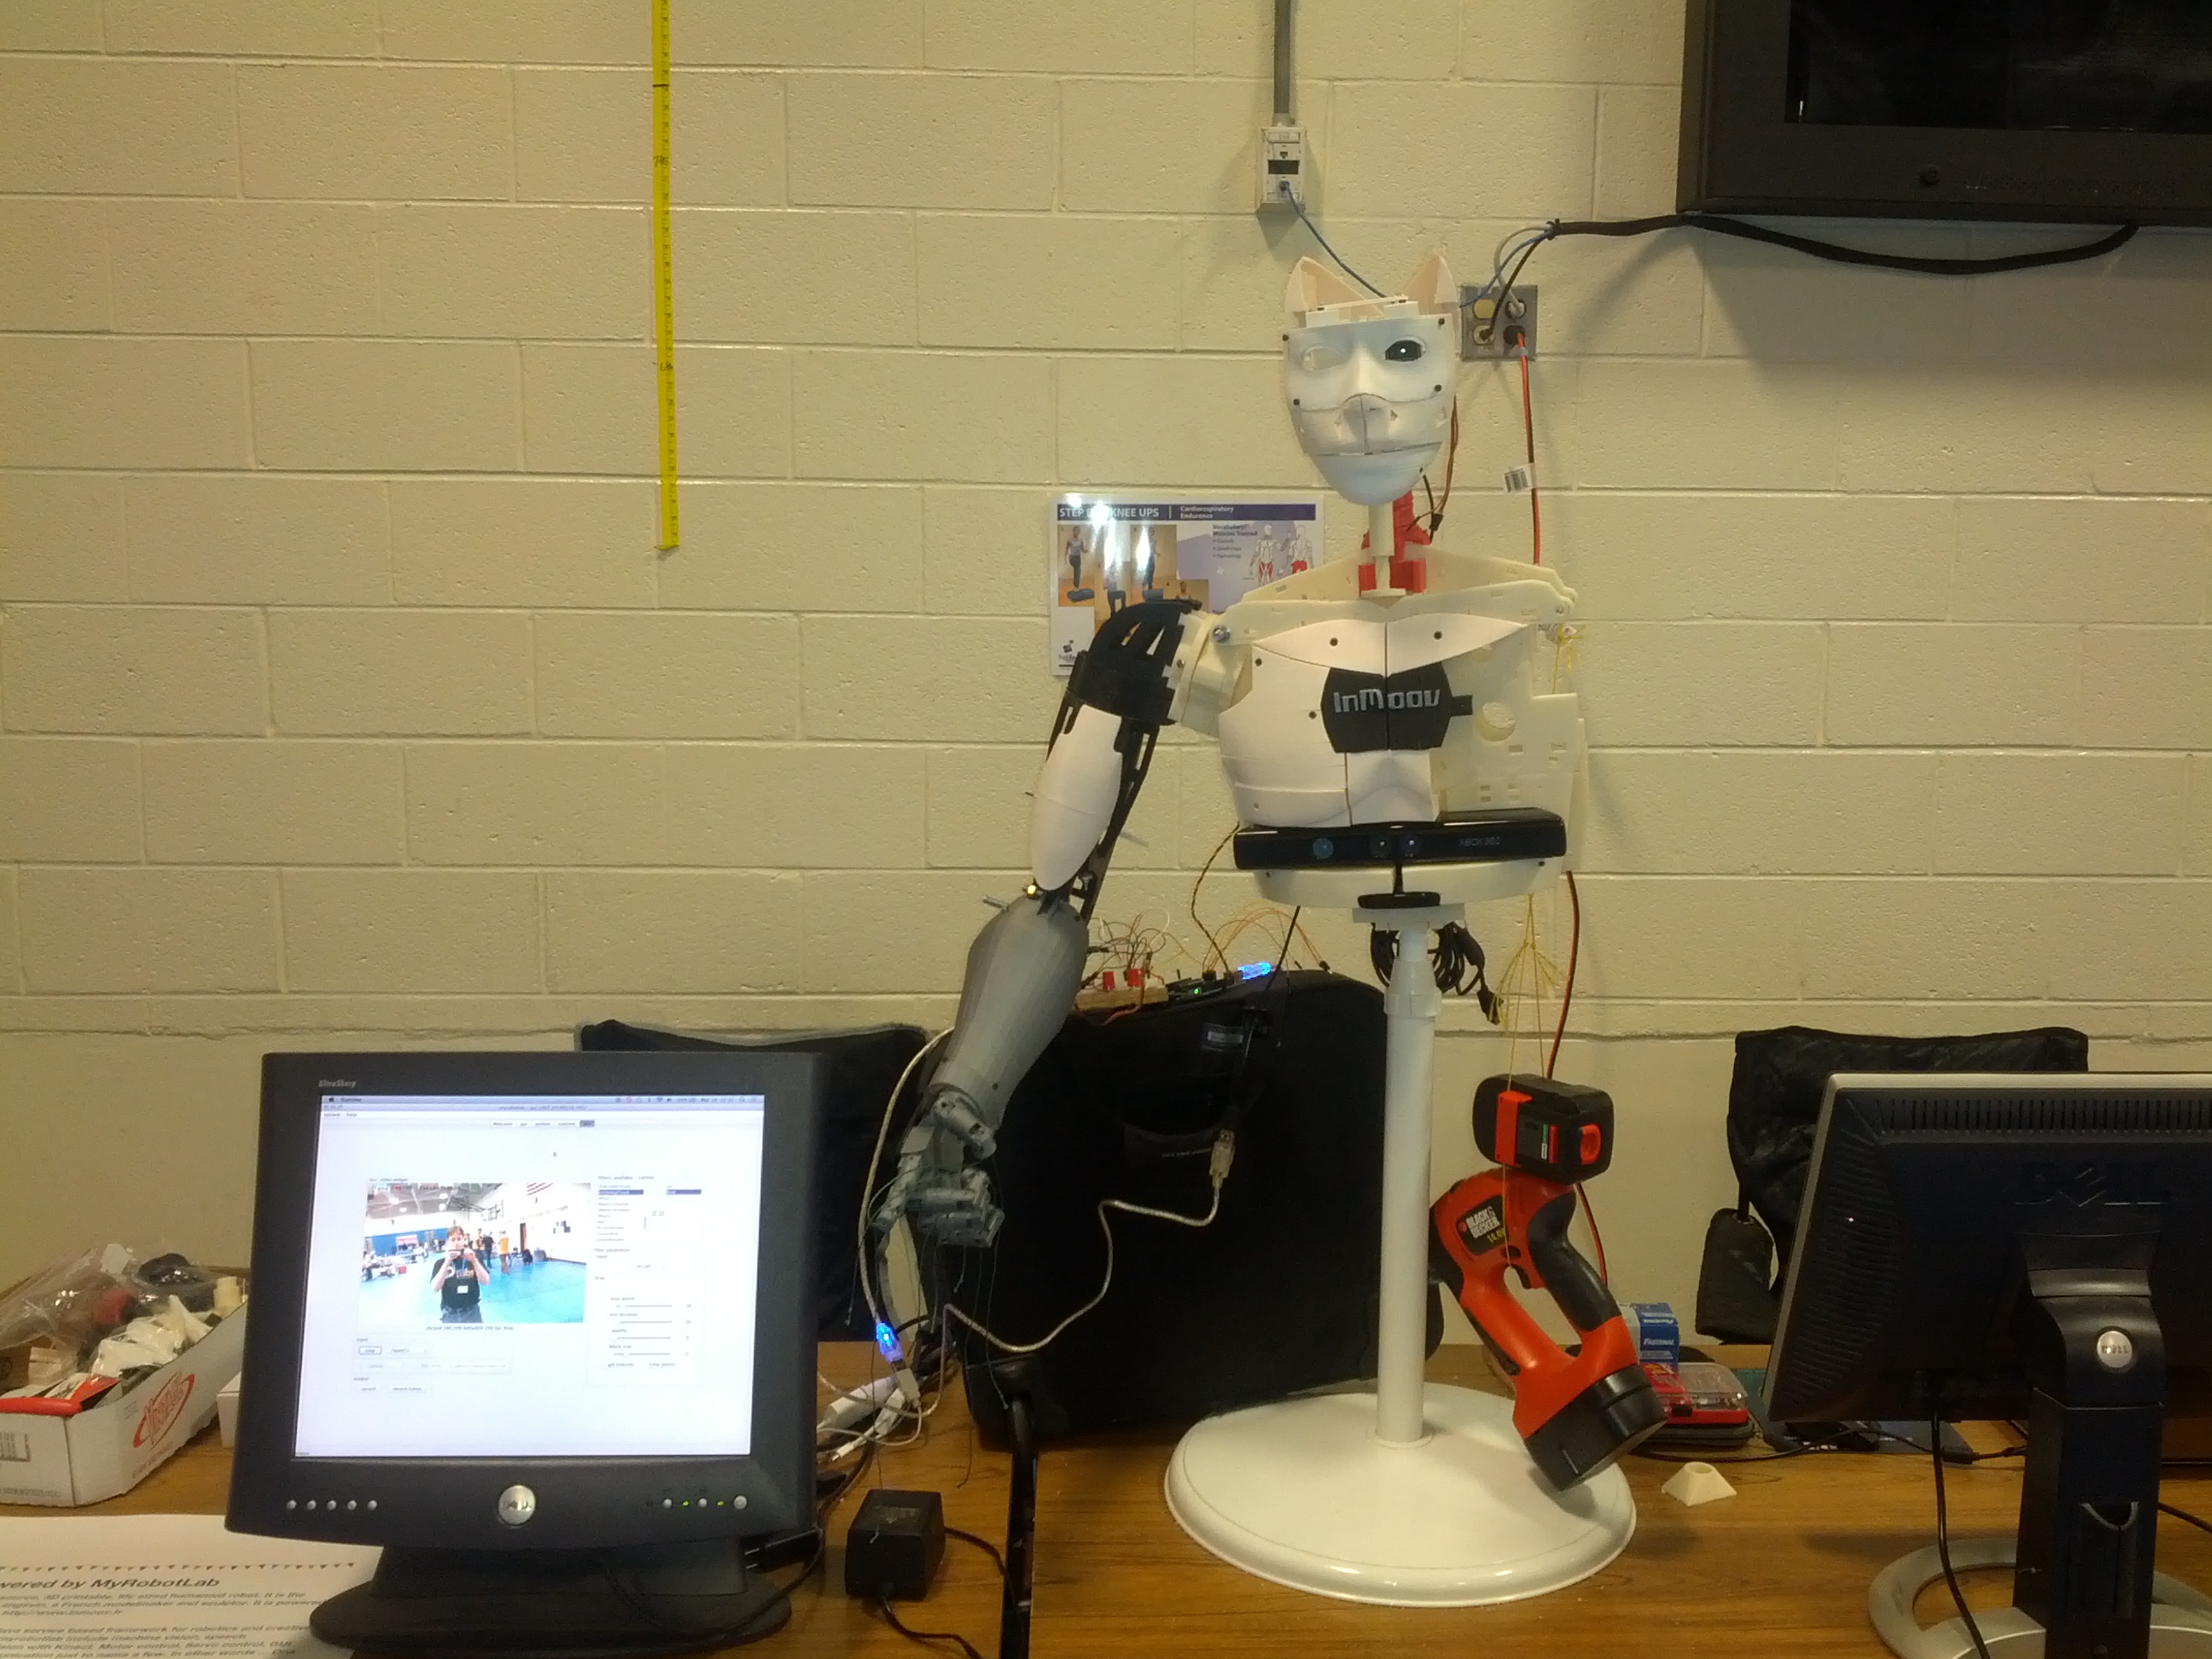
Well it was a epic hack all around (note the B&D drill counterweight to balance the arm) but overall it went well. The only parts that were working were the right hand and the webcam in the eye. I had FaceDetect running for 5 hours. The monitor by his hand was mirroring the display of my laptop so people could see what InMoov saw. I had the OpenCV tab detached so I could move it to the side and show the Python tab behind it which allowed those interested to see that so little Python was needed to run the vision, hand, speech-to-text and text-to-speech. The monitor on the right was hooked to another laptop that was repeatedly playing bhouston's demo video on YouTube showing people what it was supposed to look like. I forgot to bring external speakers so no one could hear the video or my InMoov speaking.
I was asked repeatedly "what is it's purpose". I even had a few people walk up with their own InMoov hand or finger starter that they brought with them. One woman was also trying to use the hand as a prosthetic (not for herself) so I told her to watch for Gael's updated hand. Lots of questions about the kinect too.
I got invited to exhibit at another Mini Maker Faire in Greenbelt, MD on April 5th but there's no way I'm going to try to do that.
Update 2014-03-13
Pasta anyone?
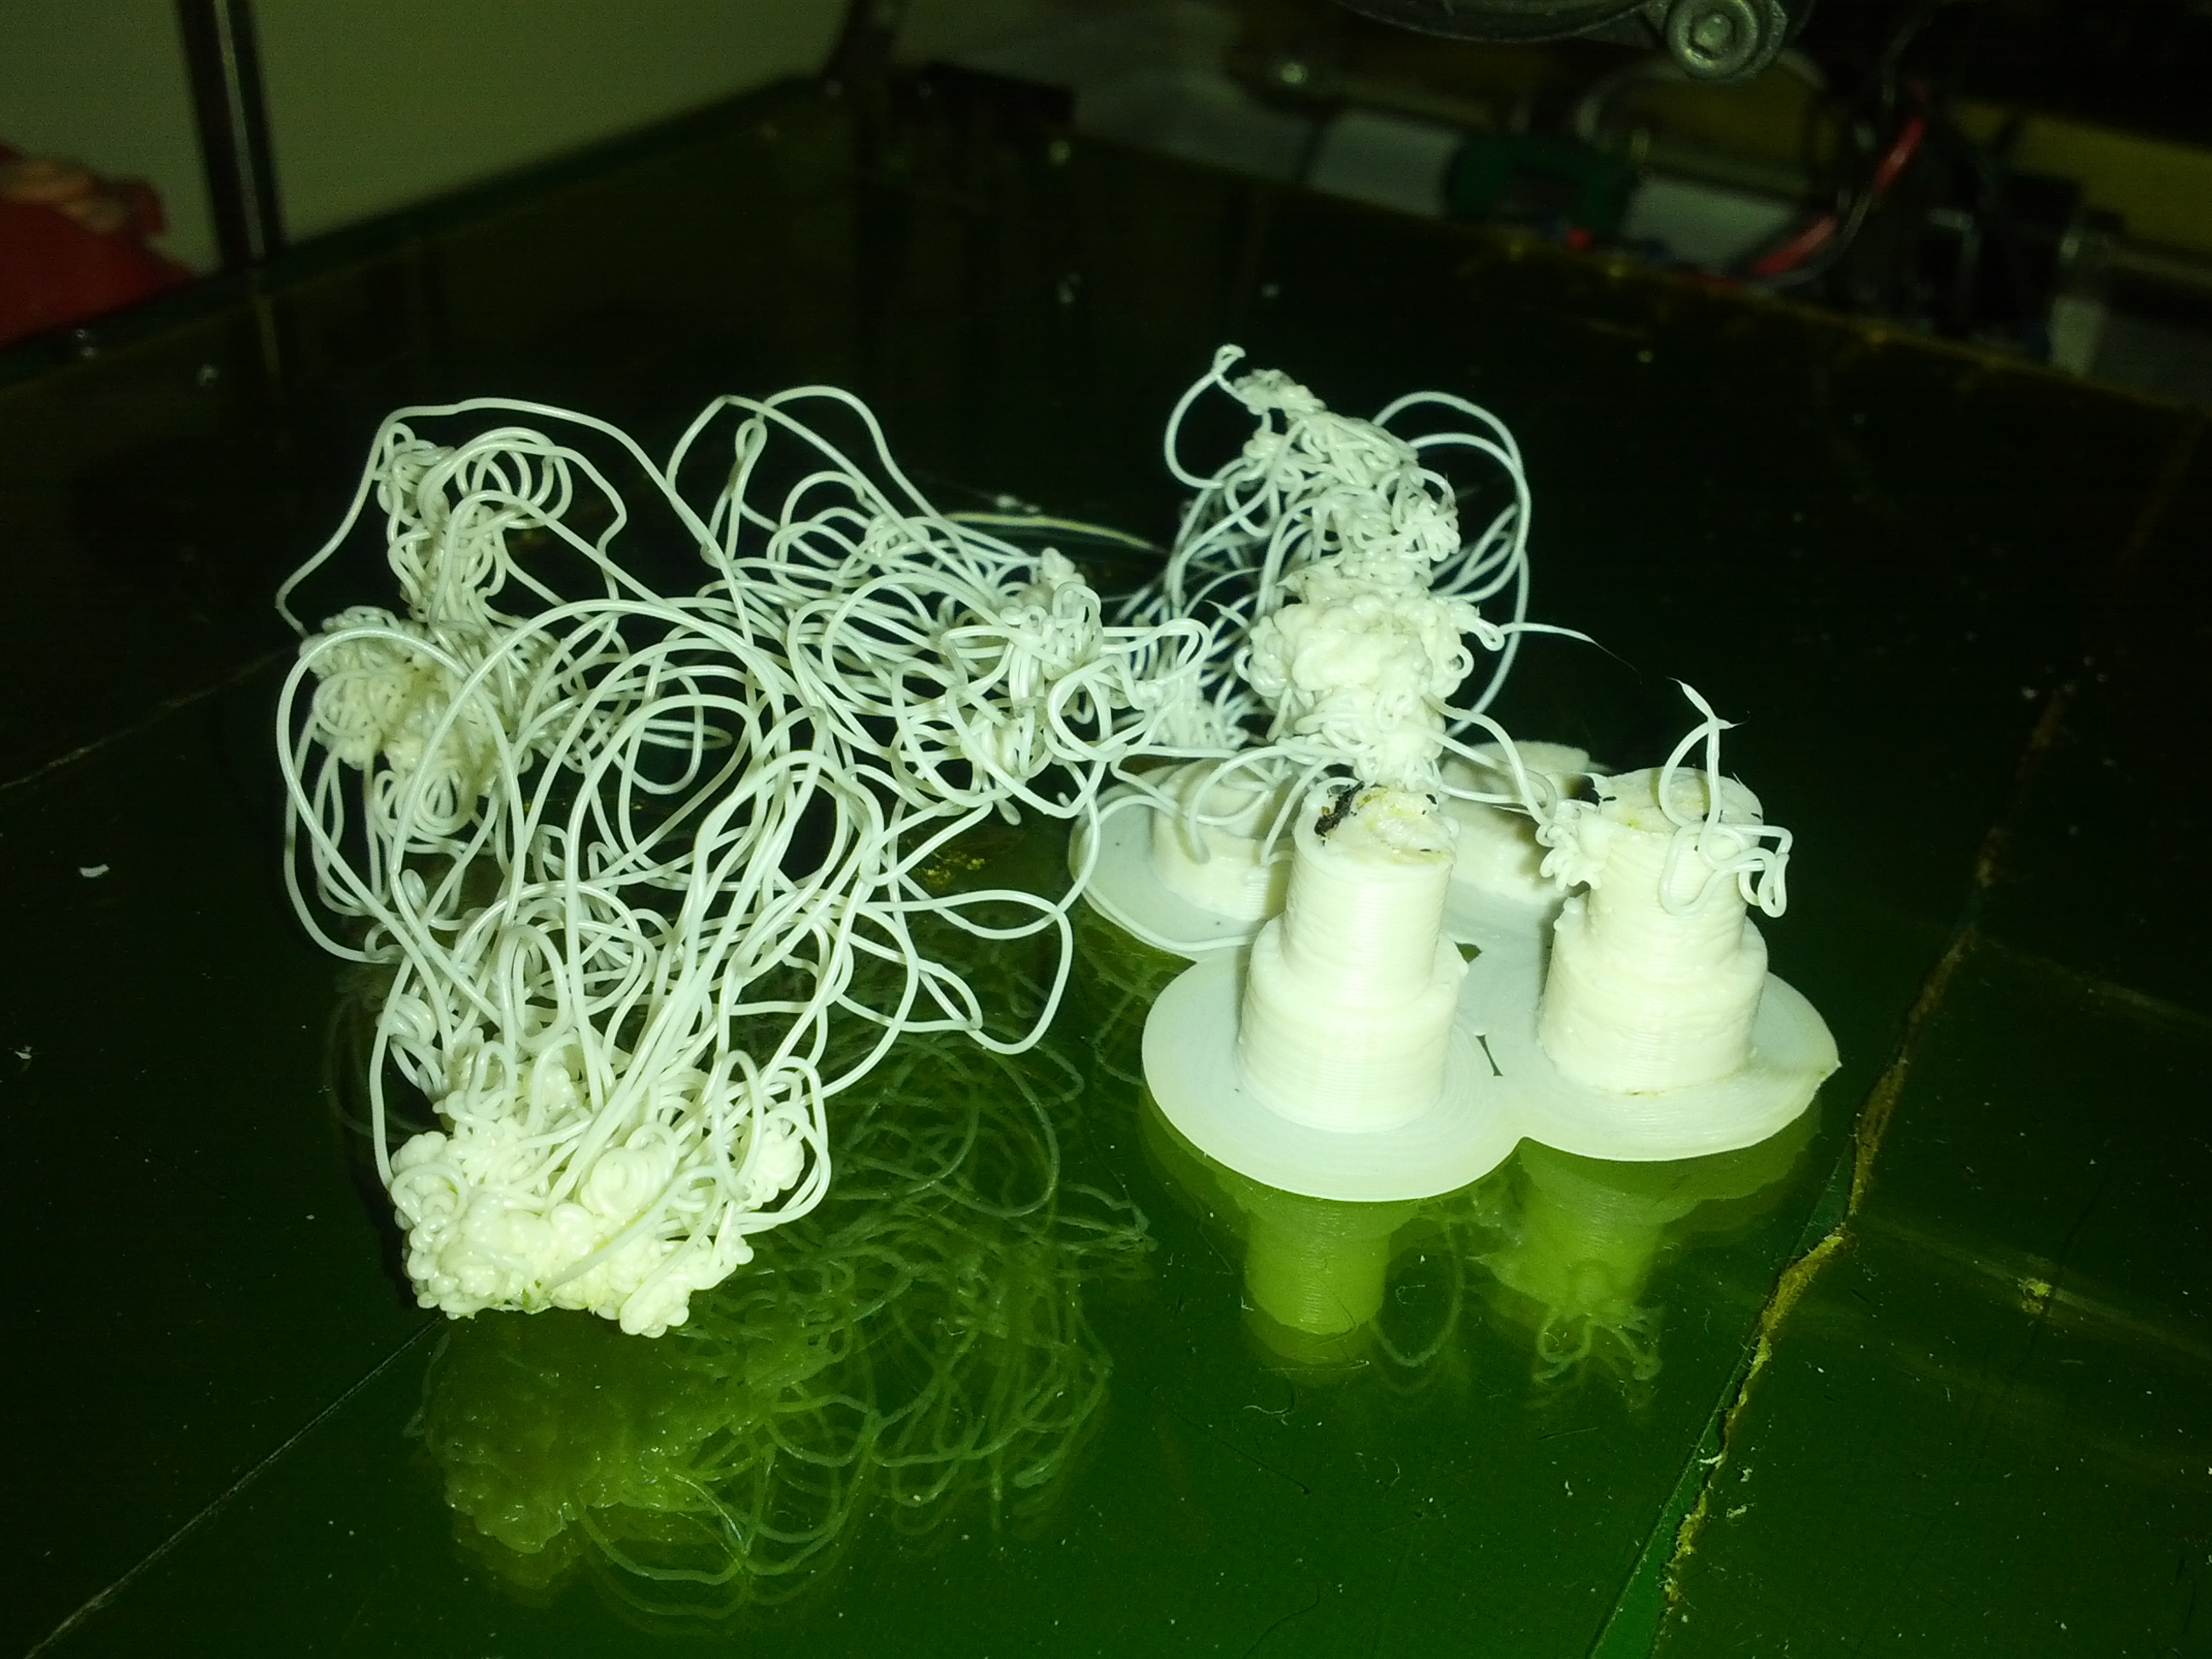
I wanted to print off a set of neck bolts real quick to use with the arm but clearly things went wrong.
Printed out ChestTopV1 tonight and just put them in place for a quick photo op.
---------------------------------------------------------------------------------------
Update 2014-03-12
Just keep building, just keep building, just keep ....
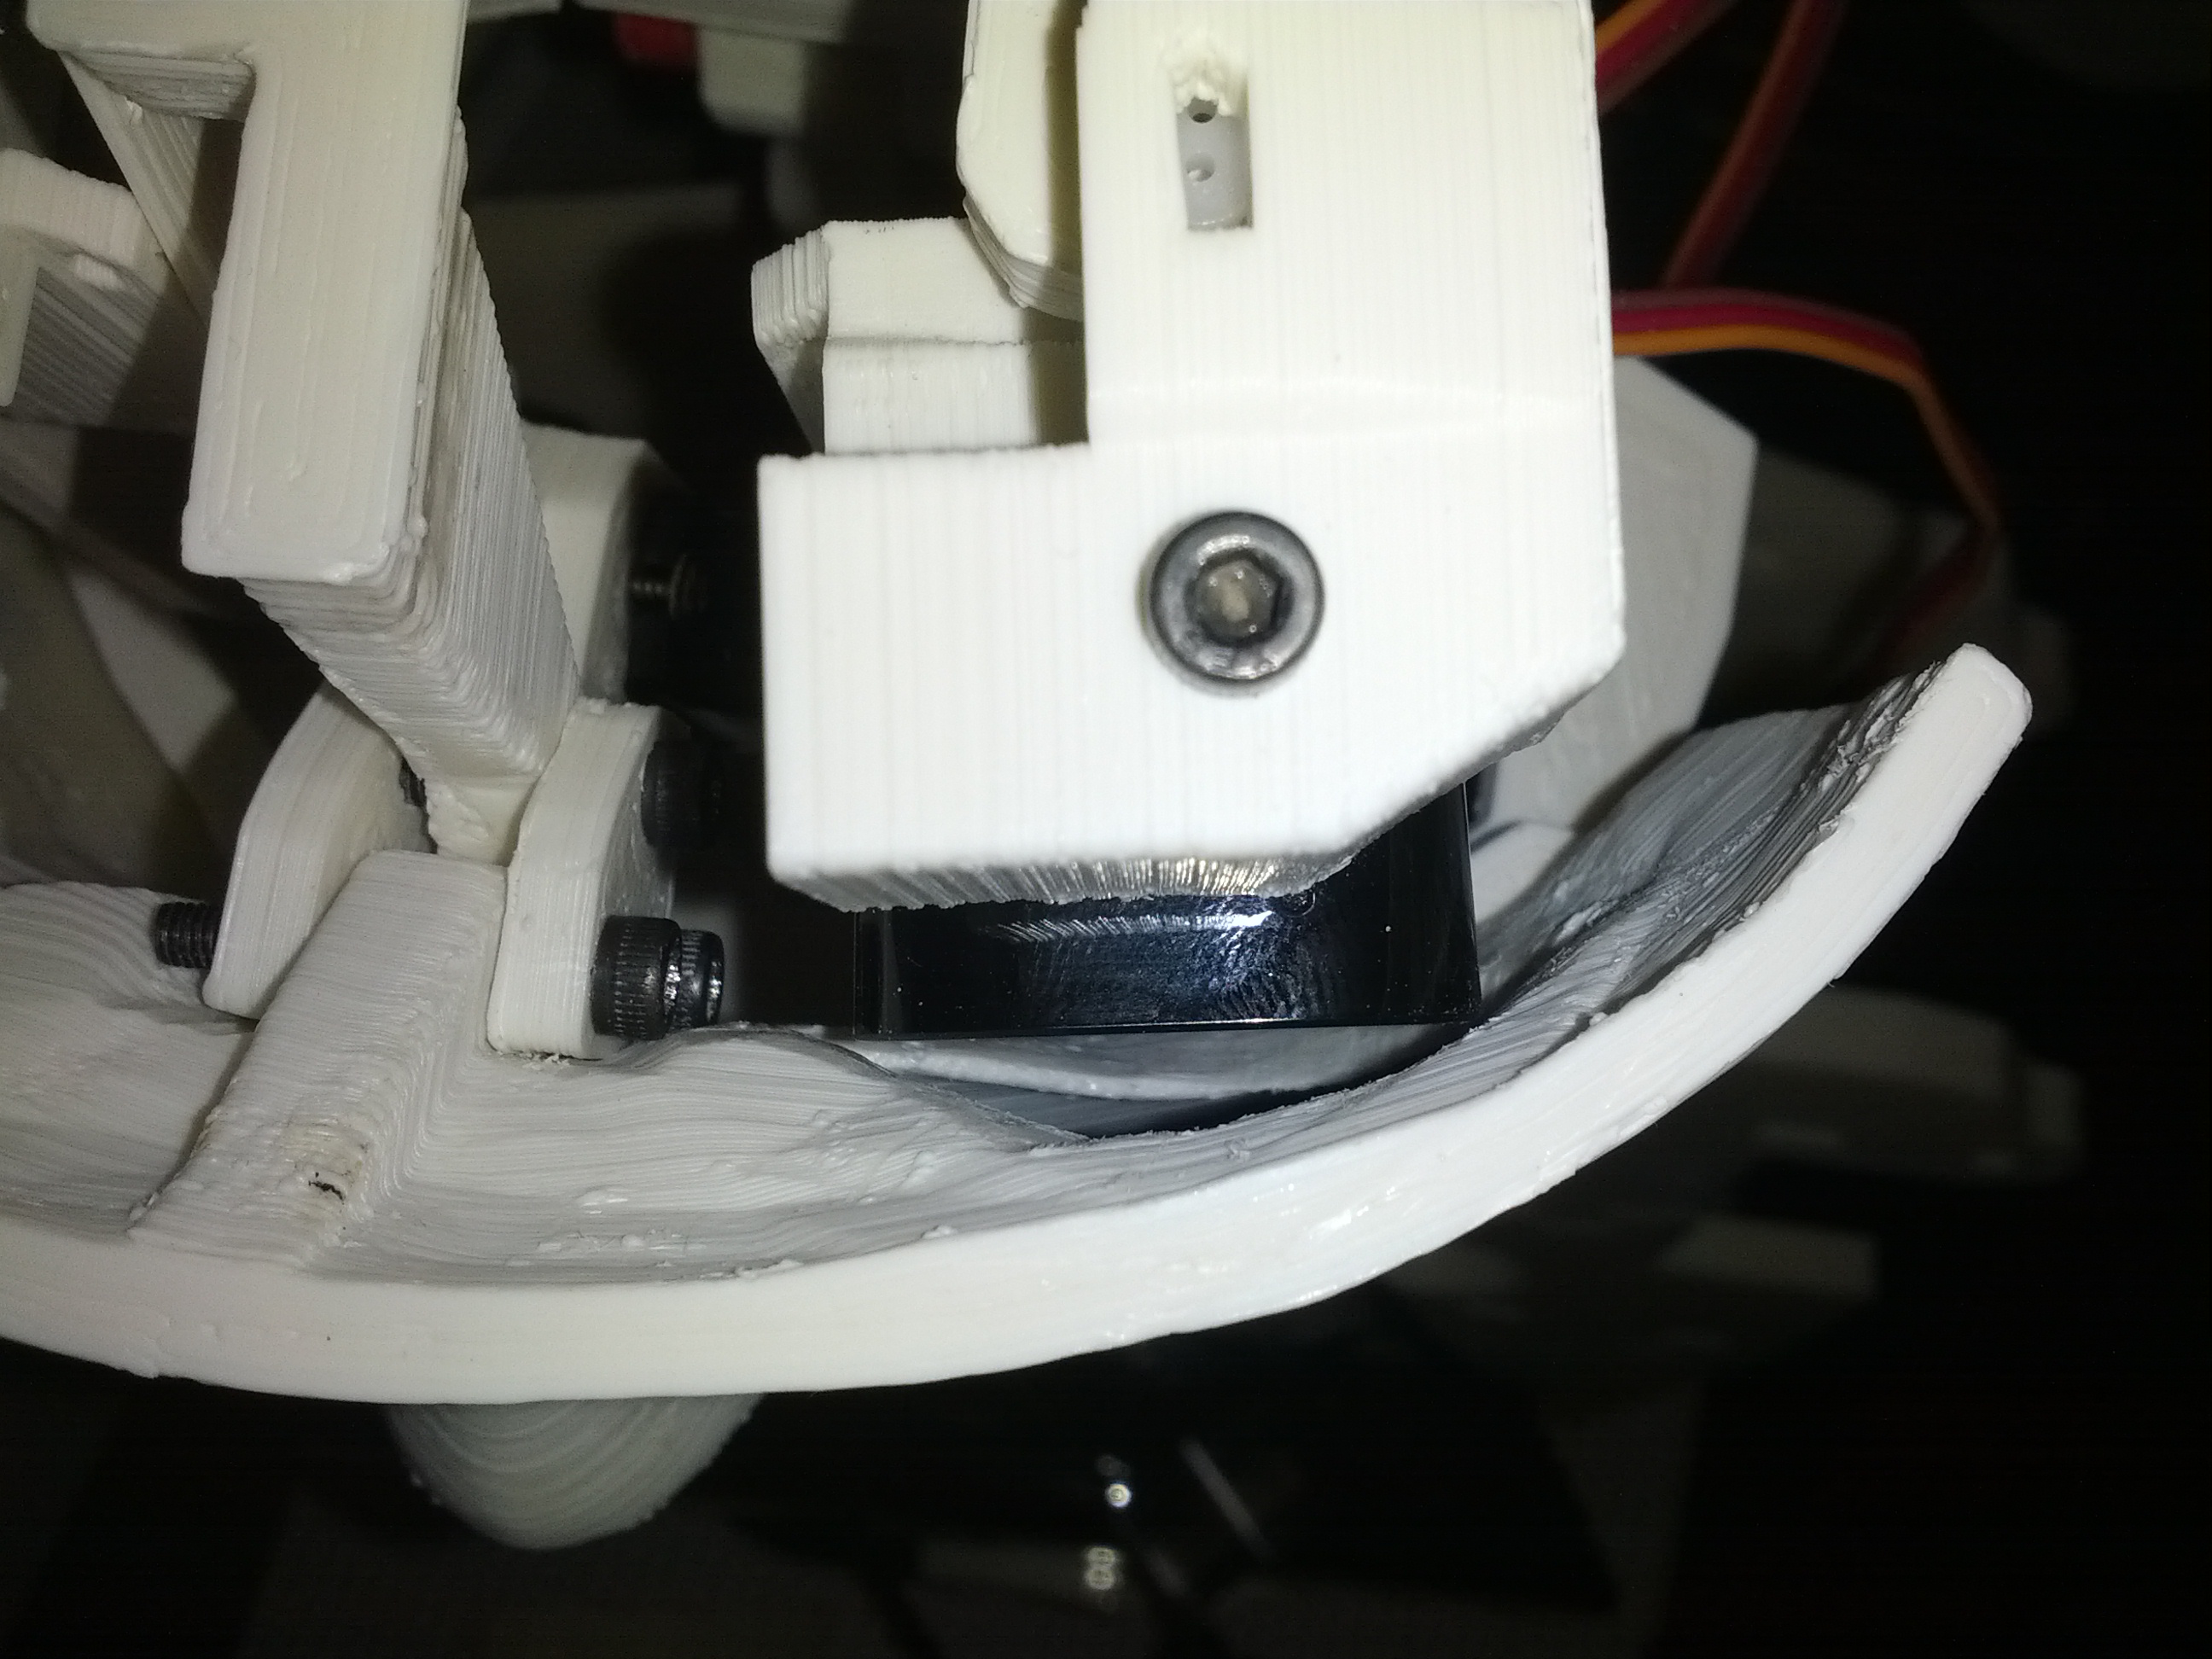
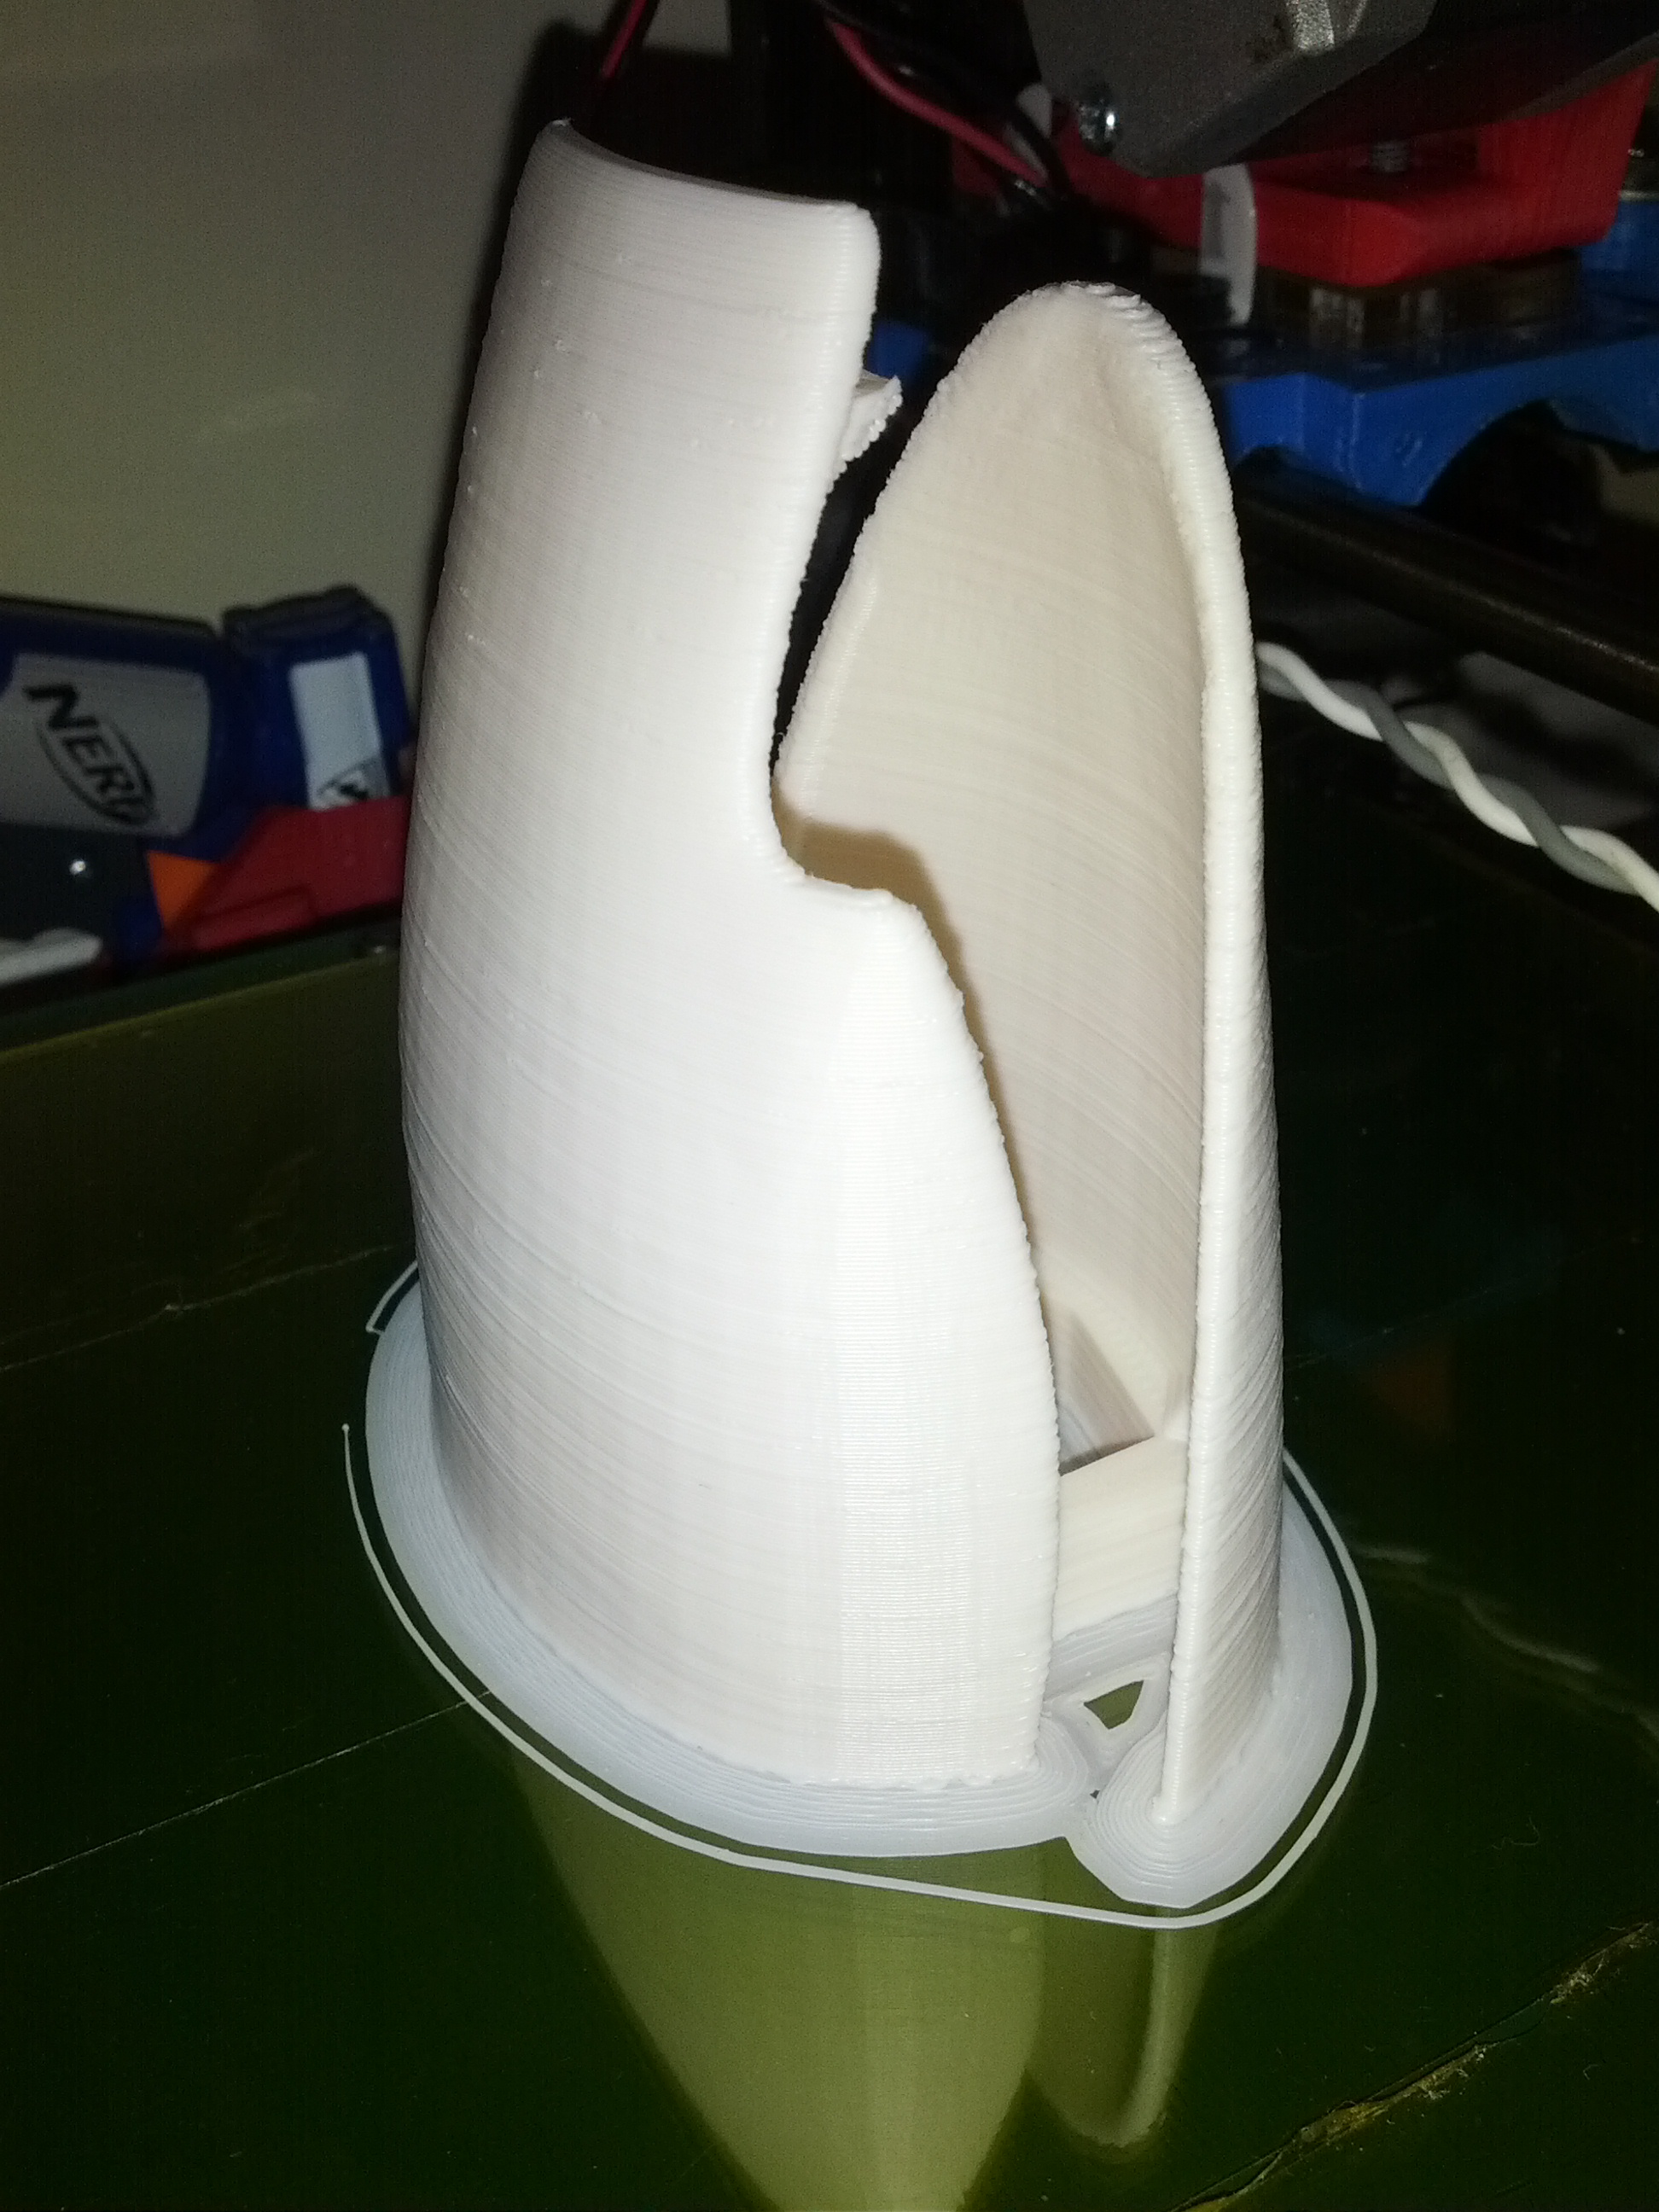
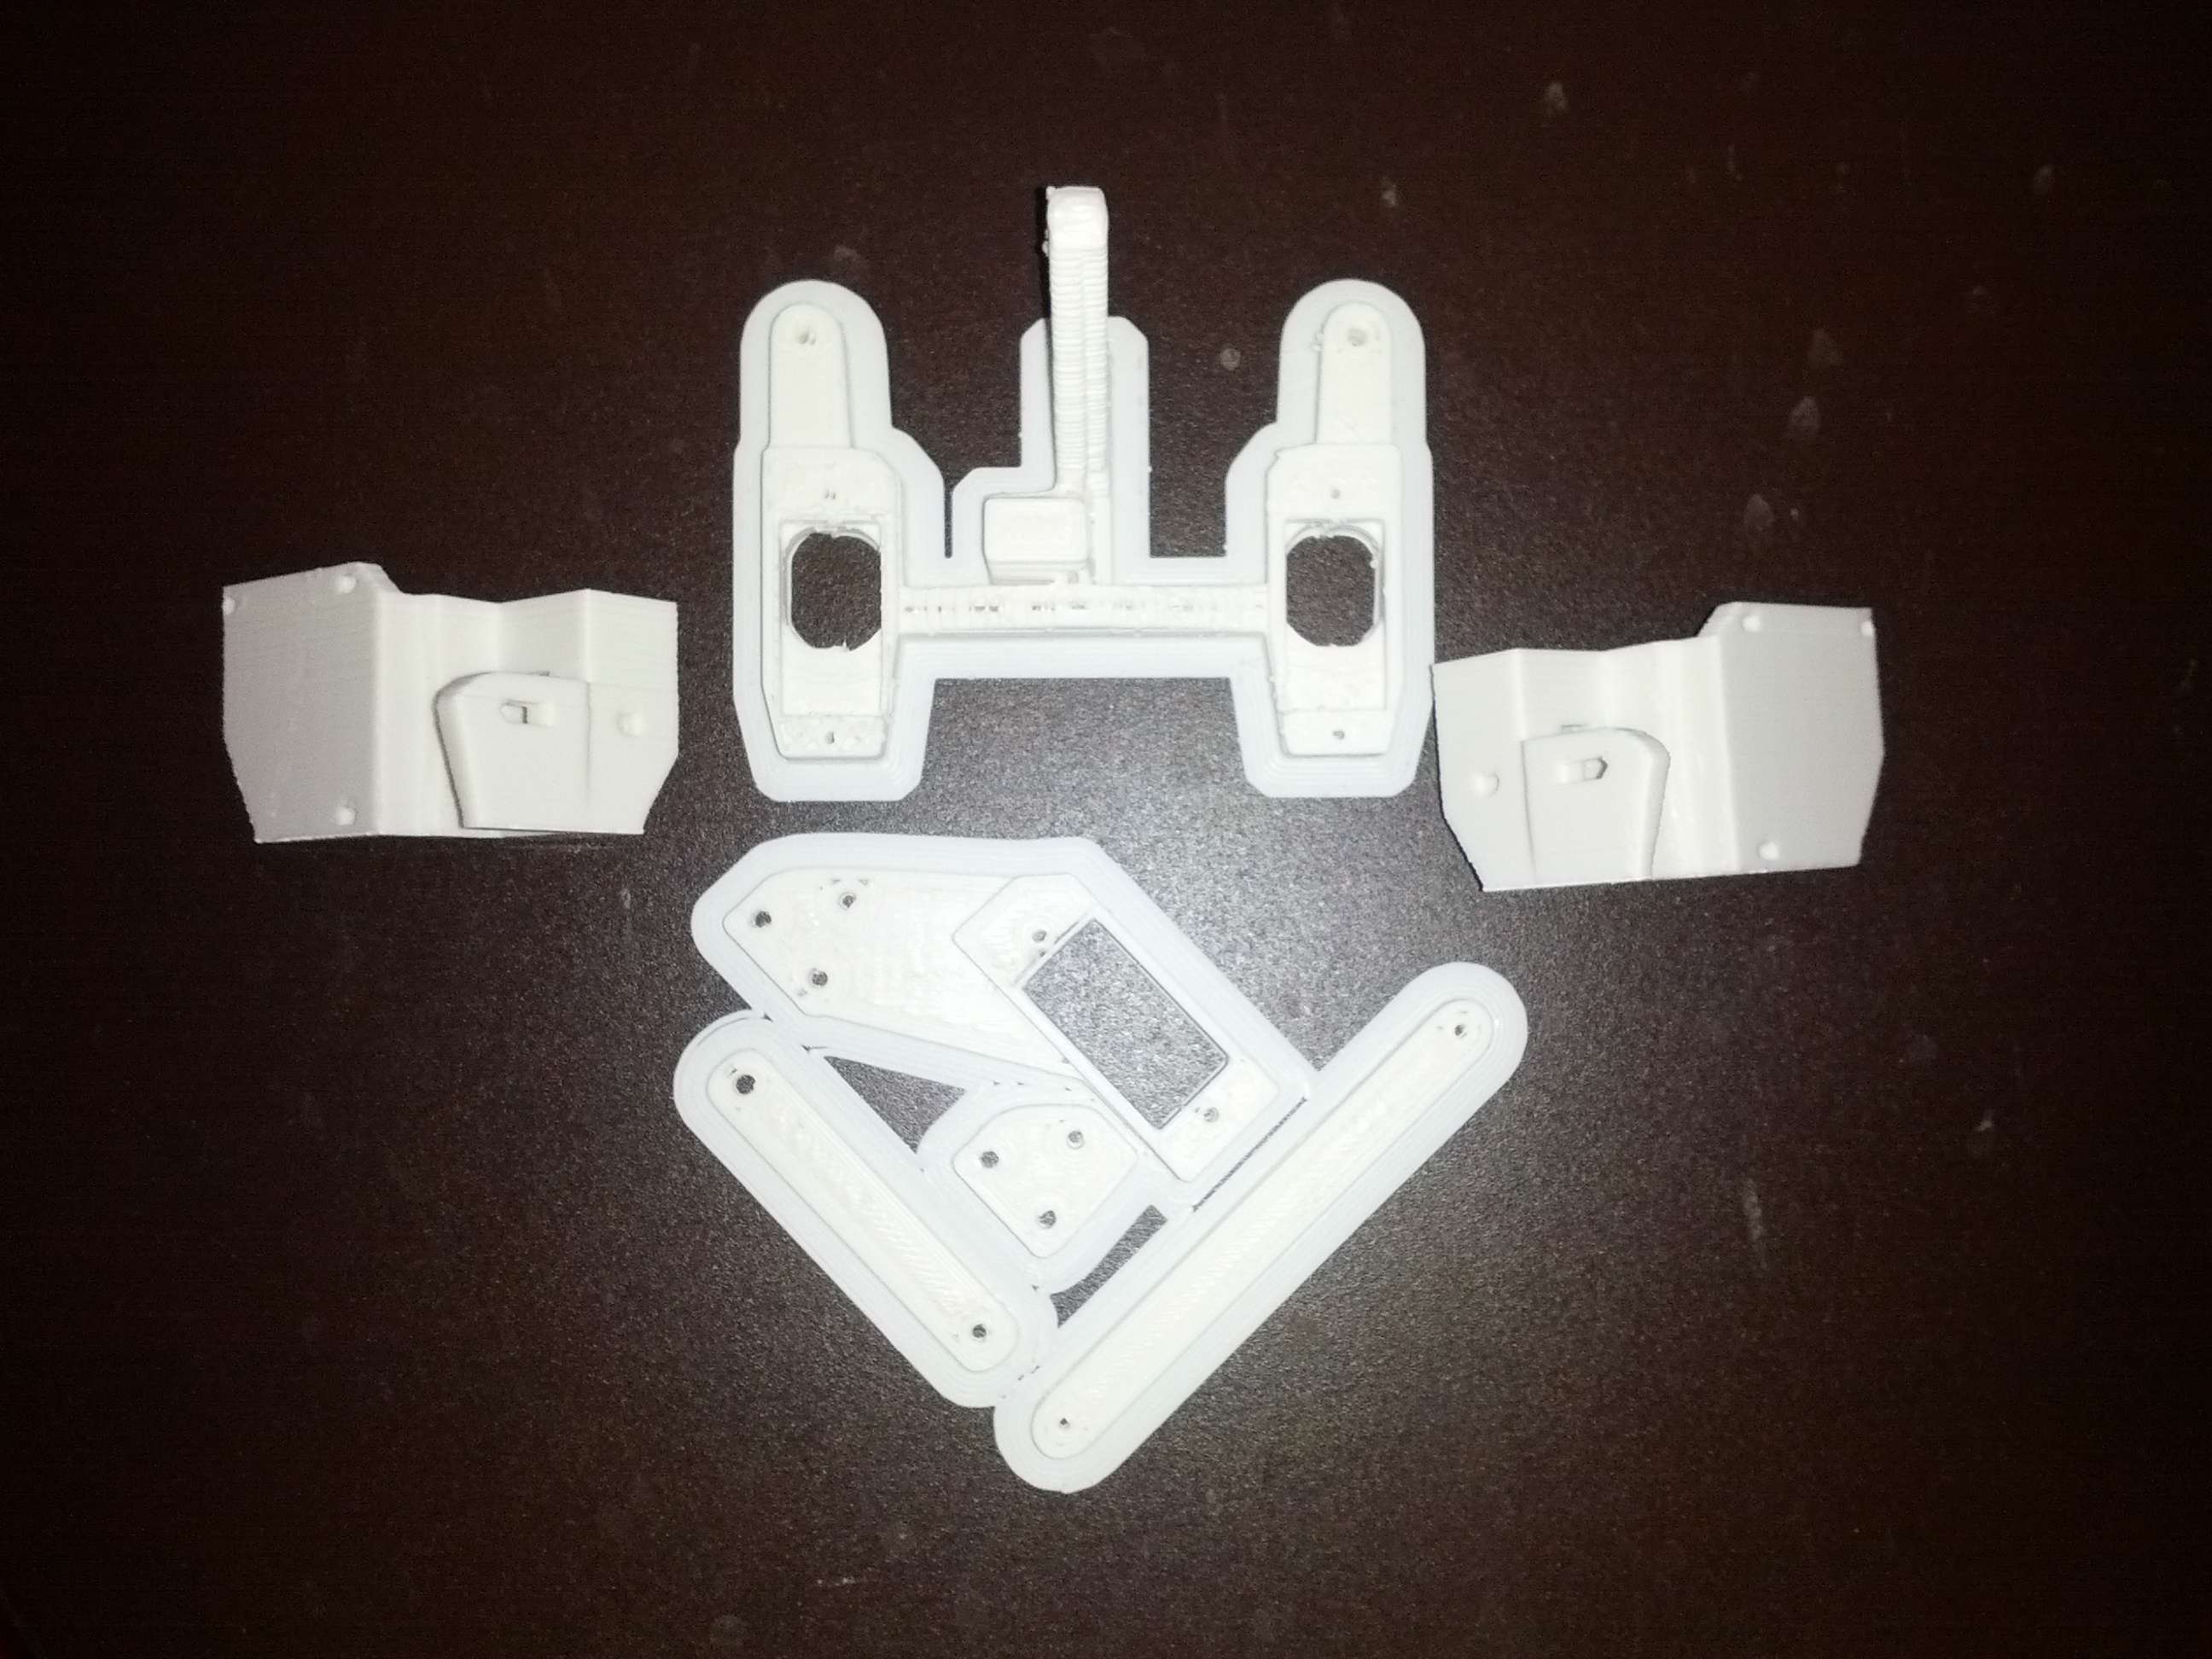
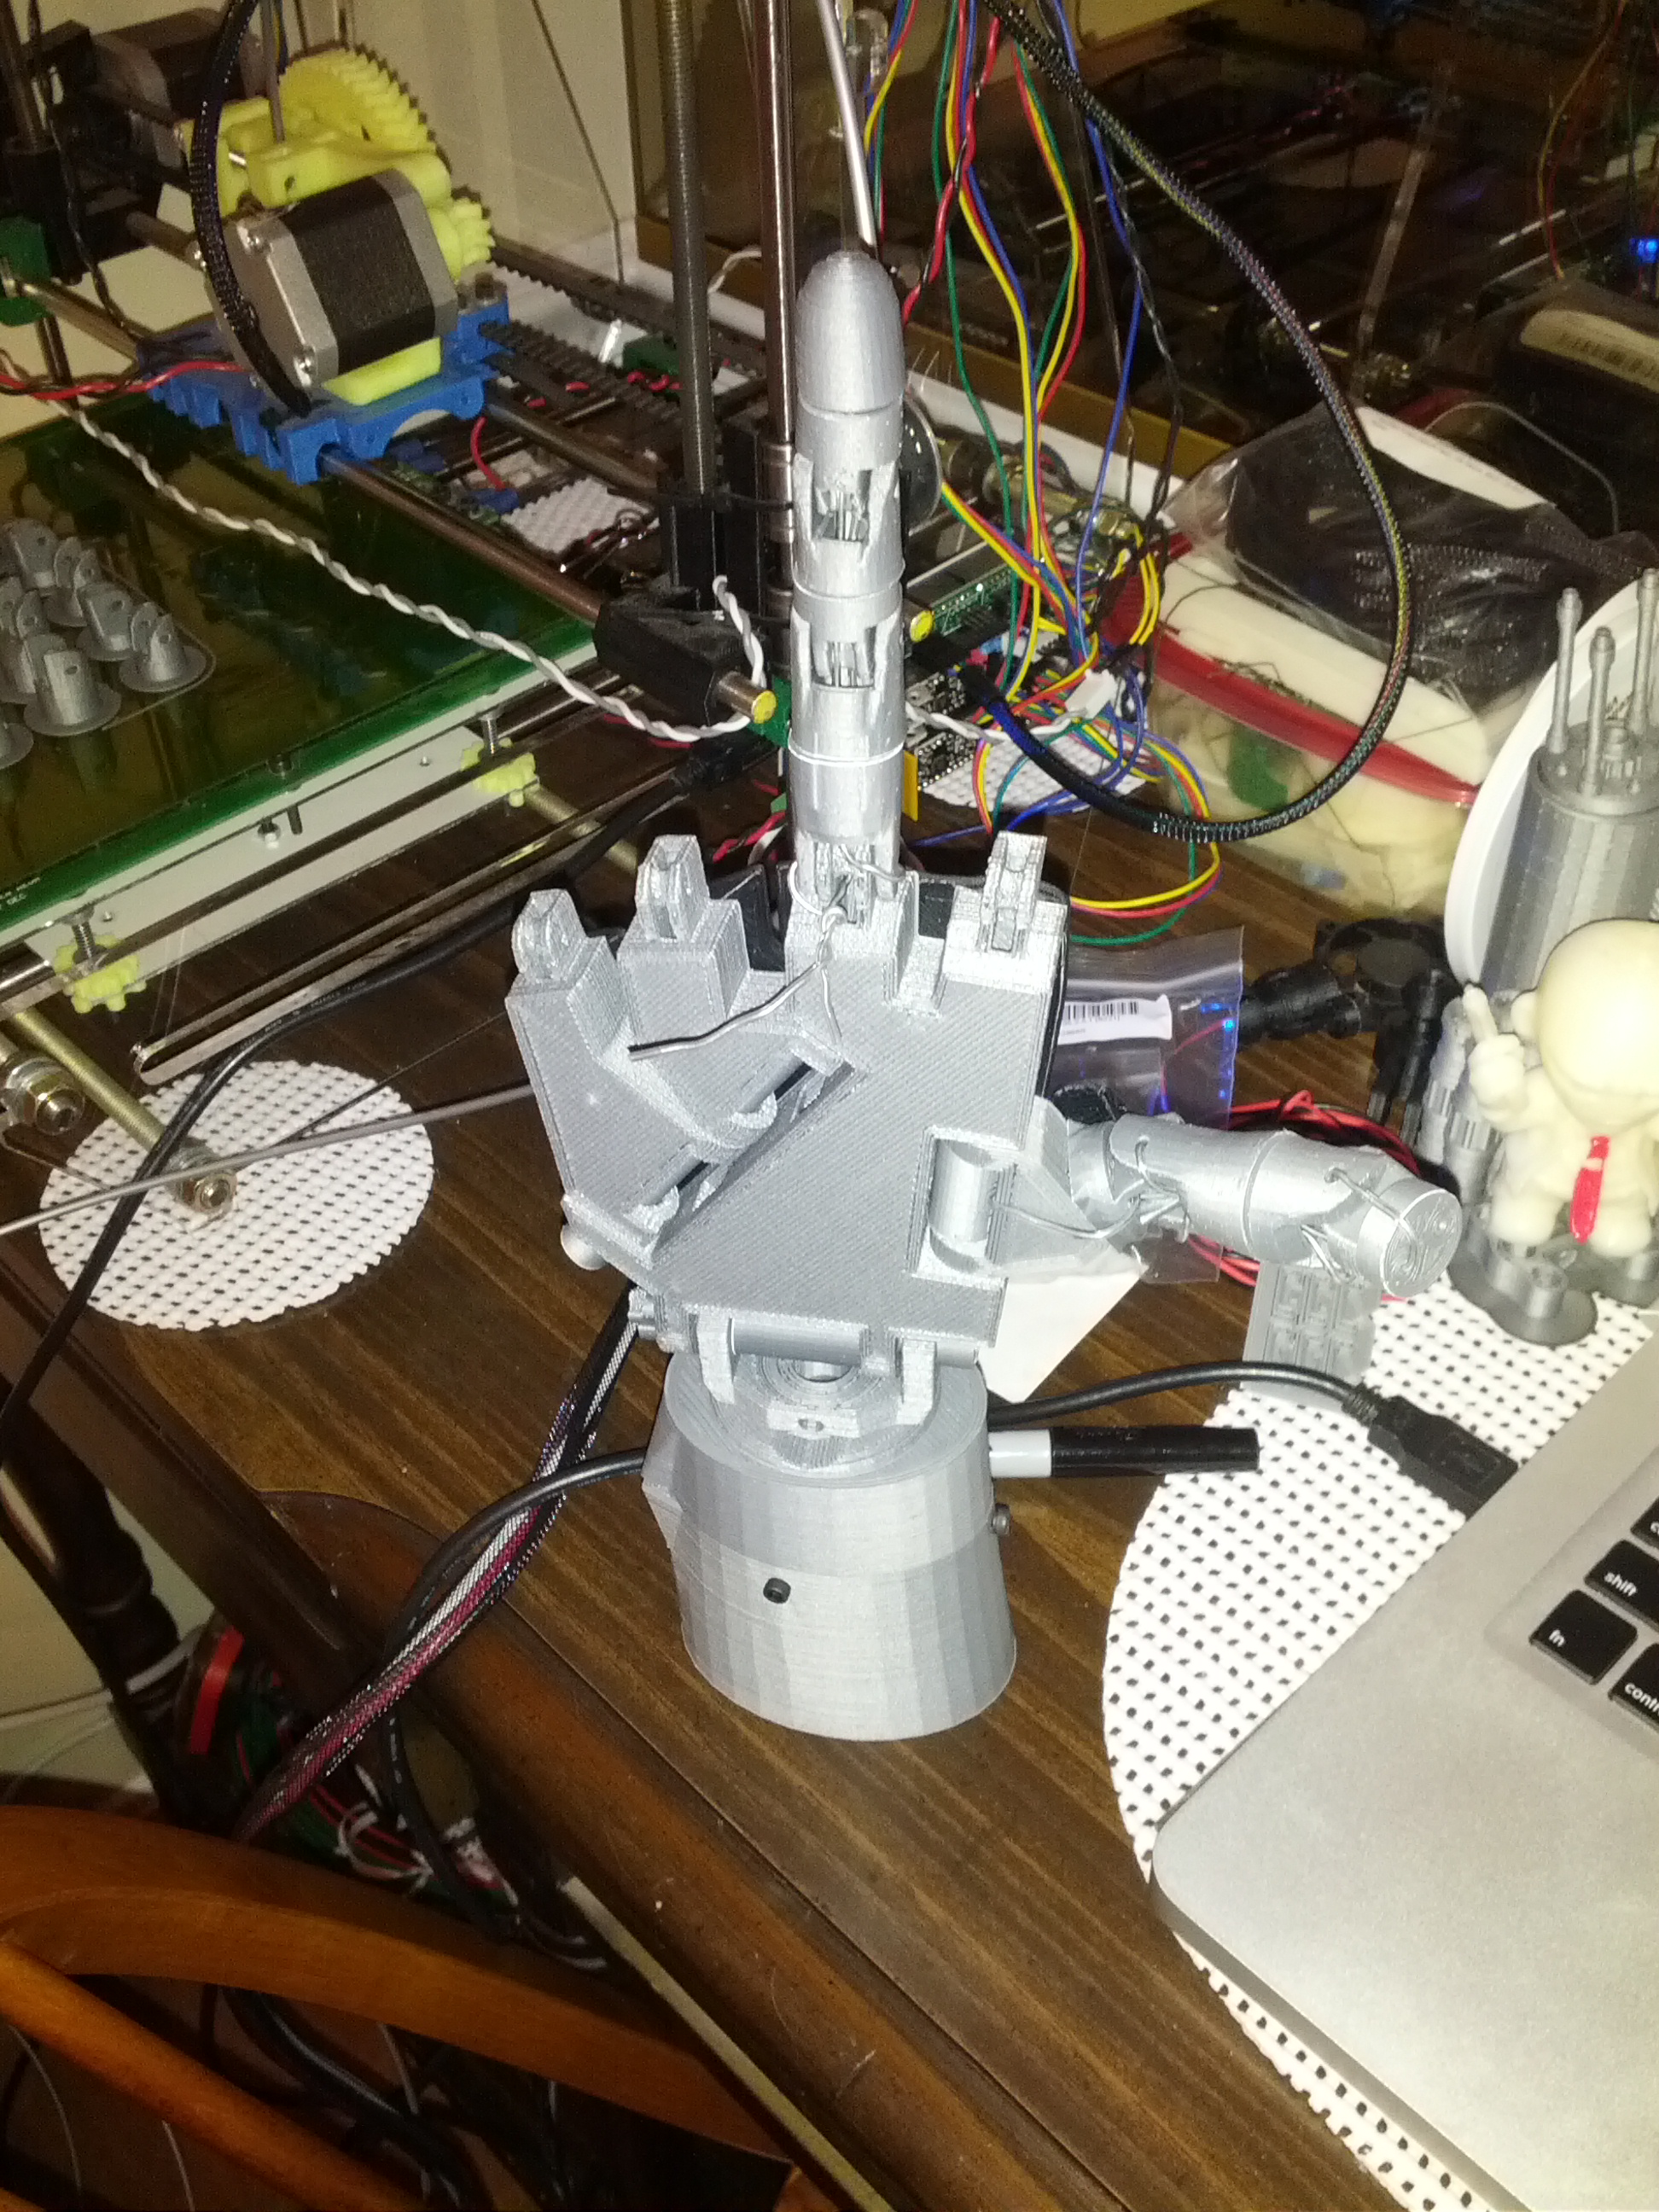
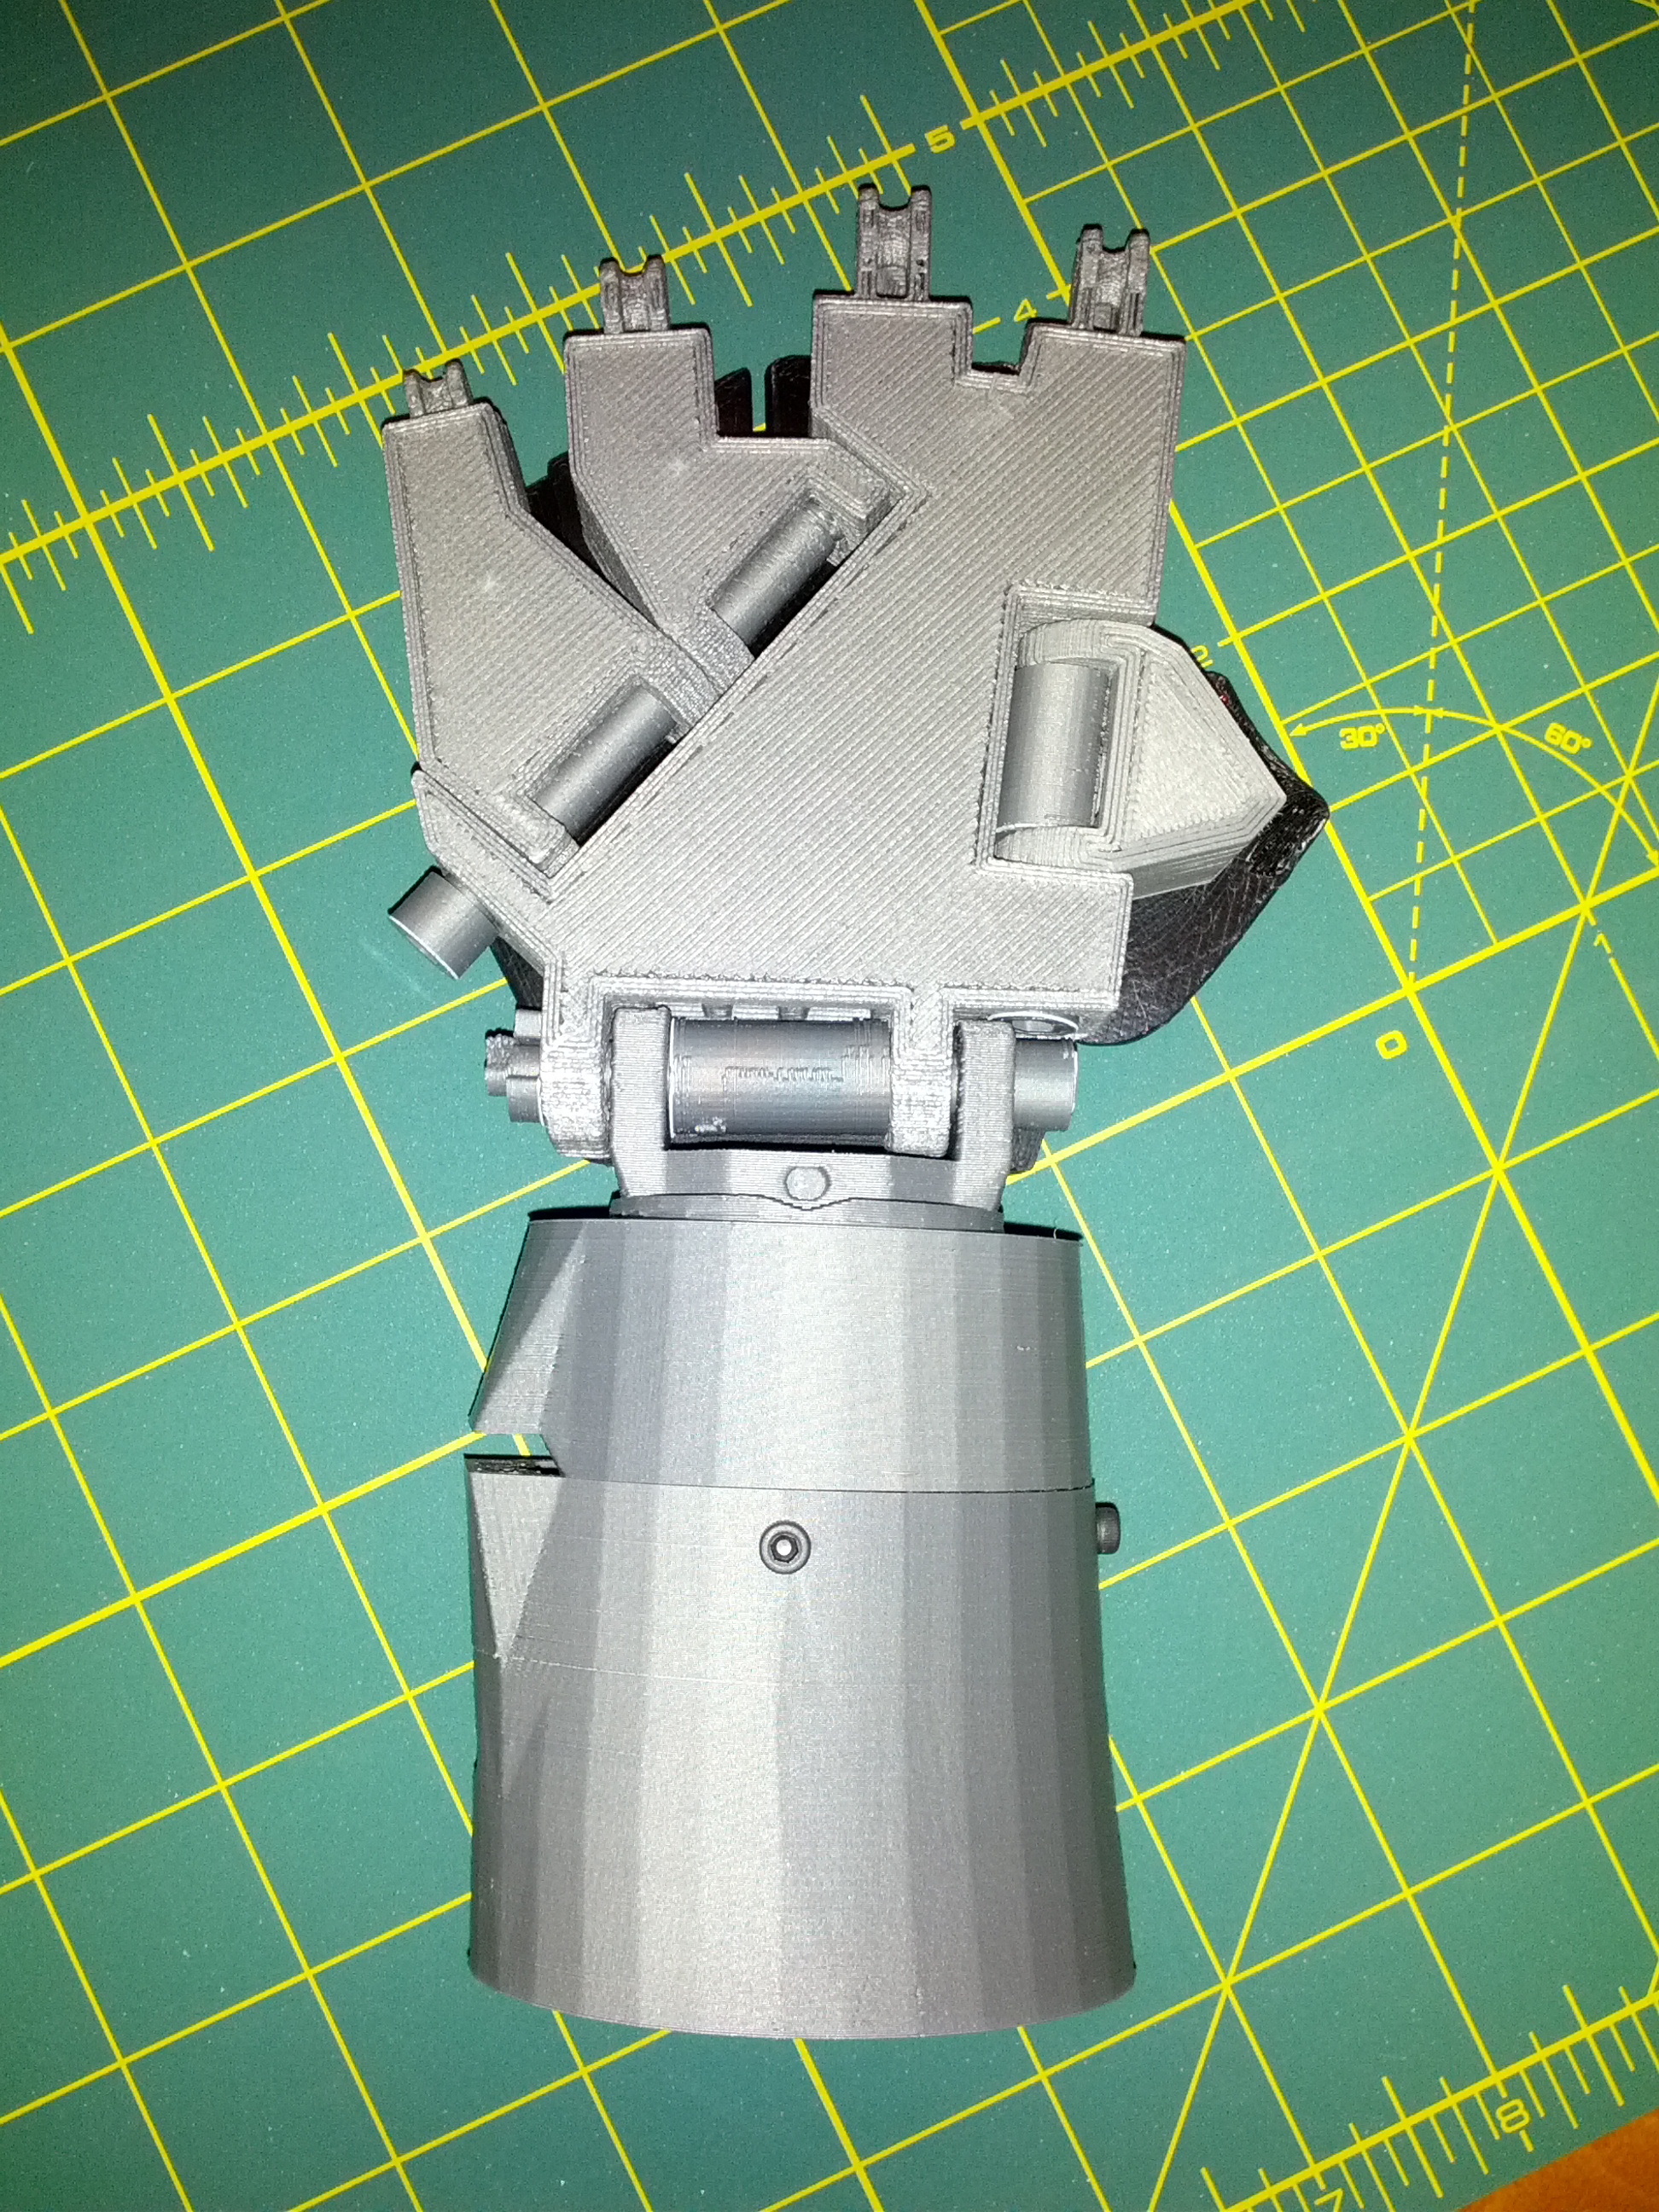
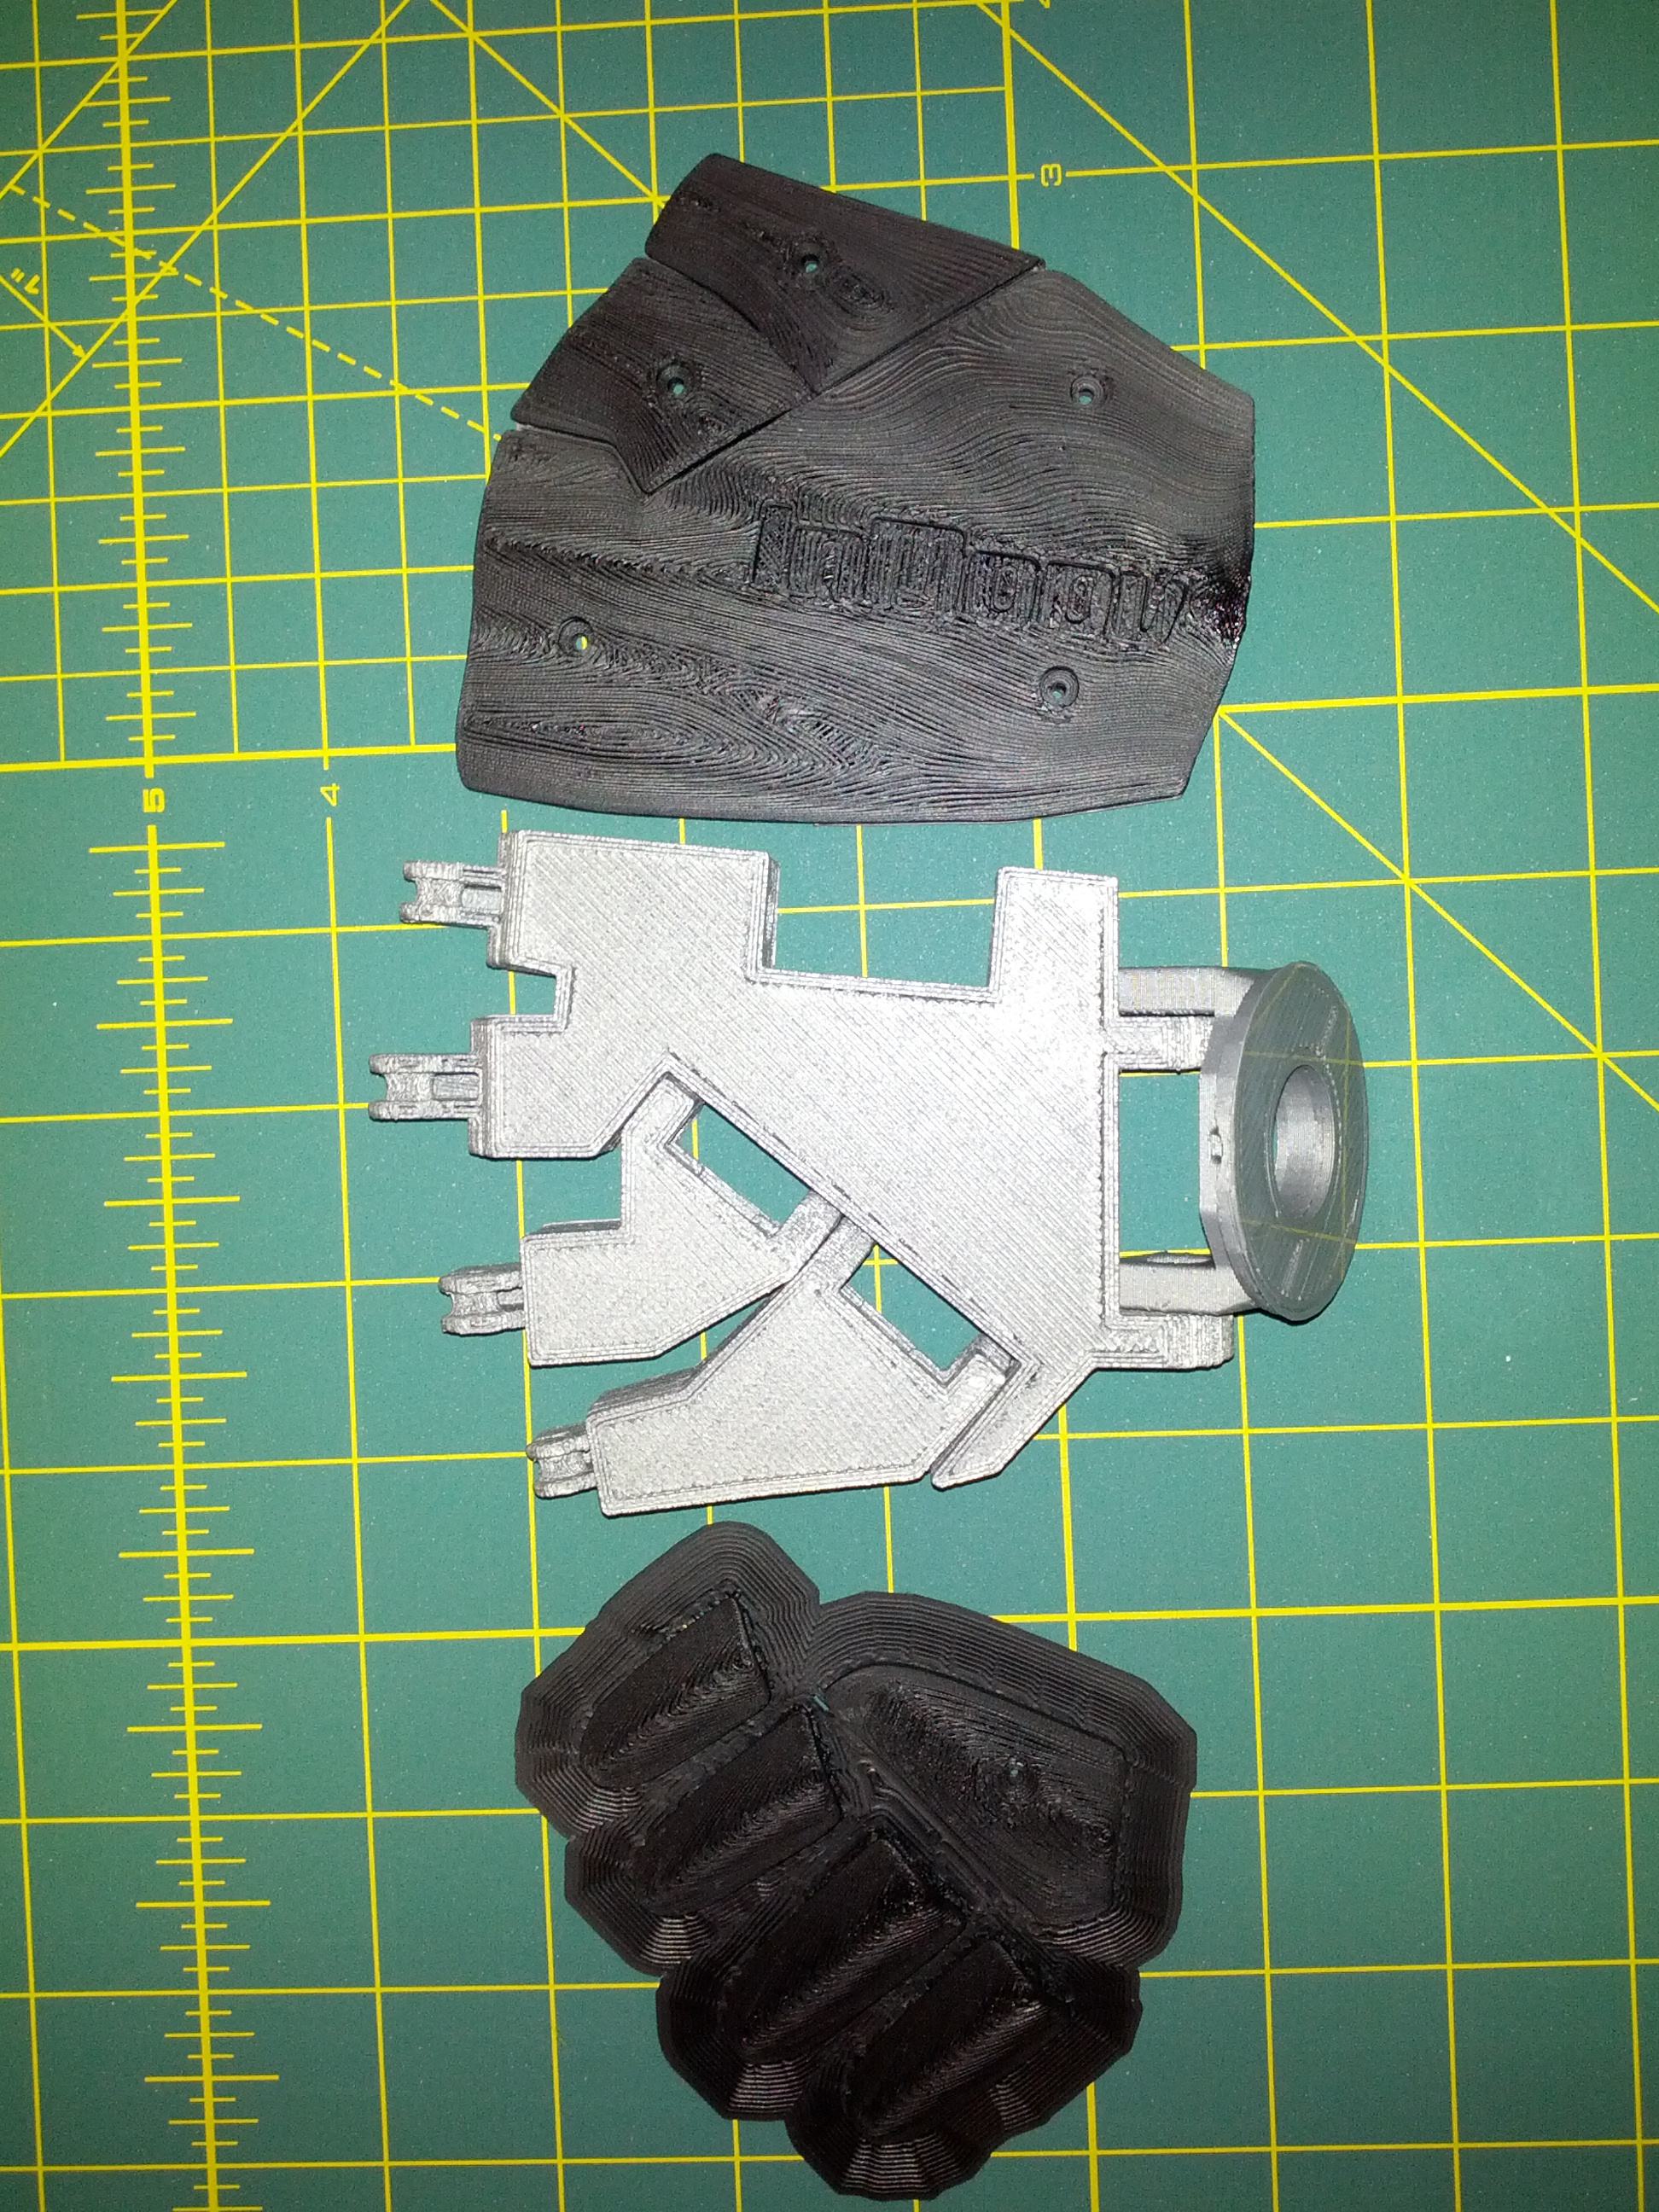
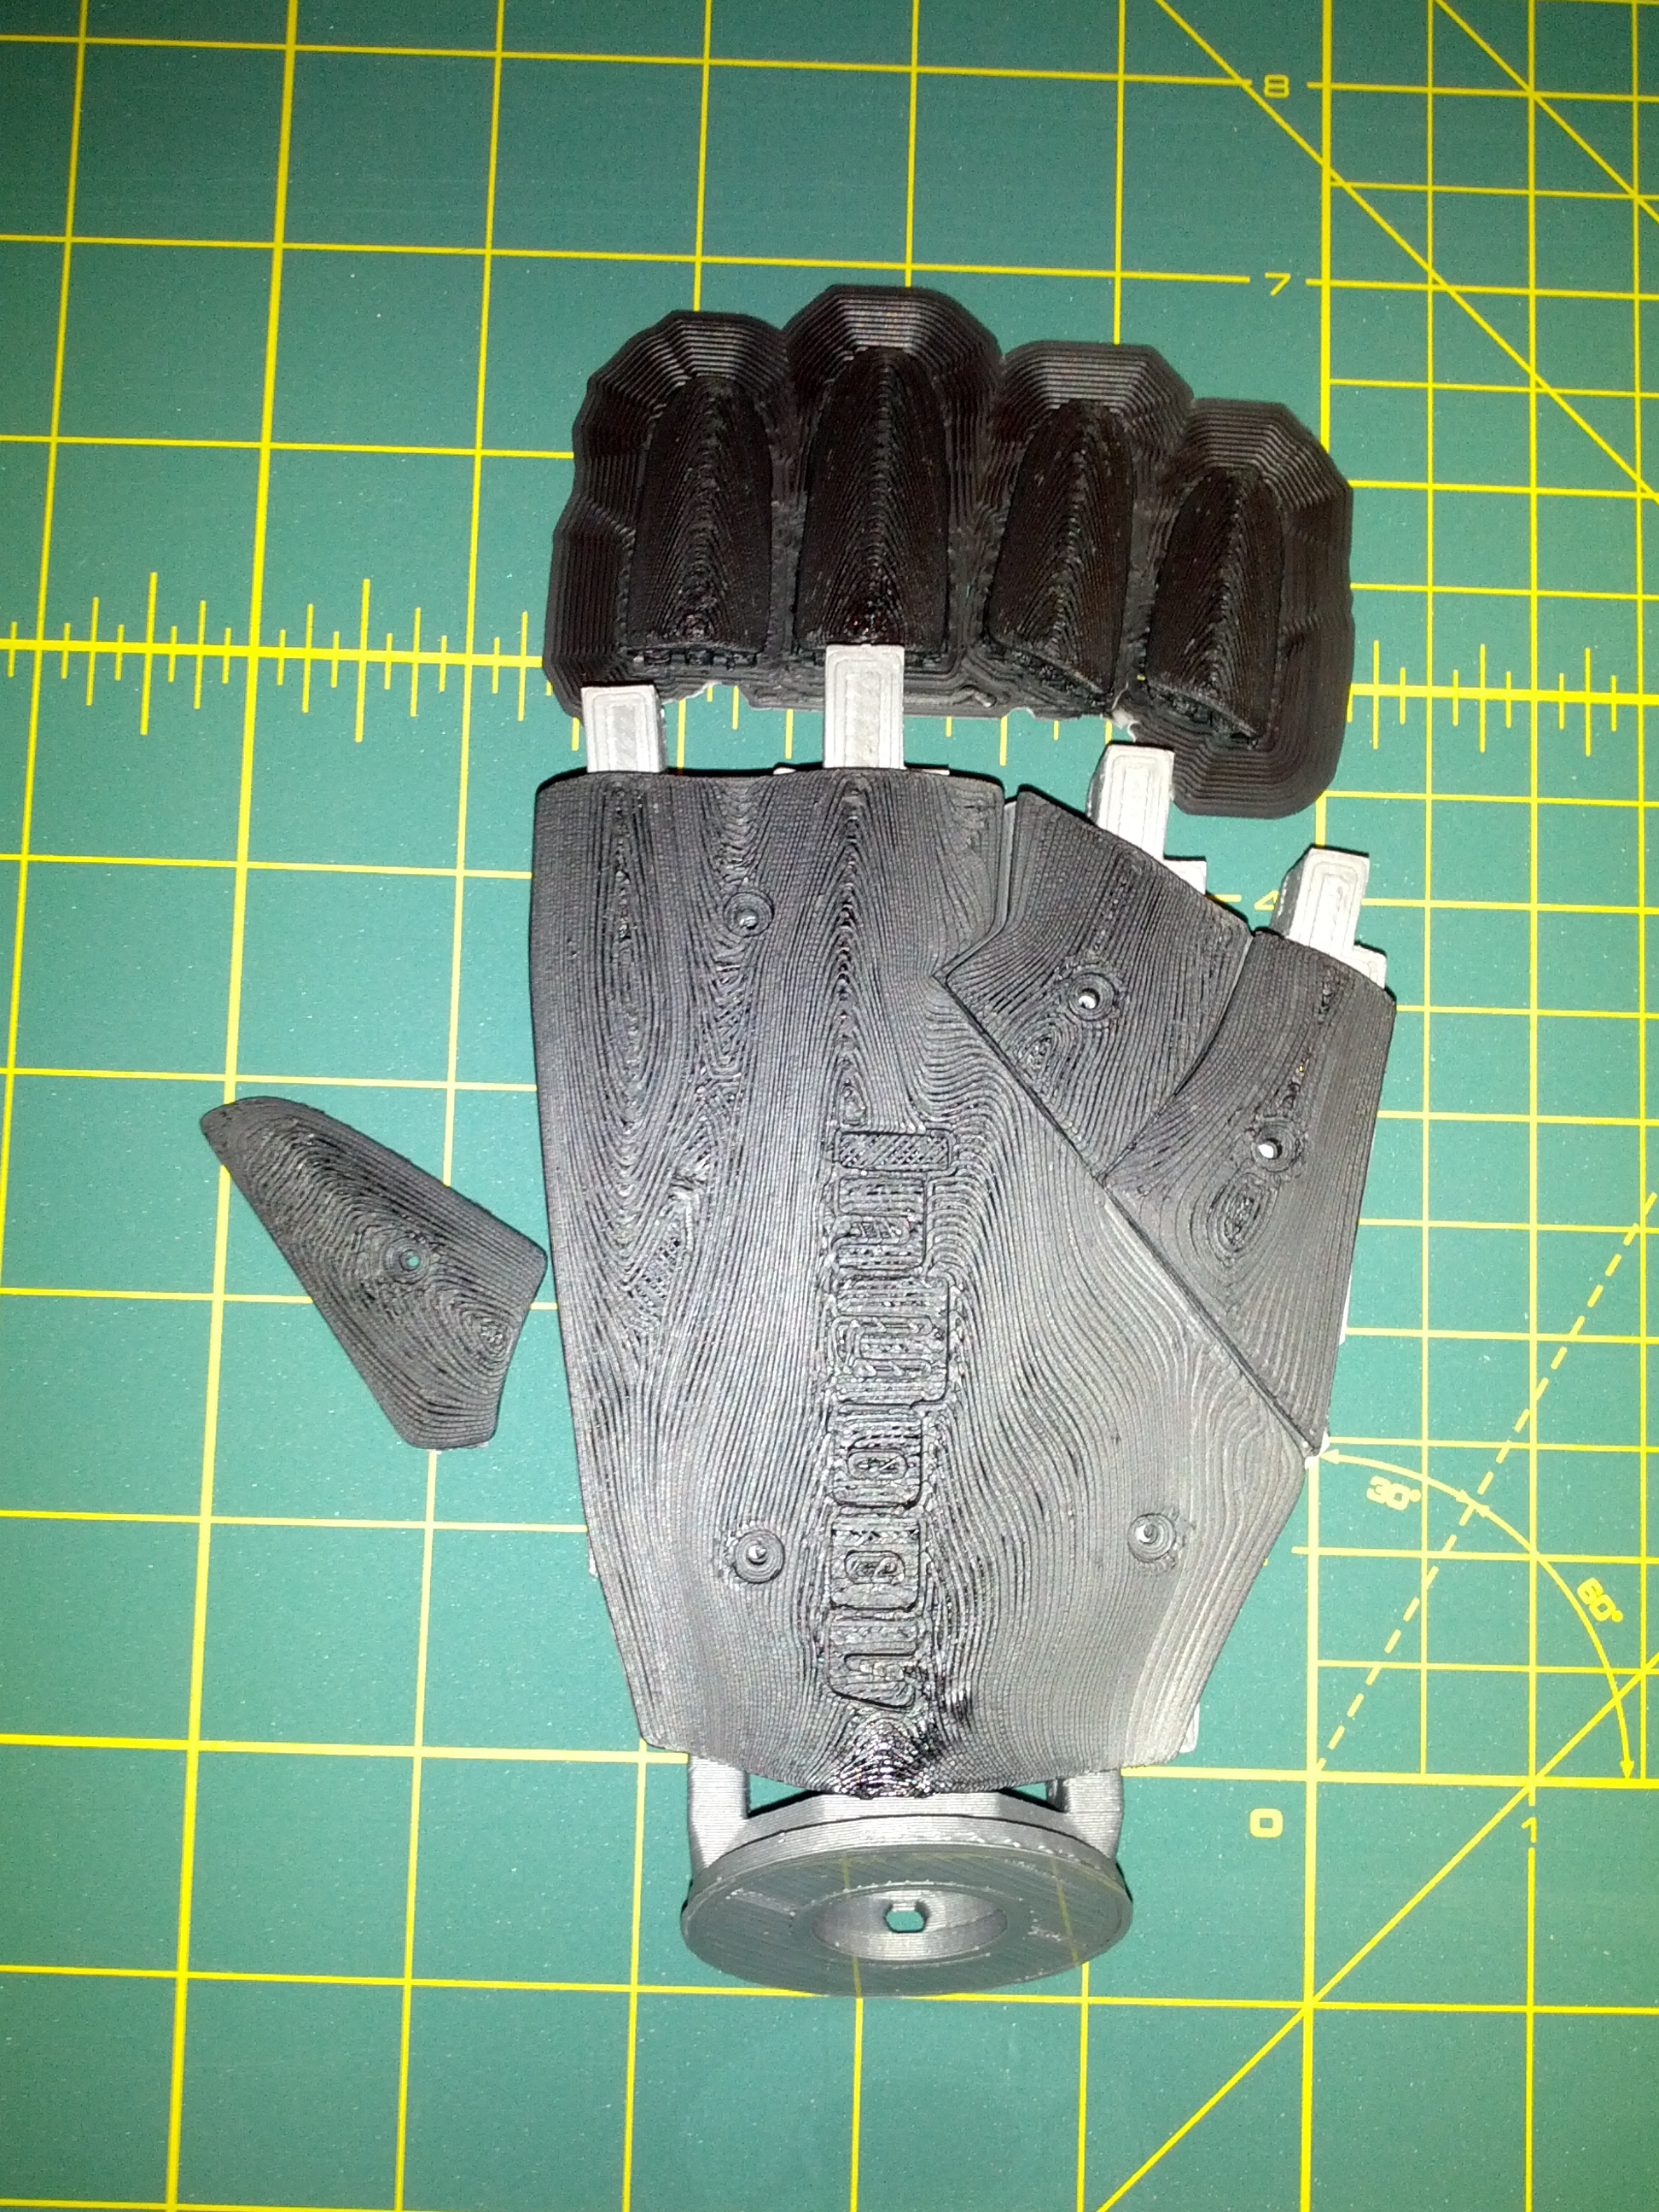
I've loosely attached part of the forearm to the bicep and partially fitted the RotGear into the main body of the bicep. I still need to do a bit more sanding to RotGear or the bicep to get it to fit smoothly and turn where it needs to. Both EarV0 are printed and on the table. You can't see it here but I also installed the proper lower back part of the skull. More of the chest plates have been printed and fitted. There are some cracks that need to be "buffed out". I also need to take care of InMoov's cleft lip. Now that I finished mounting the eye mechanism to the 9g servo horns I won't have to take the face apart as much so I can probably do that now. I fired up the camera on my computer while it was mounted in the head and the eye opening doesn't block the view too much. I'll have to look at the view a bit more in the extreme corners of view and see if the camera position needs to be tweaked. I also tried to put two standard MG996R servos in the "red mohawk" so I could get the jaw and Head rotation working but the adaptor for fitting a standard servo in the big 805bb opening didn't line my servo up correctly. I need the servo to be shifted back about 4mm more so that the servo spline lines up with the horn AND the mounting screw holes for the "red mohawk" line up at the same time. Luckily the adaptor is an easy part to build in OpenSCAD. I need to get some M8 bolts made/bought for mounting the arm. I have a short piece of M8 threaded rod holding the bicep actuator to the forearm but it just barely does the job and will wiggle out. It was an extra for building an extruder so it's not long enough to put nuts on the end of. I still need to dissect my 805BB servos and get them installed and print pot holders for them. The finger tendons need to be restrung and properly tensioned. Wiring needs to be done after everything is mounted up and then I can start smoke testing things. I'm just glad the MRL/InMoov Nation is working on the software while I try to cobble the hardware together. That's the nice thing about us all working with the same hardware and software platform. Once my InMoov is alive I can upload that which other InMoovs have already learned like bhouston's great scripts.
----------------------------------------------------------------------------------------------
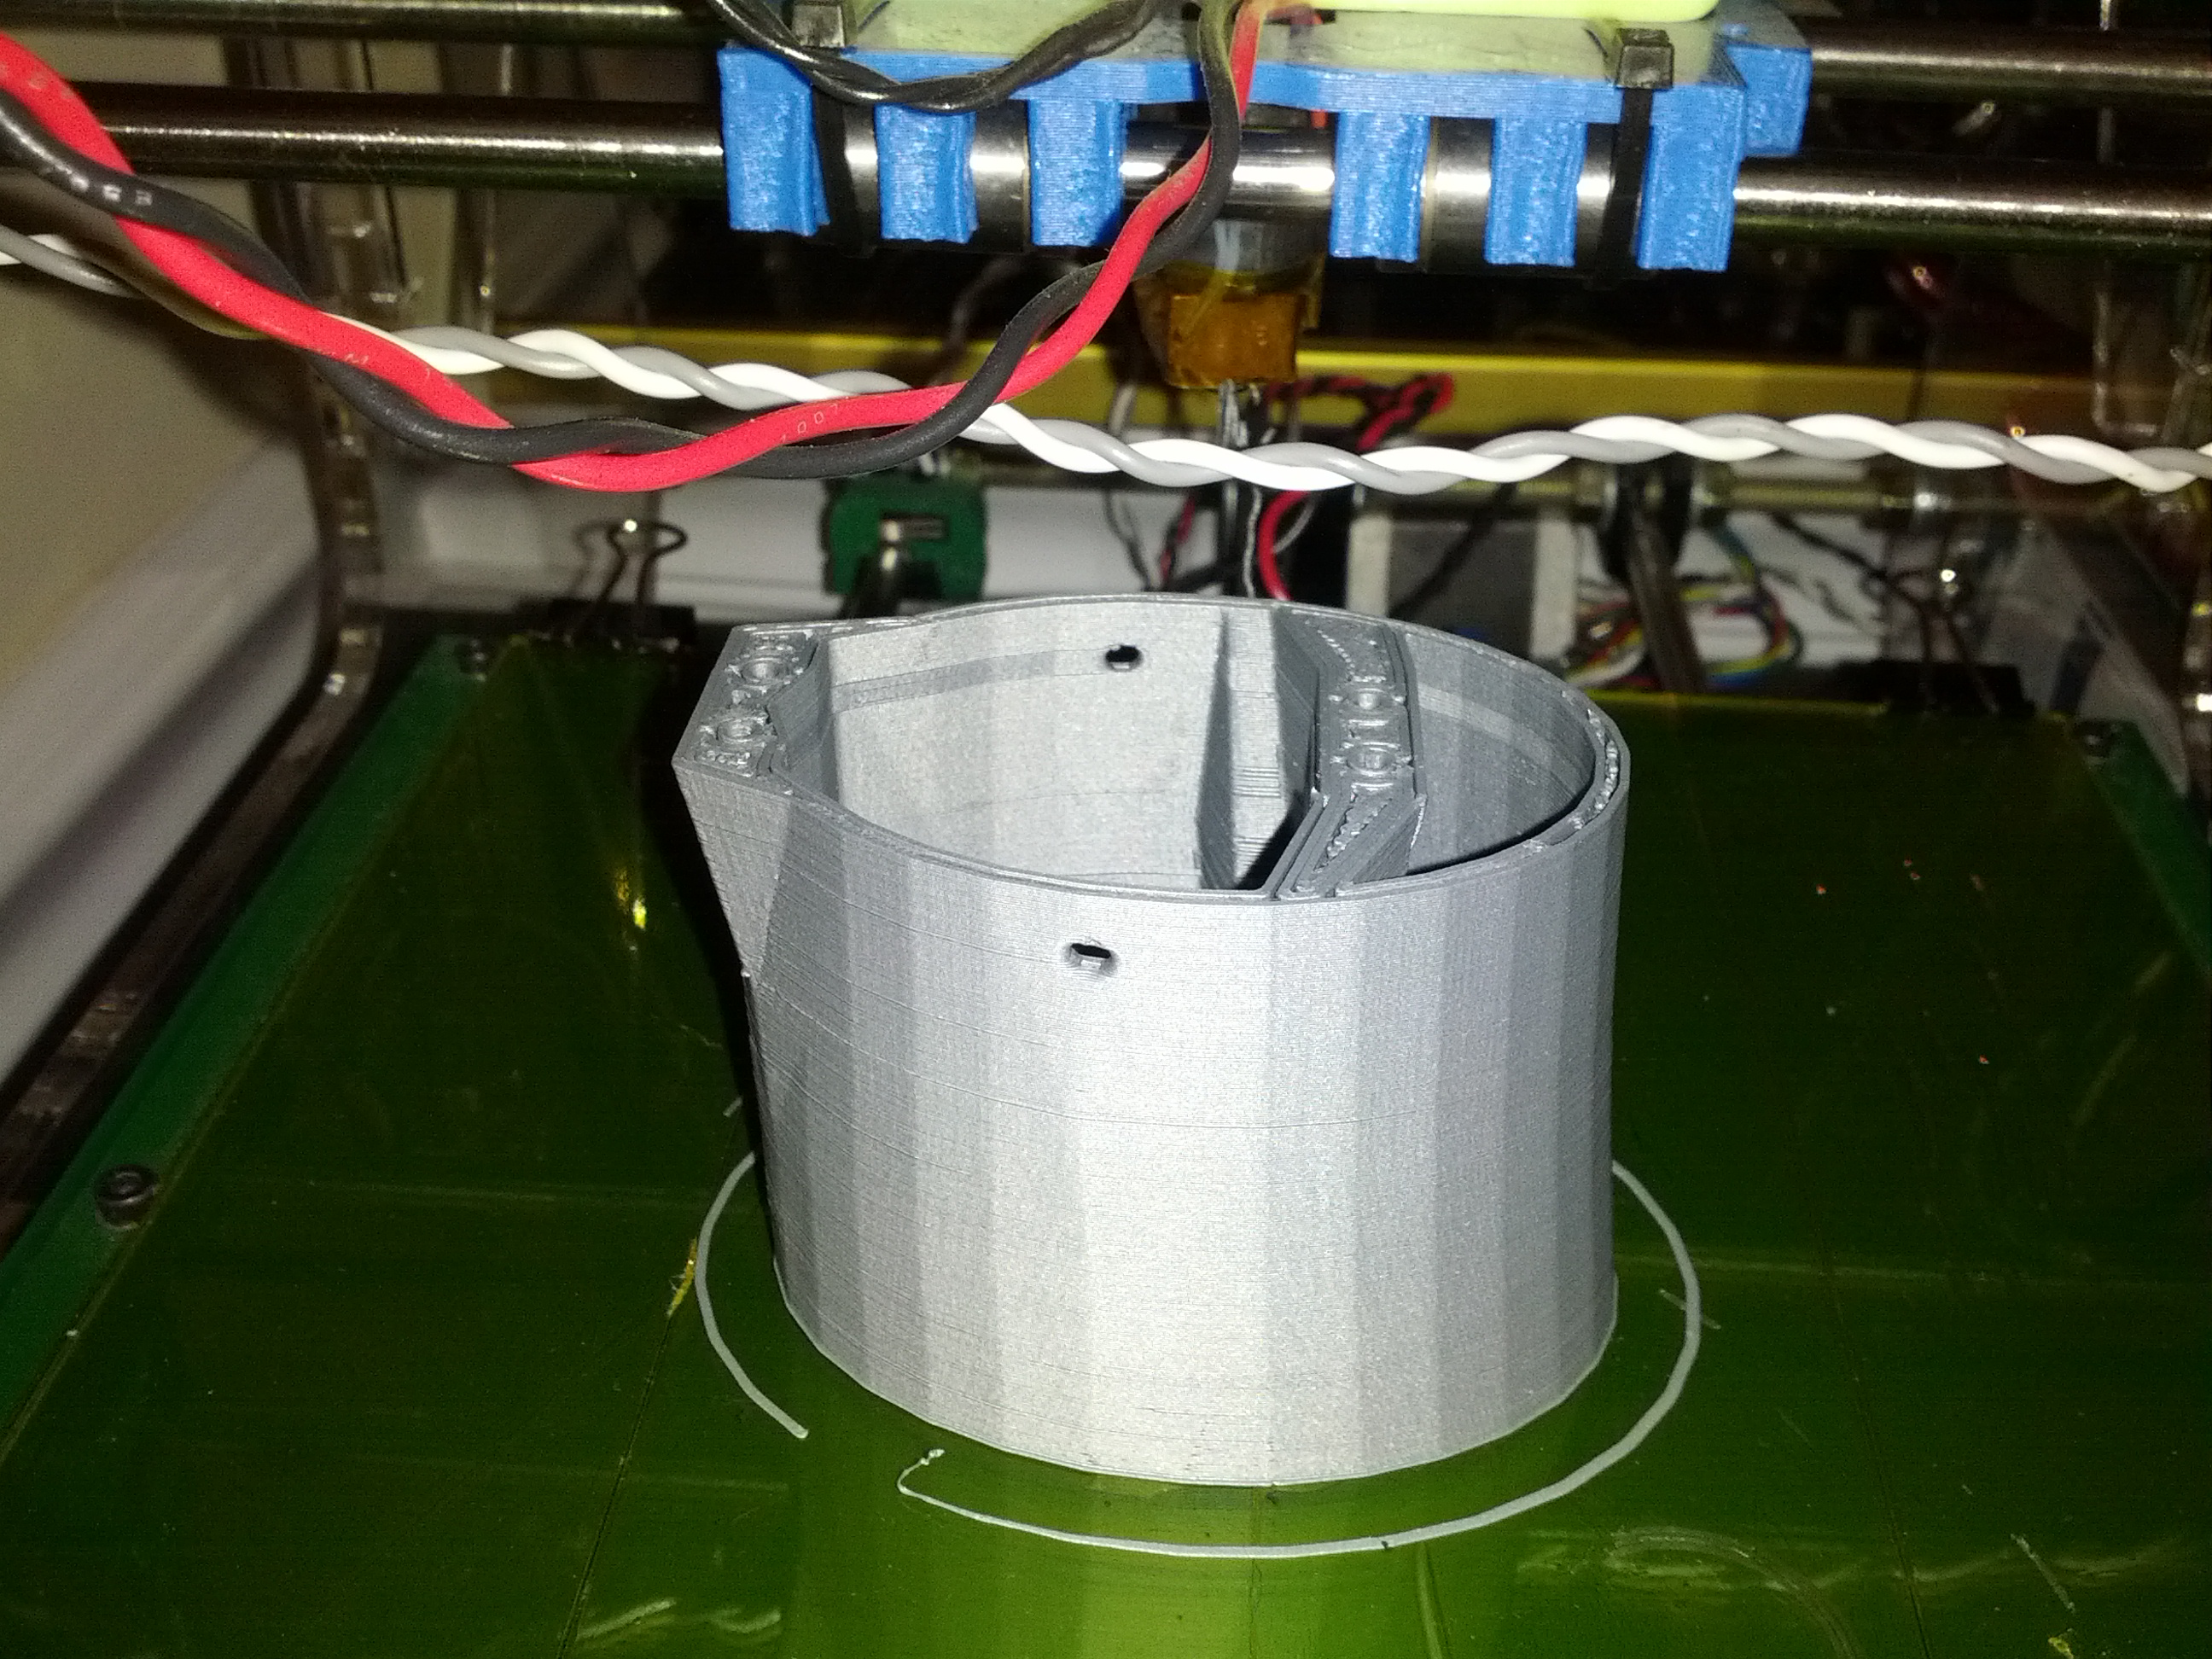
Update 2014-03-06
The bicep is almost complete. I just need to print the piston base, the rotation worm, the pot holder, and the two white covers. I should be able to get all but the covers printed tonight easily. While I have black abs in the printer I'll also print the InMoov name plates for the chest. I also need to print the pot holder for the shoulder I think. So close but I need to get cracking on electronics because I'm only 10 days away from Maker Faire Nova.
----------------------------------------------------------------------------------------
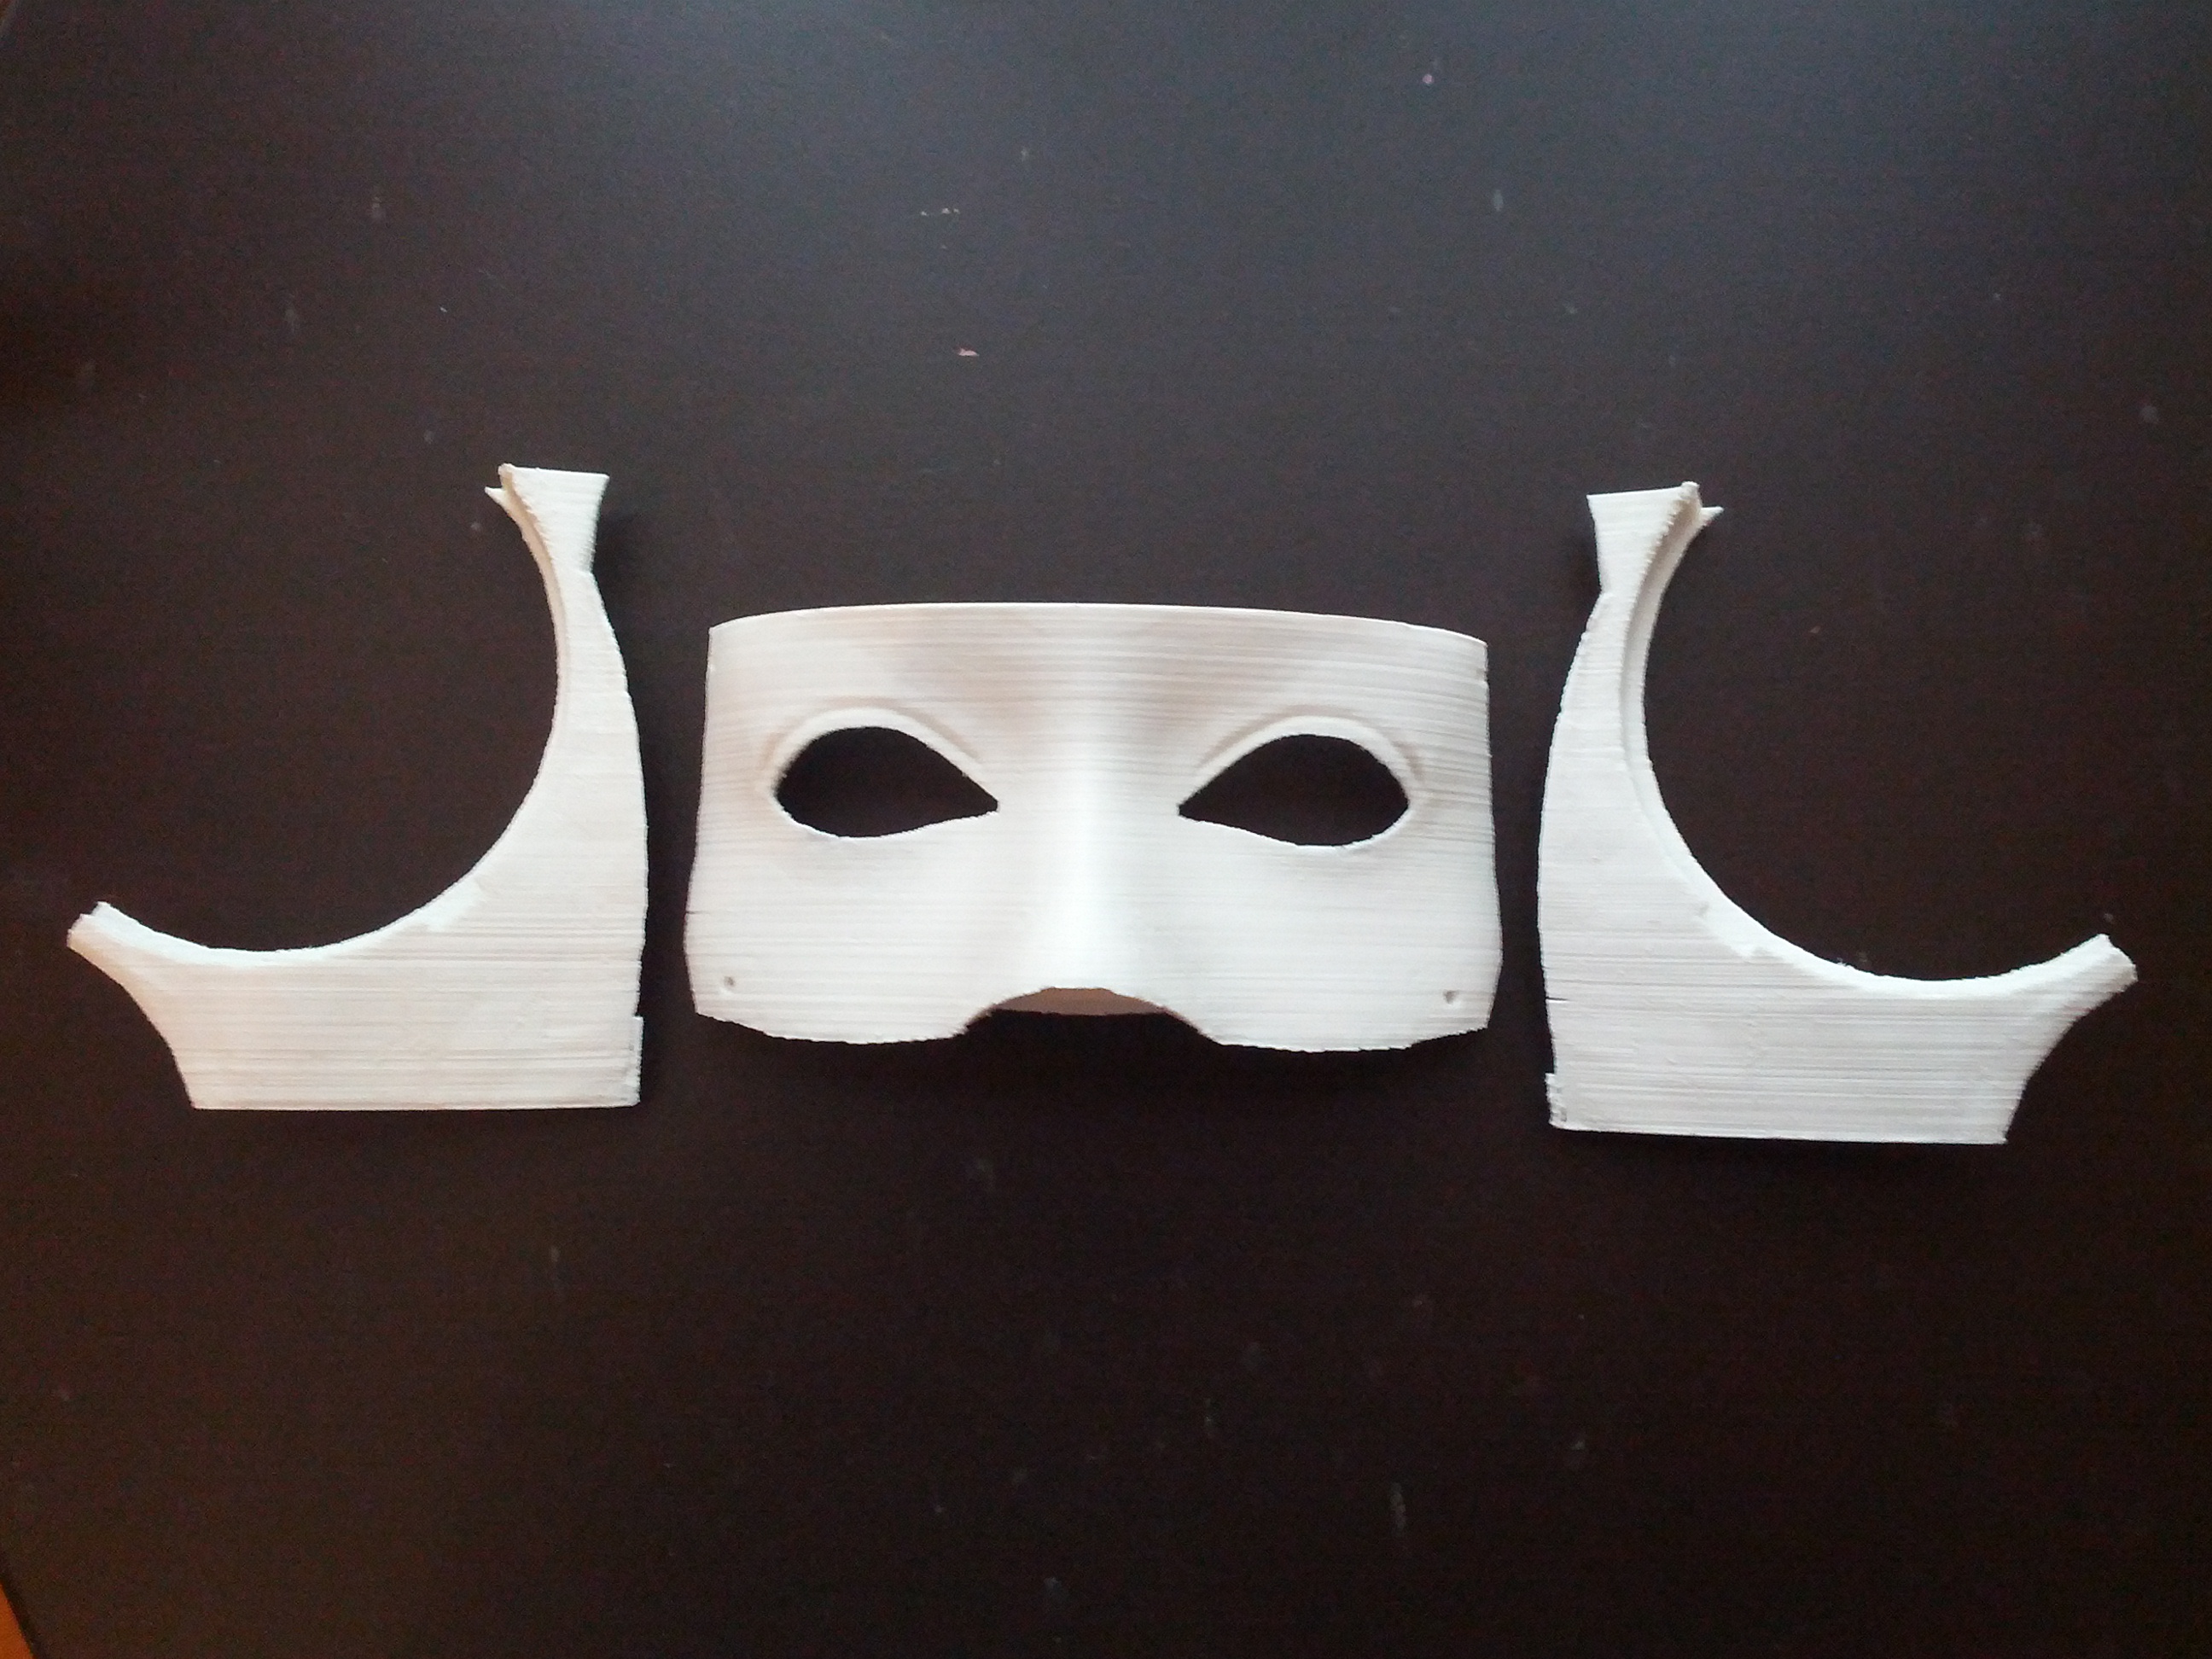
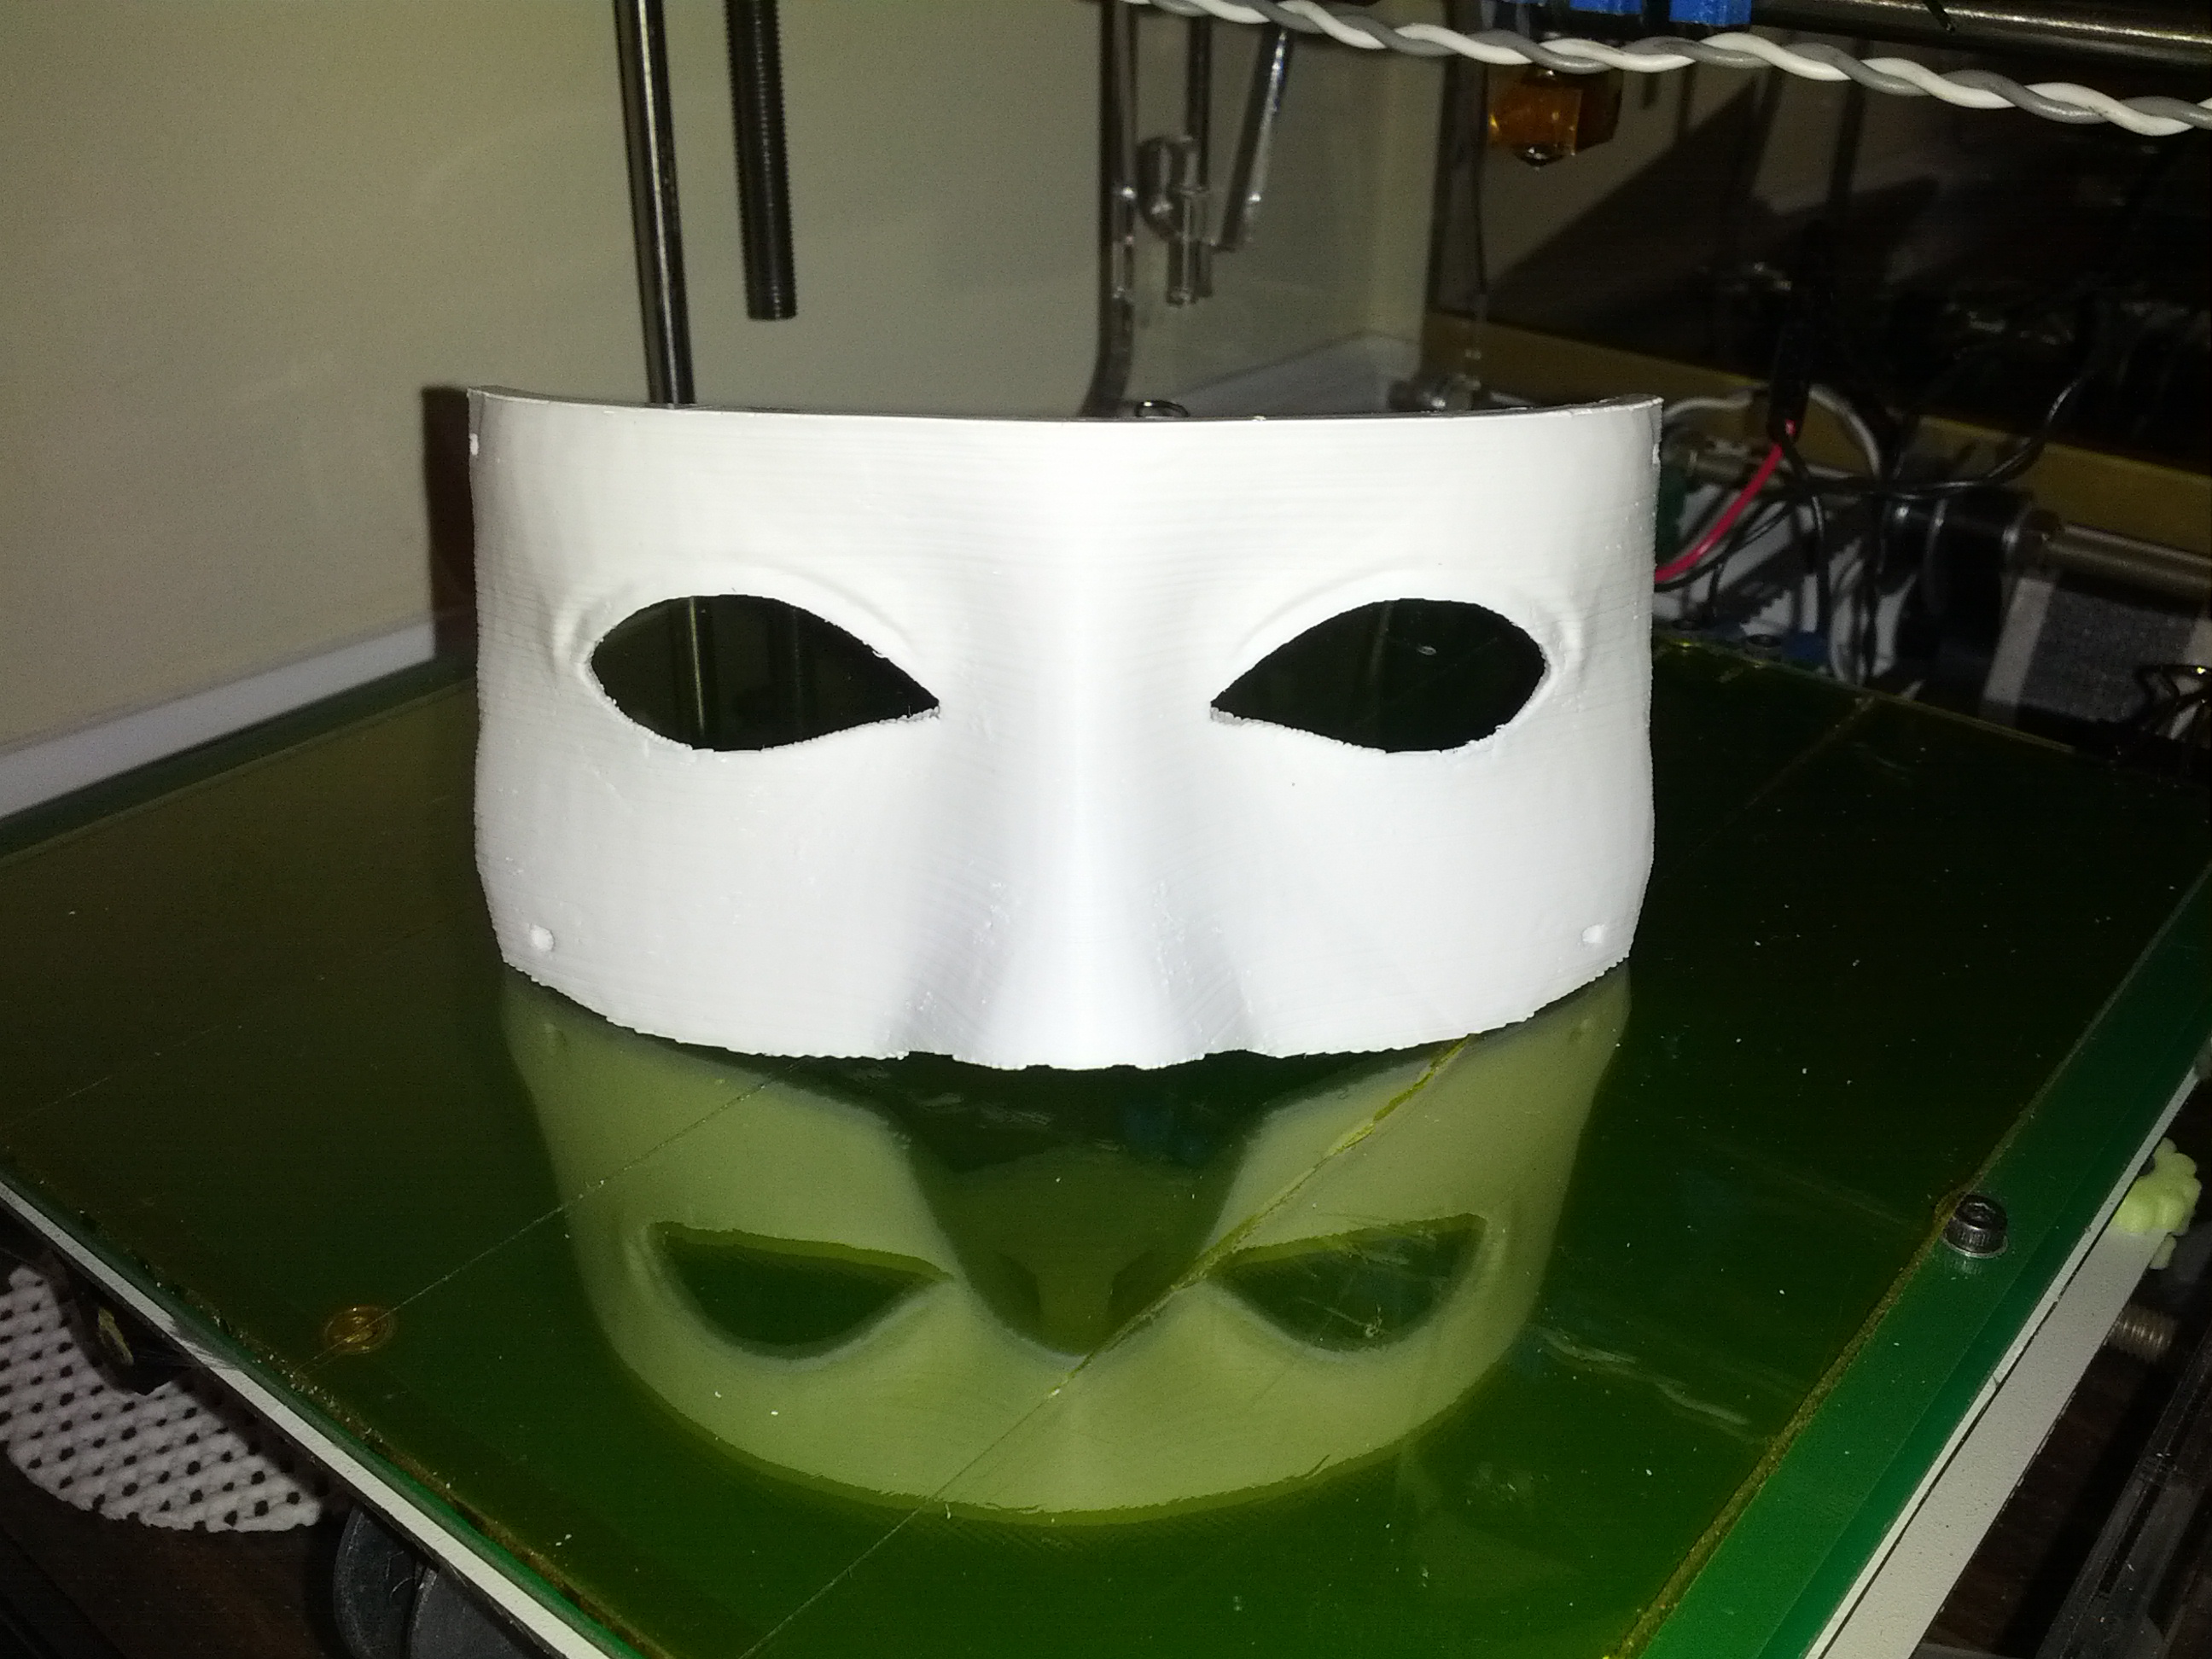
Update 2014-03-03
I reprinted the TopMouth part in my new white ABS and it's not the same as the EyeGlass and chin plastic. So which side should I go with. The new white on the left or the natural color ABS on the right side?
Meanwhile I've been printing more bicep parts today. It's getting to be time to open one of my 805BB to see what shape pots are in it.
----------------------------------------------------------------------------------------
Update 2014-03-01
Printing up a storm lately. The "white" shoulder parts were printed with my 0.5/3mm hotend right before the heating resistor started getting intermittent probably due to a failing solder joint. After that I switched over to my new .35/1.75mm hotend setup and printed the black parts and the two white parts of the face in the top corners. You'll notice that they are whiter than the natural color ABS that the shoulder parts are printed with but it so turns out that they're not as white as the eye and chin parts I printed for the face before. :( The eyes and chin were Ulitmachine white abs. The two halves of the nose/top mount are white abs from Microcenter, which although whiter than natural abs, is not as white as the other.
The three big black part of the bicep on the bottom row were all printed today. I did the left one between breakfast and lunch. The middle after lunch while I ran some errands, and the right one during dinner and putting the kids to bed. Right now I'm printing I'm printing 1 of 2 higharmsideV1 that I'll need for the right bicep. Unfortunately that will be the last print of the day. Tomorrow I'll be busy with family obligations so I won't get any printing done until maybe at night just before bed. I still don't trust my printer enough to run overnight while we sleep or else I would load it up with long prints before tucking myself in and have new parts waiting for me in the morning like Xmas. :)
----------------------------------------------------------------
Update 2014-02-28
Here's Looking at you!
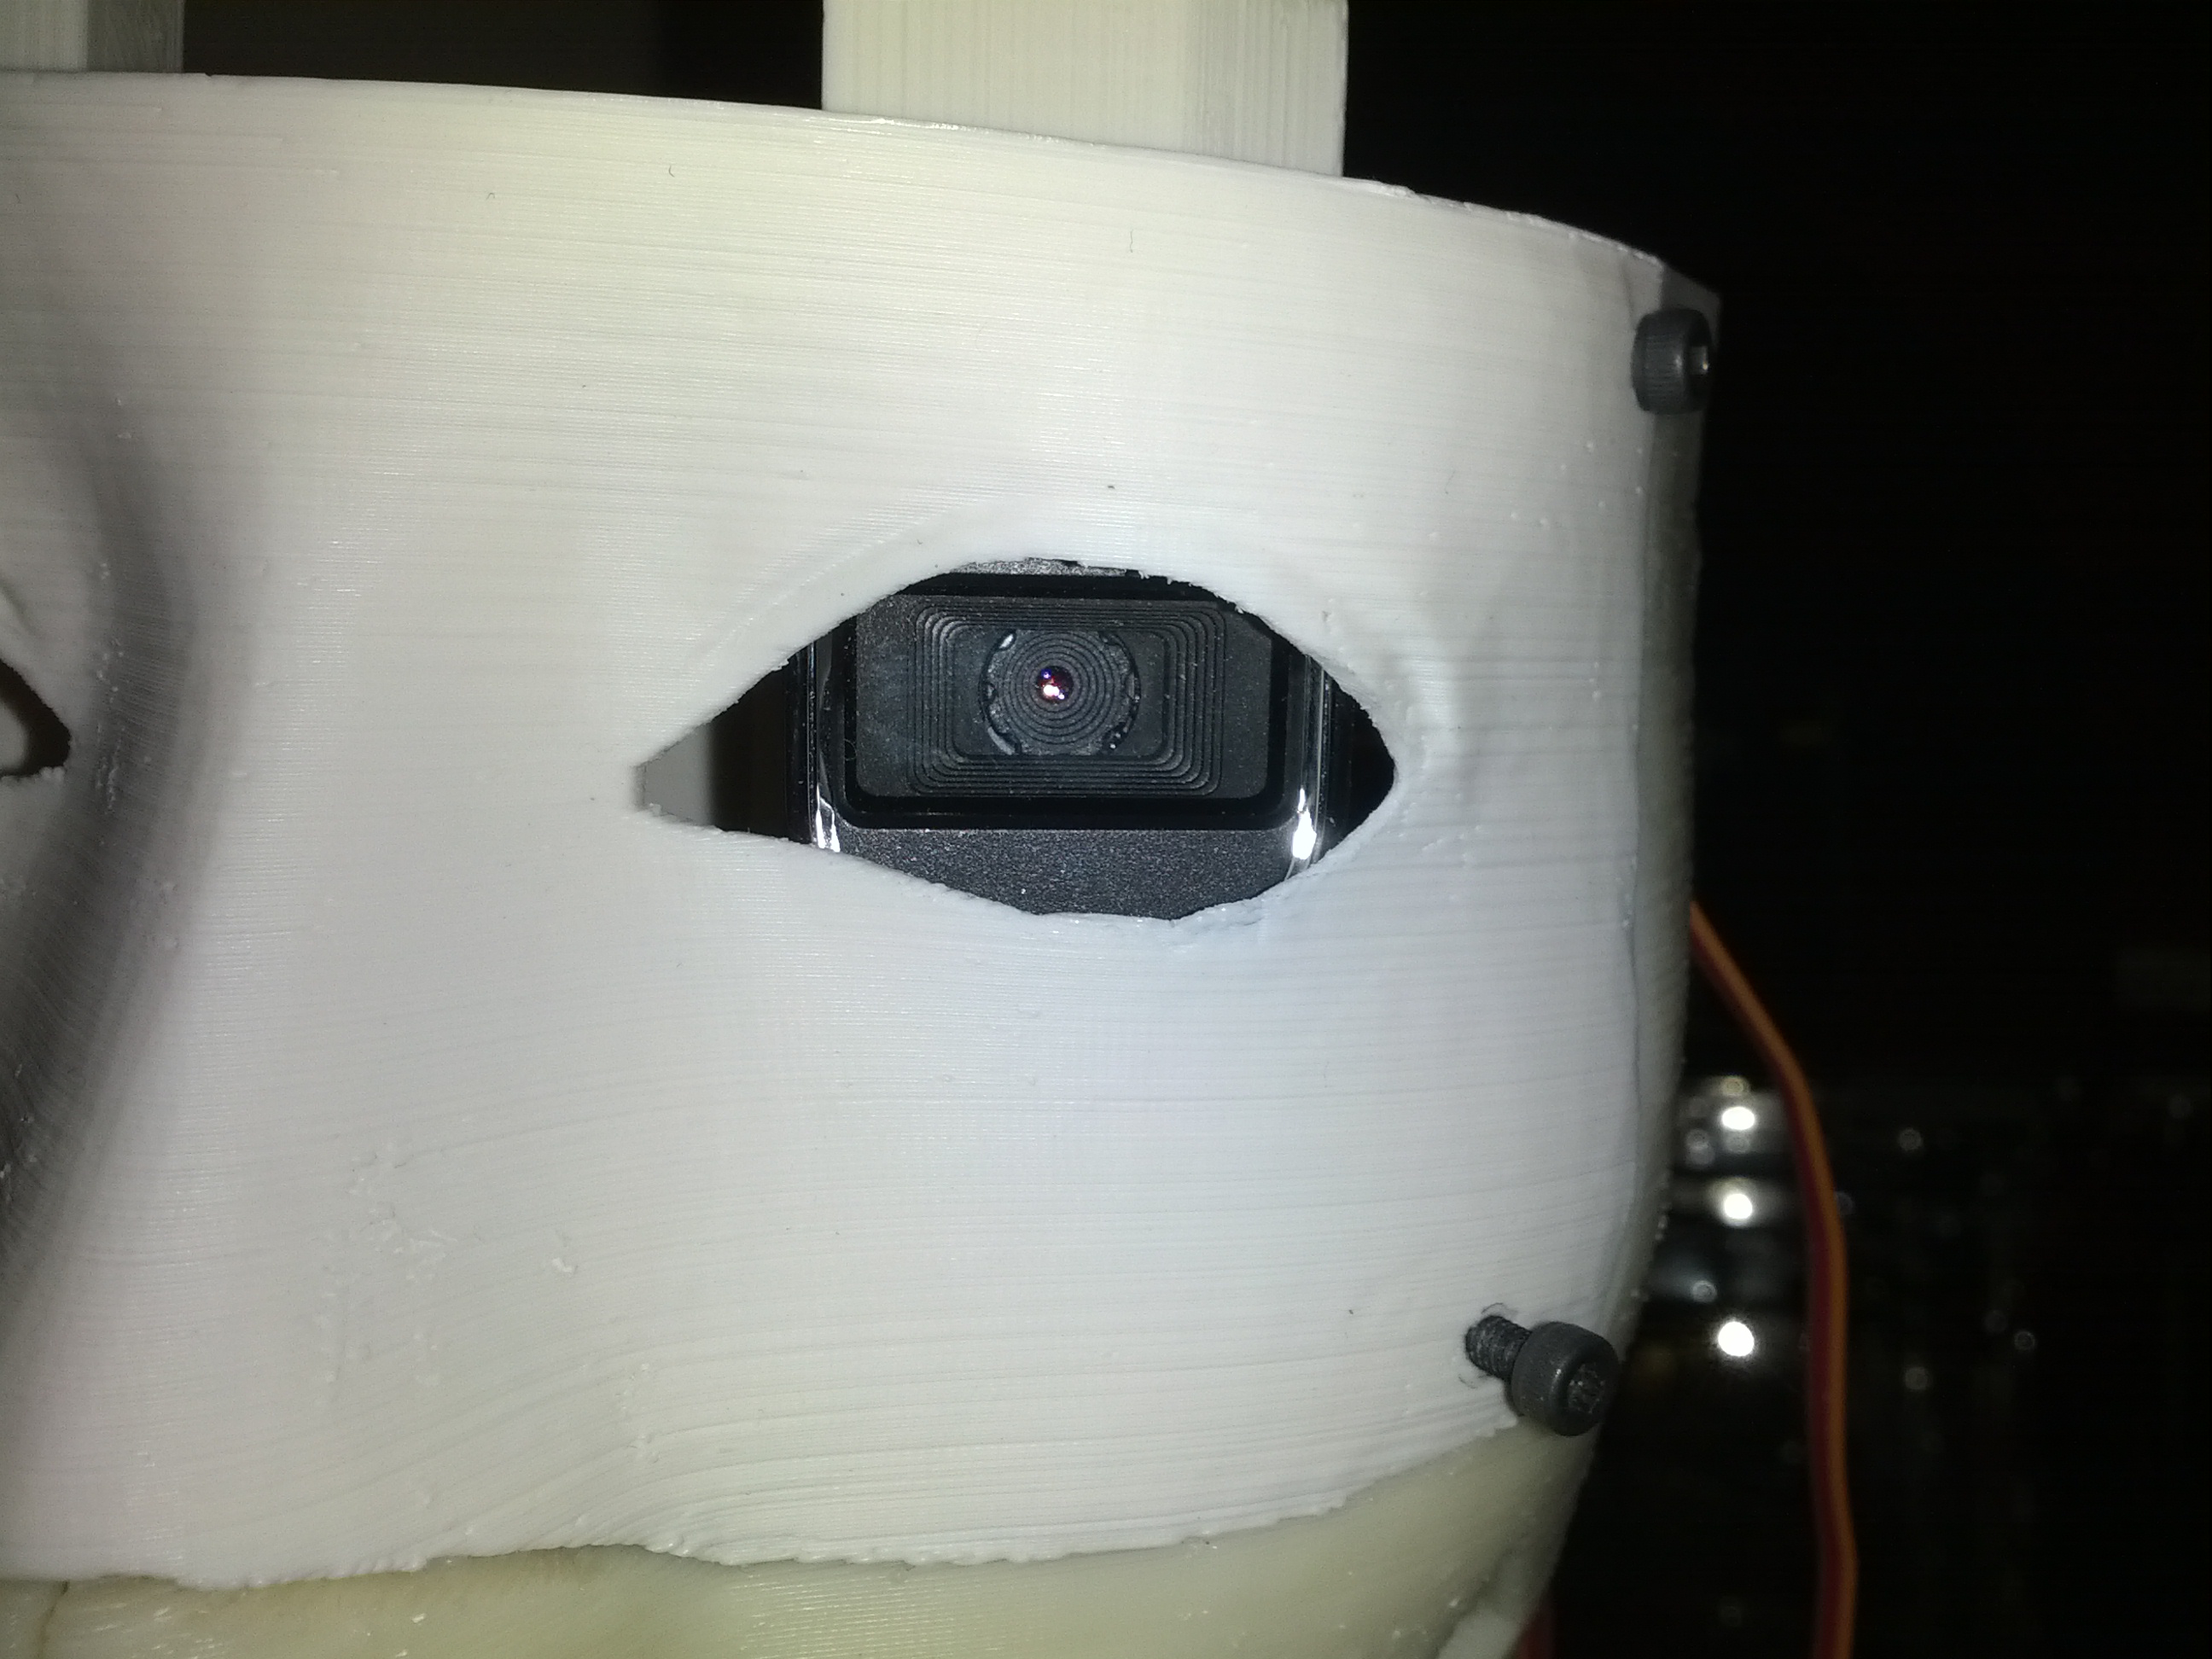
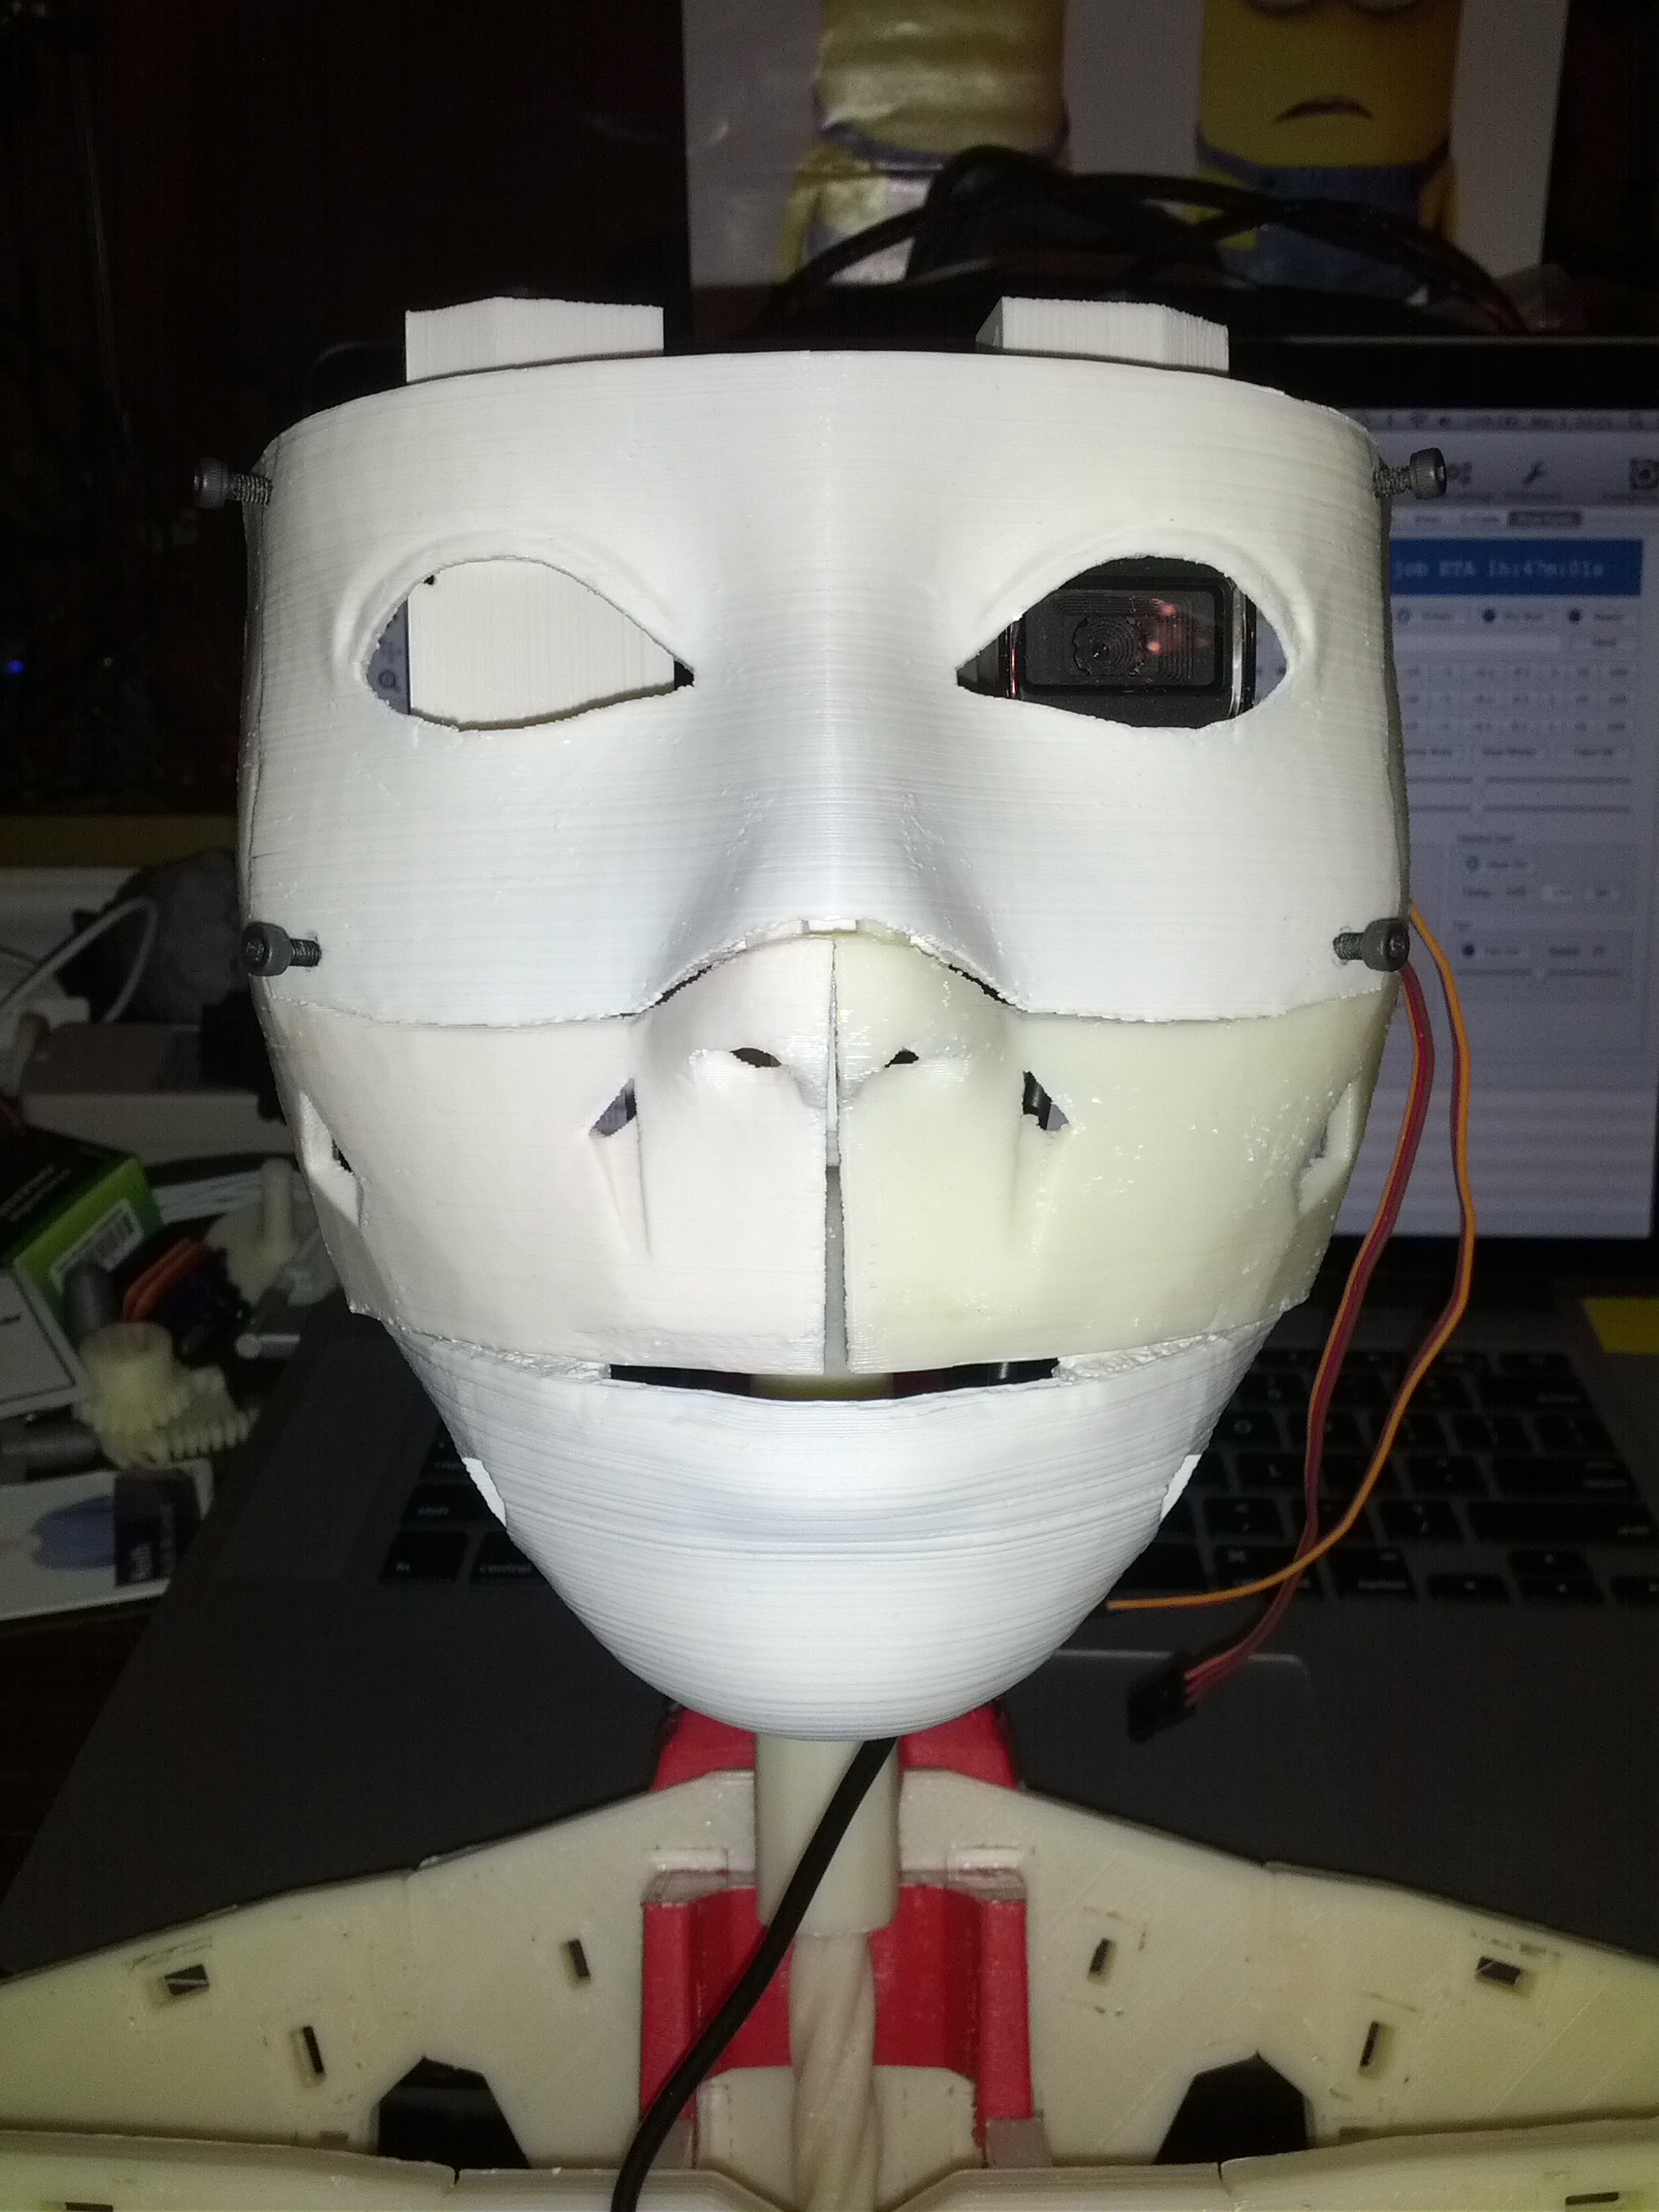
I decided to go with a Microsoft Lifecam HD-6000 webcam for InMoov's first eye. It's pretty compact and offers HD resolution. I found a tear down video (http://youtu.be/uoeUJYn5C-g) on the Internet and saw that I probably only need to rip off the clip/base that holds it to a laptop monitor in order to get it to fit. Gael suggested I post images of what it looks like mounted since it might be a good option for a lot of people. It only cost ~$30 on Amazon and it works on my Mac. Obviously it should work on Windows and will probably work on Linux too but I haven't tested that yet.
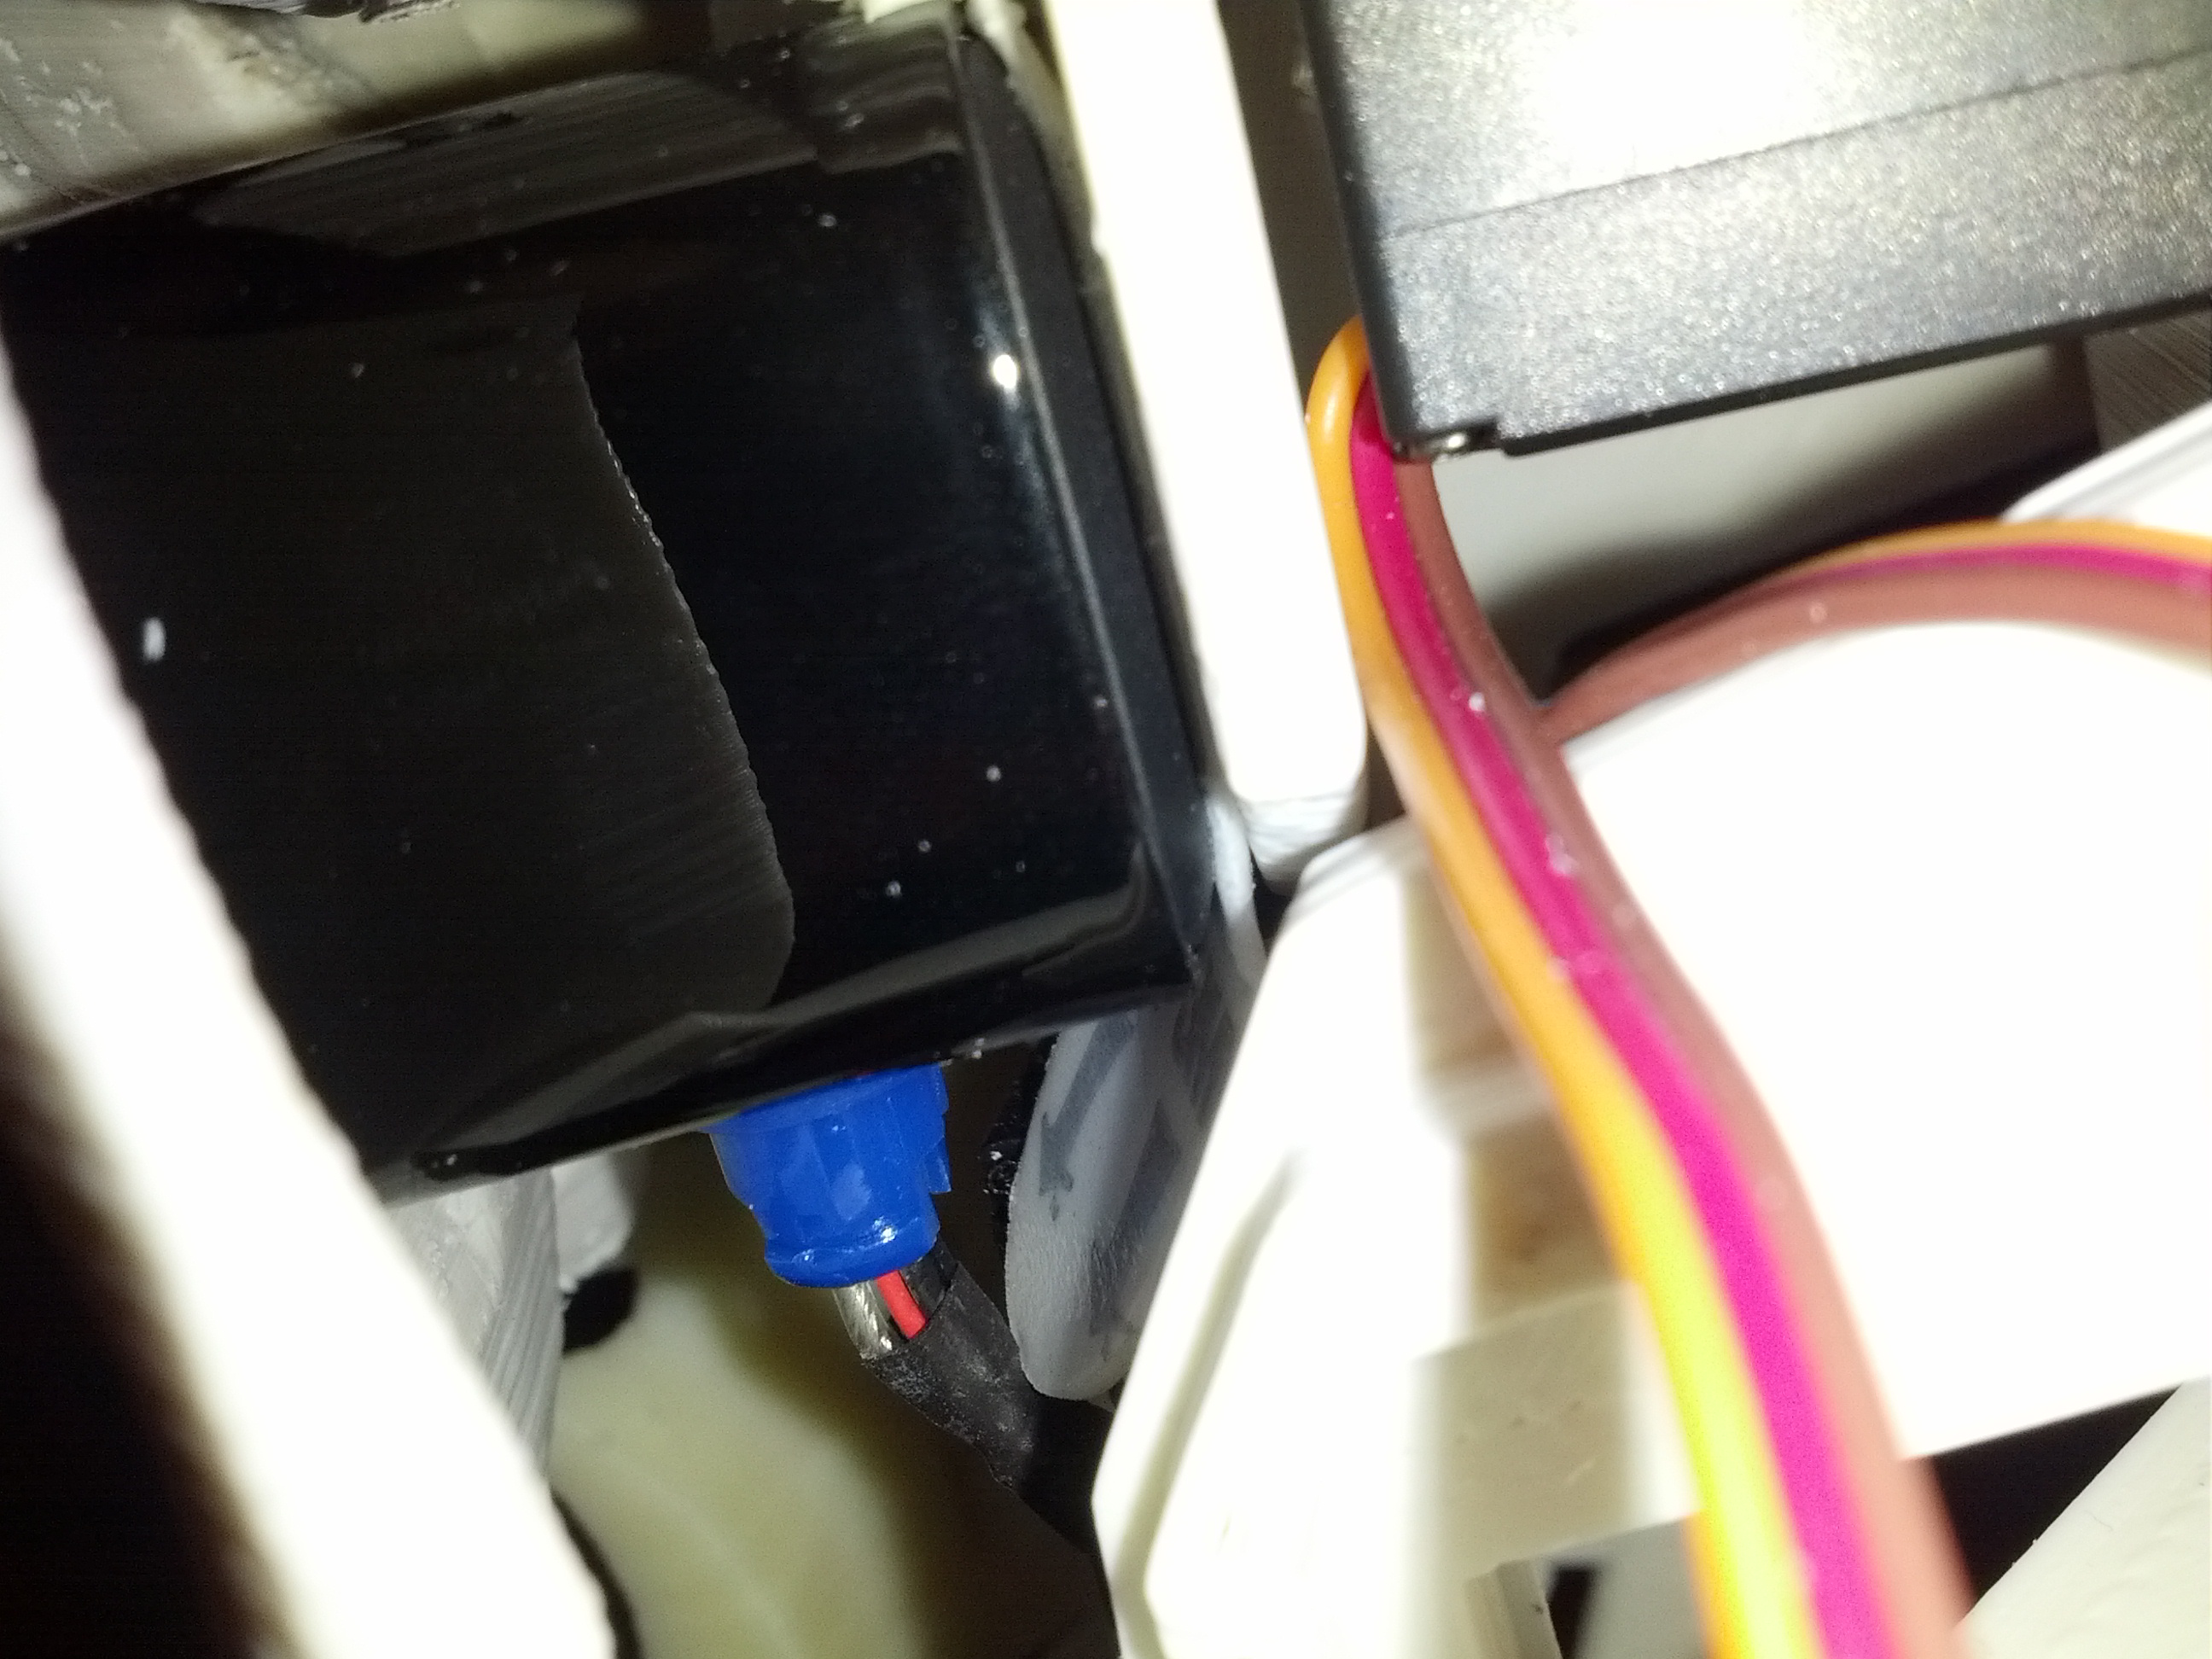
Here's a view in from the side of the head. That's the eye servo on the top right. you can see the blue stump of the base and how the USB cable comes down through it. I stuck it to the eye mount with a 3M command strip (double sided foam tape) so I can easily remove it later.
Another view from top/side with the side of the head partially installed.
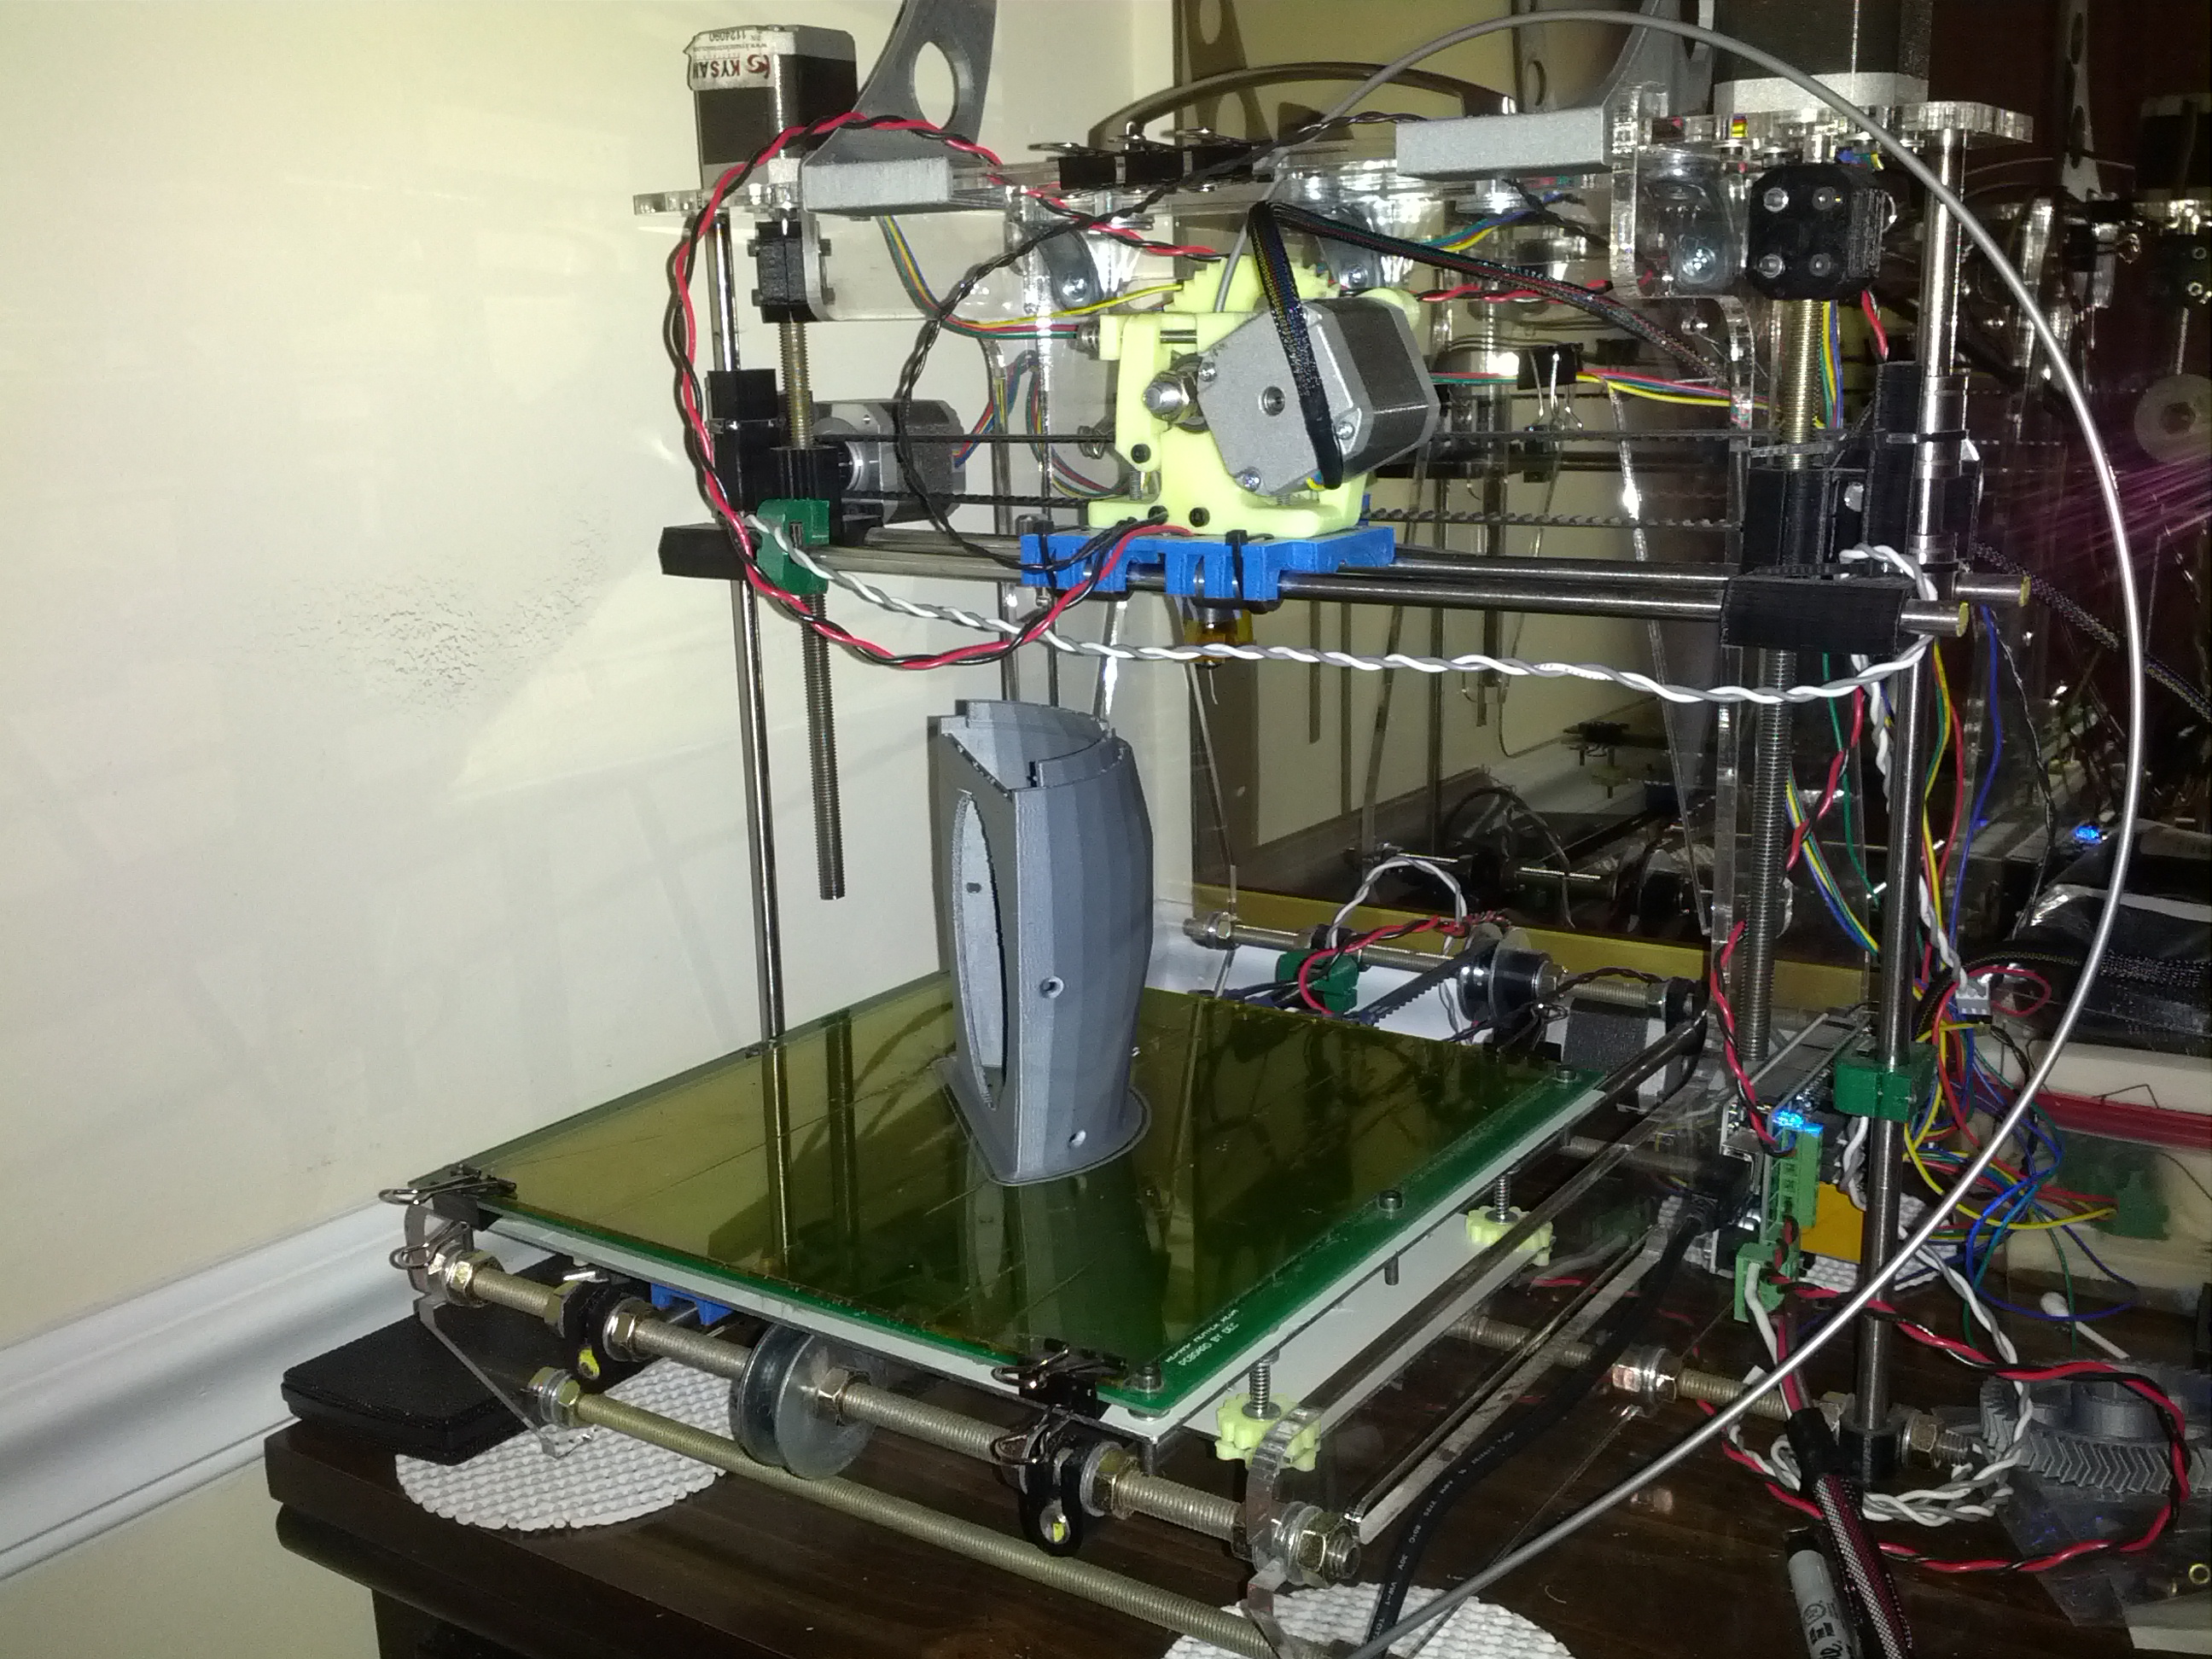
Here's a view from directly above. There's not a lot of clearance between the front of the eye and the inside of the face/eye opening. In order to put the M3 screws into the nose area to hold on the eye mechanism I already had filed off a bunch of plastic. I took a file to more of the back of the eye opening to give more room for the camera to pivot. I'm tempted to modify the eye mount so I can get the camera back further but that will probably wait until I pull video from the camera and see if the view is already blocked by any of the face. Pushing the camera back more would only make that worse.
I was going to print a new, truly white, version the top of the mouth to get rid of the bad two-tone look of the face but forgetting to turn on the 12V power supply for the printer lost me an hour of print time. I had to switch to printing armtopcover2 instead since it would finish before bed and I wanted it in white. I only recently switched to a .35mm nozzle and haven't spent a lot of time tuning settings for it but I think this came out really well printed at .3mm layer height.
---------------------------------------------------------------------------------------------
Update 2014-02-17
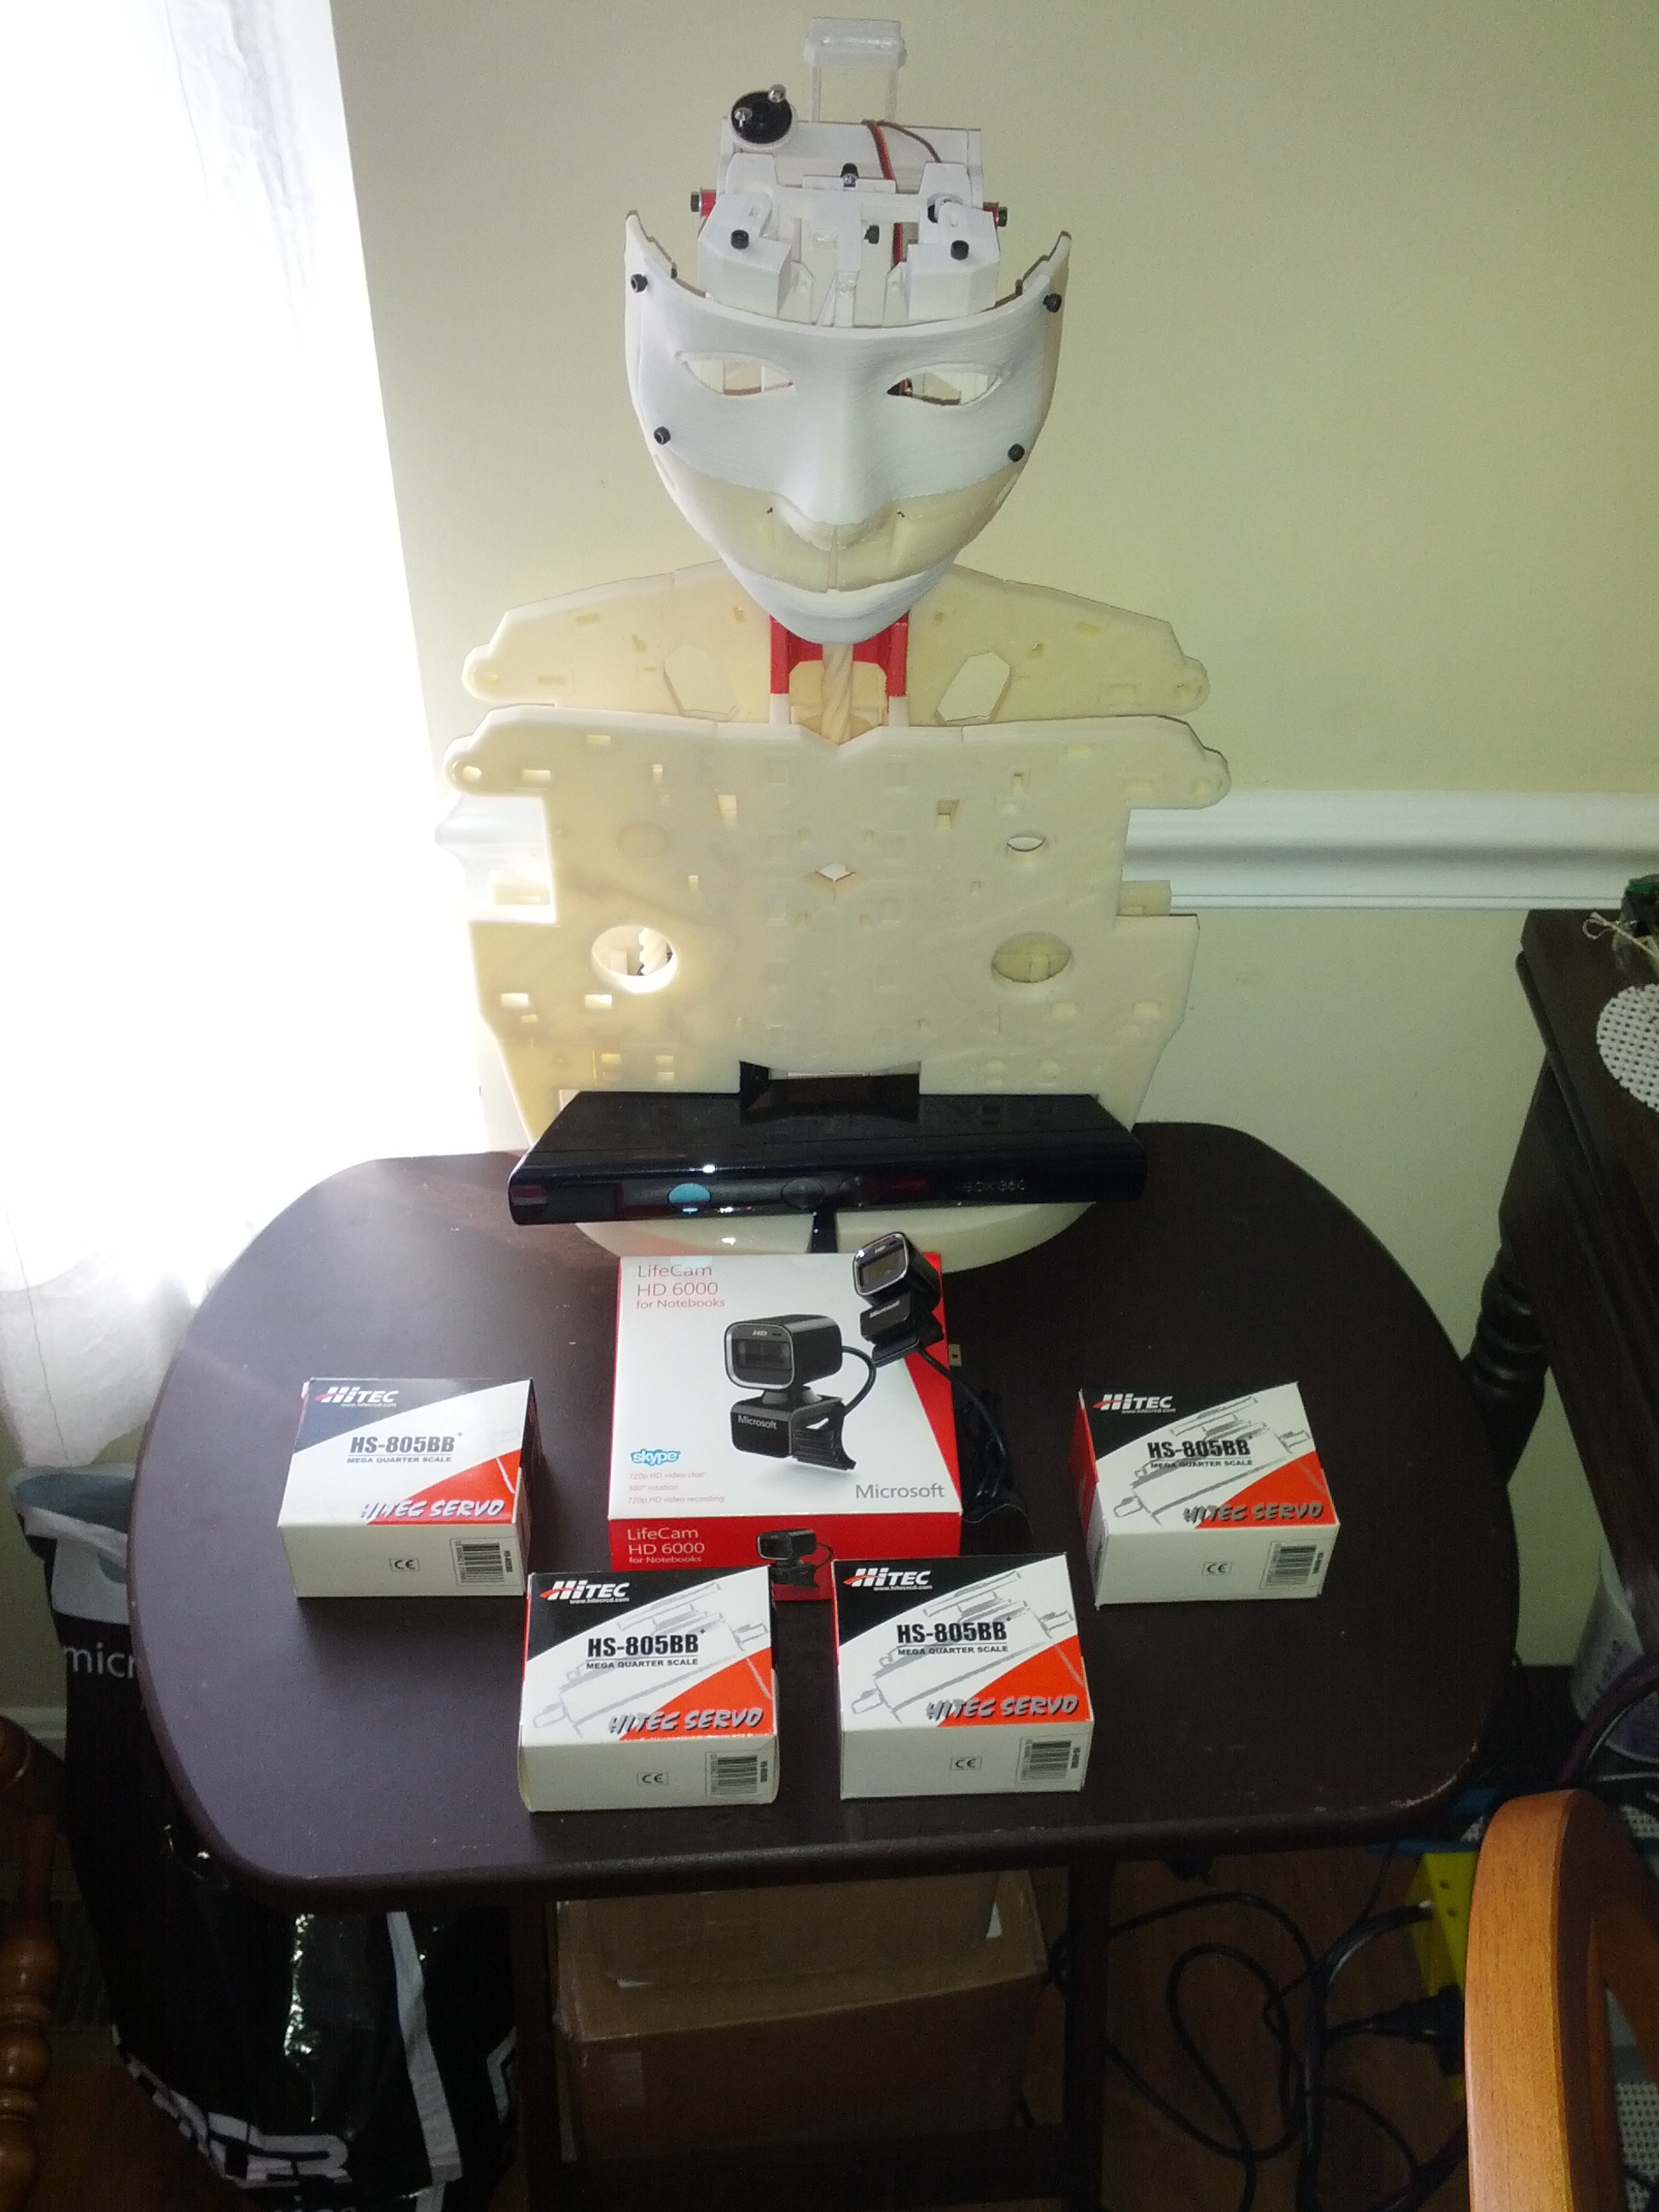
UPS finally moved my packages that were delayed due to the snow so now InMoov can admire his new "eye" and "muscles". I've tested that the camera works with my Mac via system info and the Photobooth app. I haven't gotten OpenCV in MRL to capture from it yet. Keeps falling back to the built in webcam. The camera also appears to be able to fit in the head based on a quick "eyeballing" but I won't know for sure until I actually try to fit it in there which will require a bit of disassembly of a brand new camera. :)
------------------------------------------------------------------------------------------
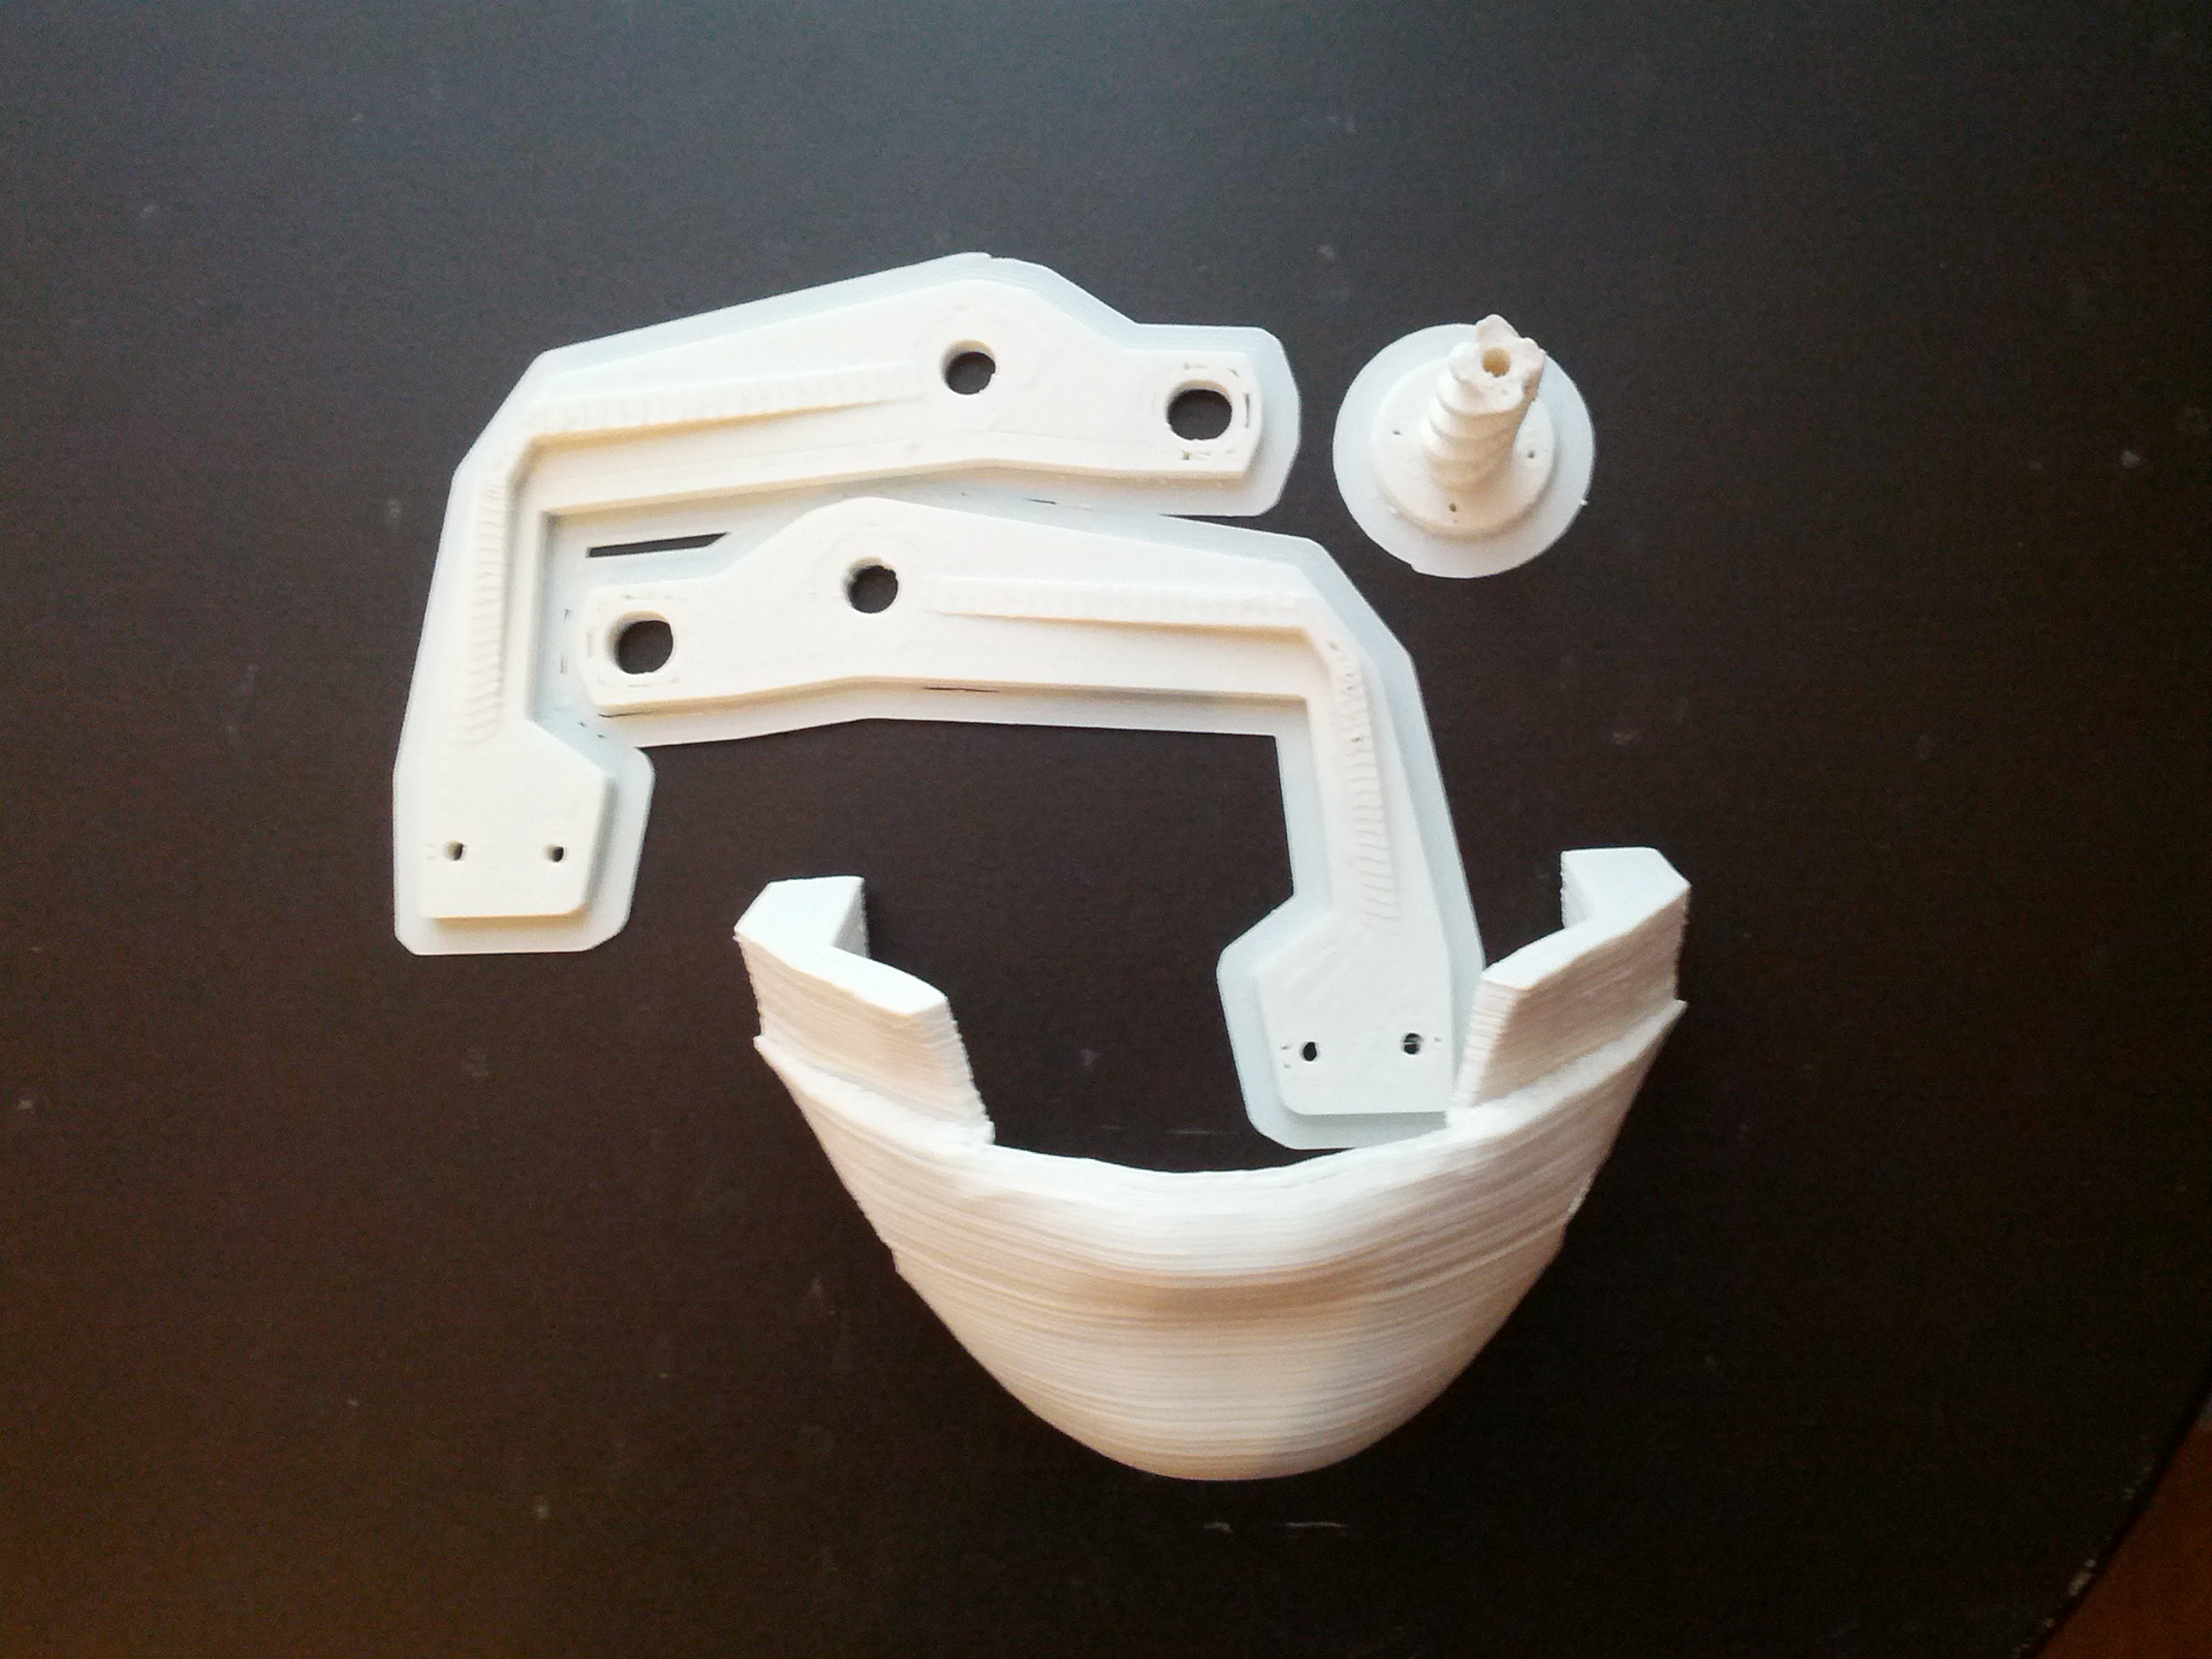
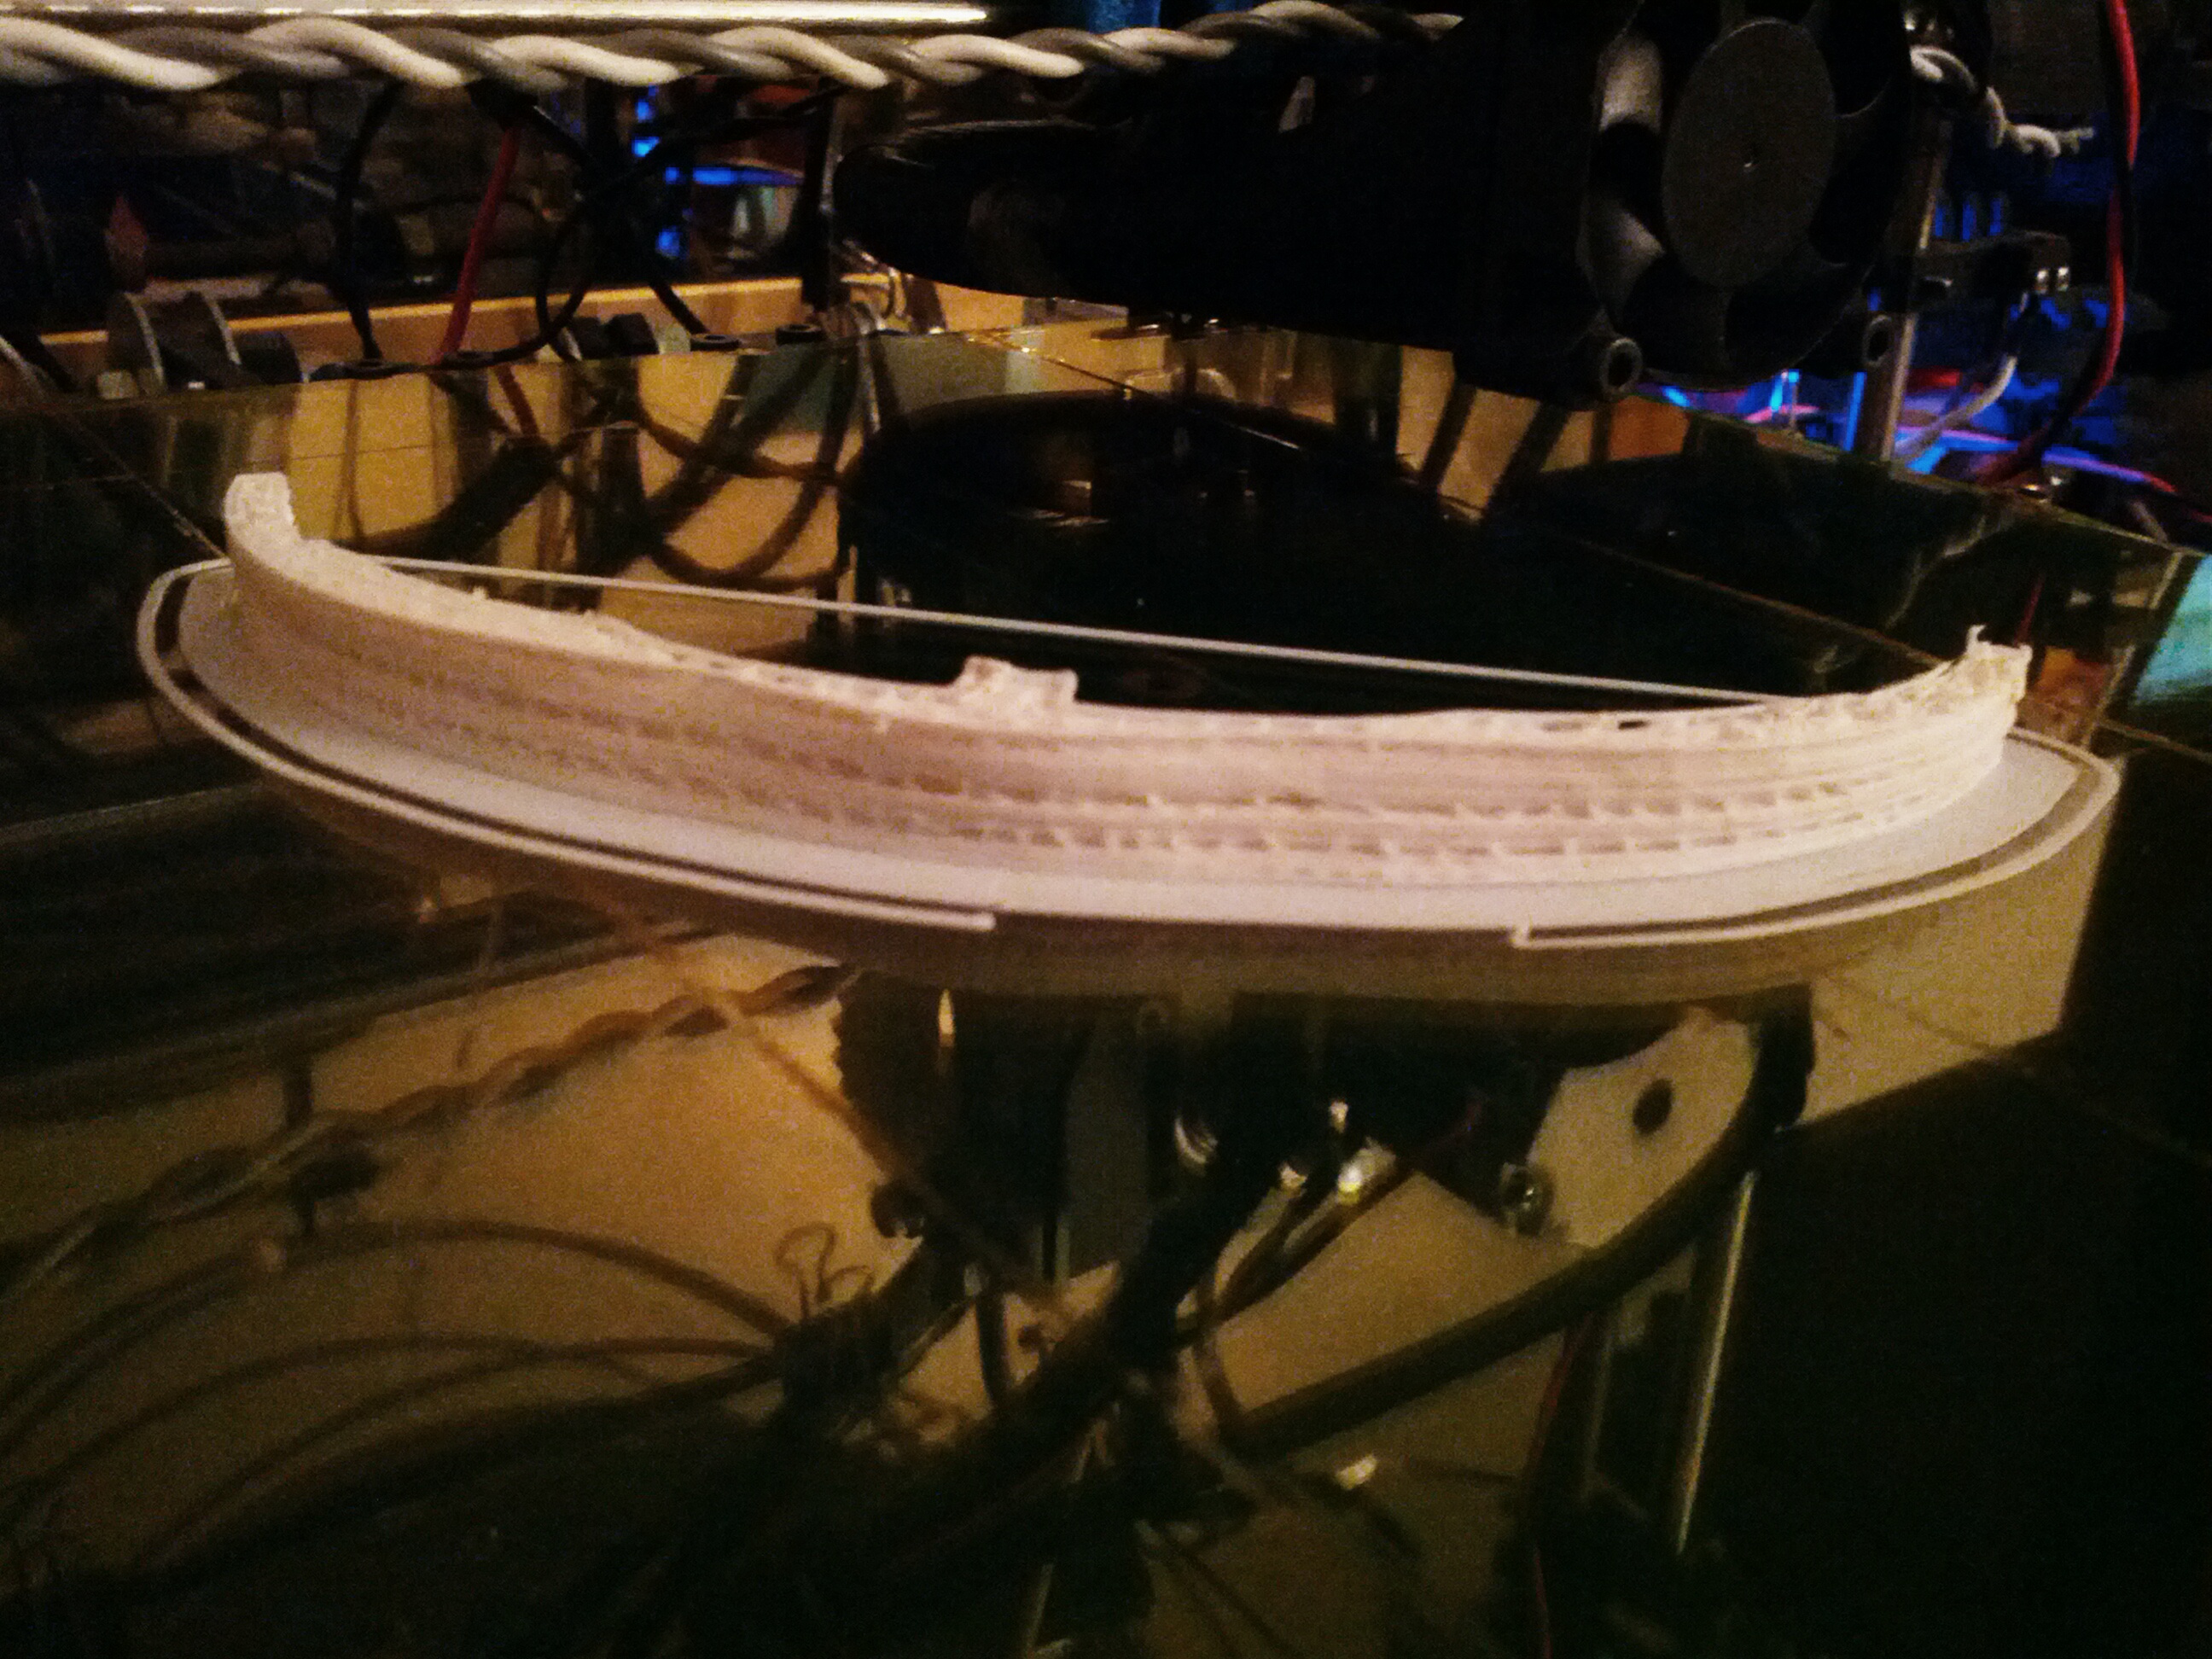
Update 2014-02-15
Torso is done and Kinect is installed (mostly).
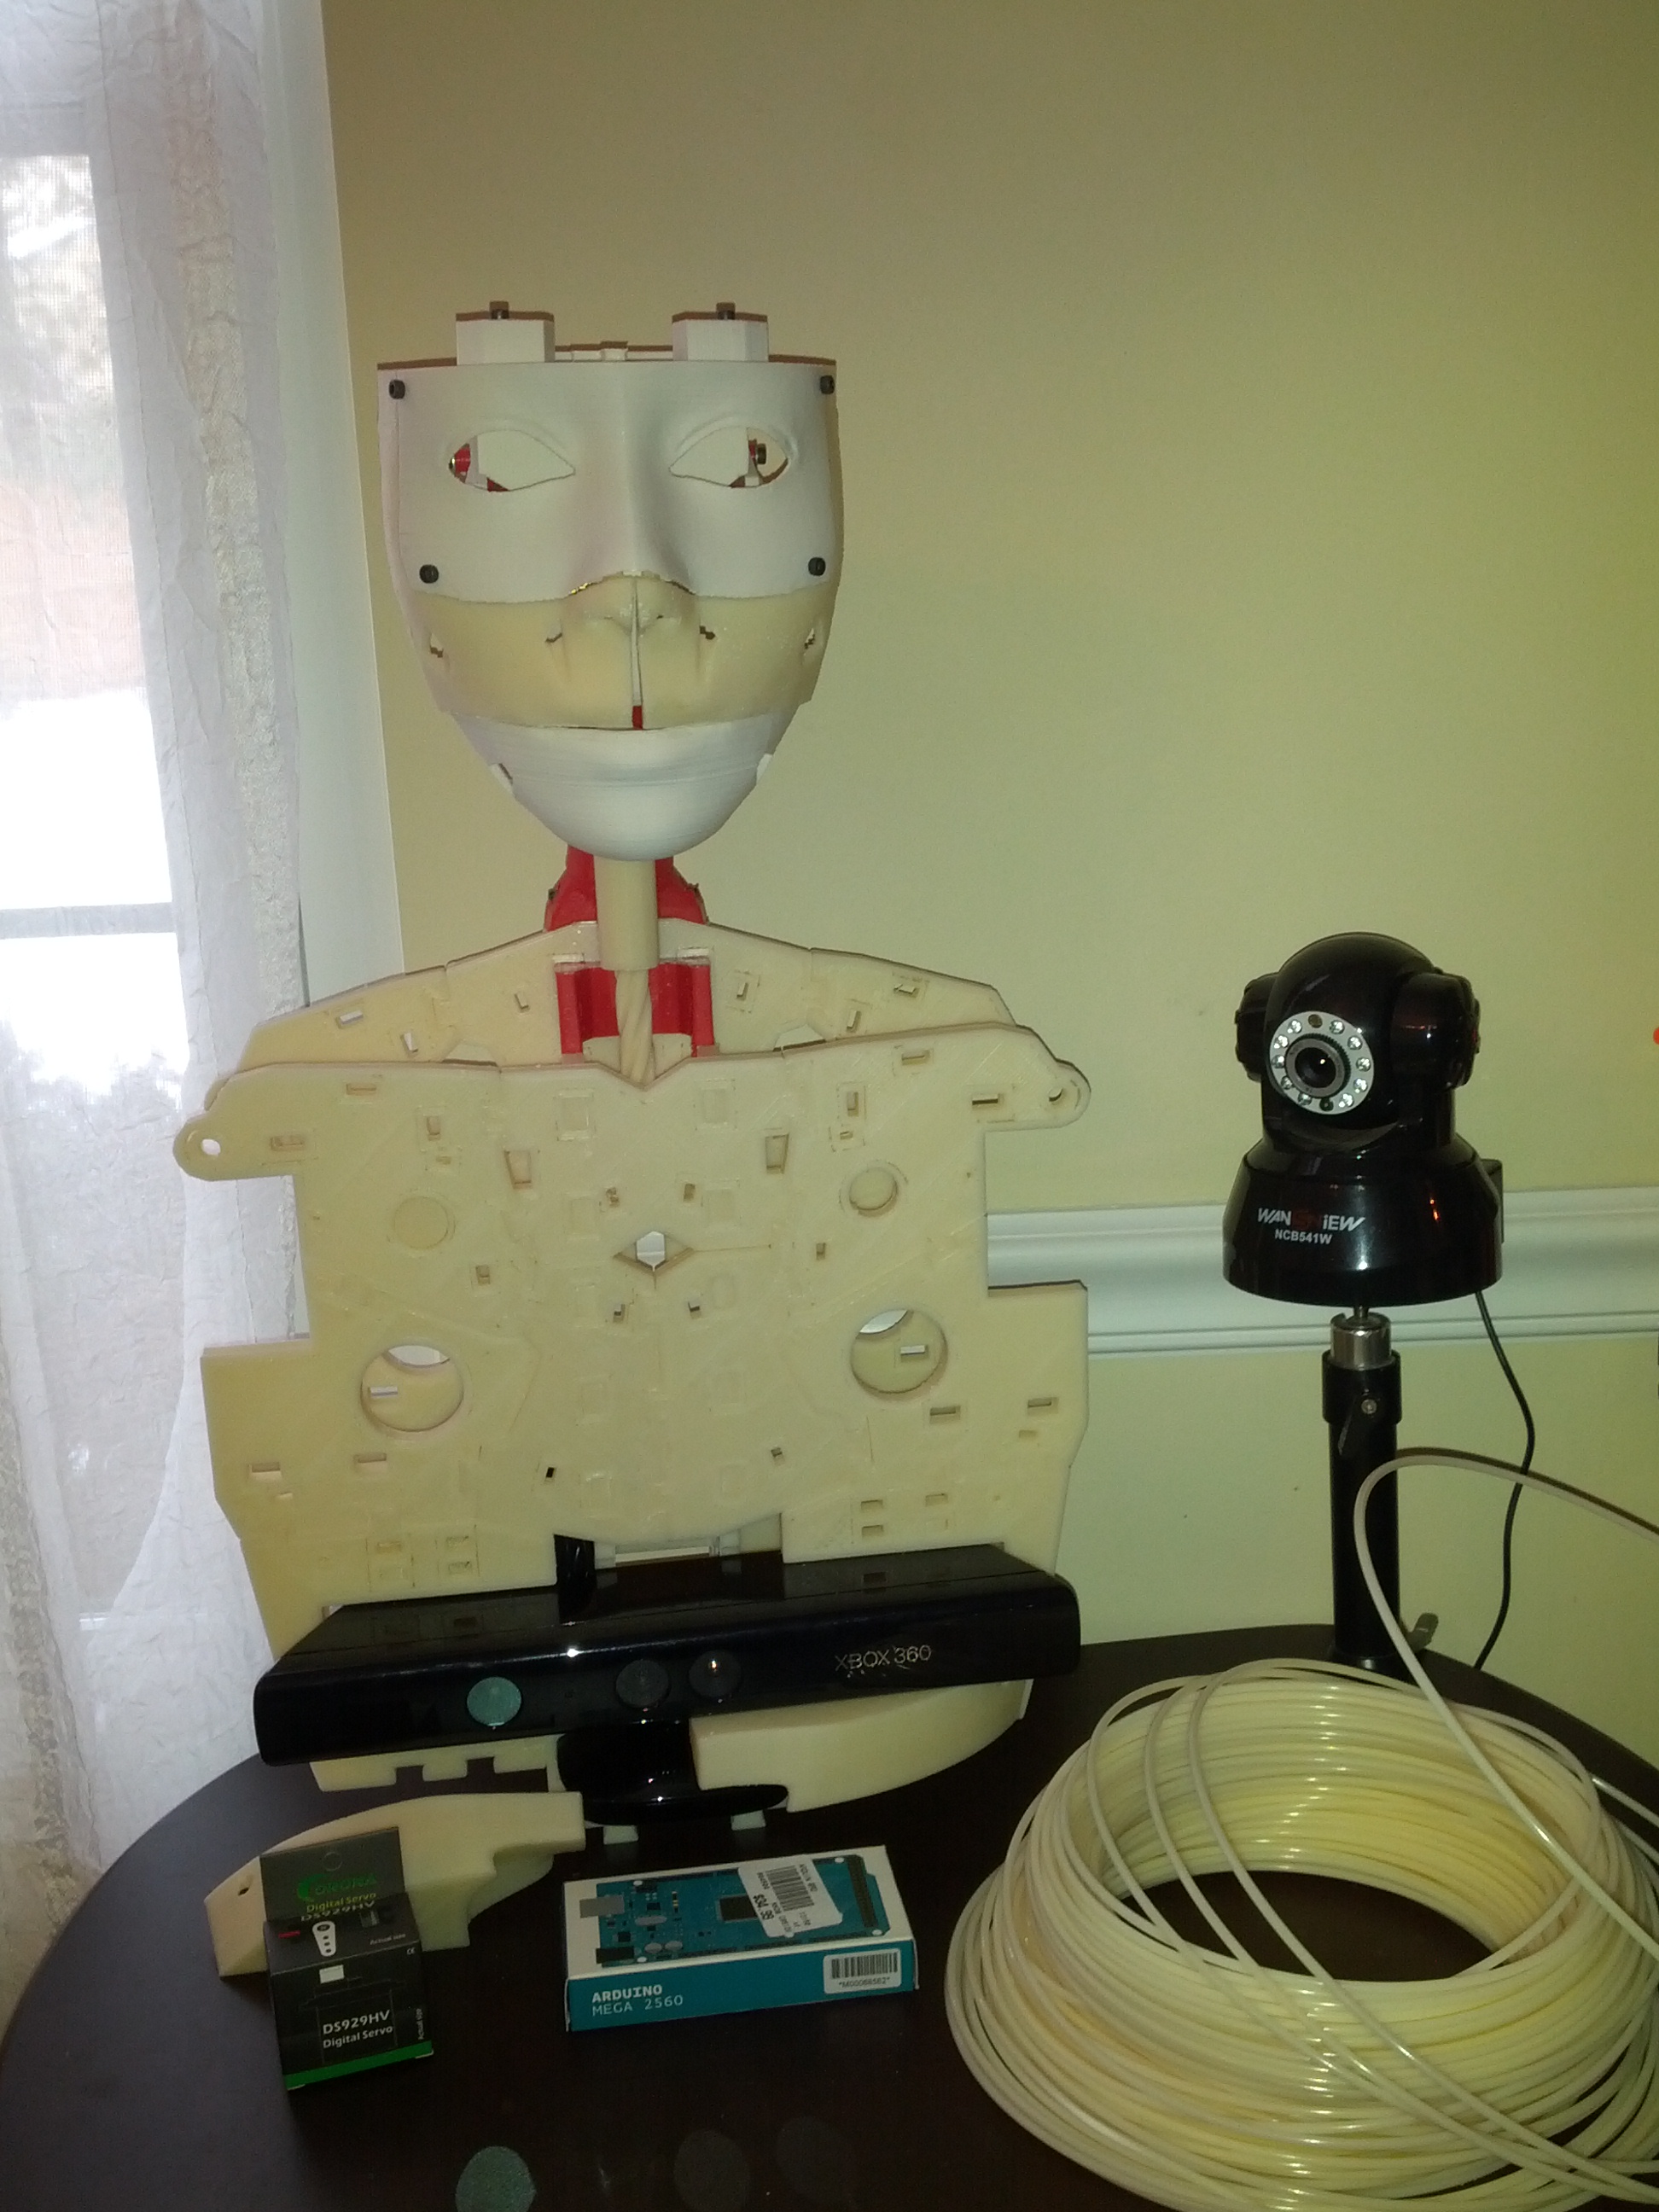
I really wanted to finish most of the face so I printed the bottom nose / upper mouth in natural colored ABS and it looks a little too weird for my tastes so I'll be reprinting that soon. Time to start printing parts for the shoulder and while they're printing I need to start working on servos and other stuff. The snow that hit the area recently delayed delivery of my MS HD-6000 webcam so I can't install and test that yet. You can see I printed and installed the piston for lifting the head and have the servo holder installed in the torso but I'm still waiting on delivery of my 805BB servos. I only orderd 4 and I think I'm going to leave them for the arm so I'll try an adaptor to put a MG996R servo in there. I also have a working worm gear installed in the torso for the right shoulder. You can see the small round hole is plugged up with the base.
------------------------------------------------------------------------------------------
Update 2014-02-01
Cranking out more parts.
------------------------------------------------------------------------------------------
Update 2014-01-25/26
Coming along nicely. Much of the upper torso is complete. More of the back plate than the front plate but I should get a bunch more printed tomorrow. Figures that a robot being built in Virginia would have a redneck. ;) I'll probably replace that at some point.
Amazing how we can build a machine that converts a spaghetti coil of plastic into a humaniod robot. I ordered a bunch of servos today, some of which are for InMoov. Hobby Kind hasn't had the 805BB servos for a while so I'll either have to wait a while or find another reliable source. For now it's time for bed.
------------------------------------------------------------------------------------------
Update 2014-01-23
Finished up the top of the torso (front and back plates).
------------------------------------------------------------------------------------------
Update 2014-01-22
Building the torso/shoulders
------------------------------------------------------------------------------------------
Update 2014-01-17
More head assembly (and problems).

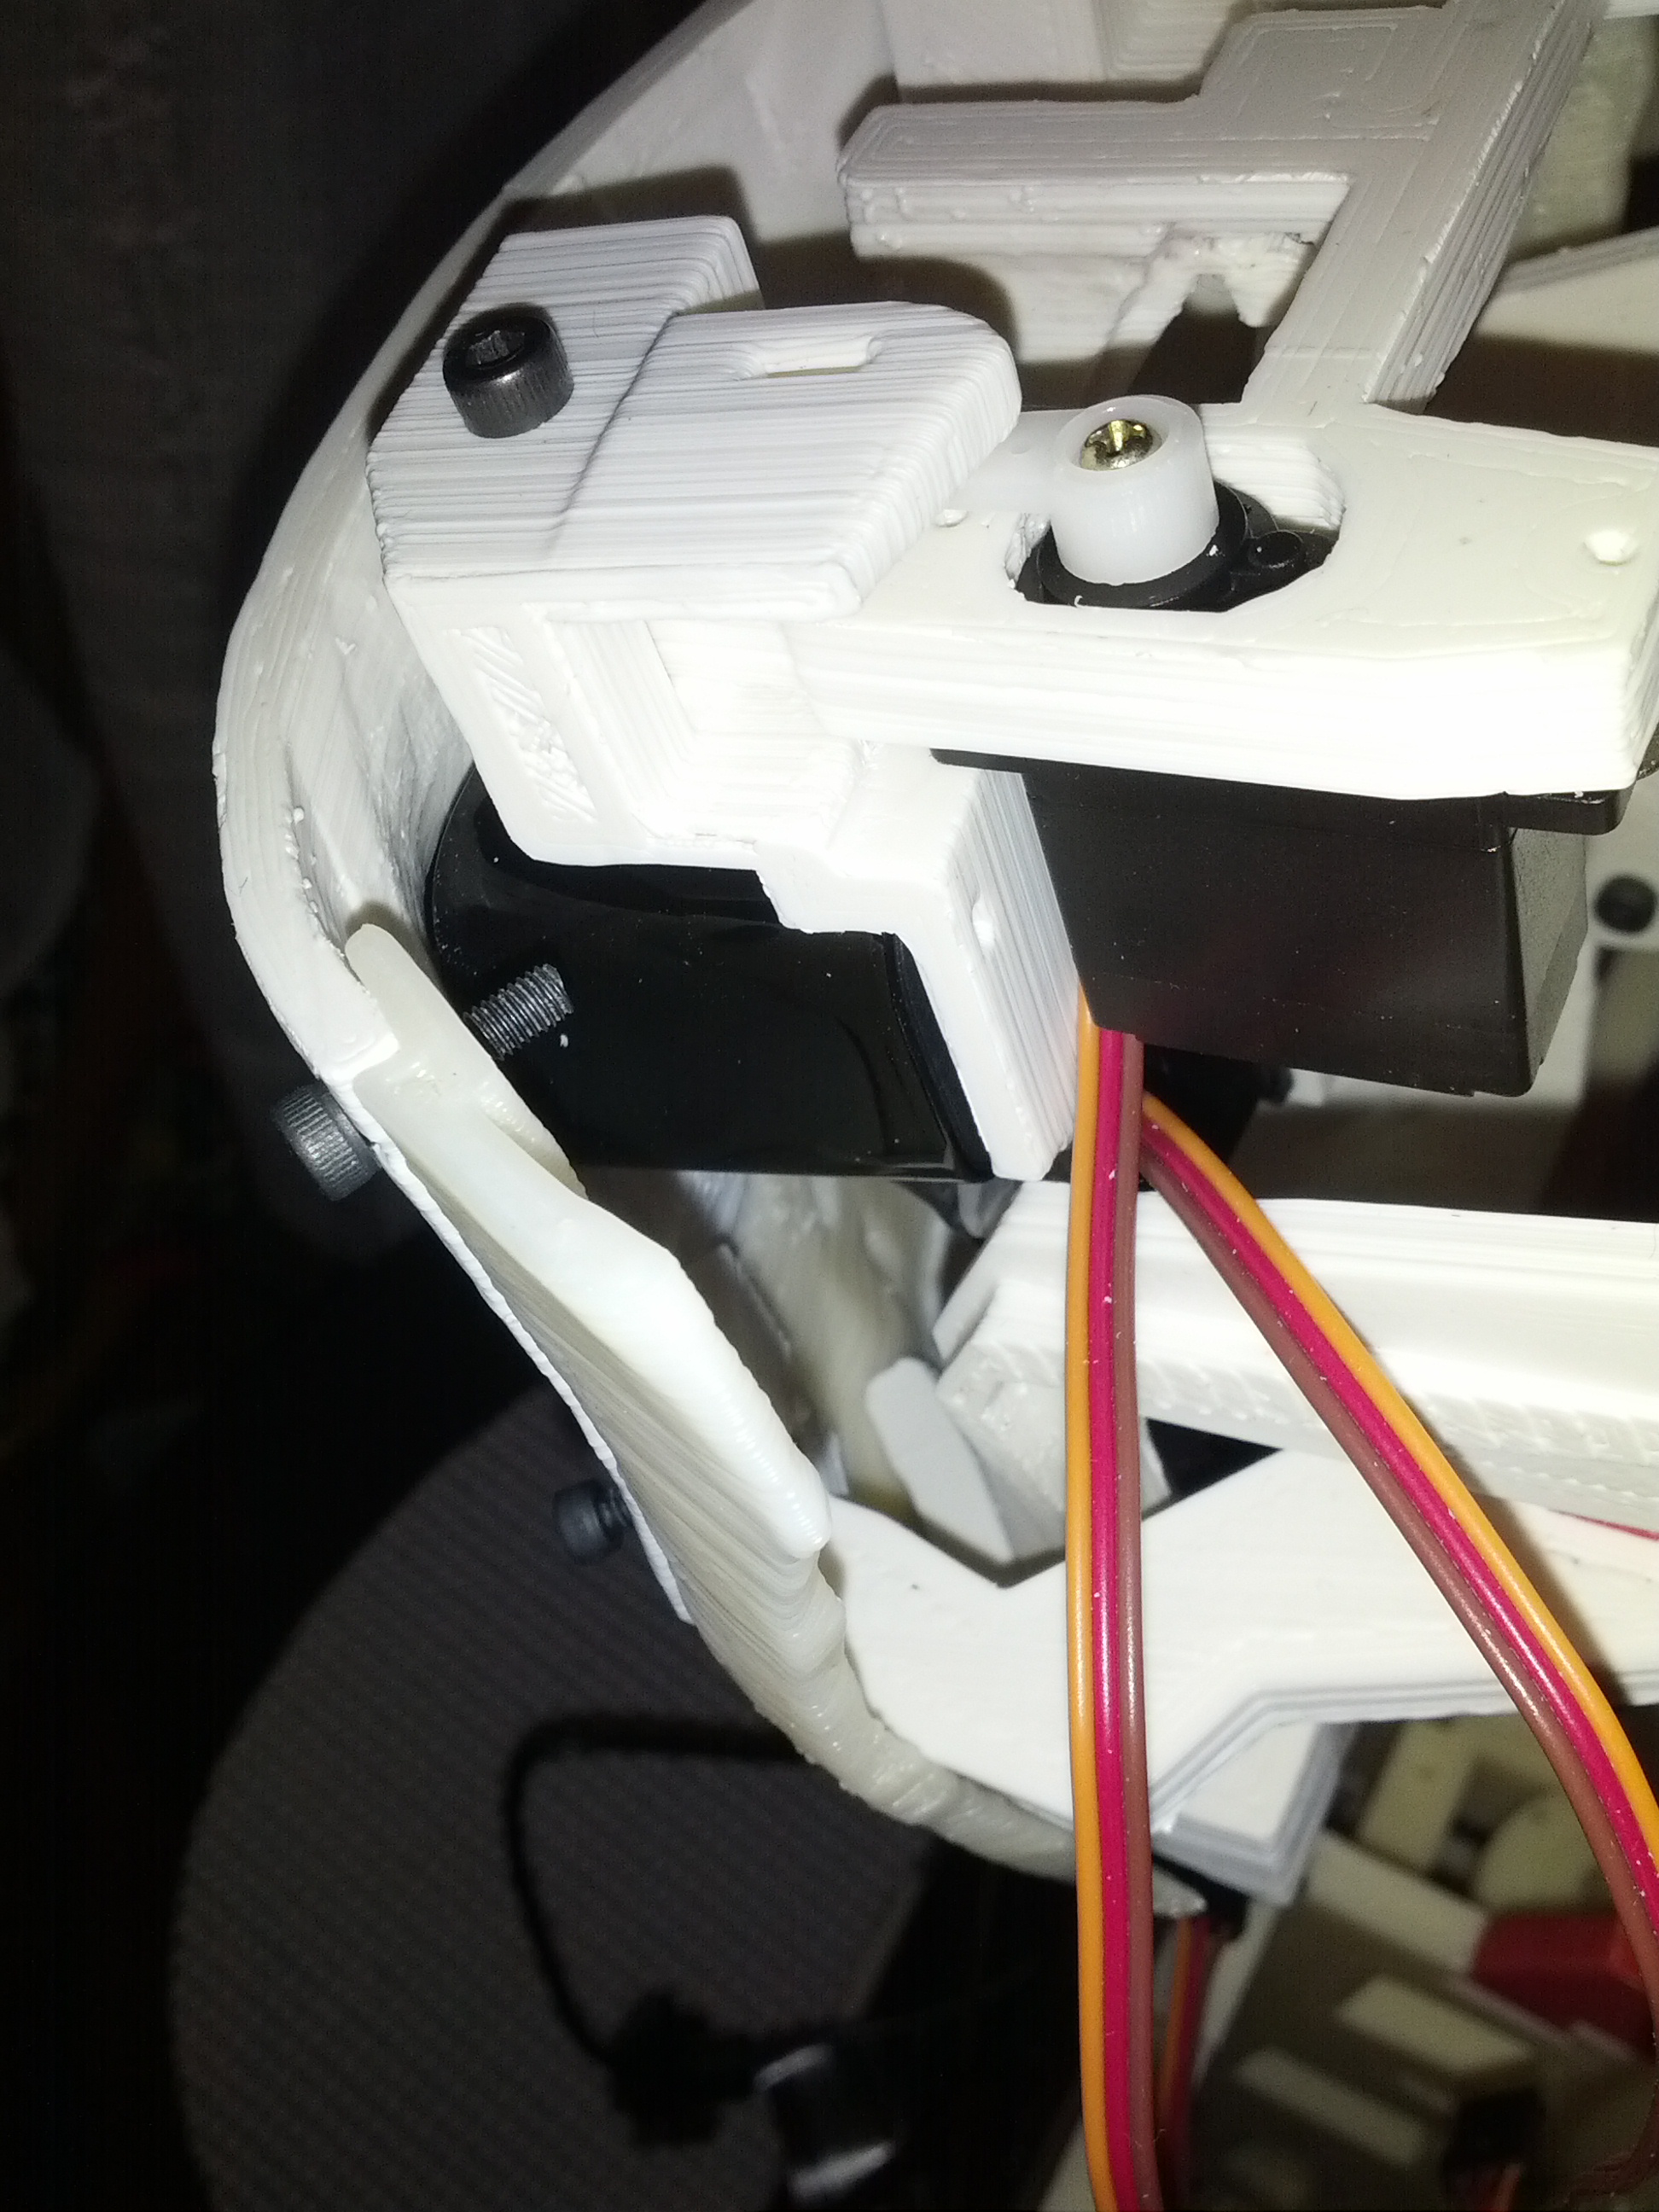
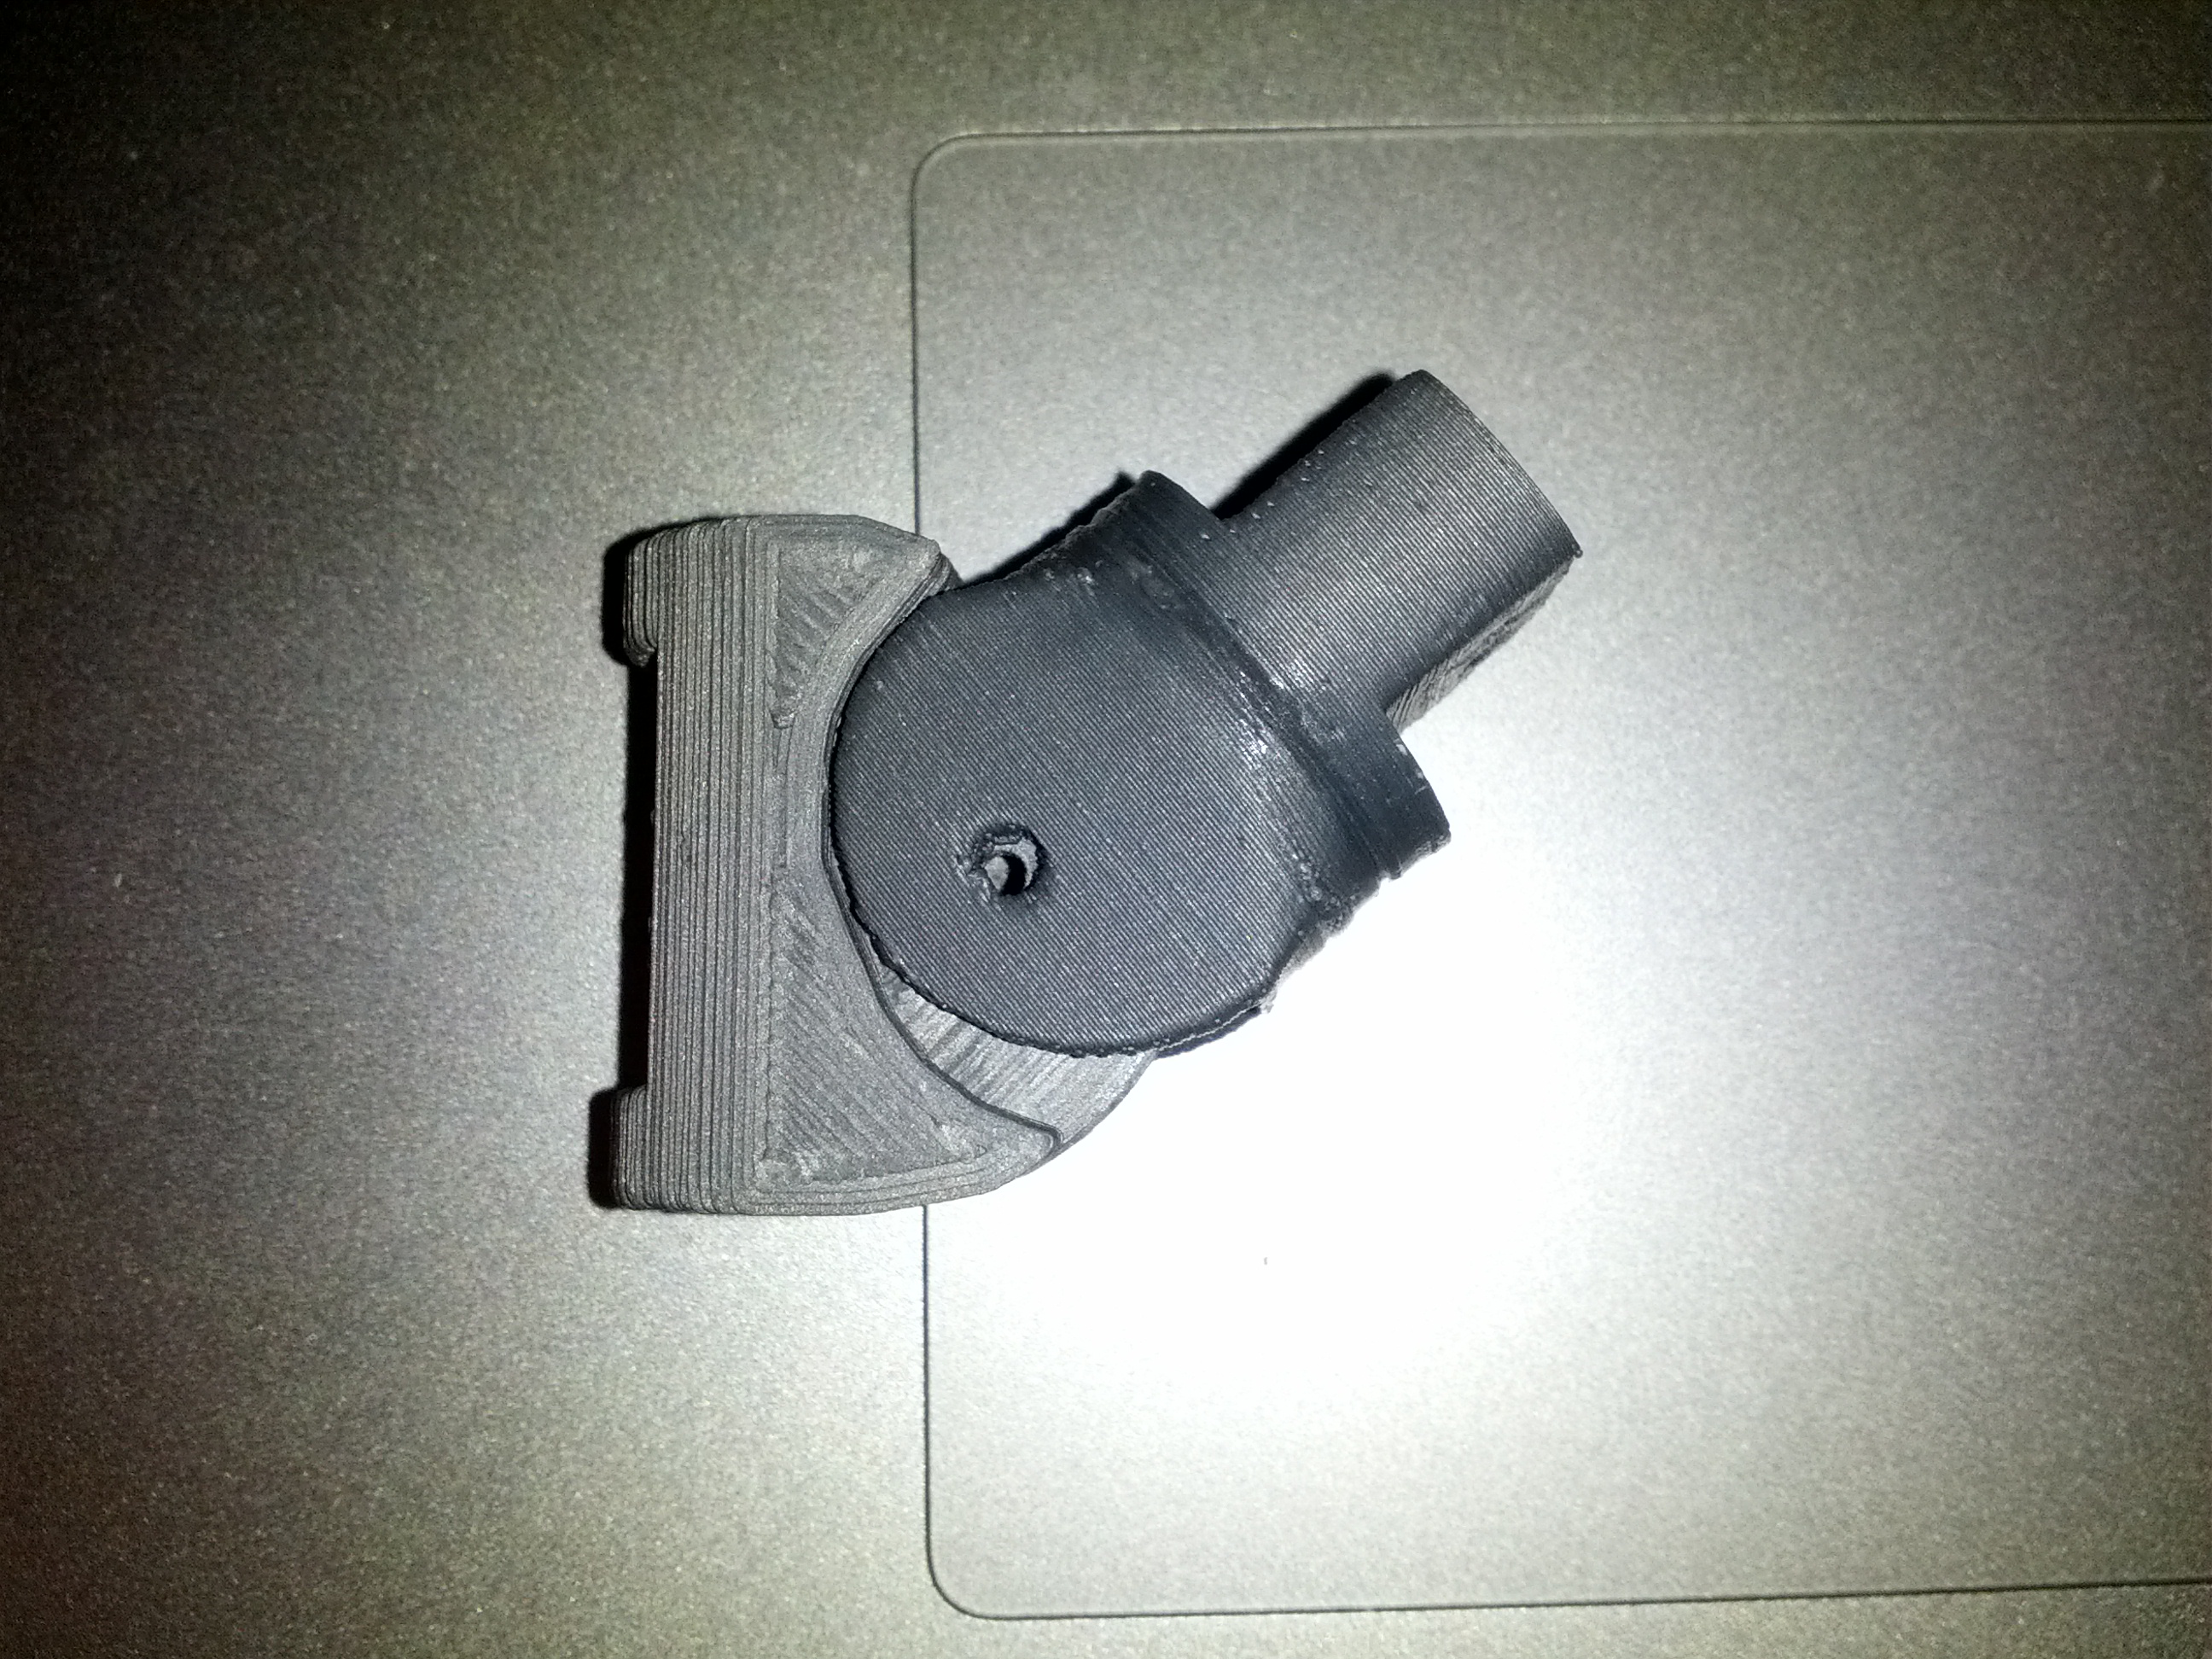
The 9g servos I had laying around looked like they would work in the eye mechanism but I was wront for the X-axis. The ones Gael uses have less of a "shoulder" above the mounting tabs than mine. So when I mount mine, the tabs don't touch the mount and they interfere with the movement of the camera mounts.
------------------------------------------------------------------------------------------
Update 2014-01-11

Pay no attention to the rubberband holding SkullServoFixV1 in place. I didn't have long enough M4 screws.
----------------------------------------------------------------------------------------
Update 2014-01-09
Getting ahead ...
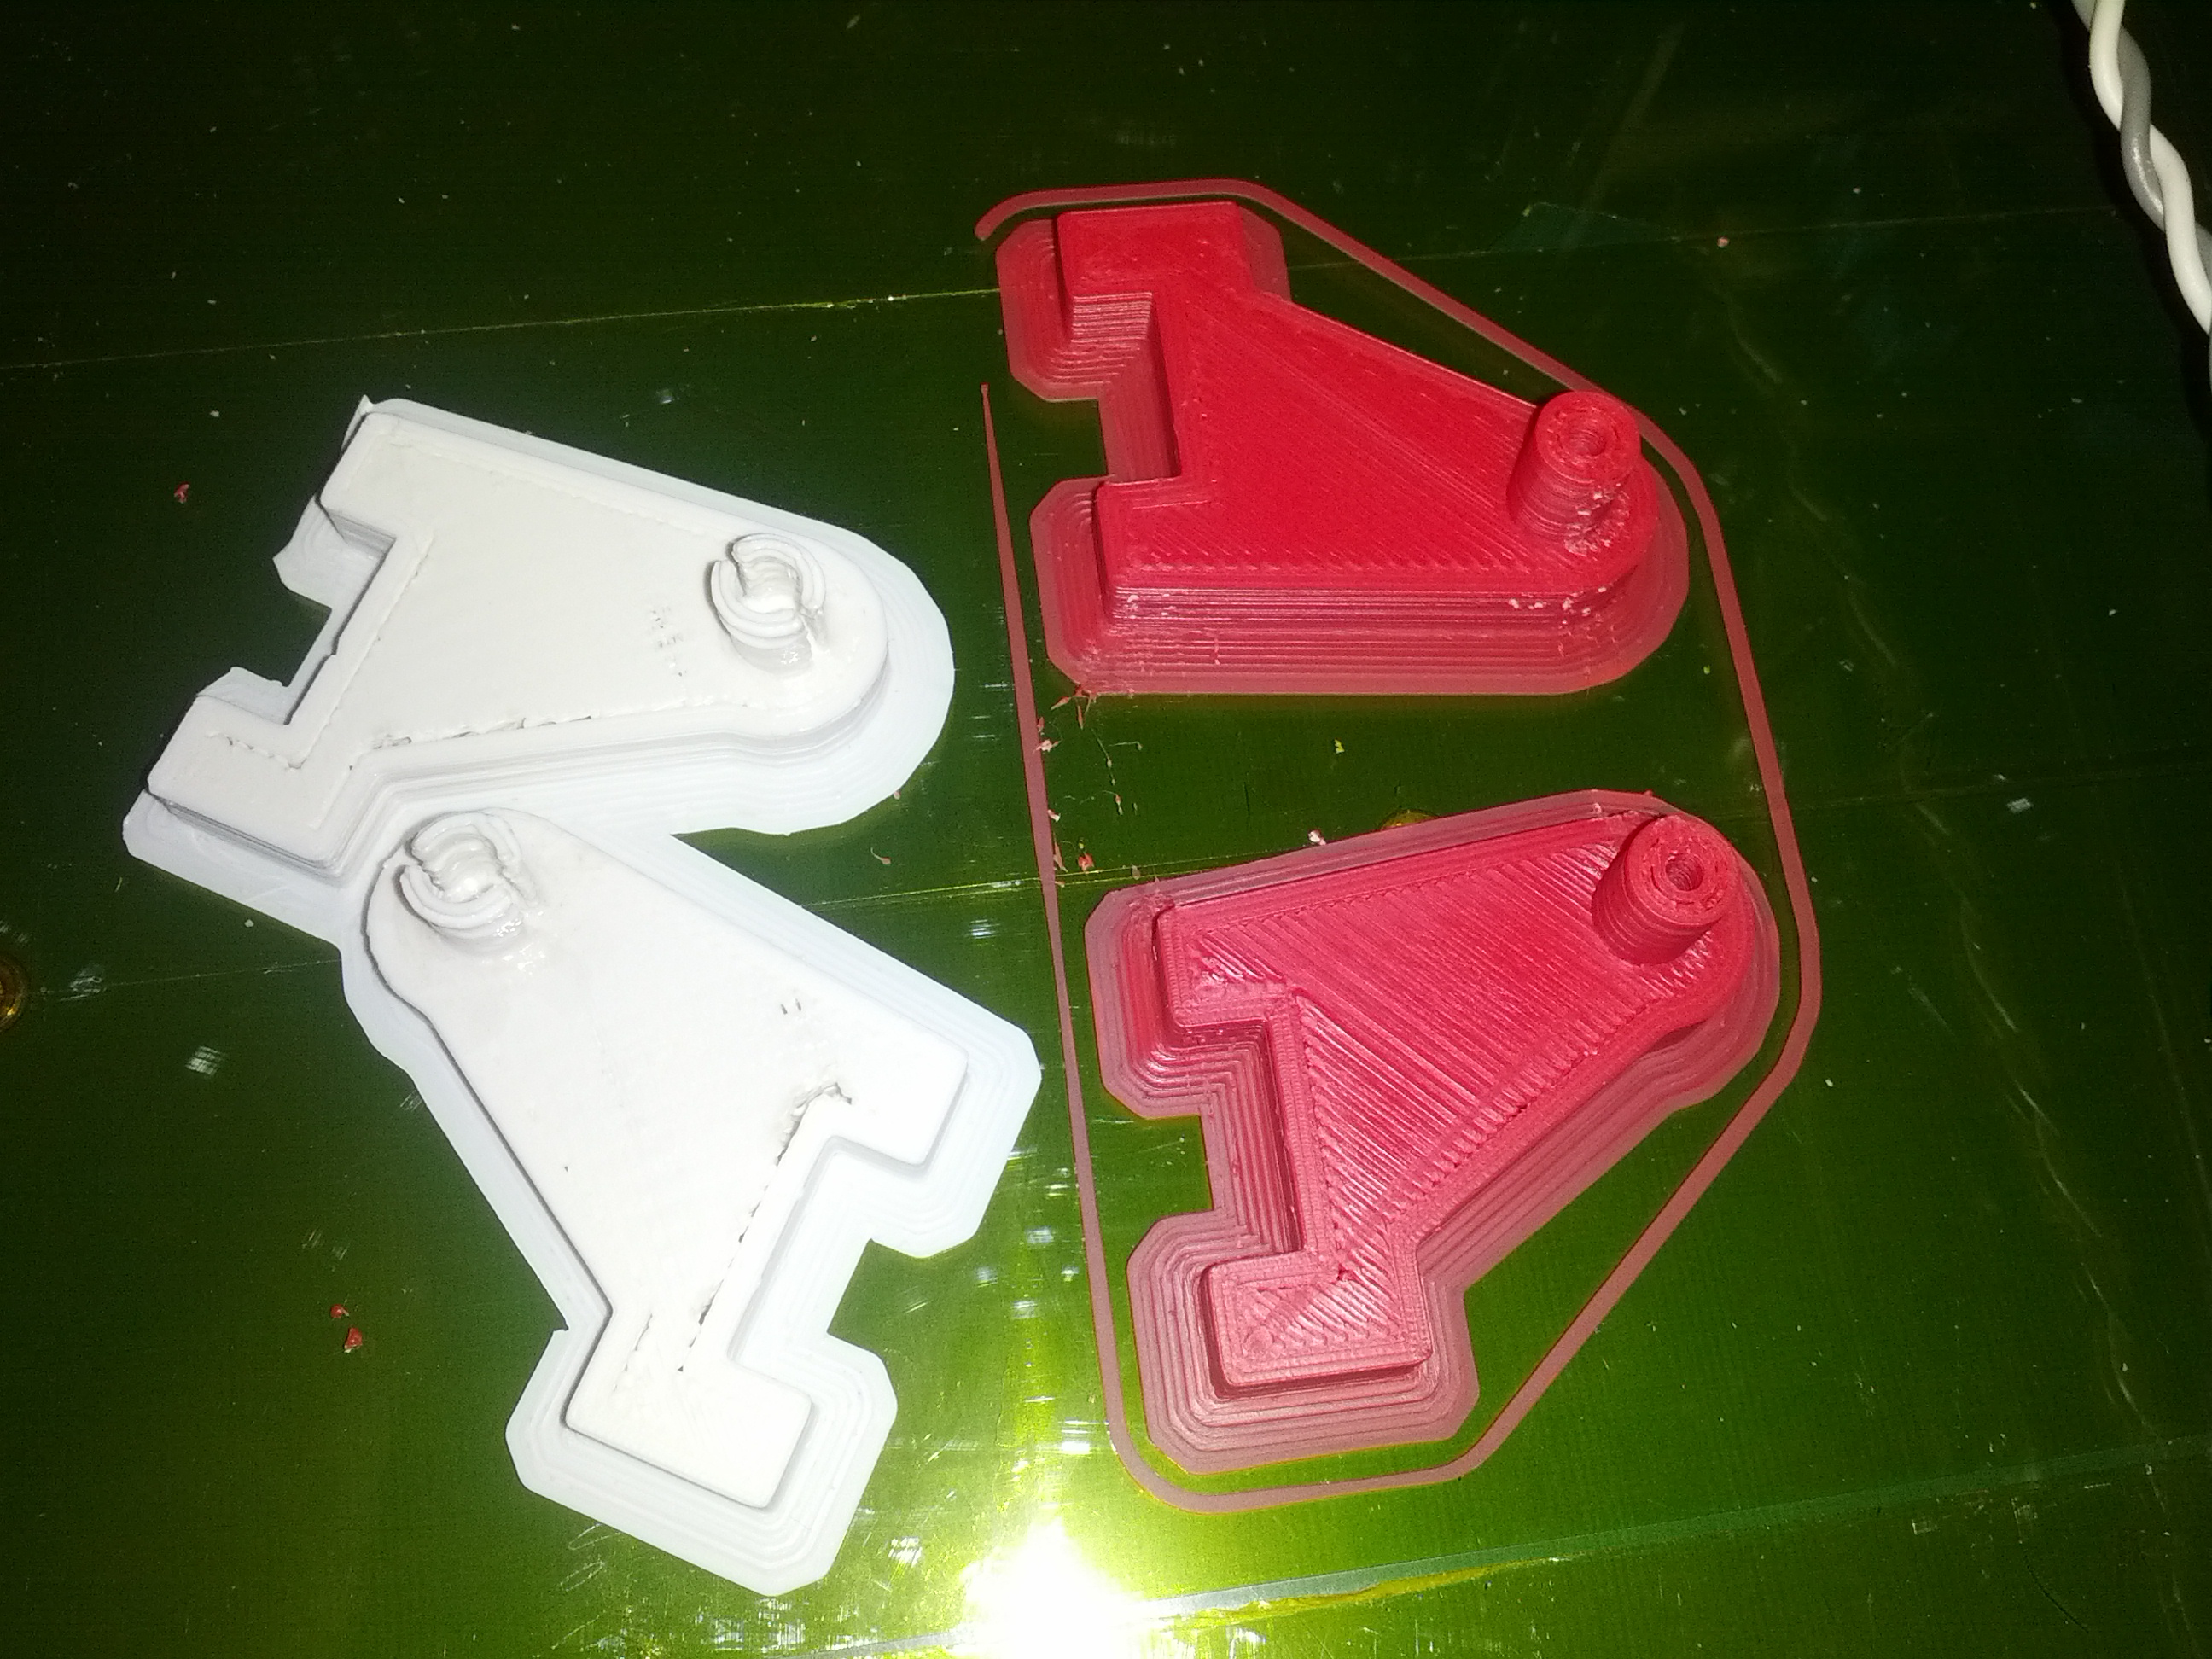
I was talking with Gael in the Shoutbox today about my experiences printing the InMoov parts and that the only one I've had a problem with was JawHingeV2. The thin "C" shaped parts that hold the two sides of the jaw "bones" are only getting printed with 1 shell on my printer and as a result are too weak. I've broken and acetone glued them several times. I suggested a cylinder with an M3 hole so I could put a M3 screw and washer on the end to keep the parts on the hinge. The white parts are the original design and the red ones are the new design Gael emailed me. I probably could have tweaked my Slic3r settings to use thinner perimeters and thus more shells on the original parts but this new design should be much stronger. We don't want an InMoov with a "glass jaw".
I was so pleased with the new parts that I stayed up until 2am assembling parts of the neck and jaw even though I don't have any servos for it yet. It turns out that the Nema17 motor on top of my printer makes a good temporary stand for taking photos of the head.
------------------------------------------------------------------------------------------
Update 2013-12-23

2 Degree of Freedom Adjustable Thumb parts (right hand)
Full Flex (adduction).
Full Extension (abduction)
I had to take break from printing InMoov parts so I could bake my white filament and so I could print some things for other projects. Since I had the silver ABS back in the printer I cranked out the adjustable thumb. I cut the 3 parts out of the STL with Netfabb Basic so I could print the base with support and the two "knuckle" pieces without support. Now I need to unthread the thumb, swap in the parts, and add another servo for it. Then it's time to make Grog support it in MRL. :)
---------------------------------------------------------------------------------------
Update 2013-12-16
Have to catch up to Ale! Must print more!
Parts of the face printed so far. All cleaned up.
Parts of the Jaw mechanism printed so far. Still need to clean the Piston and Supports and still need to print the two Hinge parts.
This should be all of the parts of the Eye mechanism. Cleanup still needed on some.
JawPistonV1 (screw in the background) and EyeSupportV3 (second attempt) were both printed before lunch. Since both were about the same height it allowed cooling on the parts between layers even though I forgot to enable cooling when I sliced it. When I printed EyeSupportV3 a few days ago by itself the top was an unuseable blobby mess (I probably could have made it work with a lot of hacking).
I like to use a brim when I print certain parts to make sure they don't warp or pop off. I know other people have tricks like brushing acetone around the edge after the first layer finishes but I feel a simple easly to remove 5mm brim is worth the wasted plastic. A brim is just an extension of the first layer (extra perimeters on the outside). It is not a raft which is a whole extra layer under an object that uses a lot more plastic and is much harder to remove.
----------------------------------------------------------------------------------------------
Update 2013-12-13
That's more like it!
Now that I got my extrusion problems worked out I printed the EyeGlassV2. It took me 4hr 39min since I print slow in order to keep the quality up where I want it. On to the next print SideHearV2 which might take even longer to print.
----------------------------------------------------------------------------------------------
Update 2013-12-11
I'm trying to print the face and for some reason my printer keeps having problems with under extrusion which is leading to ugly prints like that pictured above. This is my forth attempt at this print and I was very careful to clean my hobbed bolt of any residue and properly tensioned the idler arm to it wasn't too tight or too loose. I have retraction set to only occur if a perimeter is going to be crossed so it doesn't shred the filament trying to switch from foward to reverse and back too quickly while doing the spotty infill pattern that Slic3r does on thin parts like this. I'm too tired and dull headed to try to trouble shoot this again tonight.
---------------------------------------------------------------------
Update 2013-11-15
I have a monthly meeting for the DMV (DC/MD/VA) robotics group tomorrow and I want to show off MRL and my InMoov hand. Time to kick the tires.
Below is a InMoov2 hand script
rightHand = runtime.createAndStart("rightHand","InMoovHand")rightHand.connect("COM12")rightHand.startService()rightHand.close()sleep(1)rightHand.open()sleep(1)rightHand.openPinch()sleep(1)rightHand.closePinch()sleep(1)rightHand.rest()ear = runtime.createAndStart("ear","Sphinx")mouth = runtime.createAndStart("mouth", "Speech")ear.attach(mouth)ear.addCommand("count", "rightHand", "count")ear.addCommand("victory", "rightHand", "victory")ear.addCommand("hang ten", "rightHand", "hangTen")ear.addCommand("devil horns", "rightHand", "devilHorns")ear.addCommand("bird", "rightHand", "bird")ear.addCommand("thumbs up", "rightHand", "thumbsUp")ear.addCommand("close", "rightHand", "close")ear.addCommand("close pinch", "rightHand", "closePinch")ear.addCommand("open", "rightHand", "open")ear.addCommand("open pinch", "rightHand", "openPinch")ear.addCommand("attach", "rightHand", "attach")ear.addCommand("detach", "rightHand", "detach")ear.addCommand("manual", ear.getName(), "lockOutAllGrammarExcept", "voice control")ear.addCommand("voice control", ear.getName(), "clearLock")ear.addComfirmations("yes", "correct", "yeah", "ya")ear.addNegations("no", "wrong", "nope", "nah")# all commands MUST be before startListeningear.startListening()
To change the voice - you can set the language dialect like this
mouth.setLanguage("en_us")
valid types are en_us en_gb en_au en_sa en_nz
Be aware it affects the FIRST TIME the voice does an utterance, all subsequent repeats of the same phrase are retreived from the file cache.. if you want to purge this cache delete the AudioFile directory
--------------------------------------------------------------------------------------
Update 2013-10-21
I got some time to restring the ring finger (twisted lines) and the middle finger (forgot to pass it through the cable guide) and then strung up the pinky and thumb. One smart thing I did from the beginning was before I pulled the strings back out, I tied them to the line on the spool so it would act as a "fish tape" when I needed to pull them back through the hand since the problems that needed to be fixed were in between the hand and the servos.
Next step is to calibrate the servo positions and then tighten the strings to match. Since I haven't given much thought to the power distribution, I'm going to calibrate each finger as if it was the finger starter tutorial which I already completed.
--------------------------------------------------------------------------------------
Update 2013-10-10
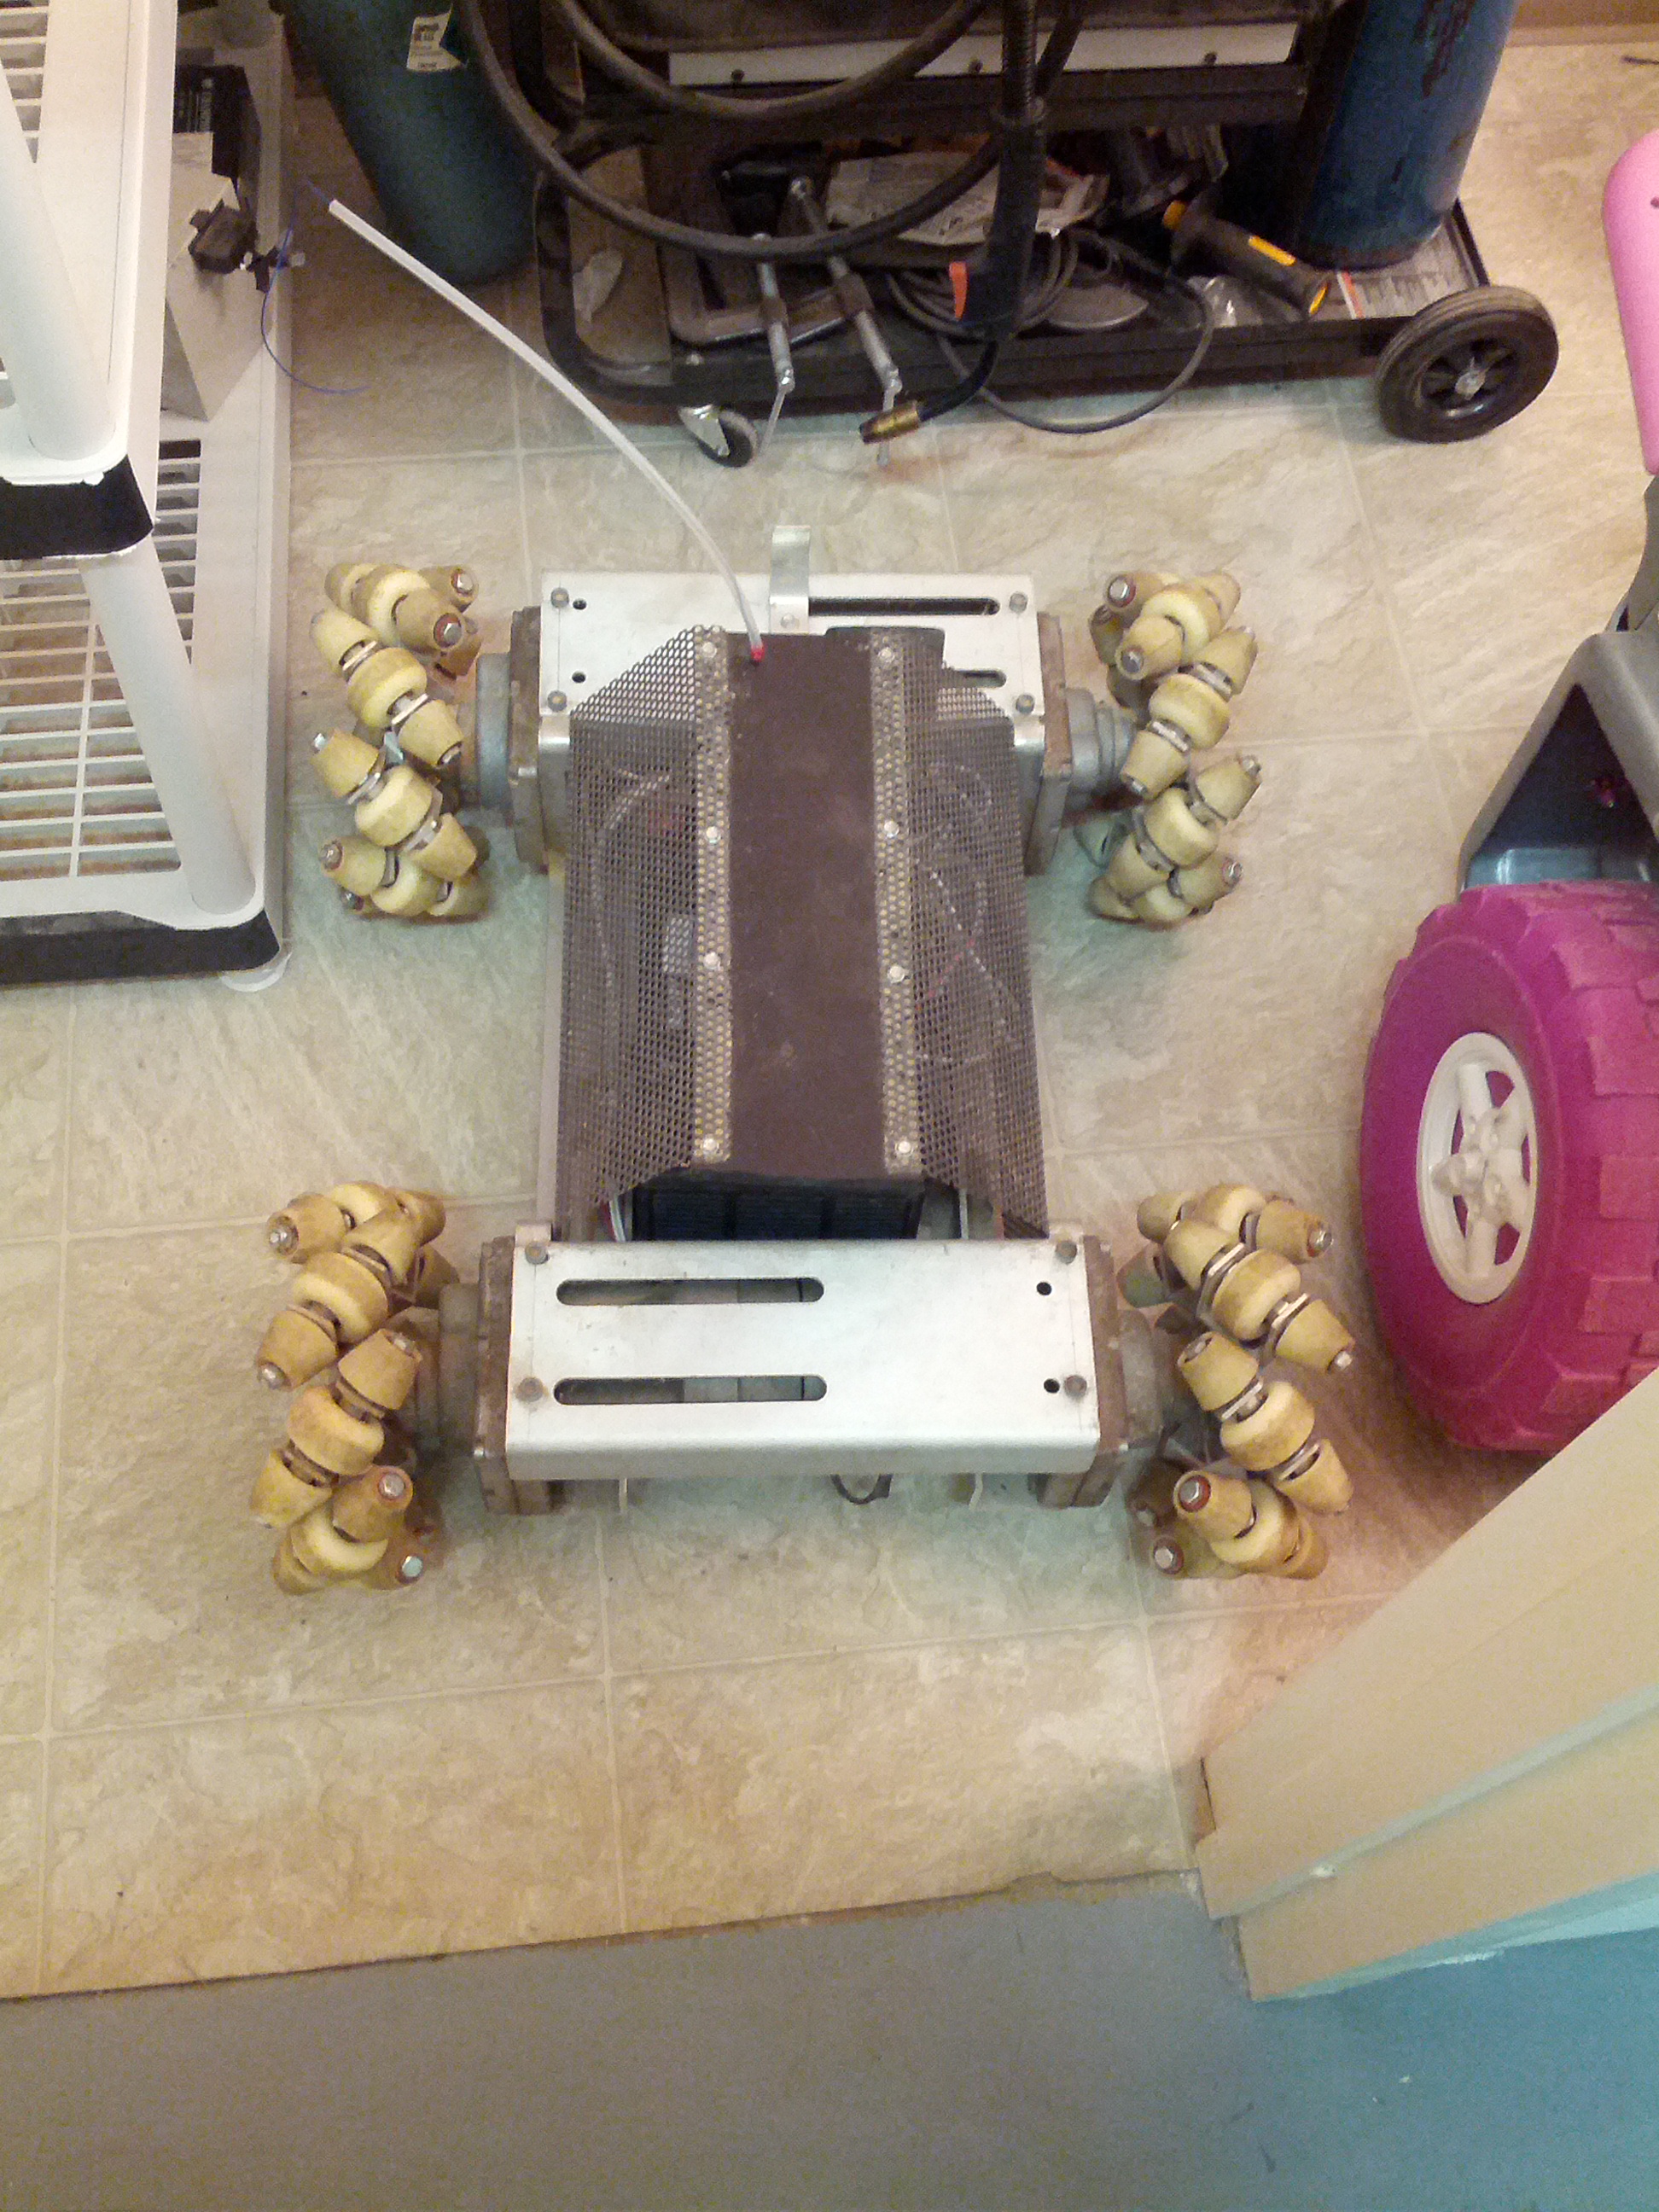
My Makerspace Nova Labs just got a cool donation. Pictured above is an RC controlled, mechanum wheel base with 4 wheel chair motors, and skateboard wheels, all powered by a car battery (maybe two). The guy that gave it to us said it was able to pull a 260 lb person up a driveway with no problem. He also supplied a jig for cutting down skateboard wheels for the cone shaped rollers.
I'm thinking it would be a great base for my "centor-hybrid" InMoov.
--------------------------------------------------------------------------------------
Update 2013-09-09
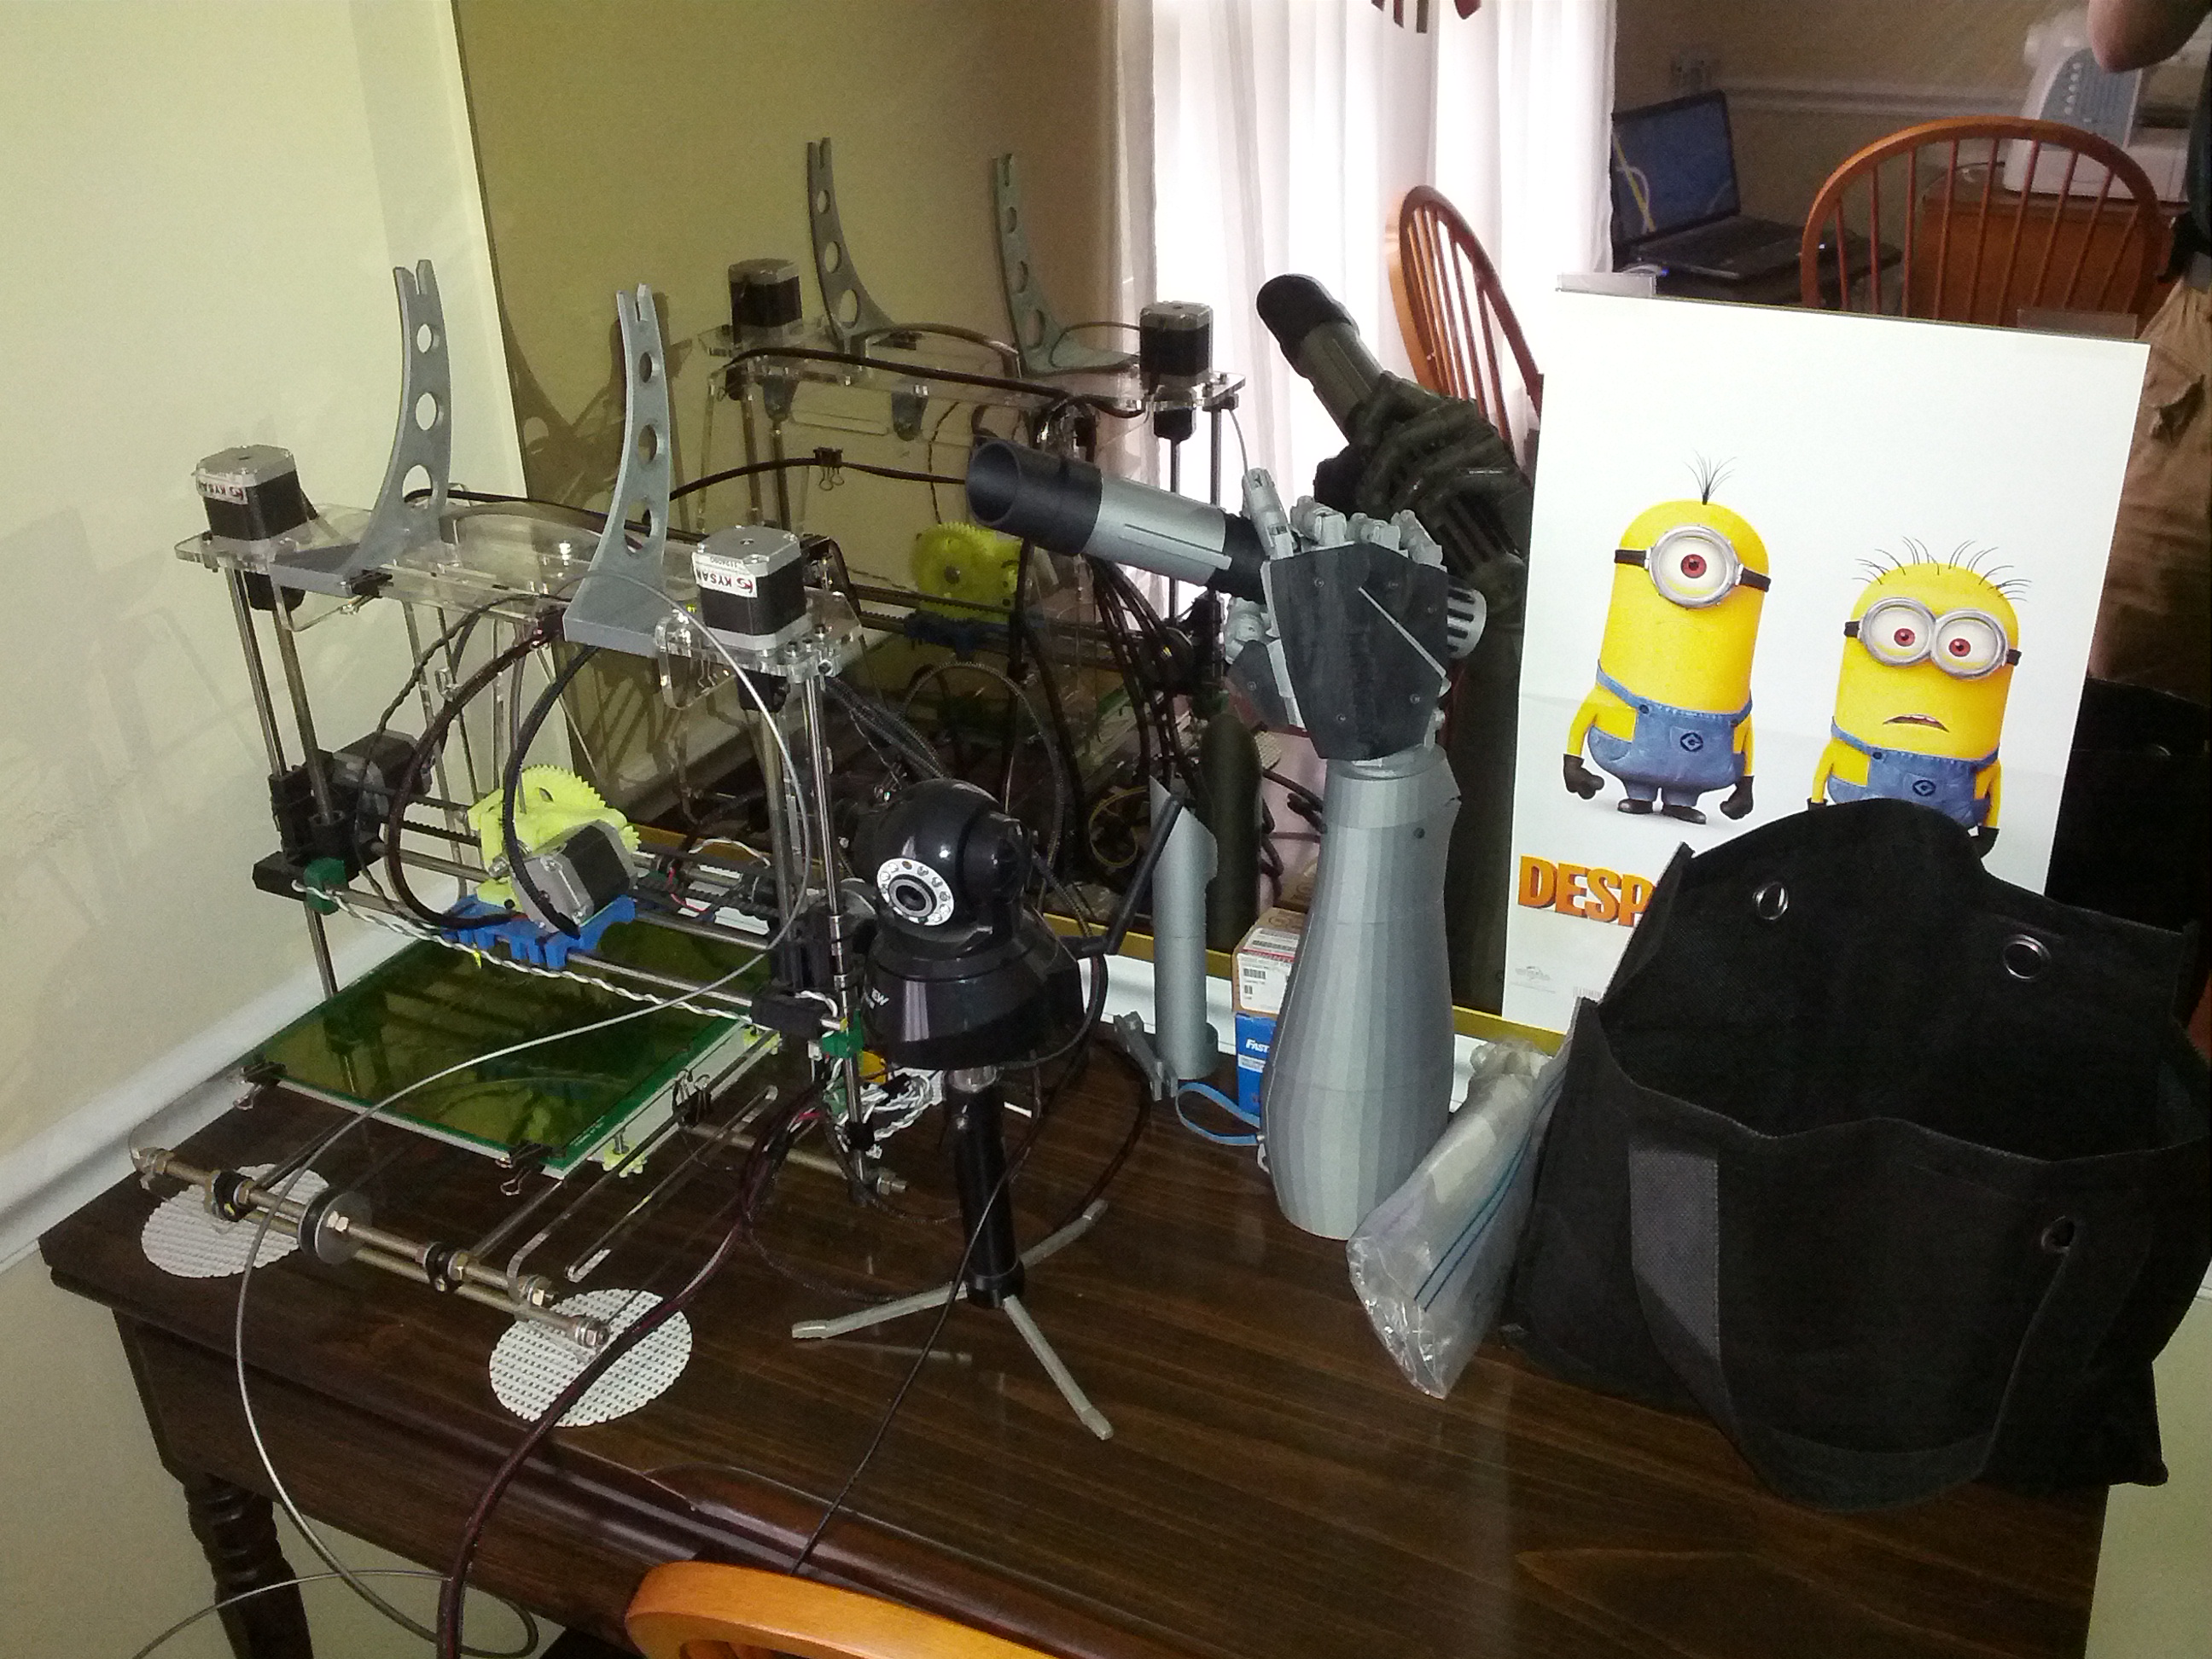
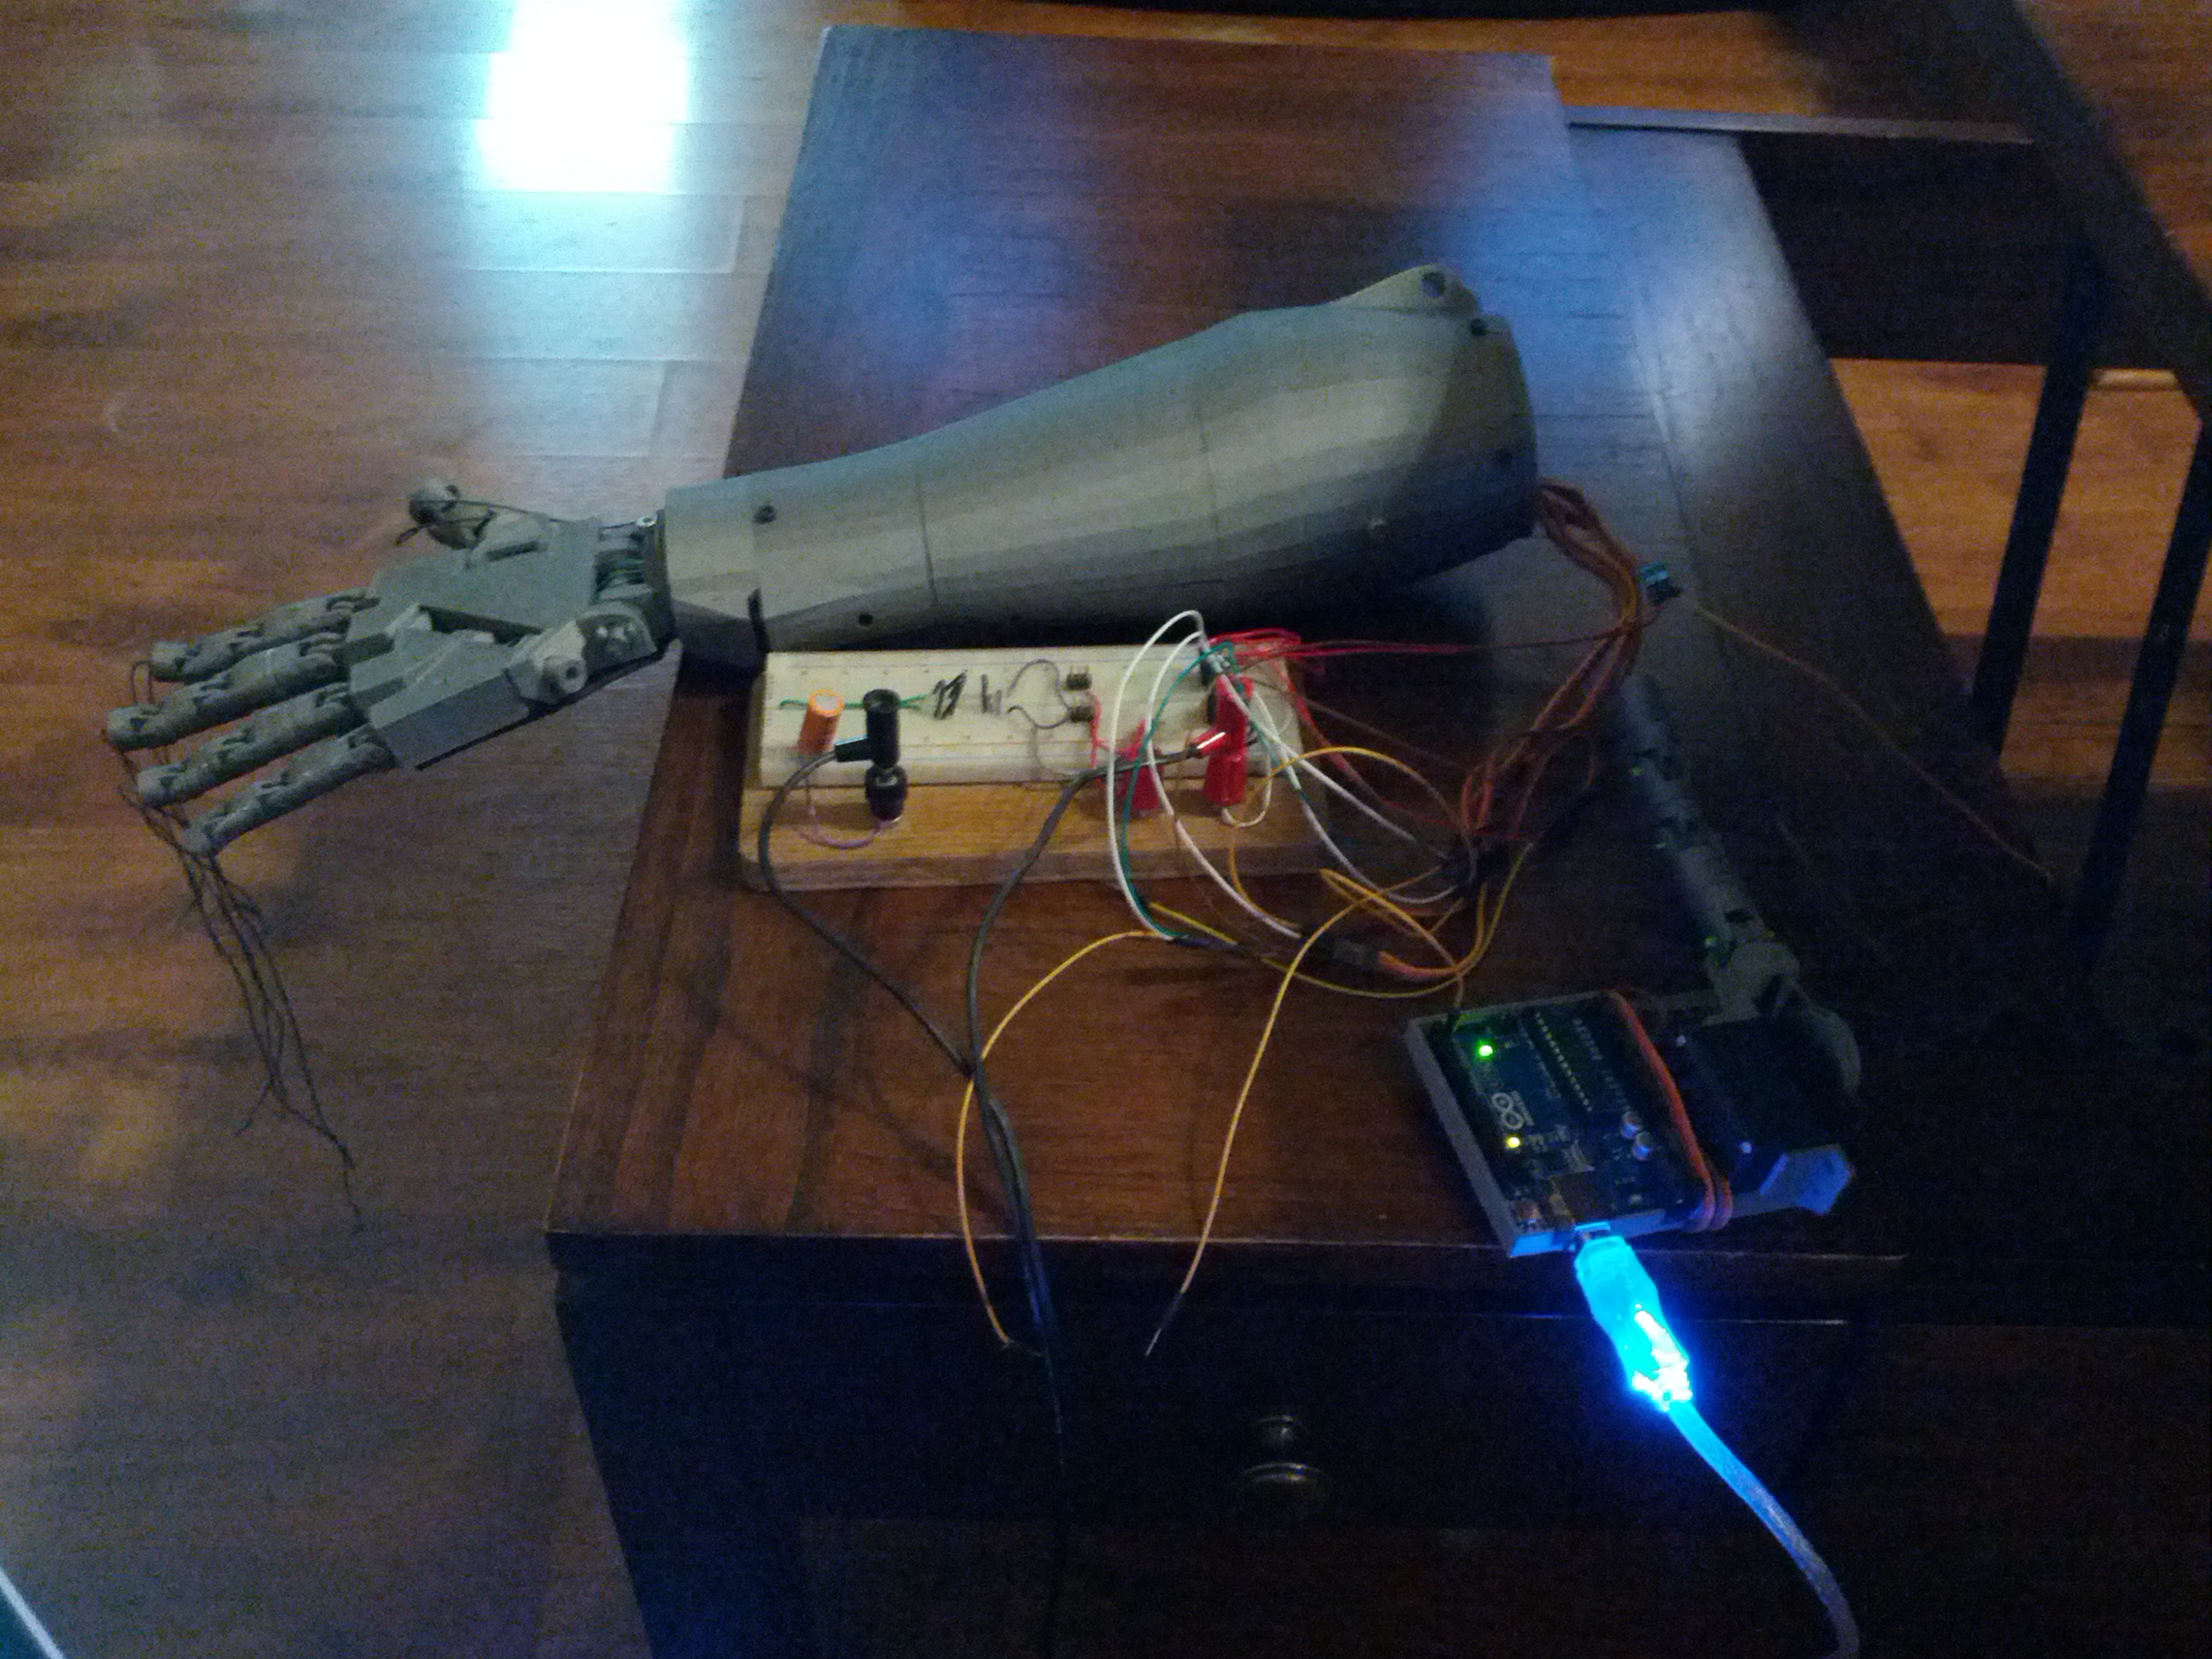
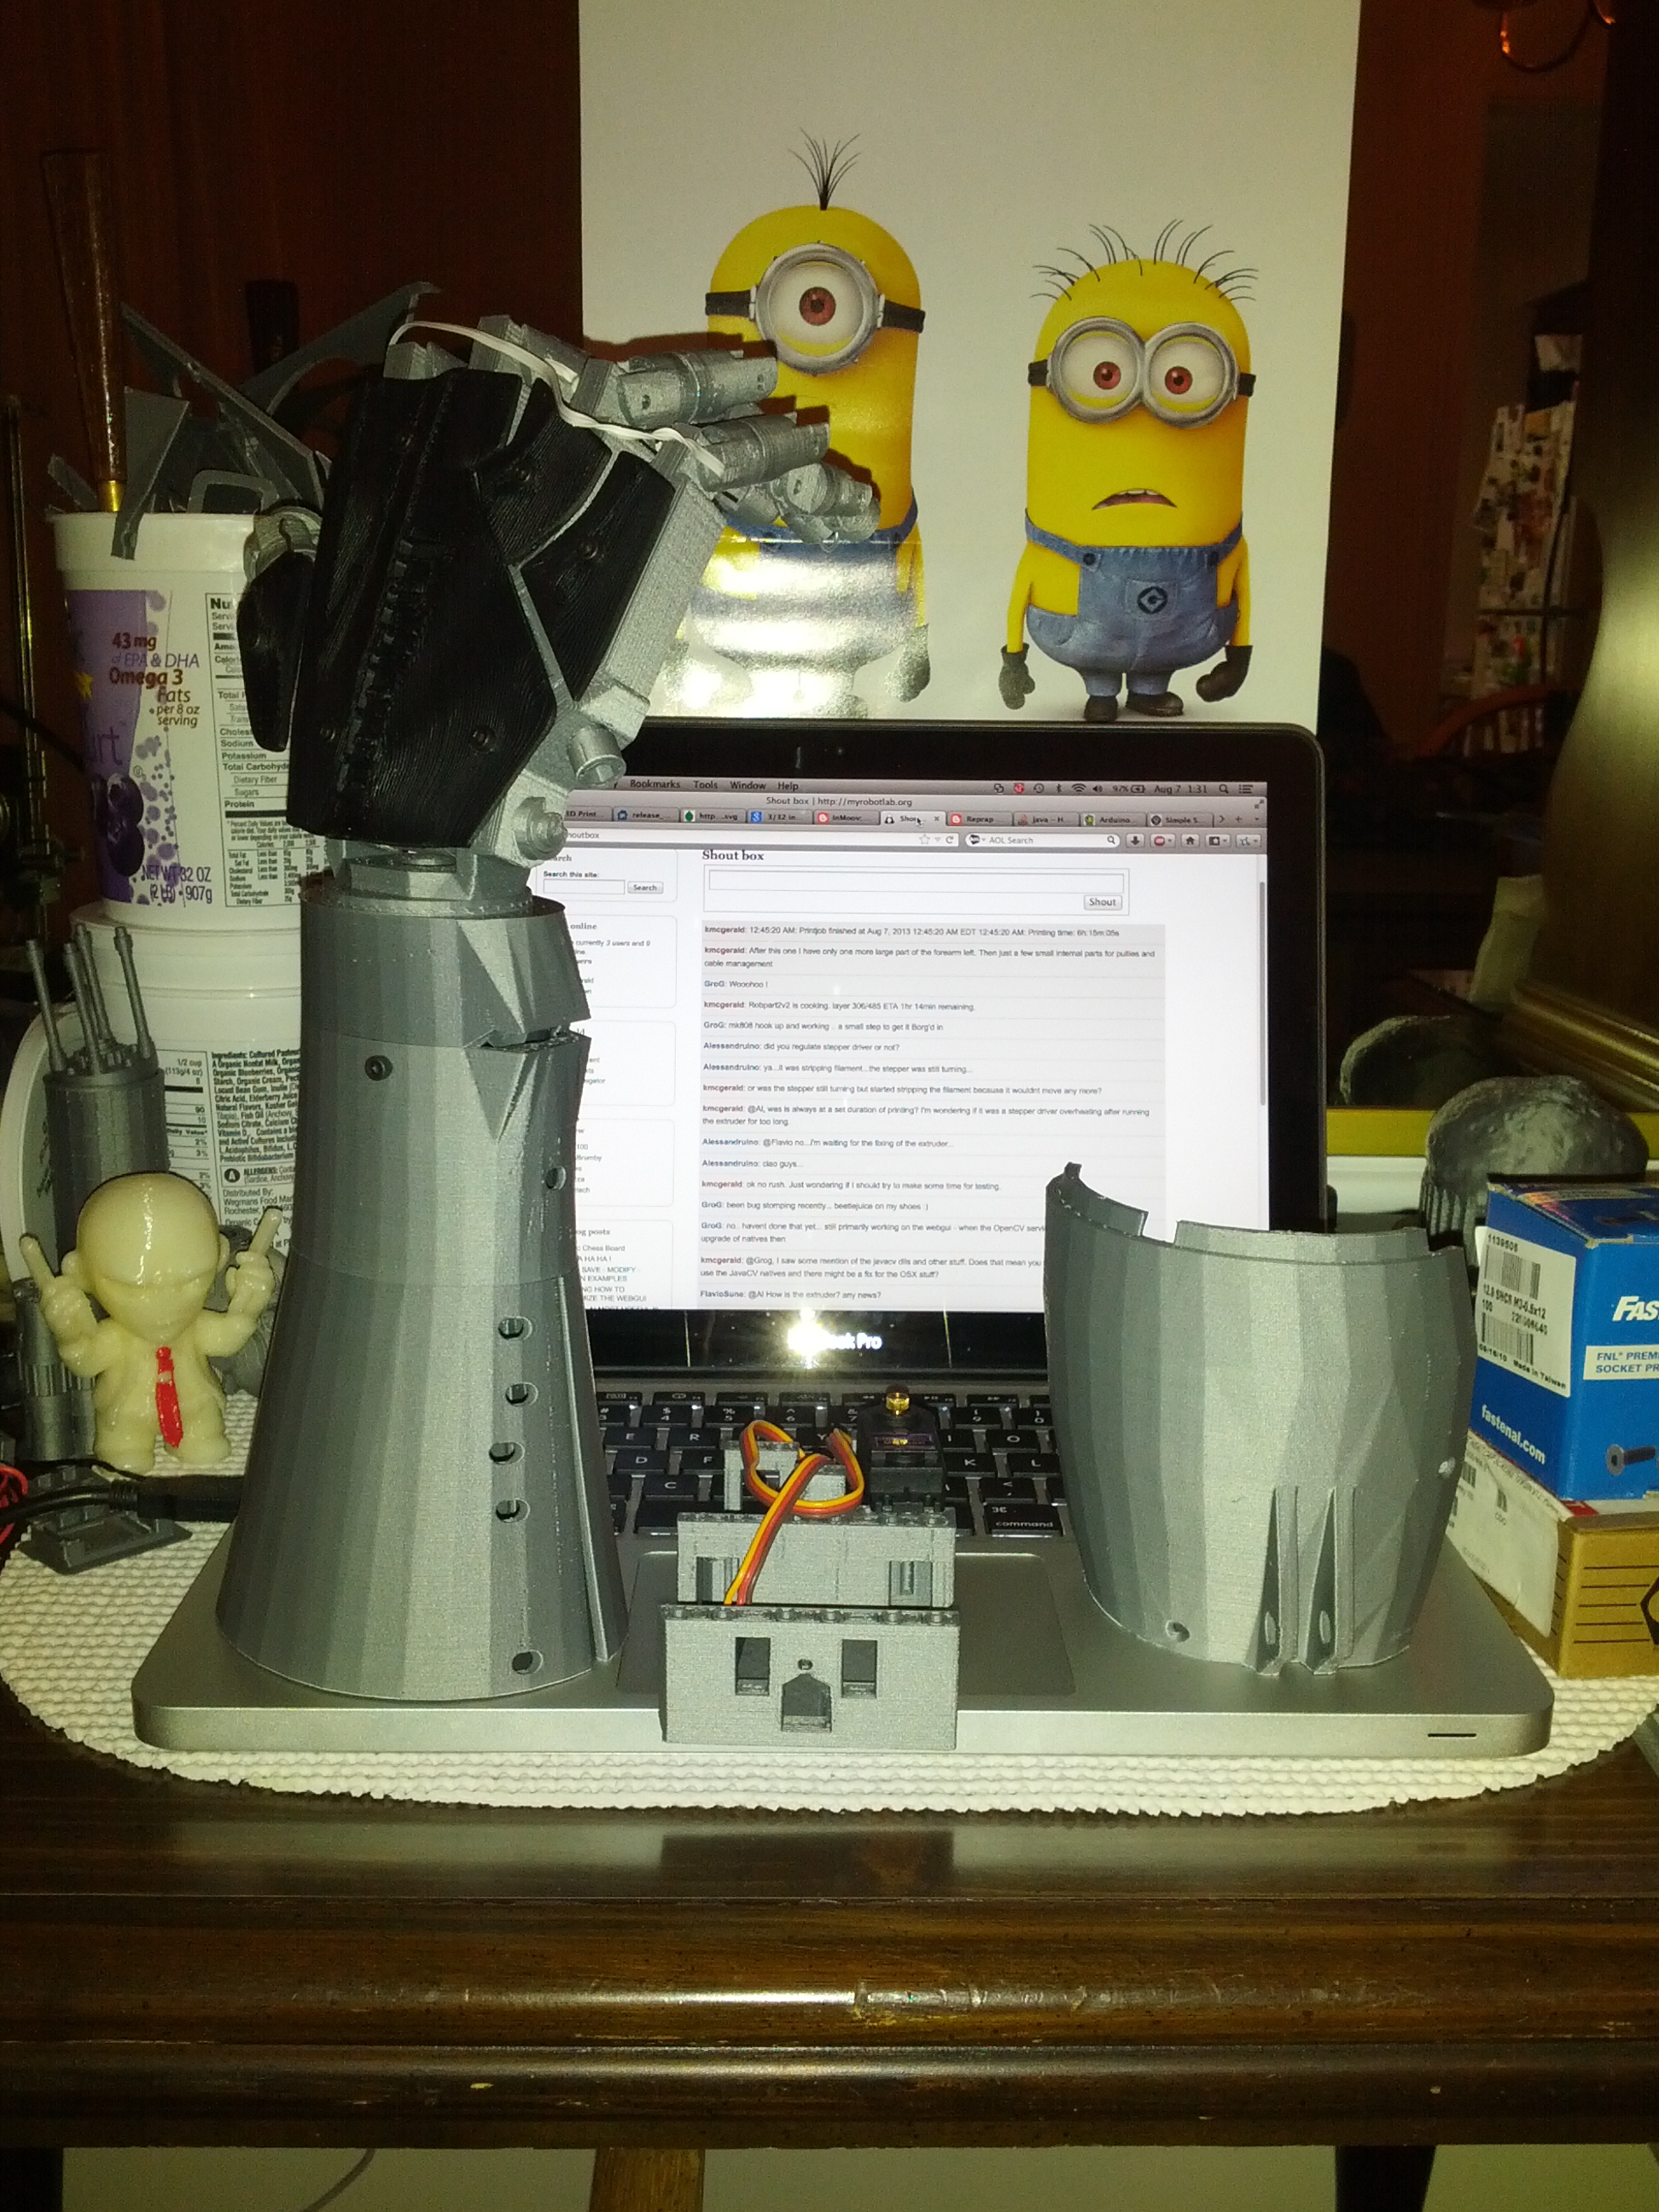
I have completed the printing of the InMoov parts for the right hand and forearm. I have assembled the printed parts, servos and 3 of the fingers have been strung with 200 lb fishing braid. I need to string up the pinky and thumb, zero the servos, and properly tension the tendons. I also have to glue on the finger covers. After that it's just a case of adding power and electronics. I have a couple of arduino options to choose from (Uno, Leo, and Mega).
Above is a picture of "man nook" with the InMoov in its current state. You can see my Prusa Air2 on the left and my Minions on the right looking on in awe. I think awe changed to fear when I let the InMoov hold my 3D printed Light Saber. I had to take everything off of the desk recently so we could use the dining room for a party and when I brought the printer back out I took some time to do some things I left out at the end of the build because I was too eager to start printing. All of the stepper and 12v heating cabes are wrapped in black TechFlex. I installed the clamps at the top of the smooth Z rods which weren't included in my parts kit so I had to print them once I got running.
--------------------------------------------------------------------------------------
Update 2013-08-15: Well THERE'S your problem!
I started troubleshooting my poor print jobs and I was going to check if the hobbed bolt was all gummed up with ABS and not feeding right well in the process of taking the tension off the guidler I noticed it was cracked at the axis. Getting the screw out was a pain in the arse and I got my thumb pinched with my Leatherman but now that it's off I'm going to try to weld the ABS back together with Acetone and as soon as the printer is running again I'm going to try to print a new extruder starting with the guildler. Hopefully this is the only thing I need to get good prints again. If not I'll have to reach out to my friends at nova-labs.org to print me a new one.
----------------------------------------------------------------------------------------

Update: 2013-08-10
-------------------------------------------------------------------------------------
Sometimes things are going too well and your 3d printer has to remind you that this is still experimental hobbiest technology. I've had a good run of printing the parts lately and on this last part (robpart5v2) which was set to be the longest print job of them all, something has gone awry and I had to abort the print. The layers look like they're not really stuck together well and will delaminate. I haven't changed anything in my settings and I haven't changed any of the hardware. Looks like some troubleshooting is in order. Things are either cooler than they're reporting to be or I'm underextruding ... or both ... or something else entirely. I guess this will give me something to do while I want for my fishing braid to arrive on the slow boat from china.
-------------------------------------------------------------------------------------
Minions look on as the forearm grows. Are they fearful or in awe?
-----------------------------------------------------------------------------------------
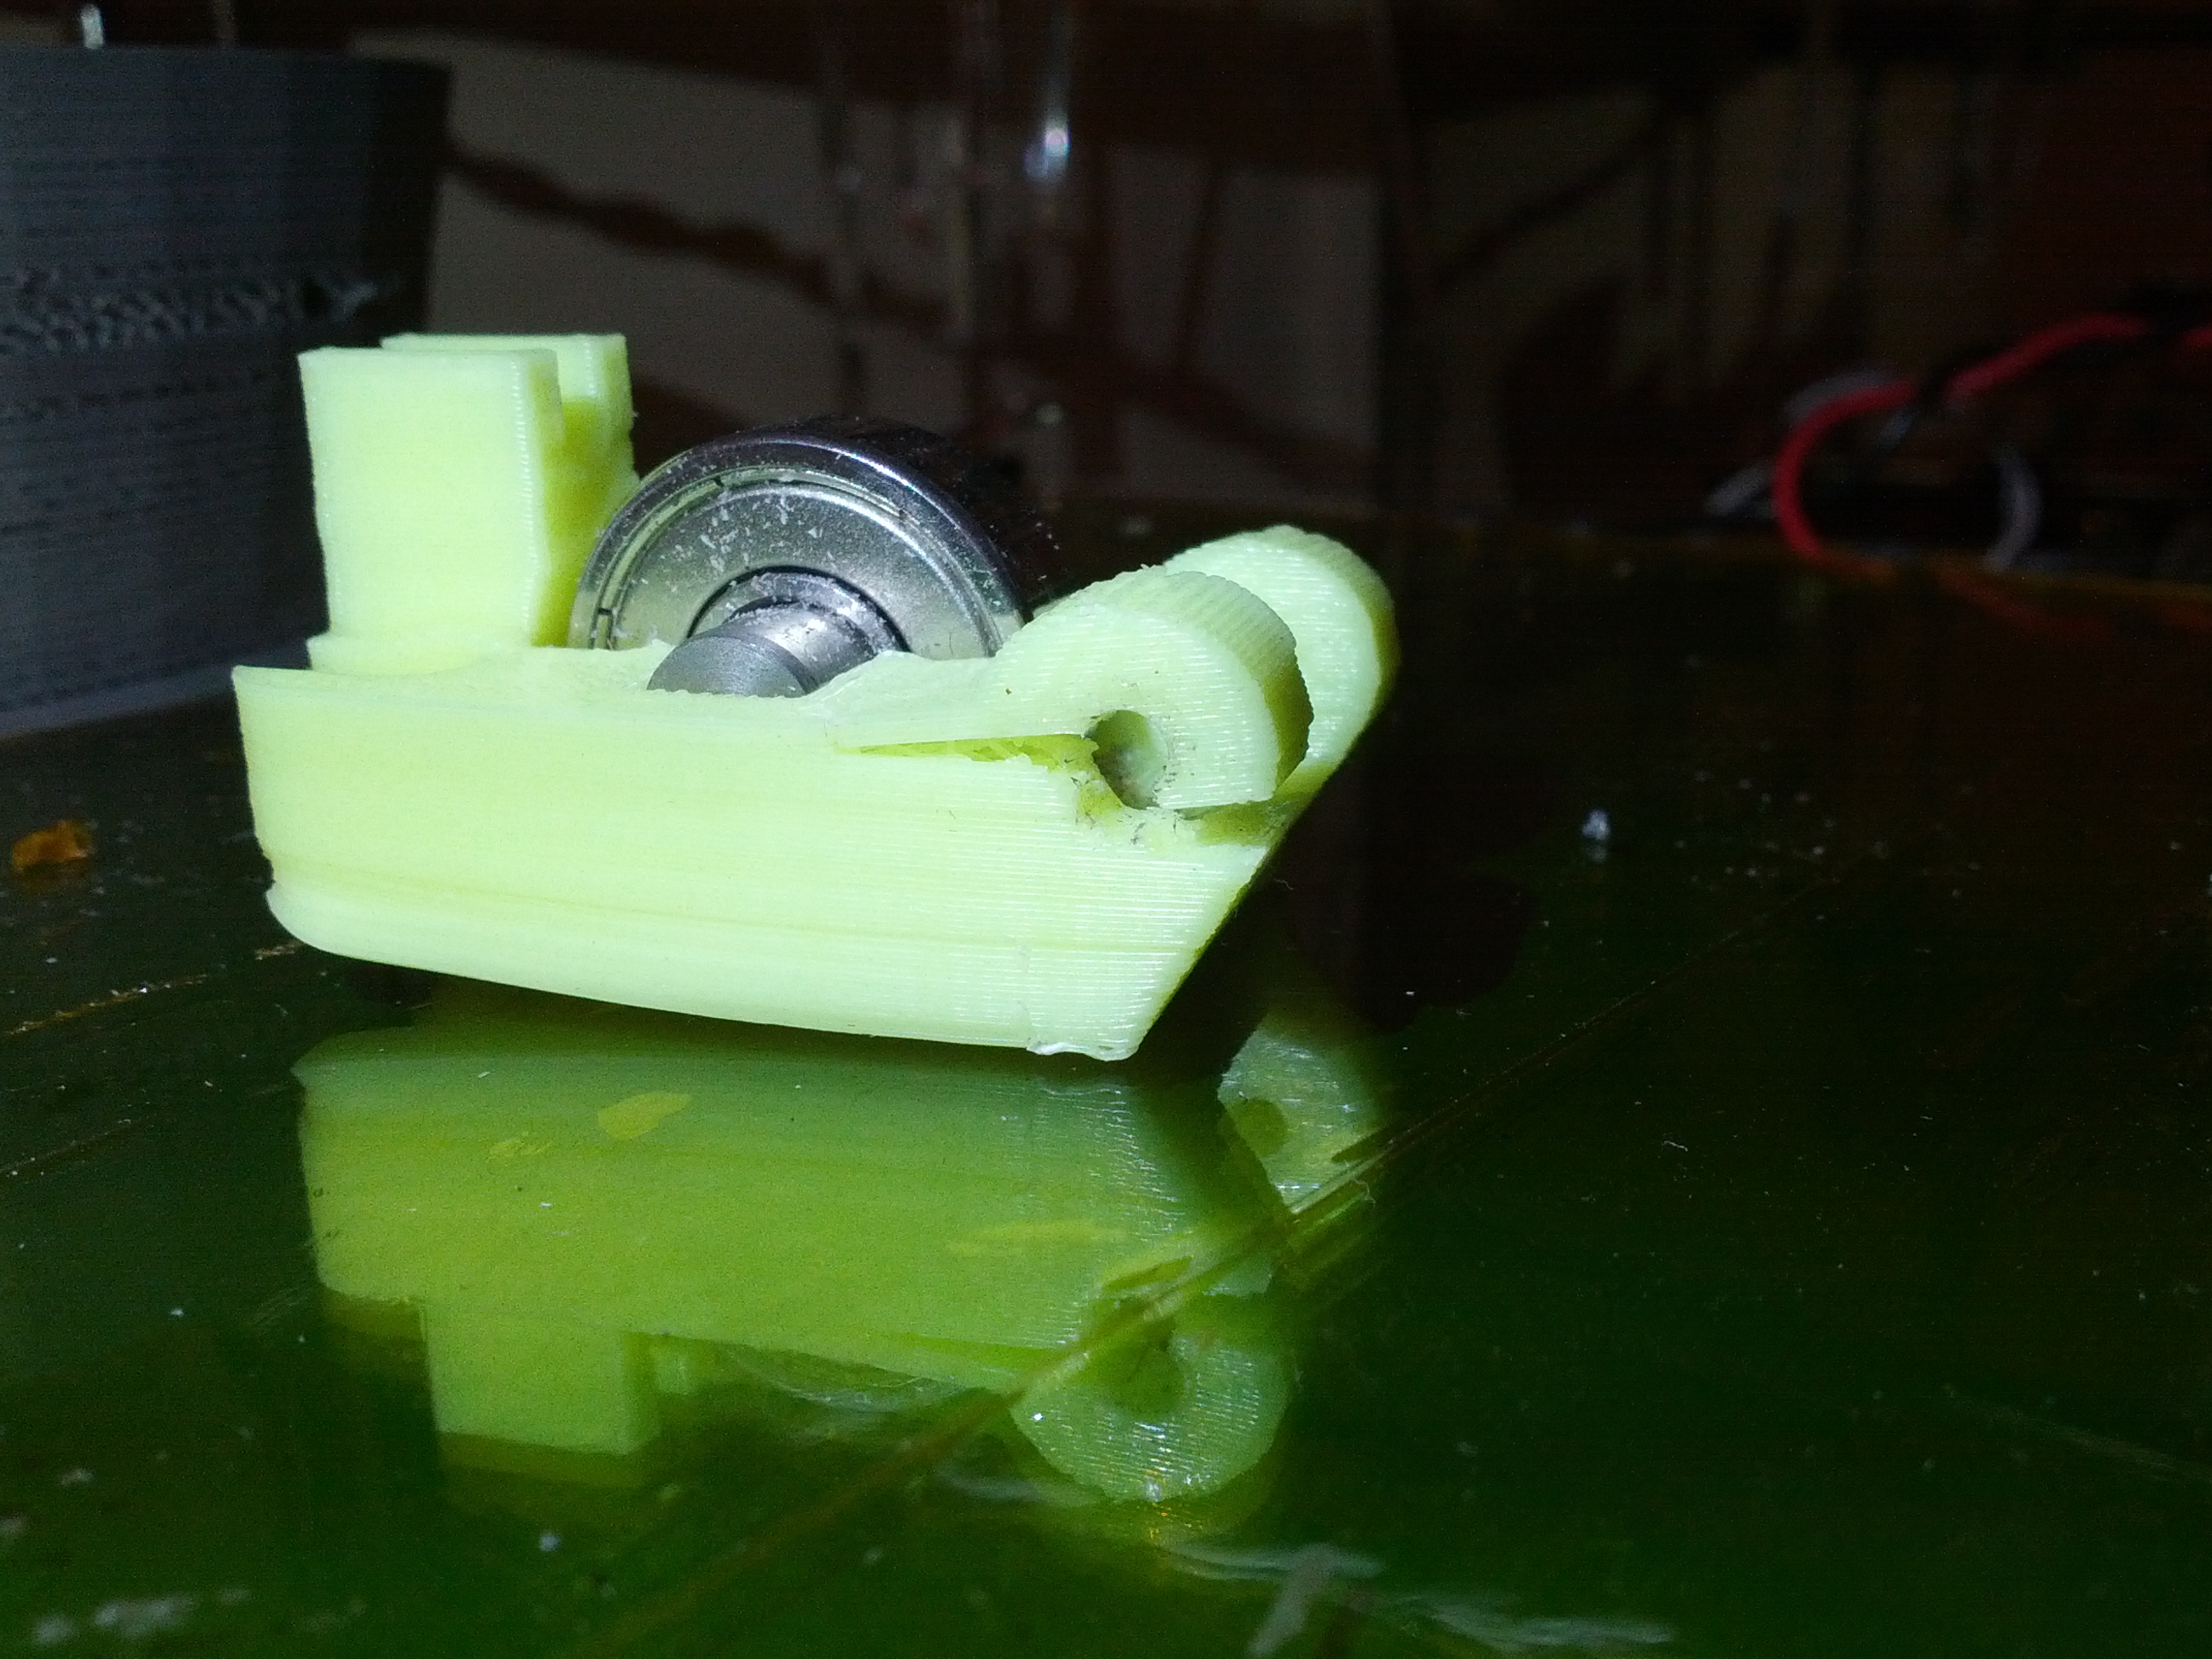
Update 2013-08-07
I finished printing robpart2v2 which is the part of the forearm pictured below. Together with robpart3v3, it forms the narrow part of the forearm connected to the wrist and has part of one servo mount (the other part is in the wrist) and another full servo mount. The last big forearm component I have to print is robpart5 but when I sliced it last night, the ETA was 7+ hours and given that my printer always takes longer than that estimate, the print will have to wait for the weekend when I can have the printer run all day. I'll print a bunch of smaller parts between now and then. I still have some internal components of the forearm to make like servo pulleys and tendon guides.
Small setback last night. While I was fitting the parts together I tilted the arm too far and the hand/wrist assembly fell off the forearm and broke the pinky when it hit the floor. The pinky sheared at a screw hole layer in one of the the joints. I'll either fix it with acetone or print a replacement.
Here is the inside of robpart2v2 showing the servo mounts.
------------------------------------------------------------------------------------------
Update: 2013-08-06
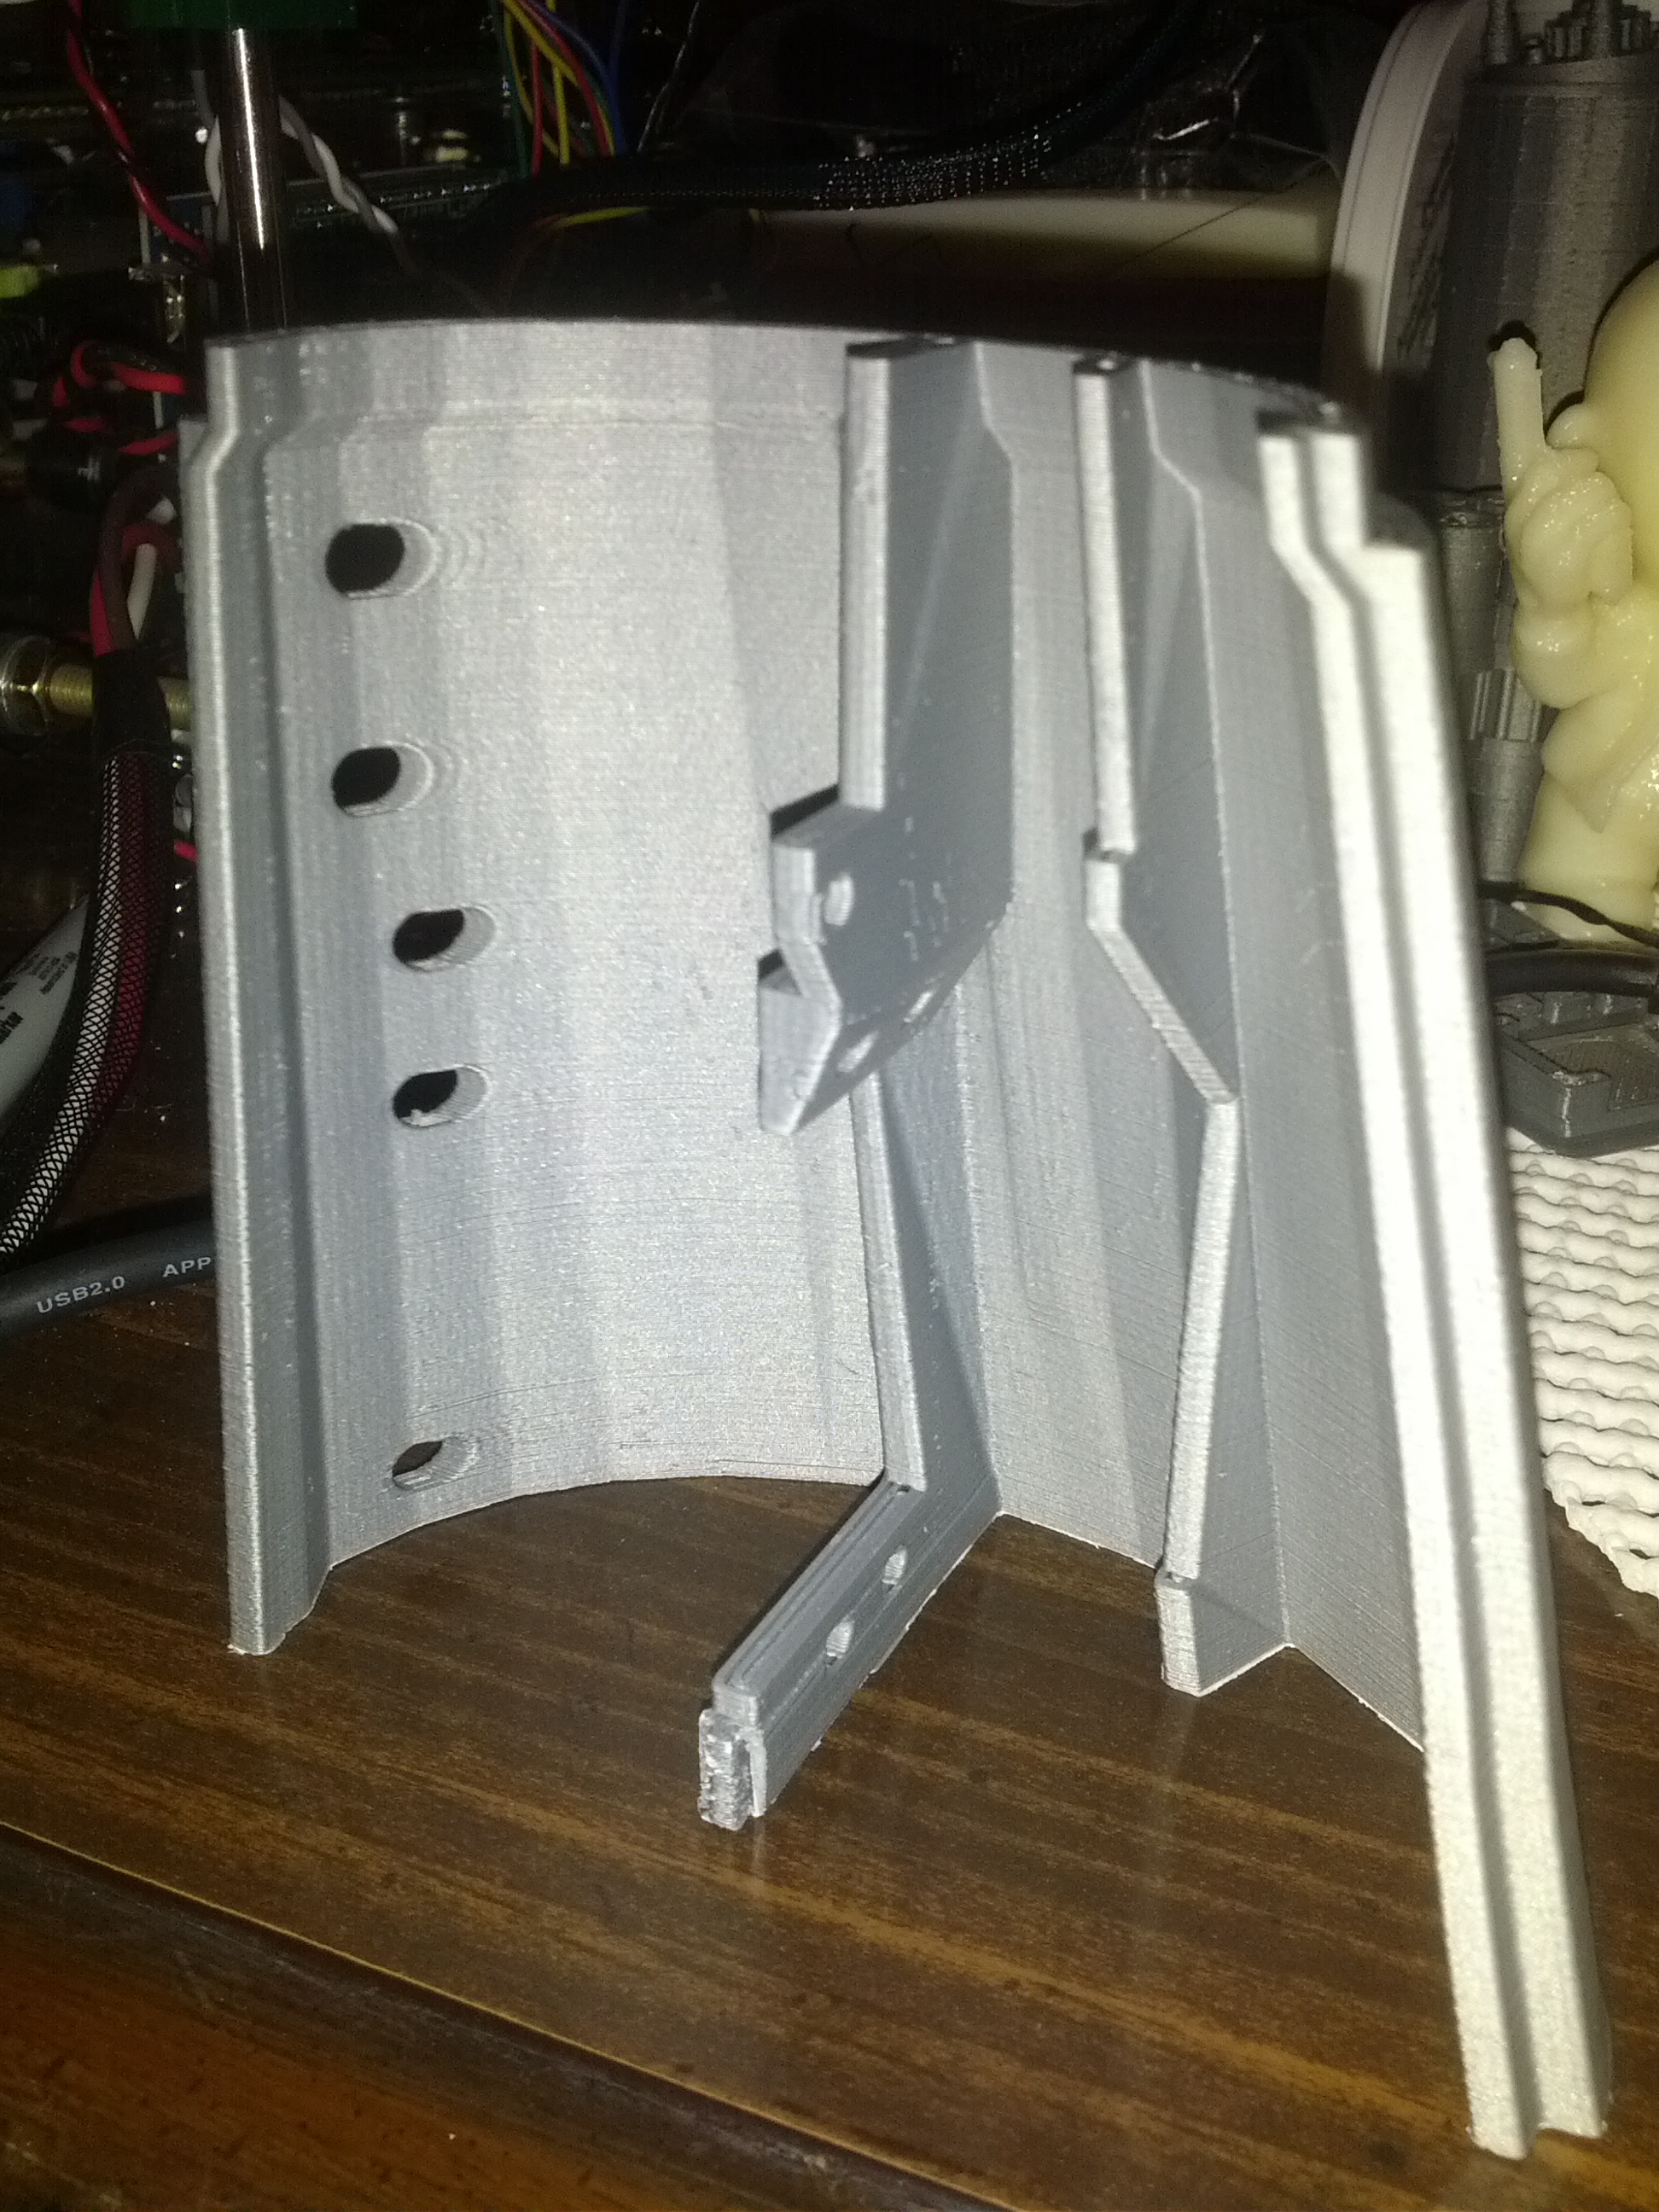
The other night (8/4) I printed the simple servo bed and it ran longer than I would have liked but even though it isn't a sexy external part of the robot it is core to making everything work.
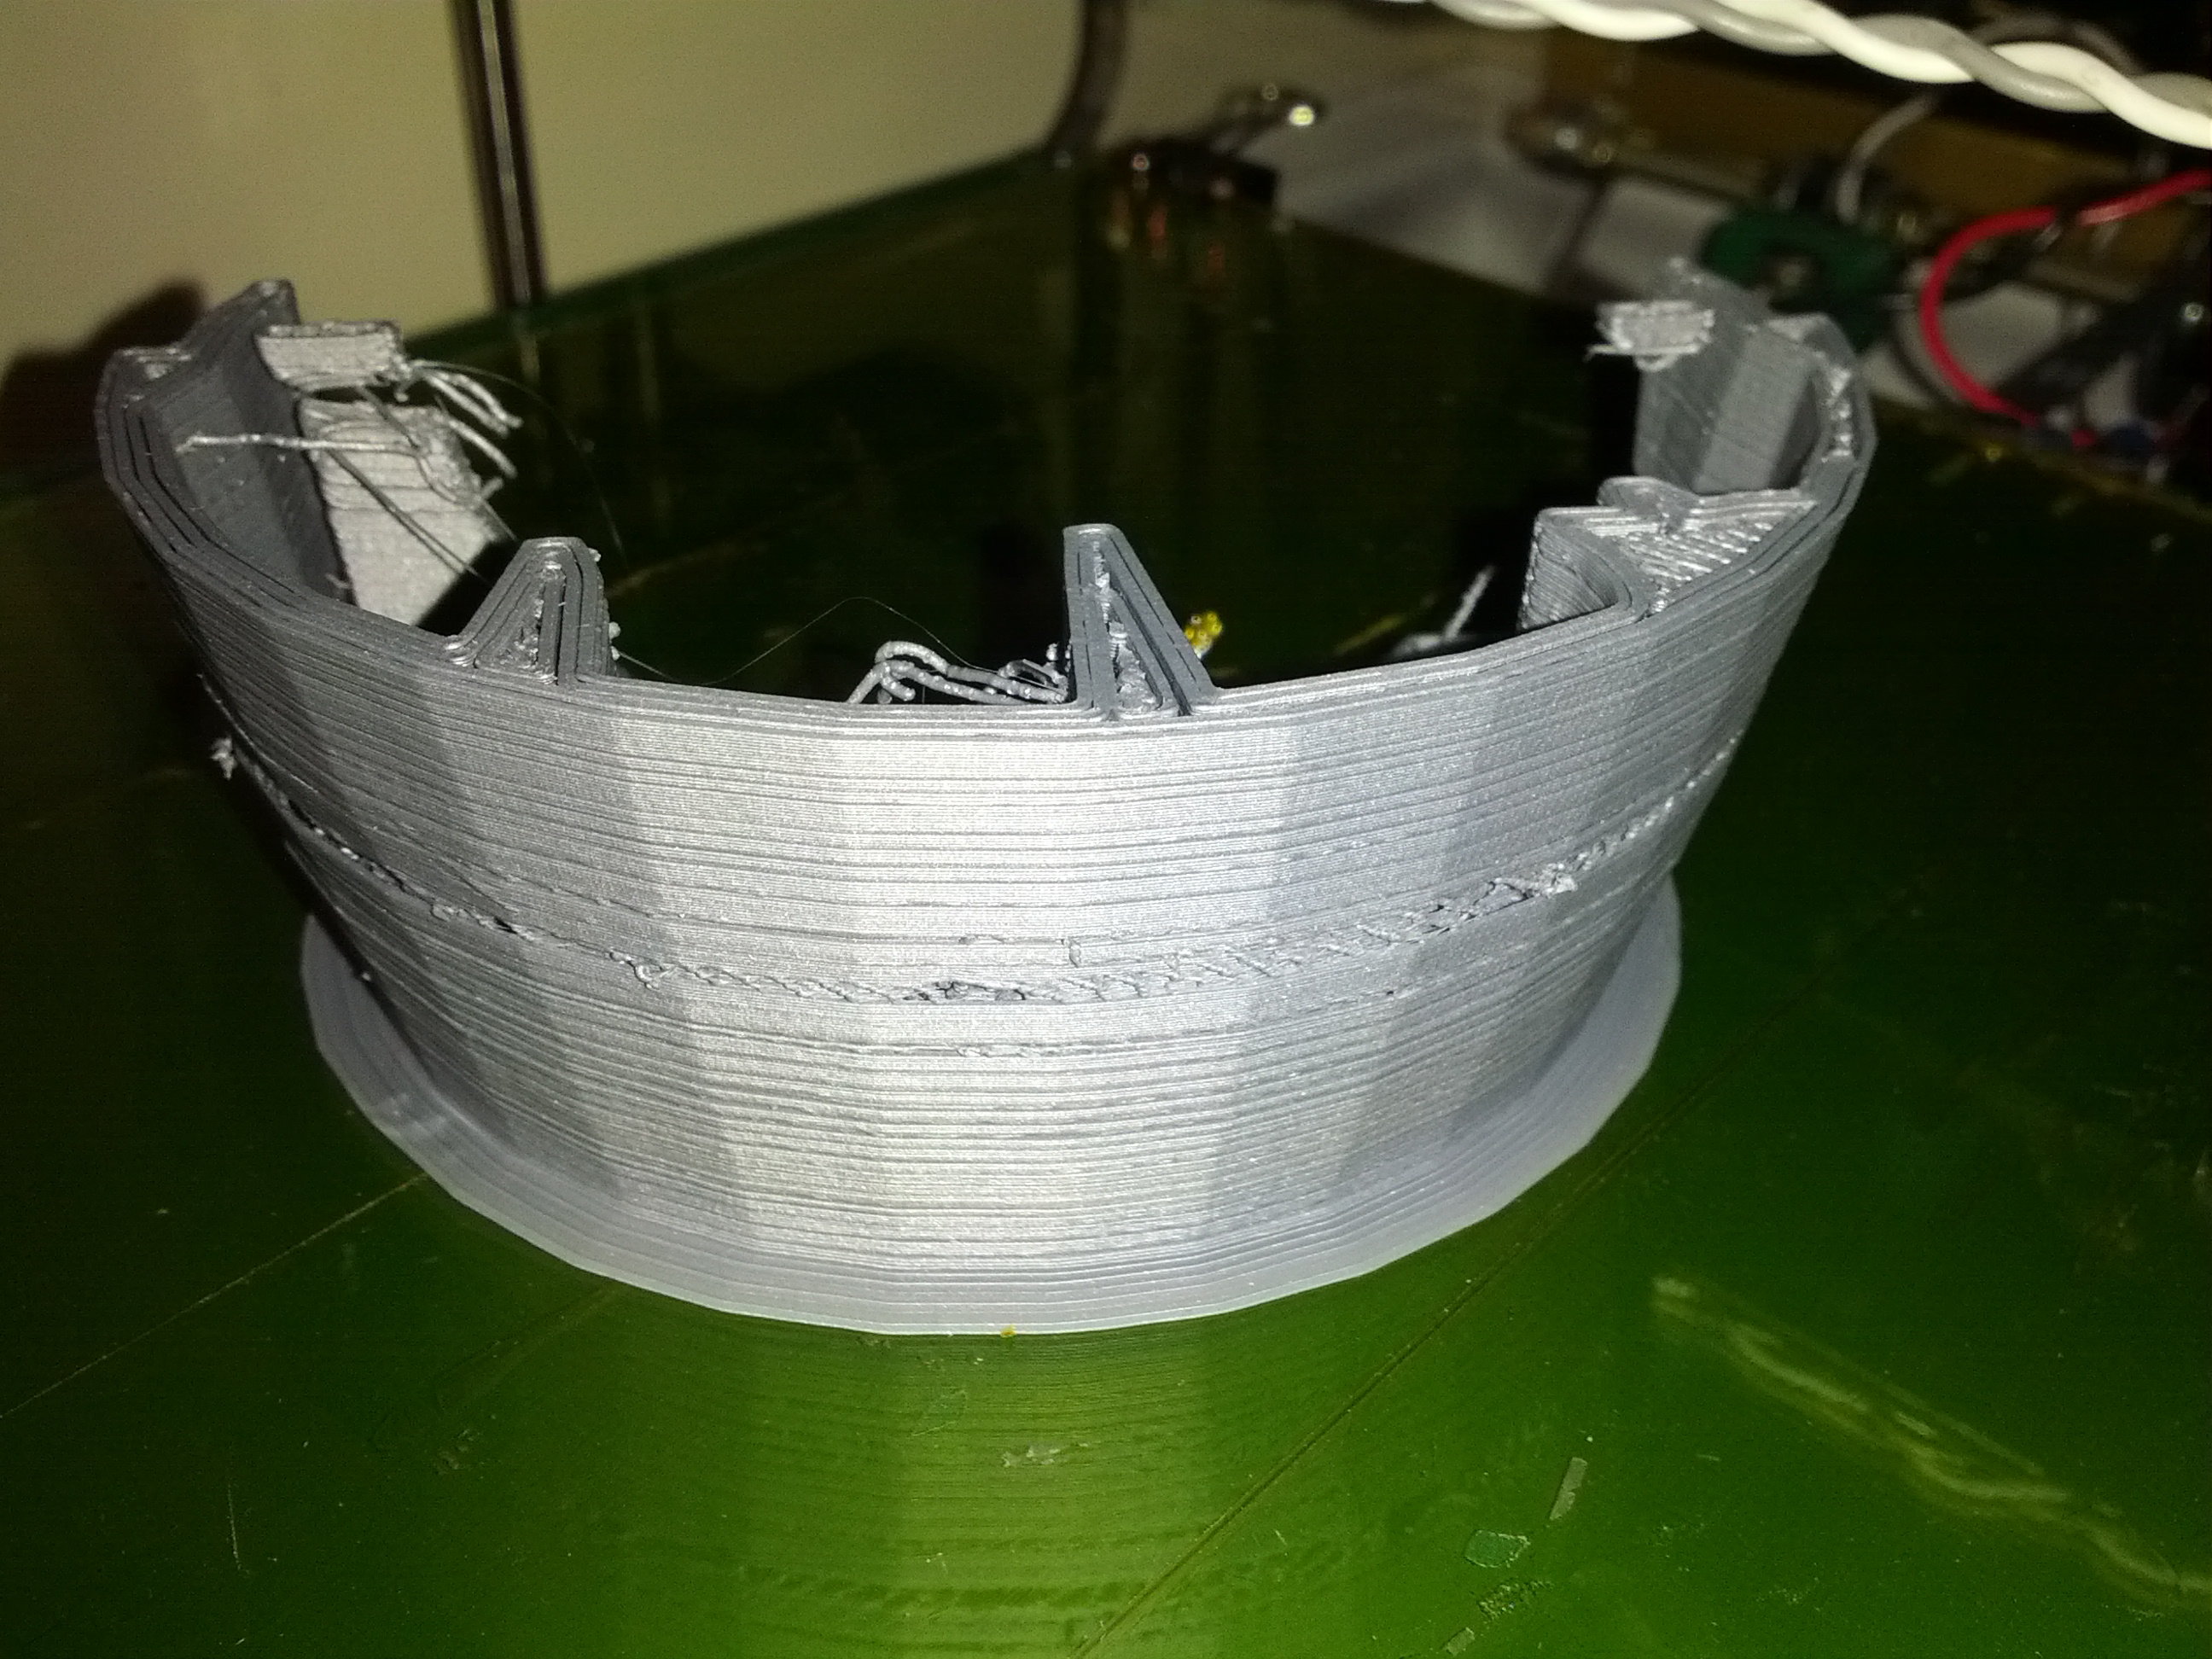
Last night (8/5) I kicked off the longest print I've ever done which took 7hr 17min to print the forearm cover where the bicep tendon connects (robpart4v3) and not only was it the longest print session it also is one of the tallest prints I've done so far. Luckily I had the "home x axis" command disabled for the end of the print job or else it would have slammed the extruder into the vertical support of the frame.
Here's a closer view of the part. After this marathon print which again kept me up too late, I think I'll be printing a shorter job tonight so I can get some sleep. I also need to invest the time to tune my printer for higher speeds while maintaining quality because 20mm/s gives good results but doesn't fit within my weeknight time constraints and I'm just not comfortable letting the printer run while I'm sleeping.
The support structure that was modeled in (the front section with the big circle cut out) stuck a bit firmly to the part in a couple locations and my lack of patience at 2am caused a little damage to the the part but they won't be seen from the outside and I can patch them with some ABS/acetone putty if I need to address any structural issues.
So other than some smaller internal parts, I only have a two big parts (robpart2 and robpart5) left to print for the forearm but they may have to wait for some speed increases or a longer weekend day print.
-------------------------------------------------------------------------------------
Update 2013-08-04
Finally managed to get robpart3v3 to print without the printer resetting or something bad. It was estimated to take 2hr 52min but it actually took 4hr 5min. I'm starting to think the reason for my prints taking longer than the gcode calculator says it will is because the Marlin firmware is doing a lot of deceleration even if I don't have any acceleration turned on in Slic3r.
Pushing the limits of my printer's height capabilities. This print is nearly 100mm tall and at this height I can't do the full width of my X axis or the extruder will hit the side walls of the acrylic frame.
It took a long time to print at the slow speed I had set but the finished results look good to me.
--------------------------------------------------------------------------------------------
Update: 8/2
Last night I finished printing the last 3 fingers (pinky, index, ring) and while they were "in the forge" I quickly attached the thumb and middle fingers to the hand with some plastic coated wire wraps I'd salvaged from some toy packages. They're only loosely held on because I didn't want to spend the time cleaning the joint holes and acetone welding the parts together for just 2 fingers. Tonight I'll do all 5 at the same time, but the tips won't get glued on because I don't have the "tendons" for the fingers yet. After looking around Thingiverse I found out there's an alternate thumb with an extra degree of freedom at the base so I'll probably print that out and swap it in before I get too much further. I'm going to print the forearm to accept an extra servo for the new thumb even though I don't have a 7th servo available yet. Yup you need 7 servos for the full function hand. You need 1 for the wrist rotation, 4 for the fingers, and 2 for the thumb.
3 fingers (2 columns each) from left to right: pinky, index, ring. Silver ABS, .2mm layers, 30% fill, 3 perimeters, .5mm nozzle, 5mm brim.
No InMoov is not giving my Prusa Air the bird. :)
-----------------------------------------------------------------------------------
Update: 2013-08-01
I printed the middle finger last night. Didn't take a picture of it on the platform. Actually I didn't even pull it off the platform before I went to bed. I did take some pictures of the hand as much as it has been assembled so far. I did add the thumb finger cover before taking the picture. Otherwise not much got done because I spent a few hours at Nova Labs socializing.
----------------------------------------------------------------------------------
Update 2013-07-30
I got the plastic bolts and clips printed but since one bolt is taller than the rest and I don't have a cooling fan installed on my printer, the top of the tallest bolt got a bit gooey. I pulled out my Leatherman and summoned my scouting skills and whittled the blobby end a bit so I could secure the pinky and ring finger palm knuckles to the rest of the palm. While I was doing that, I had my printer churning out the wrist gears and thumb parts. They came out quite well but since it was late when they were done I only installed the base knuckle of the thumb and the bit wrist gear so I could loosely attach the hand to the wrist. I still need to solve my servo cable problem but the friction fit of the big gear is enough to hold the hand on the wrist but still allow it to rotate. I'm glad my printer was so consistant on the diameter of the three parts so that I only had to clean up the tiny rim from the first layers of the two holes so the gear cylinder just slid right in. Unfortunately I only took pictures of the printed parts before I assembled them. I'll get a new picture uploaded later.
Next on my list is to star printing the other 4 fingers so I can have at least the wrist and hand assembled before Saturday afternoon. My local 3d printing group has it's monthly meetup then and I'd like to be the first person to show up with an InMoov hand even if it's not wired up and moving.
Plastic bolts (the tallest got a bit blobby due to lack of cooling between layers) and cable clips for the hands and rotawrist.
Printed the thumb and rotawrist gears (.2mm layers with 50% infill). I used 5mm brim to prevent the parts from popping off or warping. No warping and they were hard to get off the Kapton coated glass plate.
---------------------------------------------------------------------------------
Update 2013-07-29
It took 3 attempts to print the rotawrist1v2 due to printer reset issues (messed up USB port or cable) and now that it was completed I ran into an issue with the MG996R strain relief on the cable making it hard to get into the wrist. Solution will be to either print a derivative that someone uploaded, carve out some plastic to make it like the derivative, modify the servo to remove the strain relief or make it point out of the bottom of the motor.
----------------------------------------------------------------------------------
Original Post
.jpg)
Well now that Alessandruino has built his Prusa, I'm feeling motivated to start printing my InMoov before he manages to build both before I get my InMoov started.
So far I've printed the finger covers in Black ABS and the palm (wristlarge & wristsmall) in silver ABS. I'm working on the rotawrist parts and have one part (rotawrist3) completed.
If I want the quality to come out well I have to print slowly since I haven't completed all the calibration steps on my printer. I'm just too impatient. I know, I know, if I calibrated everything well I could print everything else much faster which would satisfy my future impatience.
Very Impressive KMC
It looks really very good - Which printer are you using? I think silver & black is a good combo. And what calibration steps did you skip?
Prusa Air 2
As for calibration steps skipped...
I haven't properly tensioned my belts for the X and Y. I guess the Y is done but the X is a tight but can't be easily adjusted because I left out the screw for tightening it.
I need to put in a proper Z-height adjustment device on the end of the X axis so I can make fine ajustments.
I never really calibrated my filament feed rate. You know mark off 100mm and tell it to extrude 100mm and see if it all goes in without being too much or too little.
I'm sure there are some others that I don't know about because I haven't taken the time to look them up.
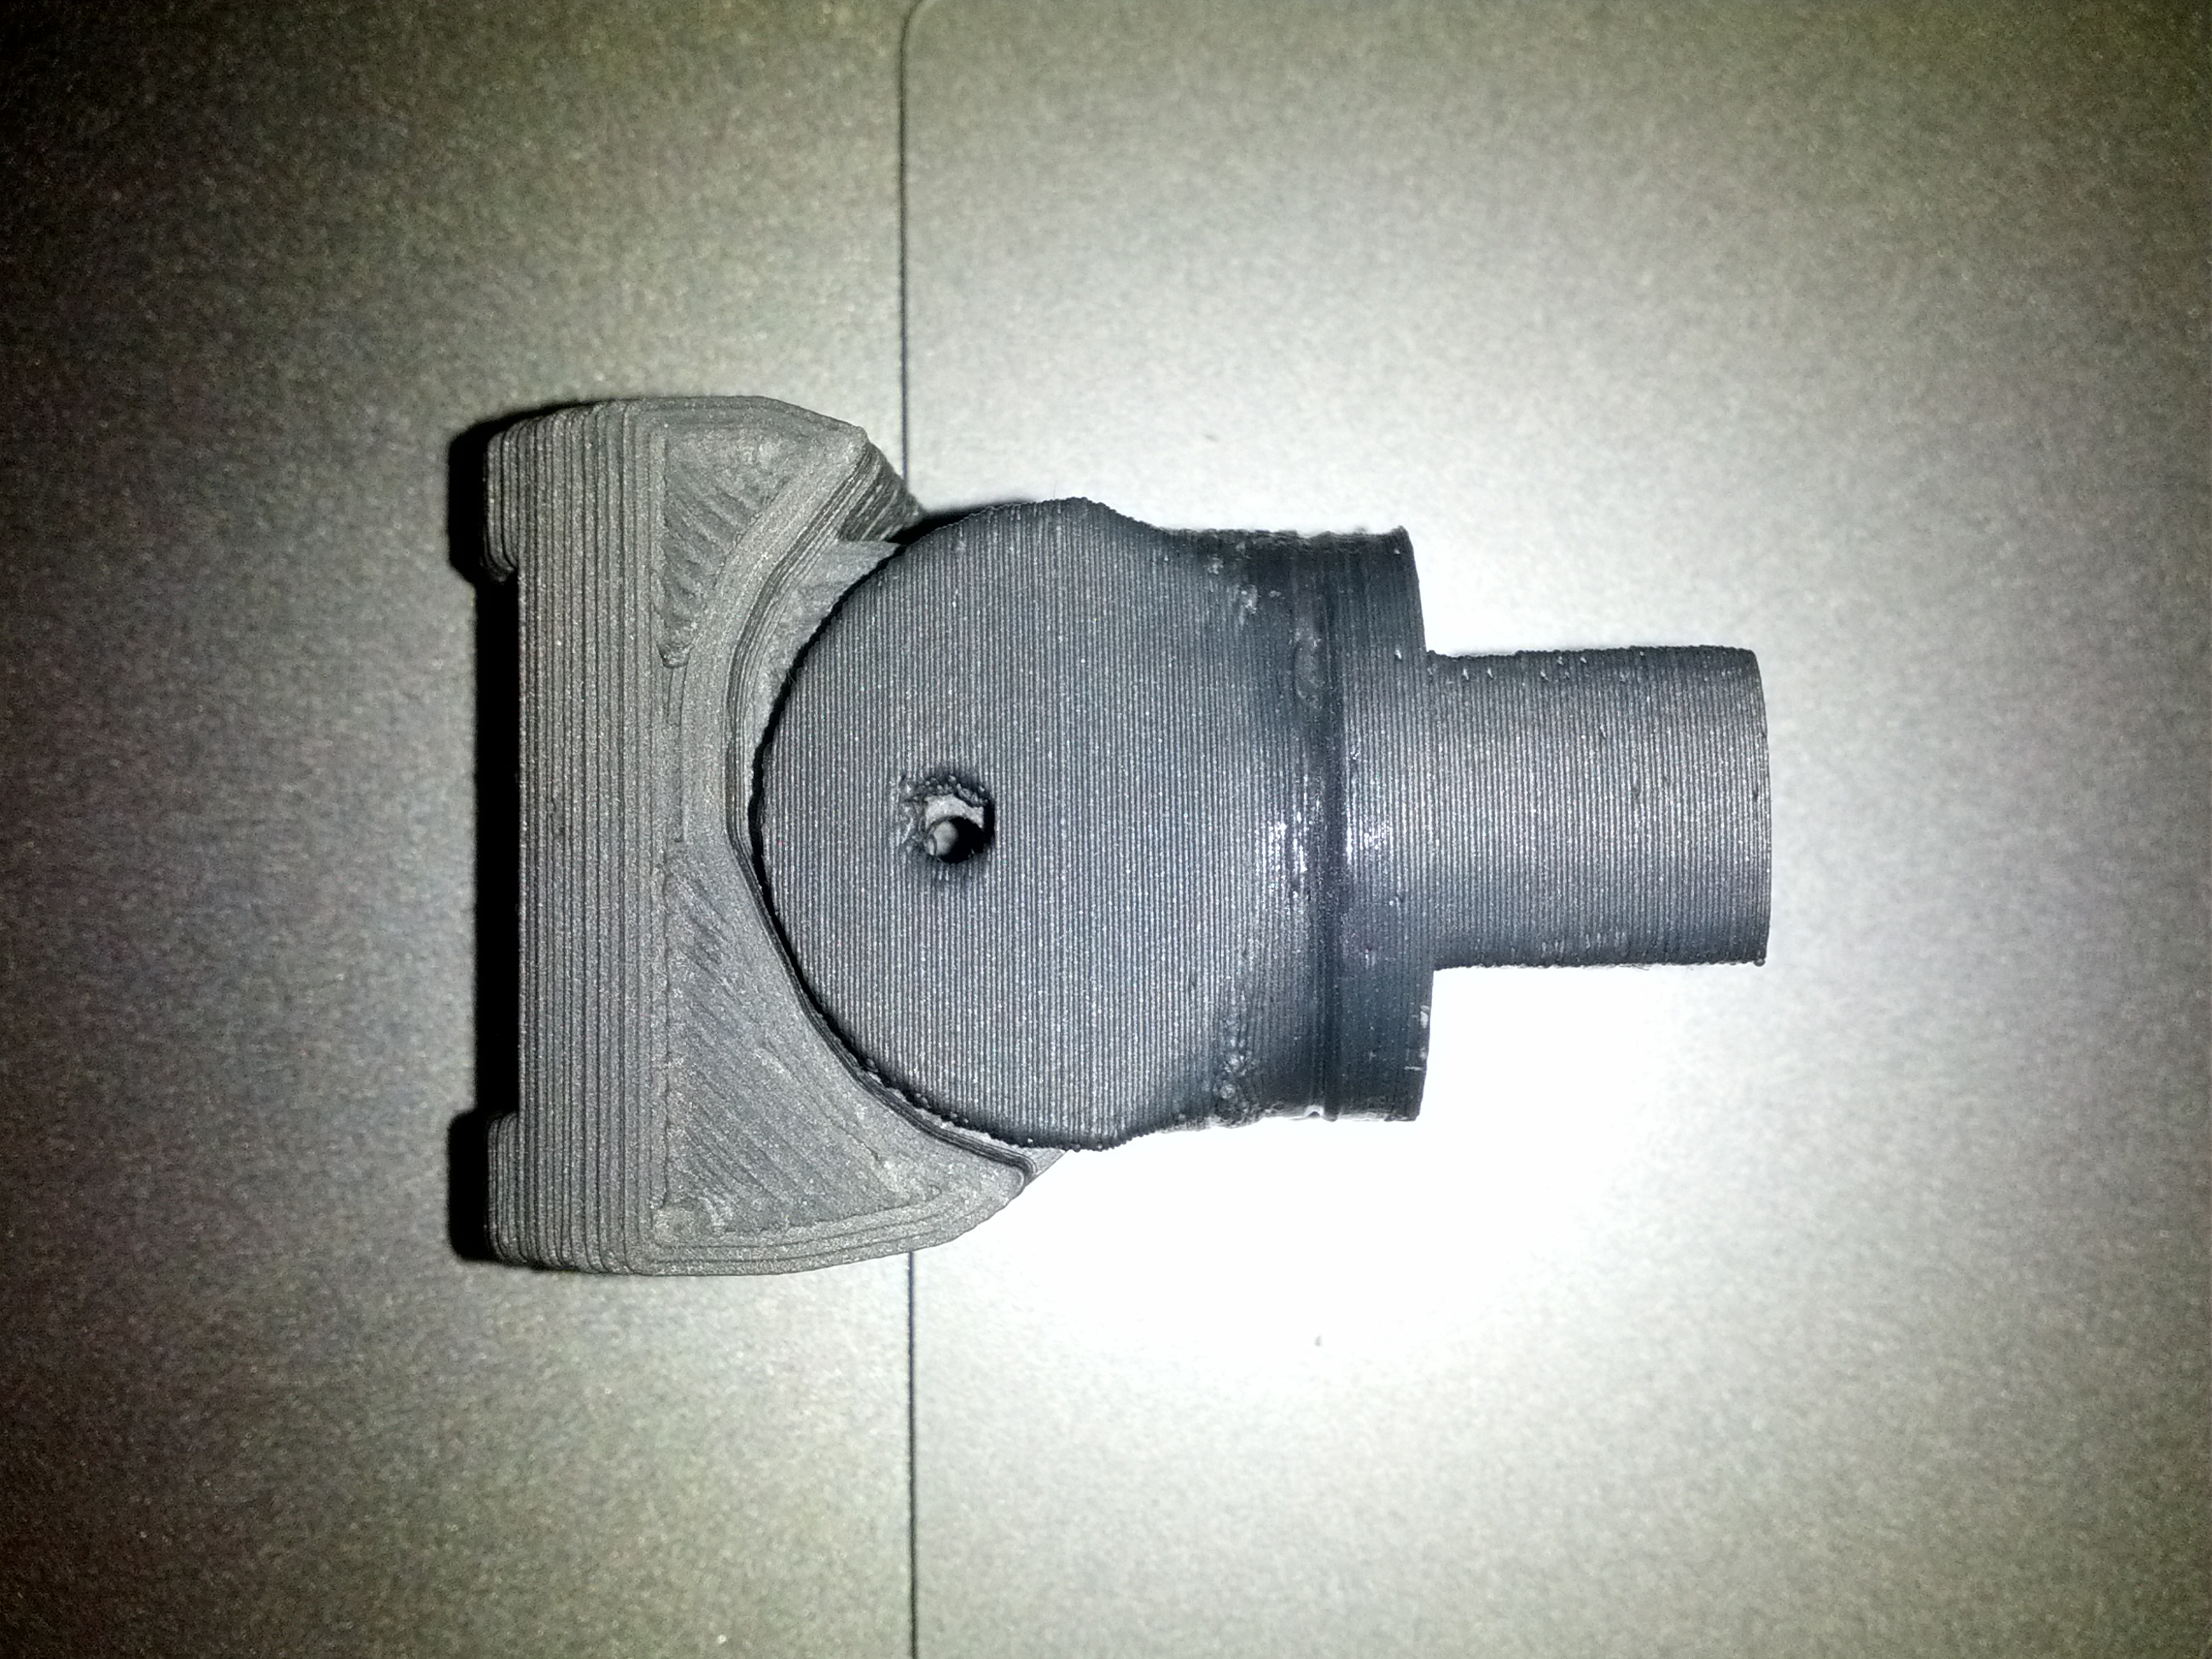
What I do know is that I printed a part that needs to mount on a commercially manufactured Picatinny rail and it fit like a glove without having to clean up the part so my printer is printing to pretty good measurements.
Pretty nice :D what
Pretty nice :D what temperature did you set for ABS? at what speed of perimeters and infill?
Depends a bit on the abs
I've had to change the temperature a bit depending on how the ABS behaves. I usually print a small calibration piece the first time I try a new filament to see if the temp is good. Natural ABS does well at a lower temperature than most colored ABS. I have some olive green that I got from Ultimachine and it is better at a higher temp to get it to really flow well.
I have my heated bed at 120C and my hot end is around 230C
I have my speeds down pretty low to keep the quality up. I'll check later to get exact numbers...
Ok now that I'm in front of my printer my speeds are ...
Perimeter: 20mm/s
Small perimeter: 20mm/s
infill: 20mm/s
solid infill: 20mm/s
top solid infill: 30% (of 20mm/s)
Support Material: 40mm/s
Bridges: 60mm/s
Gap fill: 20mm/s
travel speed: 130mm/s
That's my slow set.
For my faster set of speeds...
Perimeters: 40
Small Perimeters: 40
Infill: 60
Solid Infill: 40
Top solid infill: 30% (of 40)
Support material: 40
Bridges: 60
Travel: 130
For both my First Layer speed is 30%
Is it your nozzle of 0.5
Is it your nozzle of 0.5 mm?
Did you print every piece using 0.2 mm layers, or just fingers and gears?
Any advise for a good and easy print? (the 5 mm brim for example)
Looking good kmc! What about
Looking good kmc!
What about the servo problem? Managed to fix it?
Awesome
Its great to see the pieces start to appear ! Thanks for the updates !
Fantastic prints! Keep
Fantastic prints!
Keep printing, no matter what you do! Someday it will come, and yours better be ready.
Very exciting to follow this.
Very cool InMoov base !
nice to be manuevering in small spaces without having to turn...
It would be GREAT !
Maybe you can bi-pass the RC and just slap a raspi with wifi on it...
Yeah I was only interested in
Yeah I was only interested in the RC to take it for a quick spin before trying to borg anything else onto it. :)
Great base! When I started
Great base!
When I started InMoov project...no. (At fist it was only a hand)
Let me say it another way: When Inmoov project started to become a Robot, I had in mind to create a fully printable sort of Segway, with auto-balance. But the InMoov community wants legs. So I have put down the idea to make the robot roll around.
I still think it would be much easier, somehow your InMoov robot will certainly go around your house sooner than mine.
Can't wait to see it happening!
Here is another InMoov on wheels:
Good re-stringing! Next step
Good re-stringing!
Next step powering all of that at once and use the full potential of MRL!
Strung and knotted
Later on I connected each servo one at a time to my arduino and set the pulley position and then ran from 0-180-0 to set the braid lengths. I knotted the lines but didn't glue them yet.
Gael, when you built your new arm for use with the Leap Motion, what pulley's did you use on the servos (I'm assuming you used the simple servo bed)? I used the fully printed pulleys you published but I'm wondering if the preferred ones are using the rings around the round servo horns that come with the servos. Since you just built a new arm it seems like it would be a good post to list what parts you actually put into it.
I used the "simple servo bed"
I used the "simple servo bed" with the NOT fully printed pulleys. They are more reliable.
I originaly posted the fully printed on Thingiverse because some servos are sold without round pulleys.
I bought for 2 euros some ping pong rackets and cutted out pieces for to make a better grip.
Adding Sugru on the finger tips will do perfectly the job.
During the lining with the braided fish line, I decided to create new filament drivers and printed them out, that is to make sure they don't get mixed, it does a fantastic job and it really helps to avoid twistings.
I will post these new parts in the rotational wrist.
And last of all, I decided to try printing the TopCover4 standing up to get a better result on the surface, the result is better, but the letter finition ls loosing a bit quality. Note though that every parts are printed with a resolution thickness of 0.5mm and printed and assembled within a week-end time.
This hand is built without finger sensors, it is mostly for a display show for a London exhibit and will get intensive work through Leap Motion gestures.
Thanks for the update
I had previously printed the fully printed pullies but I wasn't happy with their ability to not spin on the servo when under load. I think I'll print the "ring" pullies and use them with the round servo horns my motors came with.
I like the look of the new string guides. Not sure if I want to restring everything in order to install them though.
I have a bunch of other little clips that I'm not sure what they are for (servo wires?). Do you glue down your simple servo bed? While testing and tensioning the strings I had to hold the bed in place so it didn't get pulled towards the wrist during actuation.
I totally understand you when
I totally understand you when you say you are not sure you want to restring the whole thing. A lot of time...
I did that already about eleven times... through the different versions and hands done for different projects.
Gluing the simple servo bed is necessary and should be well secured, the traction of all five servos at once can drag torque, enough to hear the plastic scream. :)
So if there was an
So if there was an indentation to the middle piece it would worky ? Wonder how hard it is to tweak in blender. Wonder further are Gaels original blender files online somewhere ? Or is there a converter from stl -> blender import. If there was an indentation - it shouldn't affect the other (small shoulder) servos - so it be possibly compatible with either?
Too bad your servos don't fit
Too bad your servos don't fit the eye mechanism.
At first I had bought some other servos, but they burned both at first test...
I then decided to buy some servos that can stand 7.2 V this way with my 6V supply, I would be more safe.
It is one of the reason I didn't go for the small blue servos
I can recognize him ! The
I can recognize him ! The body looks different from the face - is that 2 different types of white filament or just lighting?
Two different colors
The white in the face is white ABS that I got from Ultimachine and the yellowish stuff is "natural" color ABS. That's what the ABS looks like without any pigments thrown in I guess. It's generally the cheapest and has a slightly higher melting point.
Update 2014-01-25/26
Looking good. I am printing as quickly as my printer will run. I really like the contrast on the different shades.
I especially enjoyed the redneck comment especially since I am from Virginia.
Nice job on the torso! You
Nice job on the torso! You are correct the two different colors on the face look a bit strange.
I actually designed the eyes like a mask, and until now nobody has printed it in a different color to look like Batman.
:)
finally servo arrived! I feel
finally servo arrived! I feel like something is going to get alive very soon!
Soon but not too soon.
I got the 4 805BB servos to move the shoulder and bicep of the right arm. I just haven't printed those yet. :)
Latest Prints
They look great. You are starting to pull away from me now. But believe I will close on your heels.
I also am starting to notice some color variations in my filament. I did get all of mine from the same place though. Protoparadigm 3mm PLA with .4 nozzle.
Dwayne
InMoov At The Faire
Awesome first appearance for your InMoov Keith. Its all about the improvisation with the Black & Decker drill.
Use whats at hand McGyver stle. Love it.
Dwayne dwilli9013
Nice first public appearance
Nice first public appearance KMC !
I look forward to his interview with David Letterman..
Very good appearance, I'm
Very good appearance, I'm glad all went well.
Funny people ask almost always the same questions, no matter in which country you are.
Thank you kmc for sharing all these pictures and progress!!
Someday we will make a world InMoov meetup, ehehe!!
cool pirate eye cover!
cool pirate eye cover!